So Howard, what's the overall footprint of the addition?
It's thirty-six feet deep by forty-two point 42 and 5 inches.
So that's like a whole another house.
Now let's get a little geography lesson here.
Whats that space over there supposed to be?
That's the master bedroom, with the bathroom up behind it towards the front door.
Alright, So this won't be just a simple little in-law suite.
You're building your mother-in-law almost a separate, private apartment.
Well, you know, she's still very active, very fit and it's nice for her to have a place where she can have her own privacy and also be very independent.
And so then, this big space that we're in.
How is this going to be used?
This is a great room room, and this kind of, catches all the other activities.
Right.
There's a fireplace going in that corner.
Right.
Then, living area, dining and then we'll have a food preparation area down here against the staircase.
Yeah, and then, it connects into your own part of the house directly.
Our house connects right over.
Directly through there.
All right, well, let's recap some of the technologies that've been used here.
I mean, all these walls look white, not because they're plastered or finished, but because They're made out of an insulation material.
These are insulated concrete forms.
Yes.
And essentially it's a combination of the foam which will hold the concrete, which is steel reinforced on the inside.
Right.
Plus, it also supplies an insulation factor to the whole exterior walls, and it makes it go real fast.
It was very fast.
Lets talk about how much concrete was used here.
We used a total of eighty-four yards of concrete.
And the interesting thing is that if we'd done a standard poured reinforced concrete floor and poured concrete walls for a standard basement, we would have used 64 yards.
Right.
So, we get the second floor in concrete.
We also get the walls all the way up to the rafters for another 20 yards of concrete.
For an extra 20 yards of concrete, not to mention the speed and efficiency with which it all happened.
Very quick.
Yeah.
And then it terms of the other technologies we've got a different type of a footing in place here, don't we?
We used a fabric to contain the footings versus the standard wood construction method, we would have to remove.
In other words, we use this fabric that we were able to leave in place and the fabric is waterproof and vapor-proof, so, it actually prevents moisture from coming up through the foundations.
Exactly.
So, again it's a story of not only new technologies but of avoiding waste.
Correct.
Yeah, because you haven't had a dumpster on the job?
No, we haven't and we just believe in being thrifty also.
Makes a lot of sense.
This, so far, is the waste pile right?
That' s the real small waste.
We're keeping the other boards sorted for length so that we can grab them when we need them.
But those are our little pieces and even those little pieces get reused as well.
Sure.
Well, I noticed that you were using them up here.
Now this is a load-bearing wall.
And this two by six wall that runs the length of it sits on top of the concrete wall below us.
And the garages.
And there'll be another one just like it above that will eventually take the load of the roof.
Correct.
And what are these little short pieces of leftover two by four, two by sixes doing up there?
Those are squash blocks, and they're designed to take the compressive load from the, from the roof, that goes through the center wall and keep these eye joists which are very thin at the center, from compressing from the heavy load that's concentrated.
Right, we've got eye joist cut-offs here.
And the fact is, if you look at them in section, it's an engineered lumber product that's terrific as a joist, as a floor joist.
But what you're saying that in compression, it needs a little bit of help.
It does need some extra help with those concentrated loads.
Right, and then you and your son have done lots of the framing over here, and again you're using mostly two by six, right?
These particular structural walls, we're using 2x6's also makes it easier to put plumbing and electrical in them.
There's a little bit more depth to deal with.
And then the floor above us, I mean when you put up the interior partitions that are load-bearing, you have to be very precise about the heights of them, right?
Well, we're trying to match the existing roof upstairs.
Yeah.
Because the existing house, we really want to have the roof on the backside to become perfectly planer to one another.
To match up with each other.
To match up with the other ones, so we have to be very precise about where locate the wall because it supports that roof plan e that joins up.
Alright so everything is level?
This floor is level.
Good, let's go on up there and look at the sheathing.
Oh boy, it's nice and sunny up here.
Okay, so I what you're saying, Howard, about continuing the roof line of the existing house all the way across.
I mean, it's one long run, though, isn't it twenty some odd feet?
Actually the rafters here will be about 26 feet 5 inches.
And are they going to be traditional lumber?
No, we are going to use the I joist again up for the rafters.
You can use them for rafters?
Yeah, there is a design that allows you to actually frame a continuous rafter from the ridge all the way down to the eaves.
That'll be exciting to watch.
Okay, so now you've got the whole deck down here using this Georgia Pacific DryPly.
It really is very good looking stuff, isn't it?
Yeah, it's very attractive material.Very
highly functional as well.
It's a southern yellow pine very dense material, very strong and stiff.
In addition it has water repellent on the surface so that it's protected from the elements during the open time that it's exposed to the weather.
Yeah.
They treat it with a wax like finish so that you can have it up to like a month out here exposed to the weather, and you don't have to worry about it getting damp or de-laminating.
And the stability of this kind of lumber also makes it possible to just use it as a single layer of underlayment that you can put your finished flooring on.
That's correct.
There's no unsupported edges with the tongue and groove plywood.
So that where the ends meet, it hits on top of a joist, and then the edges, the tongue and grooves meet together.
Are supporting it.
Yeah.
And lock it together.
Now your son, Richard, has been working here all alone.
How do you like working with this dry ply?
It's great stuff, very stout, very sturdy.
It's got some great characteristics, but I'm glad you guys are here to help.
This stuff ways about seventy-five pounds a sheet.
Yeah.
Yeah, it is heavy stuff.
You guys had to bring it all up here on your own, right?
Yeah, I was uh-
Over 30 sheets for the whole area.
Yeah, we can skip the gym that day.
Yeah, you bet you can.
Yeah.
All right, so now we're using the same kind of adhesive materials that we've used on the exterior furring strips, right?
It's the same adhesive actually.
We're using on all of our structural applications.
So wherever we put plywood to structure, we're actually using this adhesive to increase the strength and stiffness of the structure.
What kind of foam is it?
This is polyurethane foam really thickened up called per stick.
It's gun dispense so I can control.
It's a better mouse trap that I can open up the set screw, lay down any size bead that Howard needs.
So we'll attach it and we'll do an as pattern and I'll get started doing that.
So if I just open up the set screw and pull the trigger, see I can lay down any size bead I want, and that goes like this.
This is a construction adhesives.
No solvents, so it's not gonna do any damage whatsoever to the EPS board.
When you say solvents, you mean any petroleum based solvents that would dissolve.
Your standard construction adhesives that have to be bled would actually start eating through the EPS.
You know, ruining, water, you know creating a water channel, ruining the R factor of this structure.
The polyurethane lesson.
The key thing though here Barbara that we have to do, it's different than the standard construction adhesive is, it comes out like a shaving cream.
It now chemically grabs the moisture out of the air and the viscosity of this resin will thicken up.
So it needs an open time of about three minutes and it'll go., I'll just touch it, go from a shaving cream into a Cheez Whiz or more of a standard construction adhesive to increase the adhesive quality of the product.
It's very space age.
And how long does the foam have to sit before you can put the plywood sheets down on it?
Under normal relative humidity conditions, we would have to let it sit, oh, five to seven minutes, but we're going to accelerate it a little bit.
We've got a...
A little spray water bottle there?
A, a little mister there and it's a moisture curing urethane.
Yeah.
So if we get a little bit of extra moisture on the material it'll accelerate the...
Alright, so lets put the two old guys on this end and Richard, you can handle that end.
Seventy-five pounds huh?
Yep.
OK, it's set up on that end.
And that is the groove side, and we're gonna fit it right in.
There we go, we just need to ease it in.
You got your end in there?
Yep!
OK.
Very nice.
That's good.
And so it's engineered so there's always a little bit of a gap here for expansion and contraction.
Yes.
In fact, if you look at the back of the sheet there, it says leave eighth inch space between all sheets.
Is that right?
Yeah.
What kind of nails were you using?
We're using hot dipped galvanized.
These are eight pennies.
Yeah the beauty of the hot dipped is that you've always got that roughness that comes from the galvanizing process, and that always helps with the grip.
It increases the coefficient of friction with the nails, so they withdraw a lot harder, so they hold better.
Yeah, exactly.
Alright, so, we'll just go ahead and tack it in place.
But the overall nailing pattern is supposed to be what, every six inches on the edges?
Six inches on the edges and eight inches on the intermediate joist.
OK, great.
Alright, well let me ask you one last question about the roof system that we that we were talking about a minute ago, because on the back side it's all going to be one continuing line and if you look at our gable-end wall here, it's kind of an unusual looking gable-end, right?
It's a clear story construction, with two, really, two shed roofs coming together.
Exactly, and so that vertical line there actually will be a vertical wall of glass all the way across the top.
It will have 5 windows in it and they will be lined up with the windows in the lower part of the building.
OK, well I can't wait to see the roof to come together, Howard.
Me too.
Nice job, Richard.
Thank you.
OK.
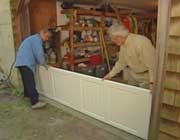
And these, of course, are installed on the other side of the house where all the new work makes it a lot easier to put in these beautiful Amarr Classica 3000, stamped-steel doors that look like a wooden carriage house door.
We're out of time.
Next week we're going to be showing you some beautiful fiberglass windows from Pella that we're installing.
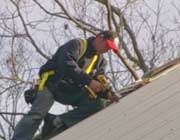
We're also going to look at how the roof gets framed and some metal roofing.
Until then, I'm Bob Vila.
Thanks for joining us.