We may earn revenue from the products available on this page and participate in affiliate programs. Learn More ›
Quality sprinkler systems are easy, water-efficient means to keep your yard green and lush. Their programmable and scheduled irrigation, combined with strategic sprinkler head placement ensure evenly distributed watering across the lawn. Depending on the season and need, the system can be altered to provide optimal watering in the new conditions. But they require their own maintenance in order to, in turn, continue to care for the lawn.
The following sprinkler repair and maintenance tips ensure a smoother-running system that endures for years to come. While some of the tasks may be best left to an irrigation specialist, others require only a consult with your owner’s manual.
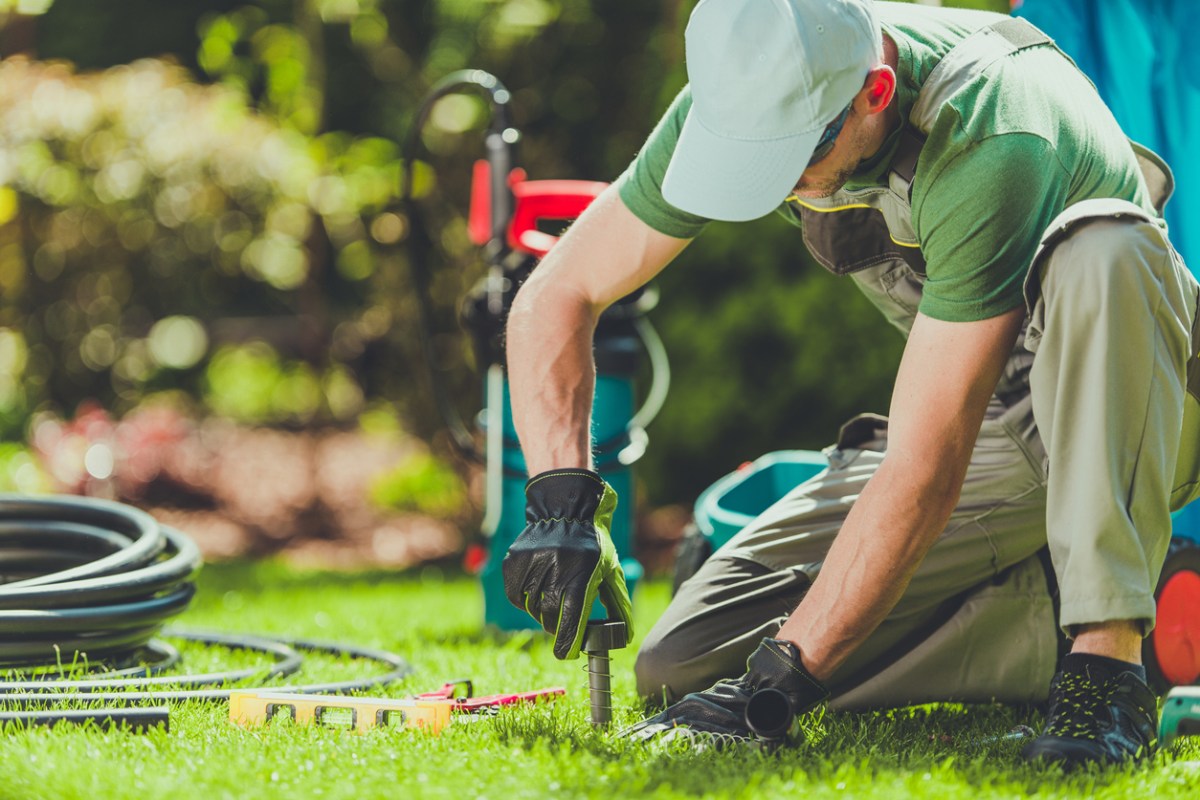
DO clean your sprinkler heads.

Sprinkler heads can easily become clogged with dirt and other ground residue. Clogged sprinkler heads impact the distribution of water across the lawn, potentially leading to patches that are drier and browner than others. Making sure sprinkler heads are clean and clear will keep the whole system running properly.
Set yourself an annual reminder to clean sprinkler heads to make sure they continue to flow water properly and that water pressure remains consistent. The process will entail turning off the irrigation system and removing and soaking the nozzle, so consult with your irrigation system manufacturer on how best to clean your sprinkler heads. Of course, always keep an eye out for any potential clogs while in use such as dry spots and no water flow, and be sure to handle the issue right away.
If in doing so you discover a damaged part leftover from the last time you mowed the lawn, follow this step-by-step on how to replace a sprinkler head.
DON’T ignore leaky sprinklers.
Similar to most plumbing issues, a small leak can create much larger problems. Not only could the lawn and garden receive too much water at the leak and too little irrigation elsewhere in the yard, but your water bill may also increase because of unneeded use.
Keep an eye on the general water flow of the whole sprinkler system. Make sure water pressure is consistent, and that there are no drier or wetter areas than others on the lawn. Take action as soon as you notice the leak in the sprinkler itself or see puddles in the surrounding lawn. You can either refer to a sprinkler installation guide for sprinkler repair steps, or contact an irrigation specialist.
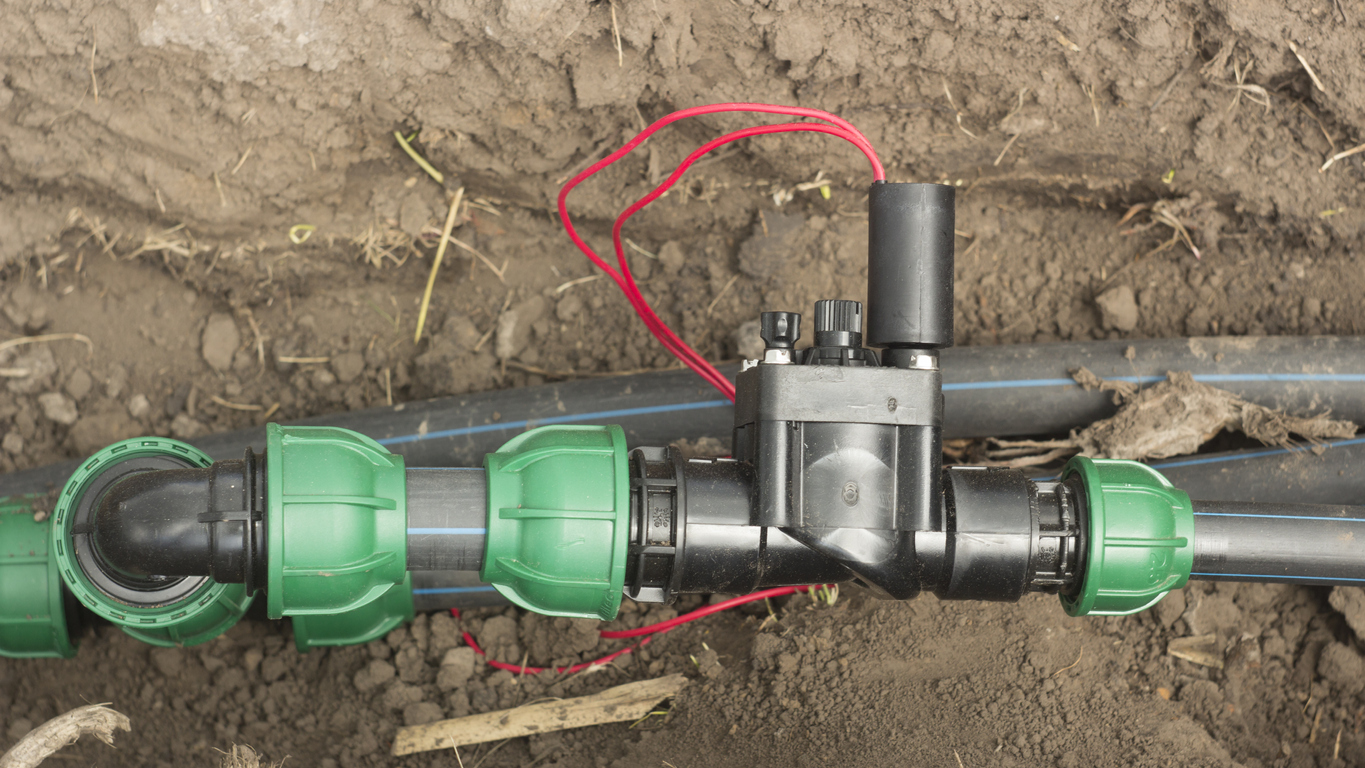
DO make sure to check valves.
Sprinkler leaks are most often caused by faulty valves. These plastic parts help direct the water from its main source to the rest of the yard through what’s known as a valve assembly or manifold.
Again, similar to any system issue, signs of a valve problem will be indicated by irregular water pressure and wetter or drier areas of the yard. Check valves in both the central valve assembly and individual sprinkler heads, as well as their coordinating areas of the grass. The central assembly is either located above ground or underground, usually close to the house. Look for cracks, rips, or other signs of disrepair in each of the valves.
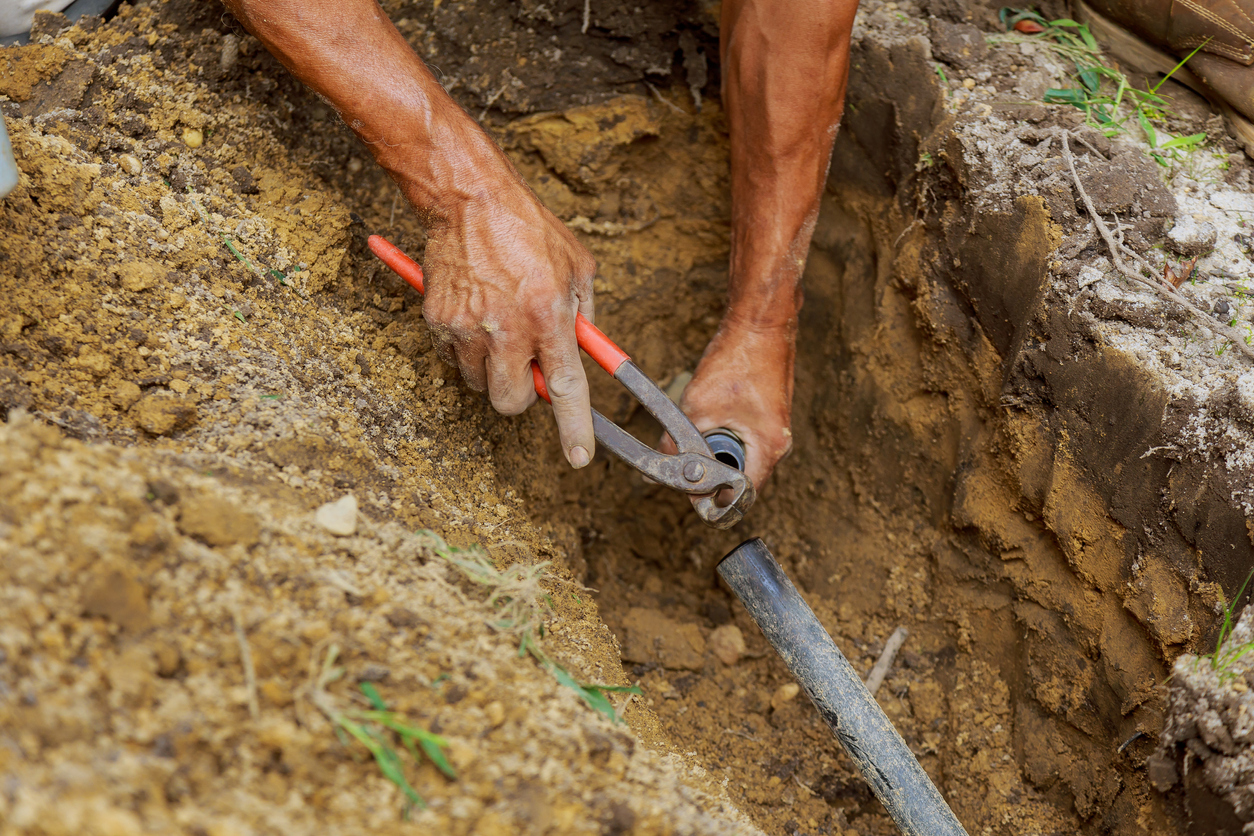
DO repair faulty pipes.
Effective and efficient water flow relies heavily on pipes in sound condition. Pipes are subject to normal wear and tear as well as other unfortunate accidents, such as a burst of water pressure or a confrontation with a garden spade or shovel. As with a leak, you’ll want to pay attention to water flow throughout the lawn and watch for any inconsistencies in certain areas. If the valves and other parts appear fine, the pipes may be damaged. Refer to the installation guide and any other manufacturer’s resources for pipe repair as soon as possible. Most replacement parts, including pipes, are available at big-box home improvement stores.
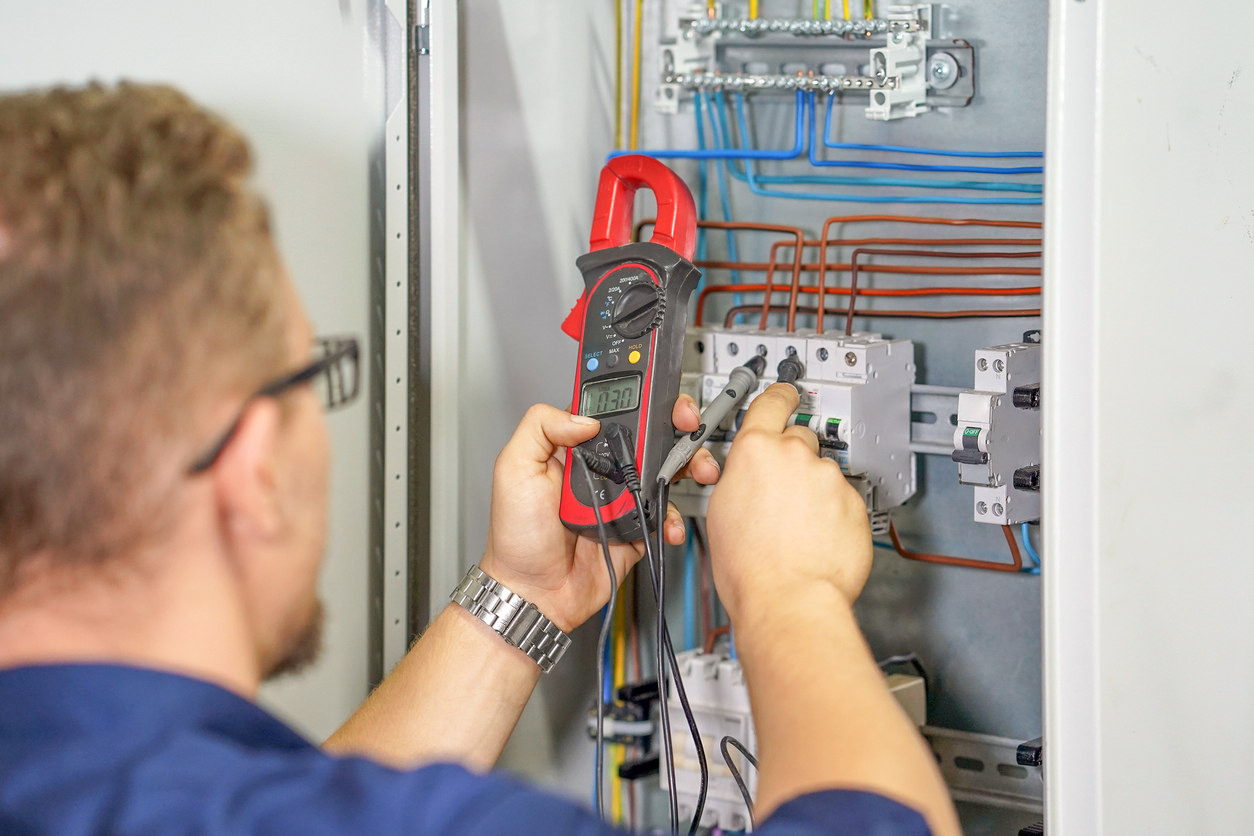
DO test the voltage.
Use a multimeter to take a voltage reading. Testing the voltage of a sprinkler system will tell you how well a sprinkler’s electrical parts—transformer, controller, solenoid, and wiring—are all co-functioning. Standard sprinkler systems operate on 24 volts, or “24 VAC” on a multimeter, although a range of 22 to 28 is acceptable. Multimeter tests are not difficult to perform, although electric repair work of any kind may be best left to an electrician, or in this specific case, to an irrigation specialist.
DON’T neglect transformers.
The pipes, valves, sprinkler heads, and water can’t do anything for the lawn without a working transformer to help power the sprinkler timer. Test this electrical part with a quality multimeter to ensure it’s operational. This reading determines if the transformer is in good shape or needs to be replaced. At the same time, look for any other signs of wear and tear, such as fraying, on the transformer, and pay attention to the system’s operation. Is it operating according to schedule? If not, the controller may not be receiving adequate power to do its job of keeping the system running on time.
DO ensure connectors are waterproof.
Water and electricity do not mix. Keeping wire connections on each individual valve protected and dry helps them last longer and maintains system communications so that the sprinklers operate properly. To do so, add waterproof connectors to protect the sprinkler system wiring from the elements. Waterproof connectors are available at most improvement stores, and cost less than a dollar each. Installation entails not much more than a simple twist. Combined with a sealant, waterproof wire connectors will keep the electric components of a sprinkler system free of exposure to moisture.
DO repair damaged wires.
Damaged wires will prohibit the controller from “talking” to the valves and making them open or close on schedule. Sometimes, normal wear and tear will deteriorate wiring, or there might be other more immediate causes, such as tampering critters or the elements.
Located primarily underground, it’s not always obvious when you have wire damage. As soon as the problem is apparent though, either visibly or from ruling out other potential electric issues, take steps immediately to repair the wire or replace it. The owner’s manual will provide installation guidance, or an irrigation specialist can handle repair if the damage is significant.
DON’T ignore detached wires.
Almost as bad as damaged wires, detached wires can also interrupt a sprinkler system by causing a failure in communication between the controller and the valve. Assess the wire to try and determine the cause for detachment, such as extreme weather or faulty parts.
Detached wires should be reattached as soon as possible. Check connectors, valves, and the controller for potential causes as to why the wire detached in the first place, in case there are preemptive steps you could take to prevent wires from becoming detached again in the future. Consult the owner’s manual on how to reattach the original wire to ensure it is restored to its original function. Assure that when becoming detached, the wire wasn’t also damaged in the process.
DON’T forget to replace the sprinkler solenoid.
Like a traffic signal for the sprinklers, a solenoid is an electromagnet that communicates with the controller to open and close the sprinkler system valves. If not working properly, they may inadvertently cause leaks or other malfunctions.
Replacing the solenoid involves taking the valve apart and reassembling in the proper order. Some models even require more than just an individual solenoid to be replaced. Consult the manufacturer’s guide for solenoid repair and replacement steps, or hire a professional for this sprinkler repair job.