We may earn revenue from the products available on this page and participate in affiliate programs. Learn More ›
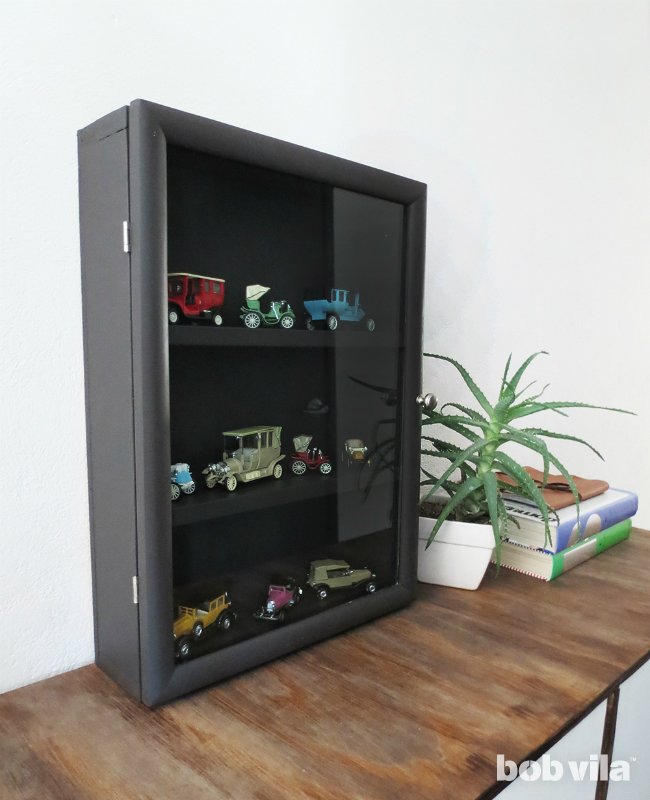
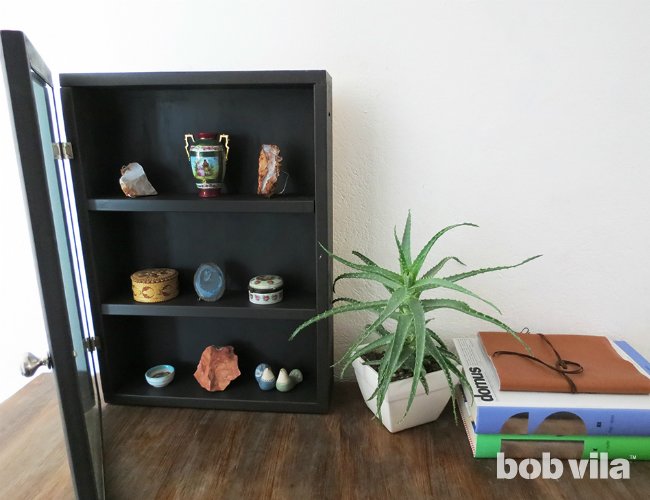
Most of us already have the makings of a collection sitting out on a shelf or dresser, right under our noses. Transform those dust-catchers into intriguing displays by arraying them behind the glass pane of a shadow box. A shadow box is essentially a framed box, just a few inches deep and often outfitted with a shelf or two, that holds collectibles, cherished mementos, and other small objects. And it’s functional too! The glass front protects the contents from dust and damage. So gather up your tiny treasures and a spare picture frame, then follow this easy tutorial that will soon have you admiring your budding collection through the artful casing of your very own DIY shadow box.
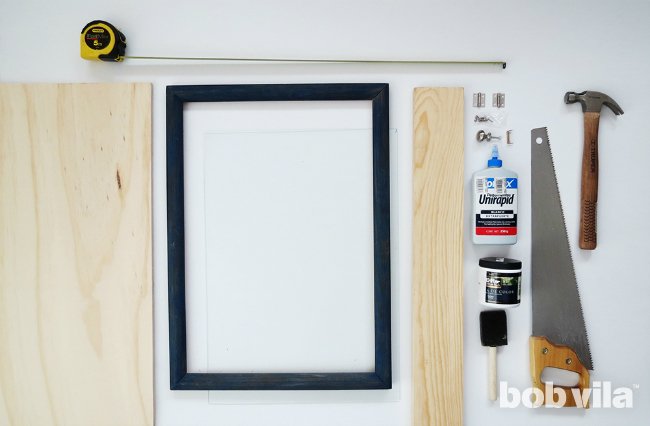
TOOLS AND MATERIALS
– Wooden picture frame with its glass
– 6mm plywood
– 8-foot-long 1×4 lumber
– Sandpaper
– Wood glue
– Clamps
– 1-inch hinge and screw (2)
– Small drawer knob
– 1-inch nails
– Acrylic paint
– Foam brush
– Rubber grip pads
– Handsaw
– Hammer
– Ruler
– Drill
– Hot glue gun (optional)
STEP 1
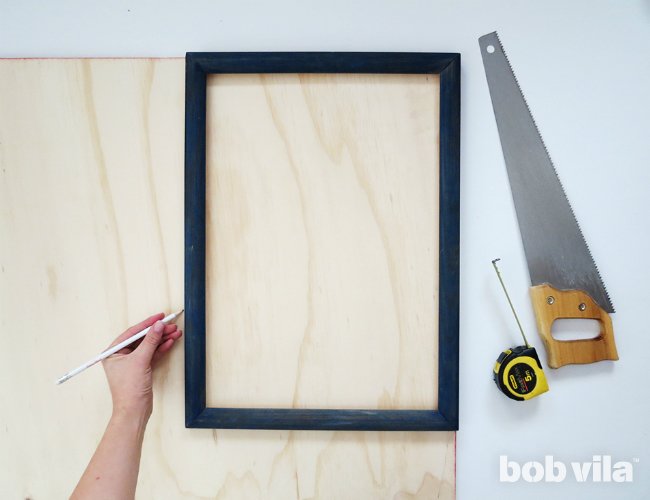
We chose a spare wooden frame as the ready-to-go front for our DIY shadow box so we wouldn’t need to cut any glass. Depending on what you intend to display, you may prefer a more decorative frame than the simple silhouette shown here. When you’ve picked yours out, just remove the back (which you won’t use) and the glass (to be set aside for later).
Start by cutting out what will be the back of your box. Place the frame onto the sheet of plywood and trace its shape. Use your saw to cut out the panel.
STEP 2

Next, cut four pieces from your 1×4 lumber to make the sides of the shadow box. The top and the bottom will be the same length as the width of your plywood back (which is also the width of your picture frame). To calculate the length of the sides, measure the length of the frame and then subtract the thickness of the pieces at the top and bottom of the box. As each 1×4 is approximately 3/4-inch thick, you’ll subtract 1-1/2 inches from the length of the frame. Cut each, then sand all the pieces smooth.
STEP 3

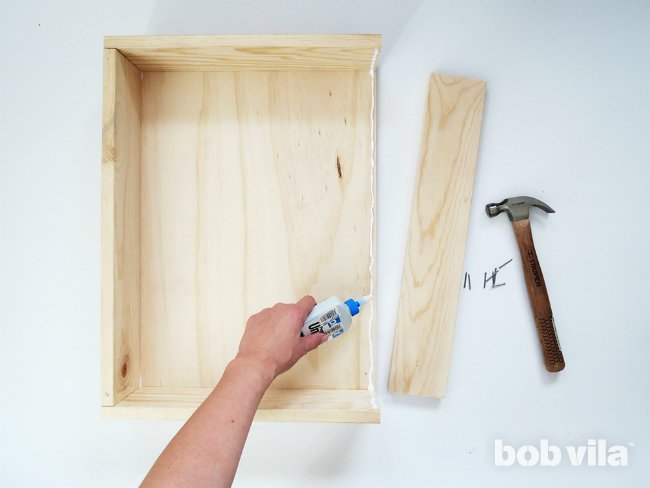
Squeeze a line of glue across one short side of the plywood rectangle, and press one of the short pieces of 1×4 into place. Repeat at the opposite end of the plywood rectangle. Use clamps to maintain pressure while the glue bonds.
STEP 4
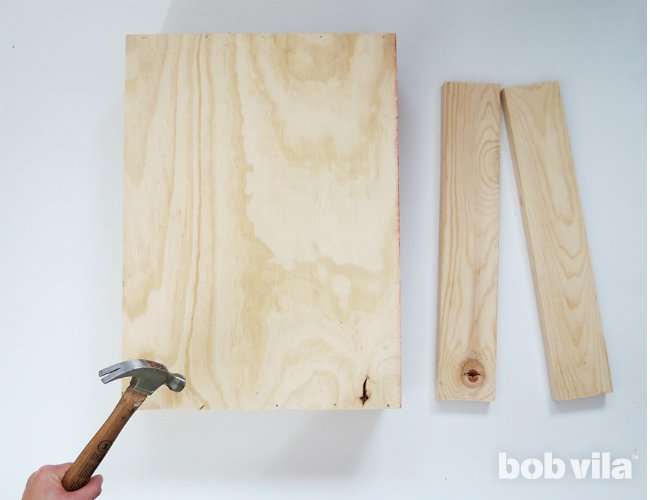
Once the glue is dry, flip the box over and hammer some 1-inch nails through the back along both top and bottom.
STEP 5
Repeat Steps 3 and 4 with the remaining 1×4 pieces to create the sides of the box.
STEP 6

If you want, at this point you can add two shelves to hold your smallest tchotchkes, as we have. Skip this step altogether if you intend to showcase something larger or plan to tack postcards and photos to the back like a three-dimensional memo board.
The length of your shelves will depend on your frame’s dimensions: To calculate, subtract 1 1/2 inches (the thickness of both side boards) from the width of your frame. Cut one or two shelves of this length from the 1×4 lumber, and sand down each piece. Estimate how far apart you’d like to space your shelves, then measure with a ruler to make sure your shelf will be level and pencil in a line along the back to mark where the shelves will go. Glue along each line and fit your shelves into place.
STEP 7

After the glue dries, you can start painting. Choose a color that will strike a real contrast with the objects you wish to exhibit—you want your collection to pop! Apply at least two coats of paint to the sides, shelves, and inside back. If necessary, clean, sand, and paint the wood frame to match.
STEP 8
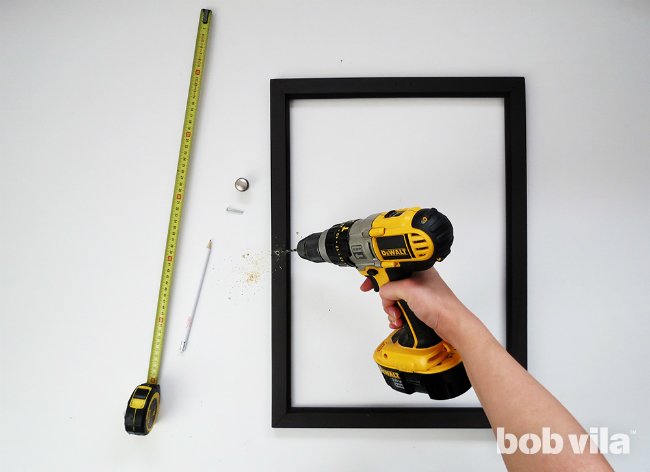
So you’ll be able to open and close the door easily, attach a small drawer knob to the right side of the frame. You’ll have to screw it in through the back, so flip the frame over, and measure to find the center of the left side, then drill a hole and screw in the knob.
STEP 9
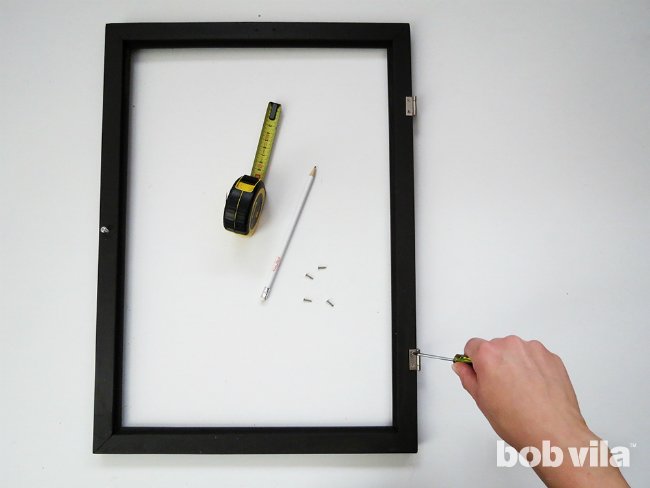
While your frame is still face down, attach the hinges on the side opposite your knob. Measure four inches from the top, then screw one part of a hinge to the outermost edge of the frame. Measure the same distance from the bottom, and attach one part of the second hinge.

Secure the glass in its frame by first lining the inside edge of the frame with hot glue or silicone adhesive and then pressing the glass into it. Don’t move the door until the glue dries. When it’s dry, file away any excess glue.
STEP 11

Attach the frame to your box, creating a door for your display. First, lay the frame on top of the box, determine where the hinges hit the side, and hold the plates there while you screw them into place along the left edge of the box.
STEP 12

If you intend to display the shadow box on a bookshelf or dresser, you can adhere four rubber grips to the corners of the bottom, as we’ve done. But this shadow box works just as well hung on a wall with other elements of your gallery wall. To hang, simply screw one large or two medium-size sawtooth hangers onto the back, and hang from a nail as you would a heavy frame.
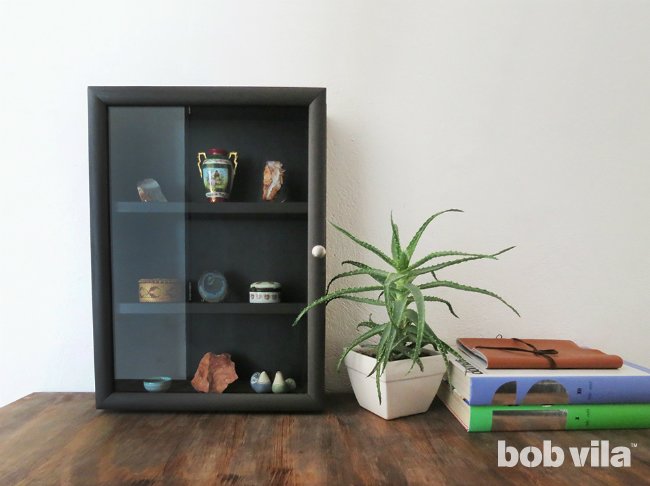
Once situated on the designated shelf or wall, your shadow box is ready to accept its collection. Even the most humble knickknacks—your child’s toy cars, mismatched salt and pepper shakers—can be elevated to the status of artwork with this powerful presentation. Go ahead and fill ‘er up!
Ama is a DIY addict and the creative mind behind Ohoh Blog. She likes home decor, lighting, and furniture projects that may involve painting, sewing, drilling…no matter the technique! Whatever she has on hand is inspiration to create and fodder for her serious addiction to upcycling.
