
We may earn revenue from the products available on this page and participate in affiliate programs. Learn More ›
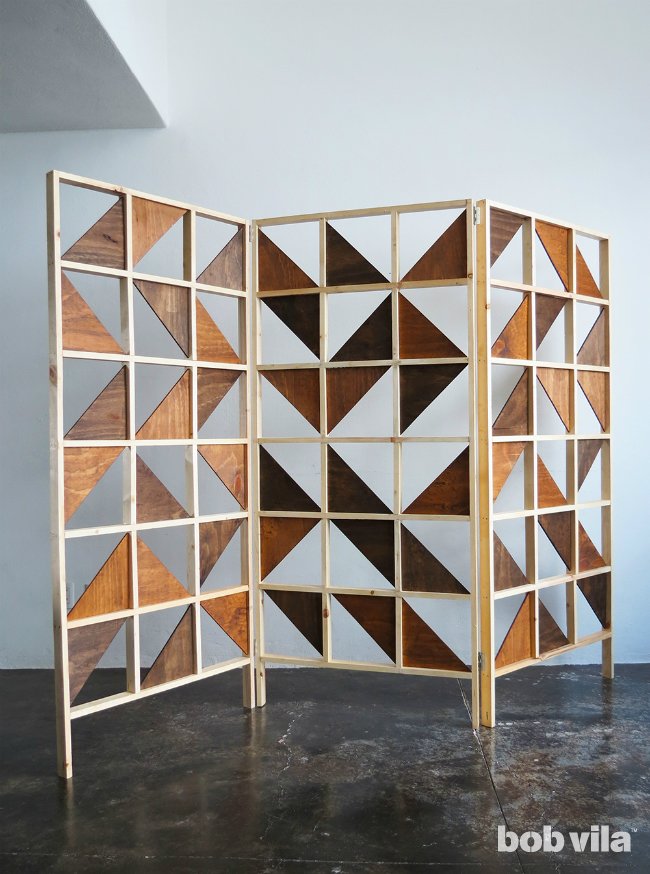
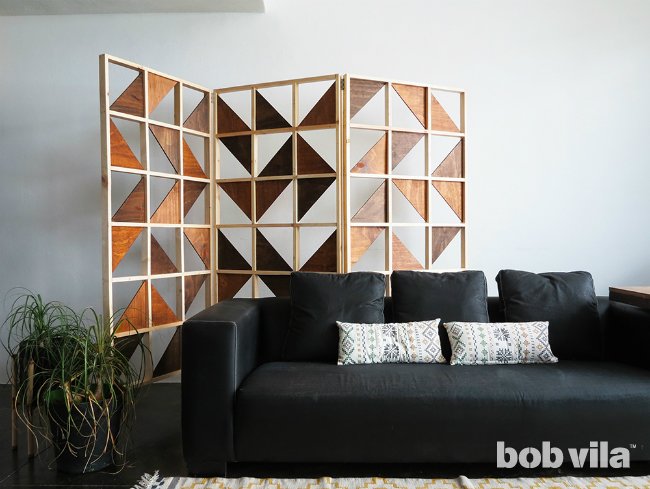
No matter whether you live in a large house with an open-concept floor plan or a small condo wherein your living room occasionally doubles as a guest bedroom, there comes a time when you need to delineate your spaces for their various functions. The easiest way to implement a little extra privacy? Build a room divider. This particular 6-foot-tall paravent design successfully partitions a space when you want it, then folds for easy storage when you’re preparing your space for a larger gathering—all only using a stack of humble plywood and 1×2 lumber.
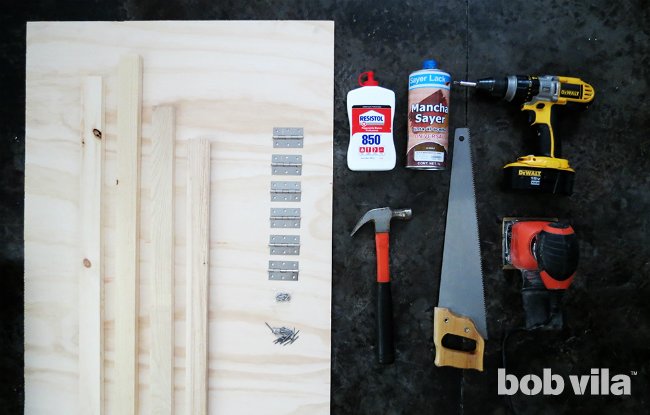
MATERIALS AND TOOLS
– 6mm plywood
– Circular saw (optional)
– Handsaw
– Palm sander
– Sandpaper (120 grit)
– Wood stain (2 colors)
– Brush
– 8-foot-long 1×2 lumber (17)
– Hammer
– 2-inch nails (156)
– Wood glue
– Varnish
– 2-inch hinge with screws (6)
– Drill
STEP 1
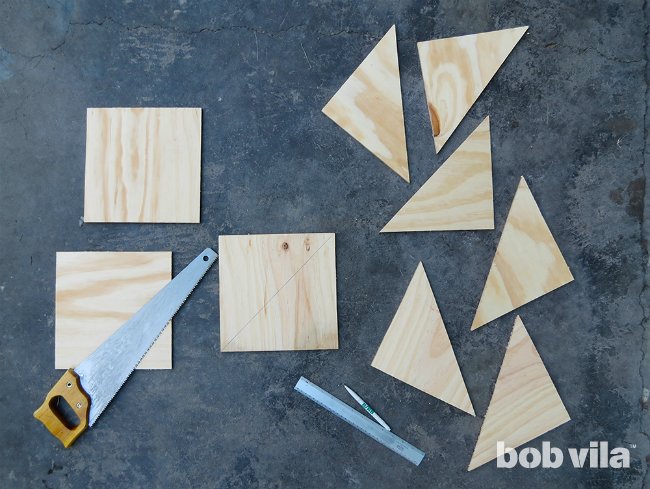
This DIY room divider is a simple grid build assembled from 1×2 lumber. Its conversation-starting geometric design—thankfully, in a harder-than-it-looks sort of way—comes from the numerous eye-catching and privacy-creating plywood triangles that fill the grid. That’s where we’ll start!
Trace 27 10-inch squares on your 6mm plywood board, and cut them with a circular saw. Once you have all of your squares, cut each across the middle from corner to corner so that you’re left with 54 right-angled triangles.
If you don’t own any power tools fit for the task, you may be able to rent a circular saw from your local hardware store, or even ask them for a few starting cuts when you purchase the plywood board. If the store cuts the board into 10-inch strips, you only need to cut the strips every 10 inches and then in half diagonally using a handsaw.
STEP 2
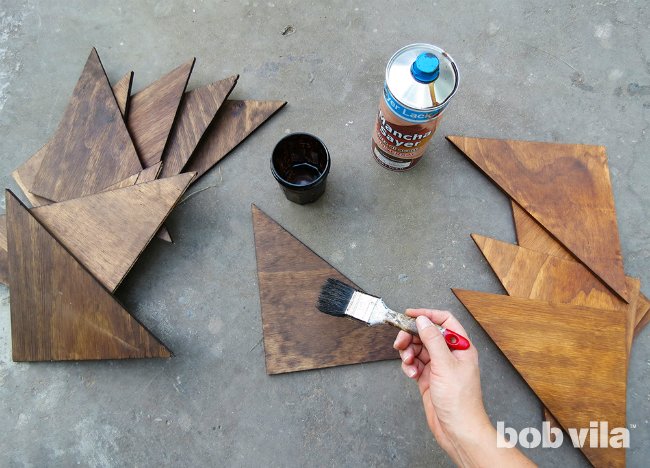
Sand all sides of the triangles with a 120-grit paper, especially the cut edges, and wipe away all dust using a microfiber cloth. Now they’re ready to stain. (We suggest choosing two complementary colors for visual variety; half of ours were coated with Oak and the other half in Early American.) Cover both sides completely, following the directions on the stain you choose.
Let them dry.
STEP 3
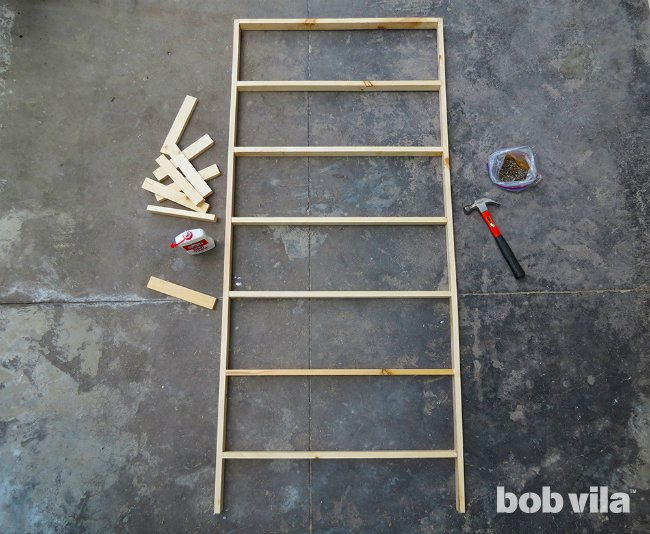
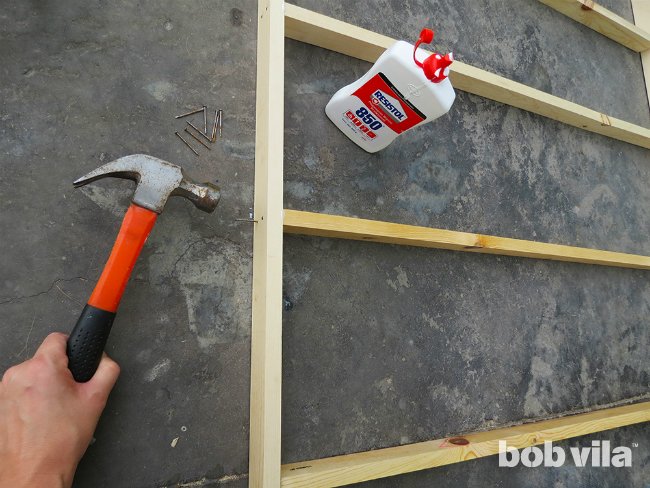
Meanwhile, you can start building the divider’s frame from your lumber. Start by making your cuts on the 1×2s: You’ll need two 73-inch pieces, seven 32-inch pieces, and 12 10-inch pieces for each panel (of which you’ll make three total).
For the first panel, lay two 73-inch posts vertically and perpendicular to each other on a flat surface—these will become the vertical posts. To connect them, you will place the seven 32-inch cuts horizontally. Begin at the top so that the first 32-inch piece is aligned with the ends of the two posts, then leave a 10-inch gap between each of the next pieces of lumber.
Note: With all of these pieces, make sure that the narrow, half-inch edges lay are the ones resting on the floor. Then you can proceed to assemble the panel, one vertical post at a time.
STEP 4
Remove the 32-inch horizontal pieces one at a time, apply wood glue to both ends, and then replace it between the posts.
As the glue dries, hammer two 2-inch nails through one vertical post and into each horizontal piece; repeat the nailing along the second adjoining vertical post.

STEP 5
Now that the basic framework of a panel is complete, let’s add the smaller vertical divisions within each row.
Grab your 12 10-inch cuts of 1×2. Place two vertically between the top of the panel and the horizontal bar beneath it; these should be equidistant from the posts and each other (leaving a 10-inch gap to fit the triangle), keep their half-inch sides flat on the work surface and fit snugly.
Once you see how they fit, remove both to coat each end in wood glue and replace. Hammer two 2-inch nails through the horizontal post into each end of the 10-inch dividers.
You’ve finished what we’ll call Row 1; now repeat in rows 3 and 5. Tip: Alternating the rows will help you in gluing and nailing them to the horizontal pieces.
STEP 6
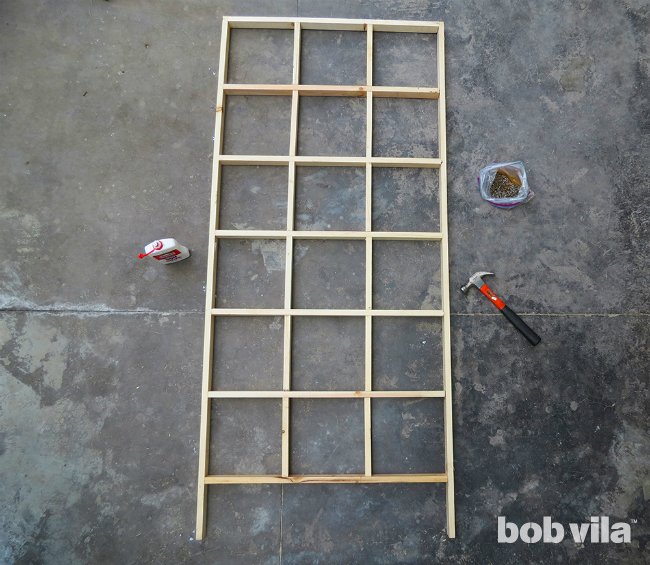
Now fill in rows 2, 4, and 6 with two 10-inch dividers apiece, spaced 10 inches apart—here, though, only affix them with glue. As best you can, try to align all of the vertical pieces to give the impression of complete and sturdy vertical posts.
Once the glue is dry, sand the structure to remove any clumps and glue stains.
STEP 7
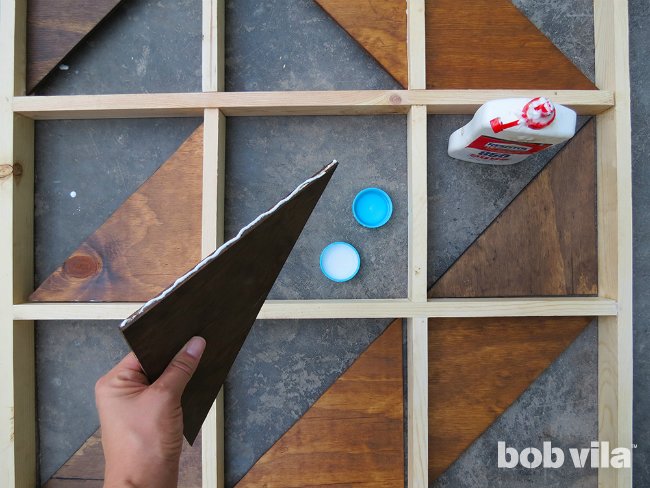
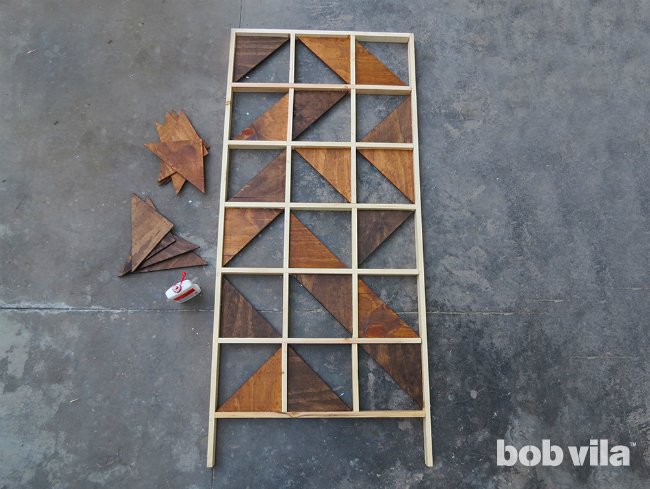
Finally, fill the gaps with your stained (and now dried) triangles. Leaving the structure flat on the floor, grab nine triangles from each wood stain (18 total) and arrange them in the panel of one grid until you are happy with the design. There’s no right or wrong way to do this—we varied the part of the square the triangle filled on ours so that it looked more artistic than entirely uniform.
Once you are satisfied, start at the upper left corner of a panel and work your way down to stick each in place. Line the 10-inch edges of each triangle with wood glue, and fit it back snugly into the square opening. To help it dry centered within the square frame, first place scrap wood or bottles caps behind (rather, underneath) the triangles to prop them up.
STEP 8
Congratulations, you’ve finished a panel! To complete the DIY room divider, you’ll need at least three total, so repeat Steps 3 through 7 to build two more.
Once the three panels are assembled, coat them in a protective coat of clear varnish.
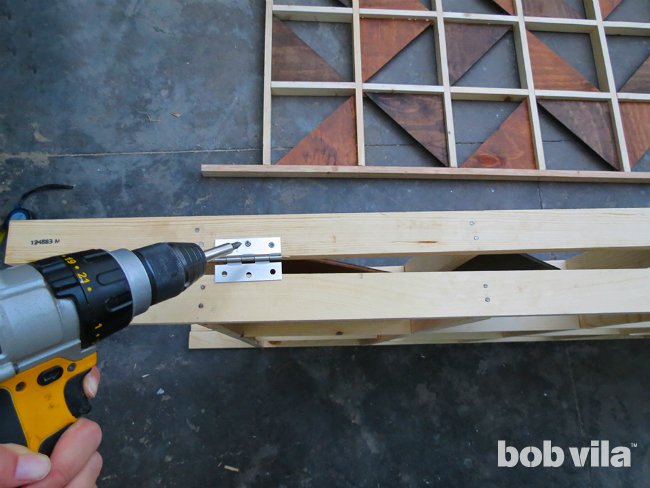
STEP 9
Last, but not least, connect the three panels using hinges. First, lay two panels next to one another and place three hinges down the middle: one near the top (Row 1 of triangles), one in the middle (Row 3 of triangles), and one near to the bottom (Row 5 of triangles). Be sure the panels’ feet align with each other before you screw it in place.
Once attached, flip the two panels face-down and place the third next to them. (It won’t matter which side is the front or the back on this DIY room divider because you’ve stained each side of every triangle—not to mention, each side will be seen when it’s set up to divide a space!) Affix three more hinges as you had the first set. When finished, the three panels will open in a “Z” shape that can expand nearly 8 feet long.
Ama is a DIY addict and the creative mind behind Ohoh Blog. She likes home decor, lighting, and furniture projects that may involve painting, sewing, drilling…no matter the technique! Whatever she has on hand is inspiration to create, and fodder for her serious addiction to upcycling.
