
We may earn revenue from the products available on this page and participate in affiliate programs. Learn More ›
Most folks don’t give their home’s driveway apron a second thought unless they’re installing a new driveway or repairing an existing one. The apron, also known as the approach, is the part of the driveway closest to the road and usually made from the same material as the rest of the driveway. Because driveway aprons are regulated by building codes in most communities, replacing yours—because it’s in bad shape or you’d like to widen the driveway—can be complicated. Keep reading for crucial info before you tackle this curbside project.
RELATED: 9 Popular Driveway Options to Welcome You Home
Sizing Up Driveway Apron Sizes
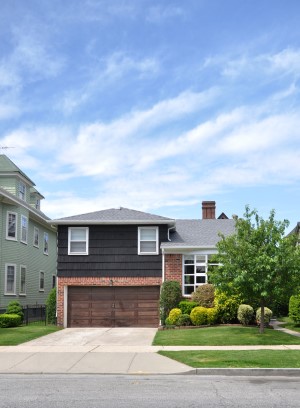
Driveway aprons vary in length from about eight to 15 feet (starting at the street and measuring toward the house). Since the apron is a part of the driveway, its width (side to side) is identical to the width of the rest of the driveway—most of the time you can’t tell where the apron starts and the driveway stops. If sidewalks are present, the apron typically extends to the edge of the sidewalk closest to the house. In many communities, the area on the street side of a sidewalk is considered an easement that the city controls. This is the area where you’ll find buried municipal water lines and storm drains. If no sidewalks are present, the length of the apron will vary from community to community, based on local construction codes.

Understanding Building Codes
Local building codes determine what type of driveway apron can be installed. In most communities, sidewalks, curbs, gutters, and driveway aprons are all regulated by local codes. These areas are considered either public access (sidewalks and aprons) or a part of the community’s storm drainage system (curbs and gutters). When you apply for a permit to construct a new driveway apron, your local codes may regulate the following:
- Who can legally install the apron (a homeowner, a licensed contractor, or a city crew).
- The width and length of the apron.
- The slope of the apron (water must drain into the gutter).
- Acceptable material—concrete is the most common, followed by asphalt, and then pavers.
- The thickness of the apron. For example, concrete on the non-apron portion of the driveway should be a minimum of four inches thick, while codes may require the apron portion to be as much as seven inches thick.
- How much and what type of fill—the sand or gravel—must be used to fill the excavated area before the concrete is poured (usually between three and five inches)
- Whether steel reinforcement (often rebar) must be installed in the concrete as it’s poured.
- Permitted type of curb cuts (see below for curb cut specifics).
In older neighborhoods where driveway aprons do not comply with current local codes, homeowners are often grandfathered-in, meaning they needn’t replace the non-compliant apron. If, however, they decide to replace it, at that point they must install the new one according to code. Failure to do so can result in a fine and having to tear out and replace the apron. Worst case scenario, the city may tear out and replace your non-compliant driveway apron and then bill you for it.
Considering the Curb Cut
A curb cut is where the existing curb is cut away to allow vehicles to enter the driveway. While communities are picky about driveway aprons, they’re even pickier about curb cuts because a system of curbs and gutters is a part of a larger drainage system. If you want to install a brand new driveway, not only will you need to follow codes for installing the apron, you’ll also need to follow codes for cutting the curb. The larger the community, the more curb cut regulations you’re likely to encounter. In New York City, for example, curb cuts are strictly regulated based on numerous criteria, including where they can be located along the curb, the minimum distance to a cross street, how many curb cuts are allowed per block, and even whether a curb cut could interfere with pedestrian traffic. In a small rural community, you may be able to install a new driveway apron and cut the curb without ever having to pull a permit.
Who Pays?
Some communities will pay a portion of driveway apron installation costs while others require the homeowner to pay the entire amount. Homeowners may be surprised to find they don’t own the apron portion of their driveway yet are responsible for maintaining it. If your driveway apron is in bad shape (presenting a danger to pedestrians), the local Code Compliance officer may ask you to have it repaired, which may include patching it (to the city’s standards) or replacing it. If you don’t, the city could fix it and then charge you for the repairs. In winter, the homeowner may also be responsible for removing snow from both the sidewalk and the driveway apron. Check with the local building authority to find out how your community handles these issues.

Evaluating Materials and Costs
Some communities specify the material used in a driveway apron, and this information is available from your local building authority. The cost to build the apron varies, depending on the going rate of labor in your area and whether you can do the work yourself.
- Asphalt, which must be installed by a paving company, runs approximately $3 to $6 per square foot. The company may also charge a setup fee, which could add another $1,000.
- Expect to pay $3 to $10 per square foot for materials if you want to install a paver or cobblestone apron. For professional installation, add another $10 to $18 per square foot.
- For a poured concrete apron, expect to pay $3 to $10 per square foot, which includes fill sand, steel reinforcement, and concrete delivered by truck (sack-type concrete is not suitable for this project). Professional installation will add another $8 to $12 per square foot.
- Equipment rental for excavating, tamping, mortar mixing (for pavers), and concrete finishing tools will add another $350 to $1,500 to a DIY project.
DIY Installation Tips
In the majority of cases, it’s best to leave driveway apron construction to the pros, but if you live in a community that permits homeowner construction, the following tips will help you get off on the right foot. Whether you’re doing a poured concrete or paver driveway, you should have a working knowledge of the material you’re installing.
- Obtain a spec sheet from your local building authority when you apply for your permit and follow it exactly. The spec sheet will give you the allowable dimensions for your apron in addition to its required thickness, the amount of fill and reinforcement, and the type(s) of material you can use.
- Start with a sound base. Whether you’re installing pavers or poured concrete, you’ll need to excavate to a depth of nine to 12 inches, fill the bottom with sand, and then compact the sand with a tamping machine. Sand that isn’t compacted adequately can settle later, resulting in a cracked apron.
- If you’re pouring concrete, consider pouring the apron in sections no larger than eight-foot by eight-foot instead of all at once. Pouring concrete is physically demanding and smaller sections are easier to pour.
- Recruit plenty of helpers when pouring concrete. On a hot dry day, concrete can begin to harden in 15 to 20 minutes, and strong backs are required to spread the semi-solid concrete mix and smooth it out before it sets.
- If you’re laying cobblestones or pavers, the process will go quicker if you have one or two helpers who can bring the pavers to you as you lay them.