We may earn revenue from the products available on this page and participate in affiliate programs. Learn More ›
Most bathroom and kitchen faucets have fittings called faucet aerators. These fittings mix air into the water as it passes through the aerator faucet to create a smooth stream made up of numerous tiny water droplets. The sink aerator also acts to restrict the flow of water. This combination of air injection and low faucet flow helps to reduce overall water consumption.
However, the faucet screen in the aerator can become clogged with mineral deposits or coated in iron oxide residue, causing low water pressure and an erratic spray pattern. To resolve this issue, it helps to know how to clean a faucet aerator.
The first step is learning how to remove a faucet aerator without damaging the fitting. After removing the aerator, the next step is to learn how to clean the aerator on a kitchen faucet or bathroom faucet. It’s a relatively simple job that should take no longer than 45 minutes to an hour to complete.
Tools & Materials
Bobvila.com may earn a commission from purchases made through these links.
Project Overview
Working time: 15 minutes
Total time: 45 minutes
Skill level: Beginner
Estimated cost: $0 to $45
Before You Begin
Cleaning a faucet aerator is a basic task that novice DIYers can handle. The key is to be careful as you work—you don’t want to damage the aerator or lose any pieces of this fitting during disassembly or reassembly.
Keep a small bowl or container nearby to corral the parts after you’ve taken the aerator apart. It’s also a good idea to place a towel or plug in the bottom of the sink to prevent the small pieces from falling into the drain.
How to Clean a Kitchen or Bathroom Sink Faucet Aerator
If you’ve never dissembled the aerator before, you may want to take a few photos as you work to ensure that you put the parts back together in the correct order.
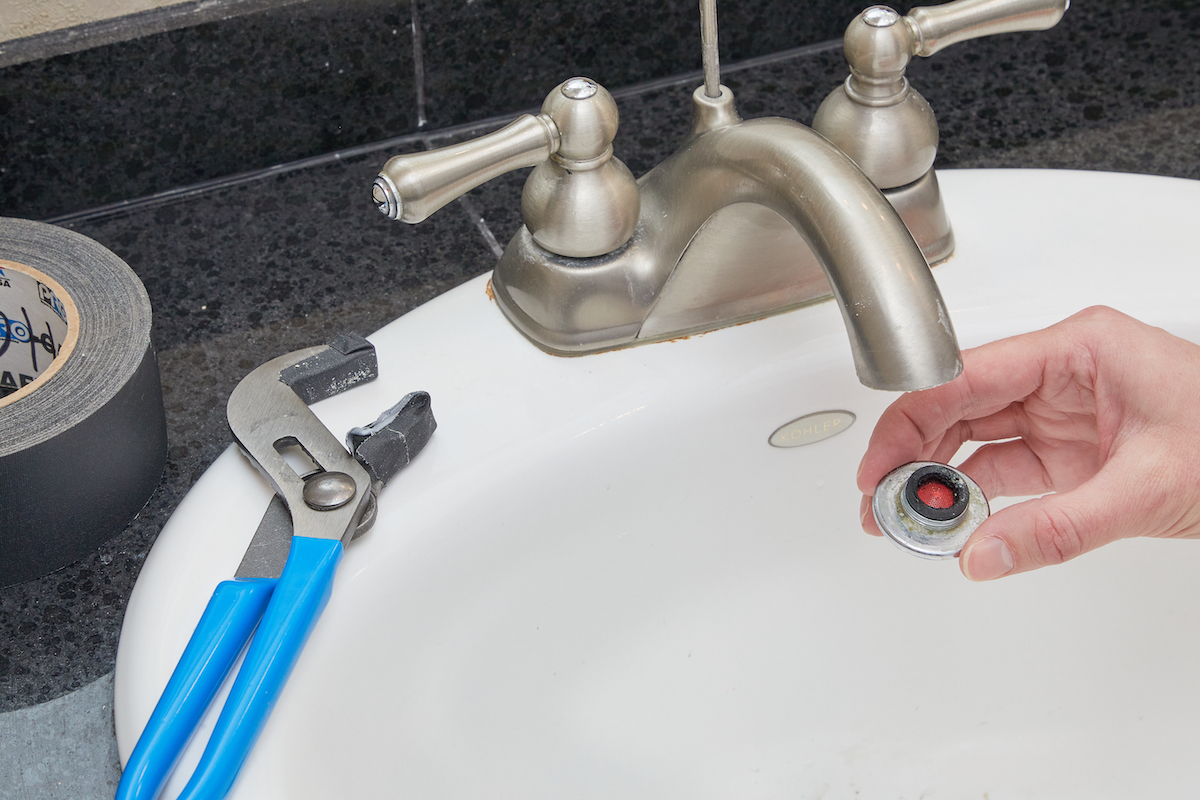
Step 1: Remove the aerator from the faucet.
An aerator will be attached to the end of your faucet. You can loosen the aerator by gripping it tightly and turning it in a clockwise direction. If the aerator doesn’t move when you try to hand loosen it, use a pair of tongue-and-groove pliers to gently grab the aerator and turn it in the clockwise direction. Keep in mind that the metal teeth on the pliers can damage the exterior of the aerator if you apply too much pressure.
To get a better grip on the aerator without damaging it, apply a strip of masking tape to the outside of the aerator. This layer of protection helps to prevent the pliers from scratching the finish.
If you cannot find the aerator, your faucet may not have one or it may be hidden inside the end of the faucet. You can remove a hidden aerator with a specialized tool known as a faucet aerator key wrench.
If you have not been able to remove the aerator from the faucet, the aerator could be seized due to mineral deposit buildup. You can still clean the parts by filling a small plastic bag with vinegar and tying the bag to the end of the faucet, submerging the aerator. After allowing the aerator to soak, try removing it again.
Step 2: Check for debris and disassemble the aerator.
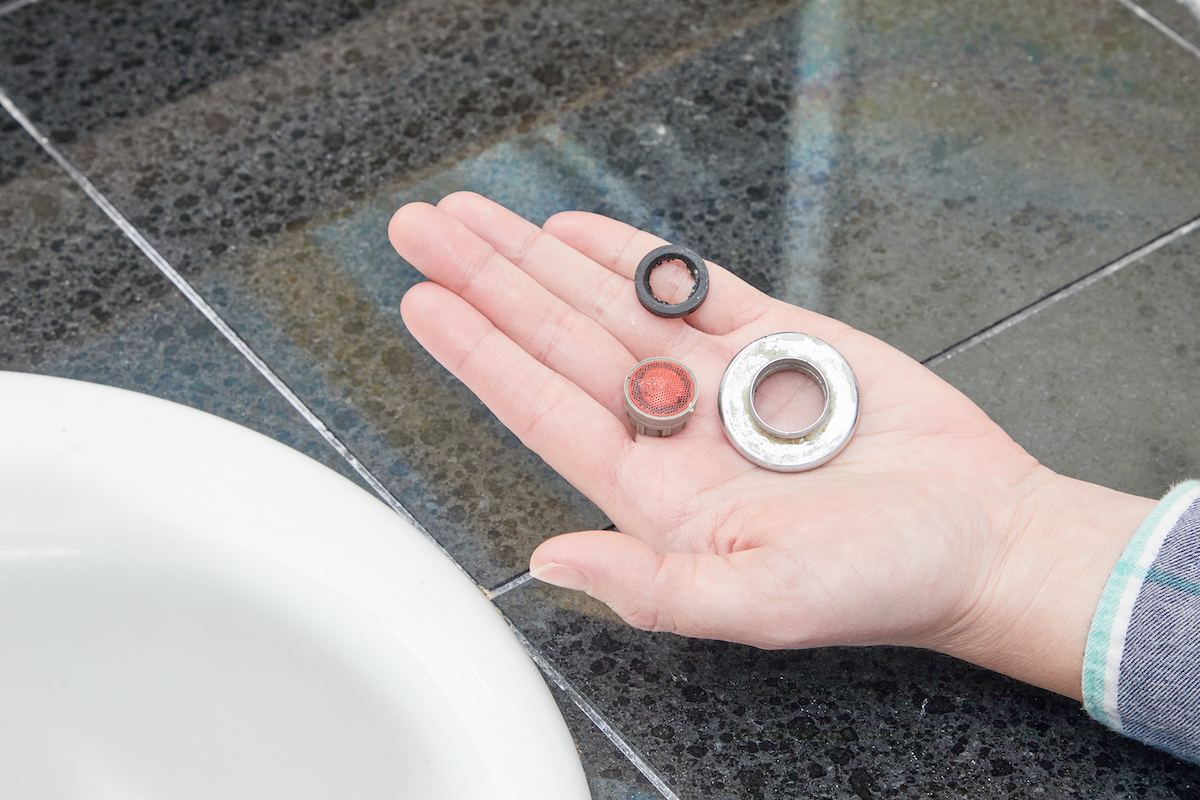
With the aerator removed, inspect the inside for any hard water debris or built-up residue that could be binding the parts together. Use your finger or a small screwdriver to gently scrape away any mineral deposits to free the pieces of the aerator. Once free, you can disassemble the aerator, taking pictures as you disassemble the parts to ensure they are reassembled in the correct order. Keep the parts in a safe place to avoid losing them.
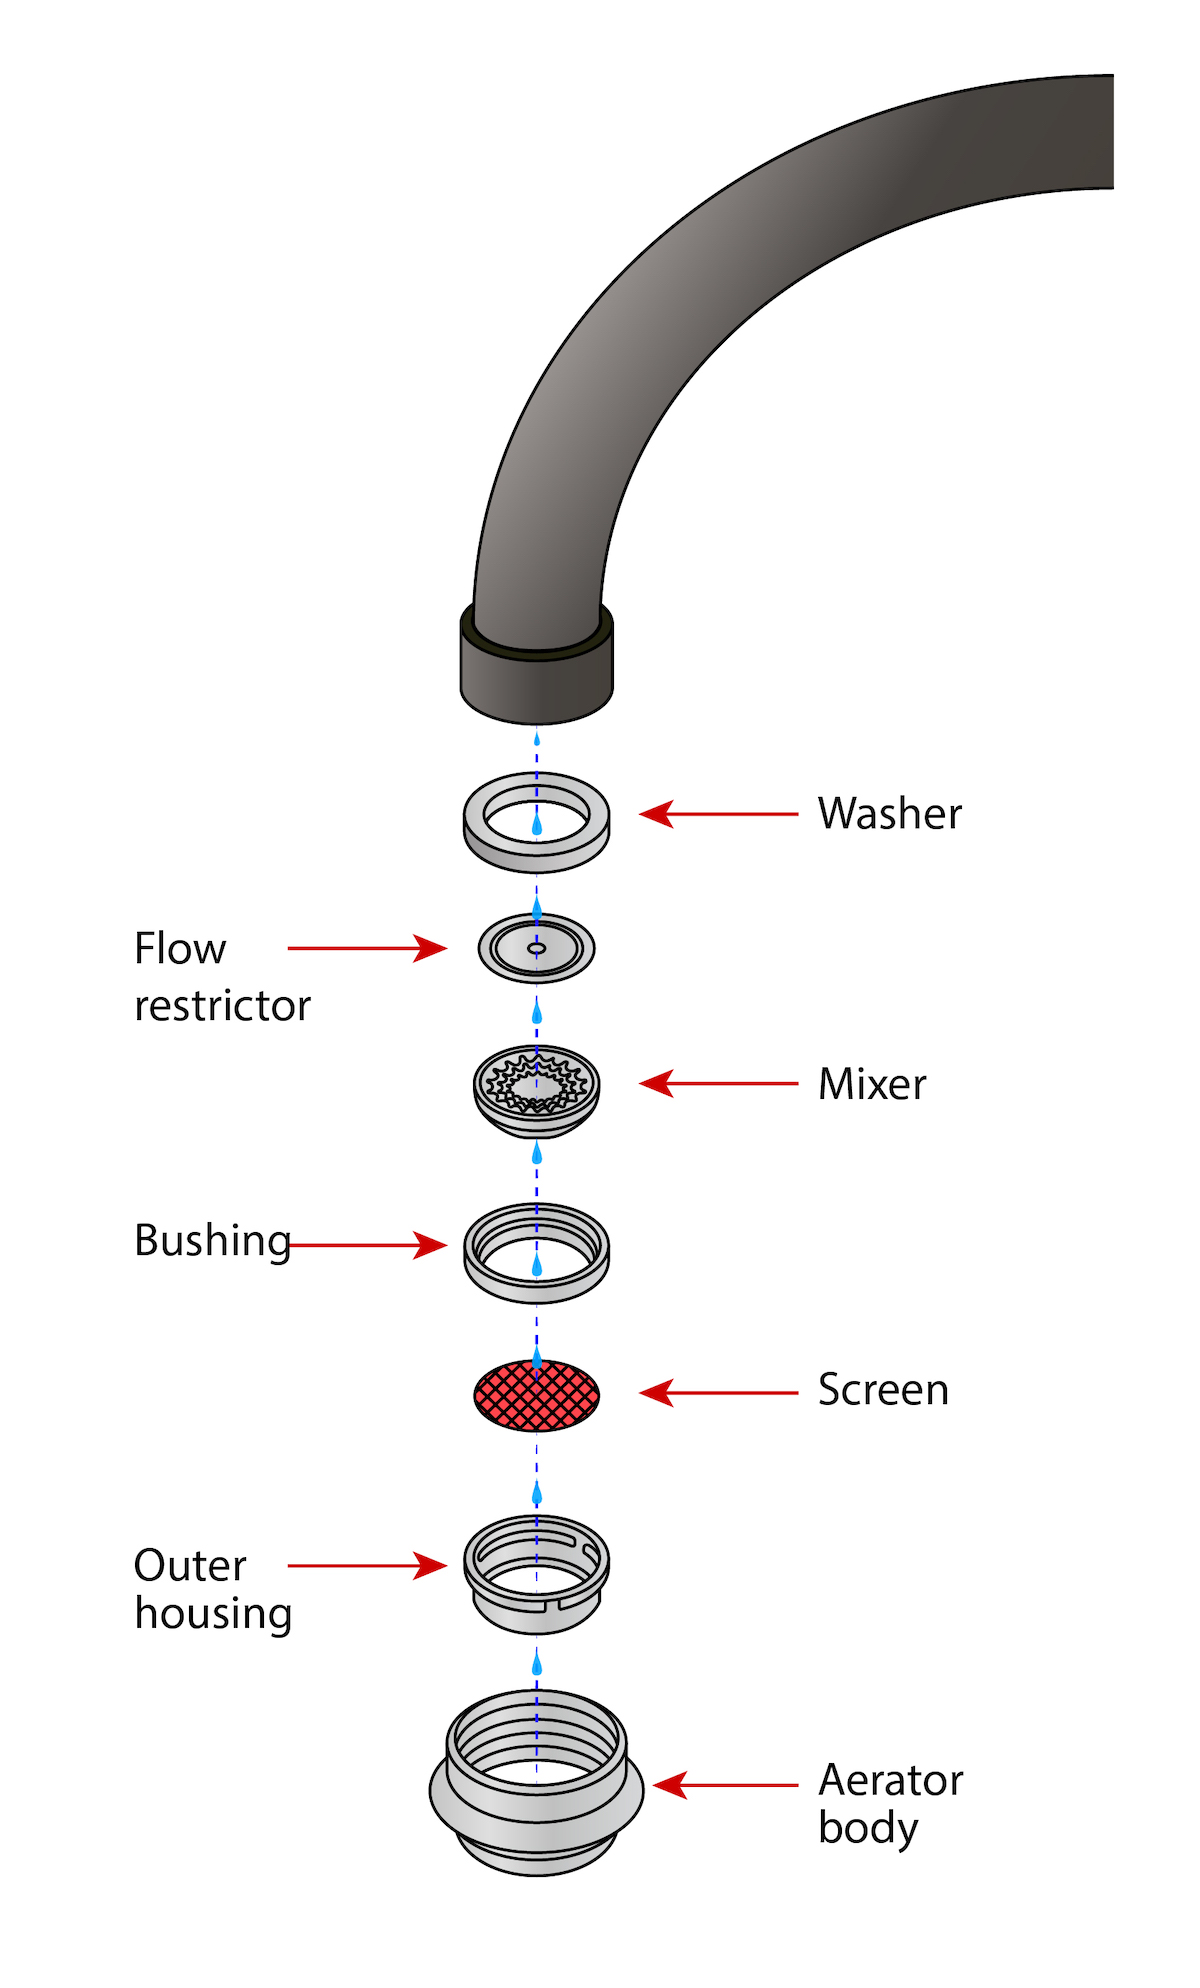
Faucet aerators are made up of several parts that sit inside the metal aerator body, including an outer housing, screen, bushing, mixer, flow restrictor, and washer. A toothpick or a similarly small and thin object can help to pop apart the pieces of the aerator and clean out any debris trapped in the threads or blocking the holes in the screen.
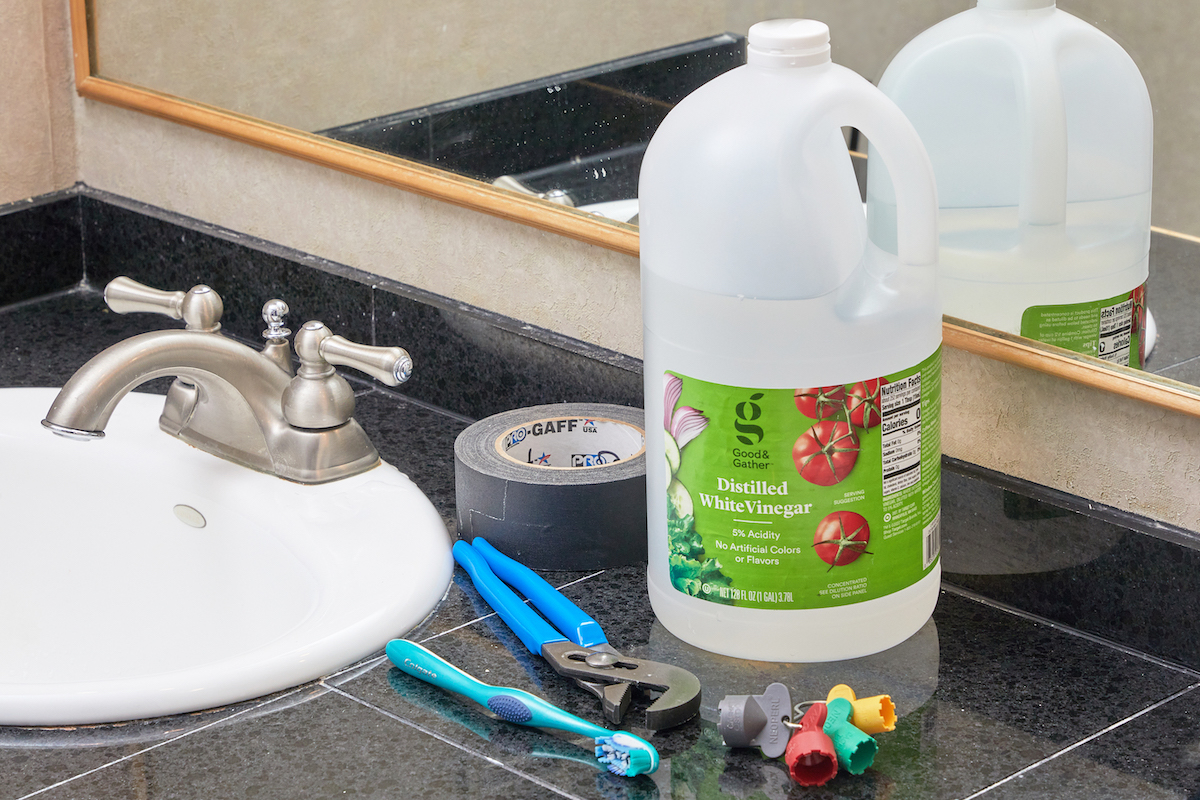
Step 3: Rinse away loose residue and soak the aerator in vinegar.

Carefully rinse and inspect each piece of the aerator for any signs of significant damage. If the internal pieces of the aerator are damaged, then it’s recommended to replace this fitting entirely. A simple cleaning will not be able to restore its proper flow or function. Some debris and grime will not be able to be rinsed off the aerator pieces. Instead, you should proceed as you would if you were learning how to clean a faucet head.
Prepare a bowl with enough white vinegar for the pieces of the aerator to be fully submerged. Place the pieces of the aerator into the container and allow the vinegar to break down the tough residue over the next 20 to 30 minutes.
Step 4: Scrub the aerator clean with a toothbrush.
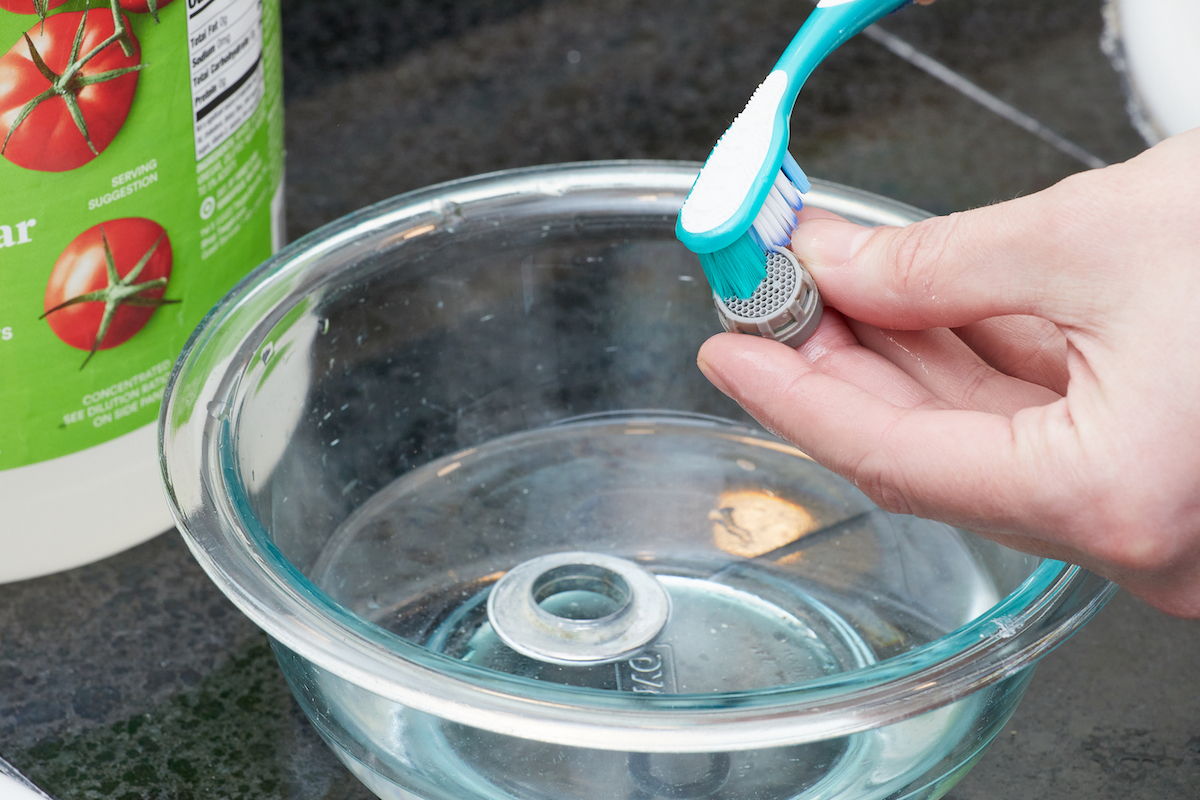
After soaking the aerator parts in vinegar, most of the grime and mineral buildup should be gone, but to ensure the fitting is completely clean, you can use an old toothbrush to scrub the individual parts.
Hold the screen and mixer up to the light in the bathroom to inspect the parts for any residual debris. The tough bristles of a toothbrush can get into small holes and crevices, allowing them to break apart any leftover fragments. Work slowly to avoid damaging the parts.
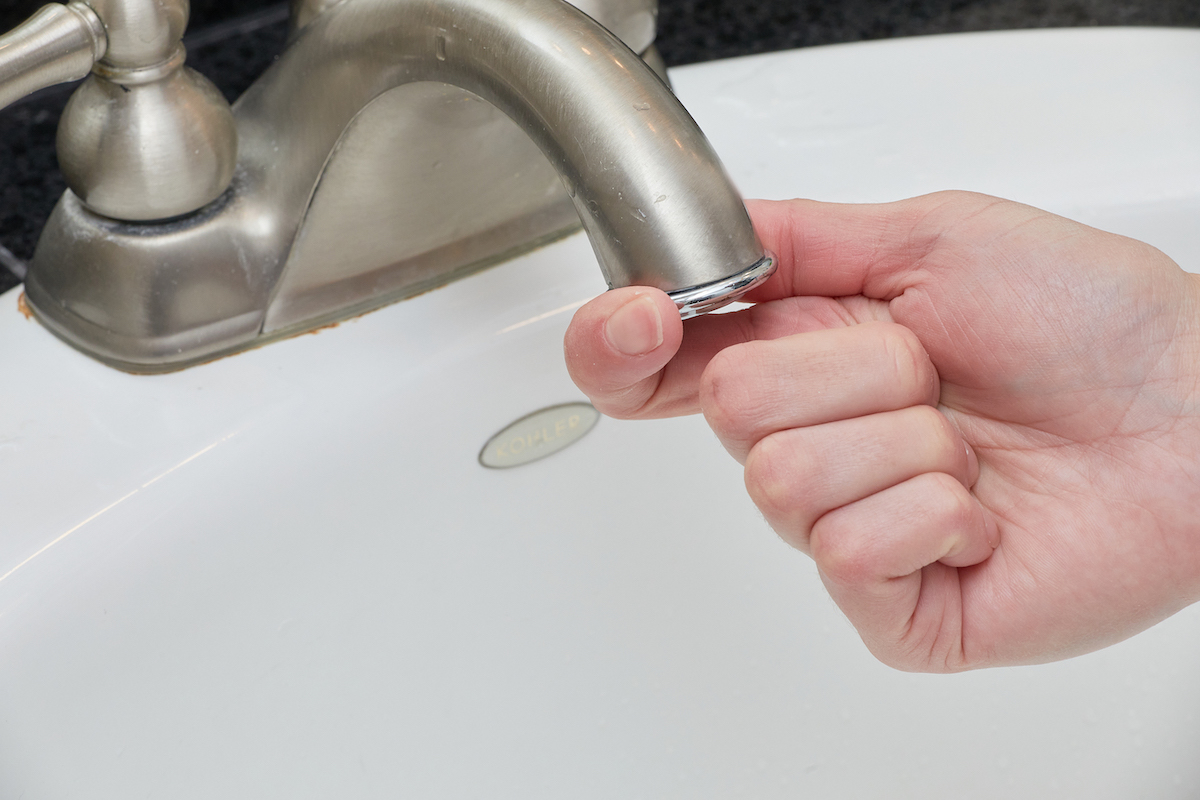
Step 5: Rinse, reassemble, and reinstall the aerator.

Run the faucet to rinse each part of the aerator before carefully reassembling this fitting. Use the pictures you took during disassembly to ensure the parts are put back in the correct order. With the aerator reassembled, you can reinstall it on the faucet.
Use your hands to carefully thread the aerator into the end of the faucet, turning counterclockwise to tighten the fitting. Turn the water on to test the flow of the water. You may only need to hand-tighten the aerator, but if any water sprays or gushes out of the side of the fitting, use a wrench to finish tightening the aerator.
Final Thoughts
Cleaning a faucet aerator is a simple, inexpensive job you can usually complete in less than an hour, which is a great incentive to tackle this task sooner than later. Make sure to check and clean the aerator at least twice a year to help prevent mineral deposits from building up. If work is being done on the plumbing system or the neighborhood water lines, you may need to clean the aerator more frequently.
During the inspection and cleaning process, you may encounter broken or worn parts. If this is the case, it’s time to replace the aerator for your faucet. Trying to use a broken fitting only creates more problems. A new faucet aerator isn’t expensive; make sure to take the old one with you to the store when looking for a compatible replacement.