We may earn revenue from the products available on this page and participate in affiliate programs. Learn More ›
Smart homes, or homes where a variety of home functions can be controlled from a panel display, mobile app, voice assistant, or all of the above, used to be a common element in movies where the wealthy protagonist shows off their expensive futuristic toys. With the explosion of smart devices, smart-home hubs, voice assistants, and apps to control them, the competition among manufacturers to make useful, affordable devices available to consumers has become fierce. This is a great thing for people who are interested in making their home smarter for convenience, accessibility, energy efficiency, or just for fun. Learning how to make a smart home isn’t as technical or complex as most people think, especially if they are aware of potential smart-home mistakes and know how to avoid them.
An important first step is determining just how smart the residents want the home to be; not everyone is comfortable with a fully linked smart home. Some people just want to be able to turn on the lights from their phone and make sure the garage door is closed, while others are interested in full automation of appliances, HVAC, lighting, audio-visual (AV), and a home security system. Before embarking on this project, take some time to browse and look at the variety of products available to see what the best smart-home systems are capable of, and then decide which elements work for the home’s residents and which do not.
Turn your house into a smart home
Get free, no-commitment project estimates from top-rated local installation experts and services near you.
Time required: Varies based on size of home and system, but plan on a few hours plus shopping time
Difficulty: Beginner
Estimated cost: A basic hub can cost as little as $60 or as much as $600; the cost of the devices will depend on user selection
Tools & Materials
Bobvila.com may earn a commission from purchases made through these links.
Before You Begin…

Installing a smart-home system doesn’t require special skills or talents, but it can take some time and patience. If installing many of the best smart-home devices from different manufacturers, users will need to take the time to download the apps from each manufacturer to a cell phone, then create an account with the manufacturer and then add the connected devices. This can be irritating for users who are impatient with cell phones to begin with, so it may be easier to do this step over the course of a few evenings instead of all at once.
Don’t be afraid to ask for help if the technology isn’t cooperating or is confusing. The voice-controlled assistants can answer some questions, but each device will include instructions, links to YouTube videos that can be helpful, and customer service phone numbers staffed by people for whom the technology is a snap. Use these resources.
Tips for Installing a Smart-Home System
- Before beginning, make sure internet-access passwords and the Wi-Fi router name and passwords are handy.
- Identify where the devices will be placed, and assess whether mounting brackets are necessary.
- Determine whether the devices will be battery-powered, or locate them near an appropriate power source.
Safety Considerations
- If hard-wiring or electrical work is necessary prior to installation, take all appropriate precautions, including turning the power off at the breaker box or hiring an electrician.
- Use caution when climbing on ladders to mount devices at heights.
- Check to make sure that internet access and Wi-Fi routers have all available security precautions enabled and that each password is different and tough to guess.
STEP 1: Choose your preferred ecosystem with which to control your smart home.
Amazon Alexa. Google Home. Apple HomeKit. These names will sound familiar for anyone considering the installation of a smart-home system. While there are other smart-home systems, these are the top three in the industry—but that doesn’t mean shoppers are limited to products branded as Alexa, Google, or Apple. The vast majority of quality devices are compatible with these three systems (or with at least one of them). Companies such as Ring, Blink, Wink, and SimpliSafe (as well as a host of other devices and adapters) list their compatibility, so while the first decision will be to choose the device or company that will serve as the center of the smart home, it’s possible to integrate pieces from other systems that work well.
How does one choose which ecosystem will best serve the needs of the home? First, consider devices already in use in the home. Is it primarily an iPhone and Mac home? Or are there already Alexa-enabled devices all over the house? Those who prefer Android devices or who spend a lot of time in the Google arena for work will want to look closely at Google Home. There are some other open-source options, and Samsung is making a push into the market with its SmartThings home system; Samsung has offered smart TVs and other AV components for years, but its platform connects to Google Assistant or Amazon Alexa if the user wants to have voice commands as an option. It’s important that the users be comfortable with the system that supports the hub. Learning to manage a smart home means there will be lots of settings and options, so having a level of comfort with the mechanics of the system can make the transition easier.
Apple HomeKit is a strong option for those who are already using iPhones or Mac computers. The HomeKit software is built into many of those devices or easily downloadable. As is the case with most Apple apps, the software is intuitive to use. While it’s true that there is a smaller number of devices that are compatible with Apple HomeKit than with the other platforms, Apple’s selectivity does come with a benefit. Because the company so closely restricts the apps that are available for download and the devices it will accept and approve, it’s a bit easier to be certain of the security and safety of the hardware and software that are controlling the home, and a hack is less likely, which allays a concern many would-be smart-home customers have. Siri (Apple’s voice assistant) is not quite as conversational as the other platforms’ voice assistants, and while it is improving its conversation skills every day, this voice assistant just isn’t quite as natural or easy to communicate with as the others.
Don't know where to start?
Talk to a smart home pro. Get free, no-commitment project estimates from top-rated local installation experts and services near you.
In contrast, the voice-command function of Google Home, generically named Google Assistant, is the strongest part of Google Home’s offering. Google Assistant is smart, chatty, and quick to respond to questions and queries. Google Assistant can also handle a complex series of requests without confusion, delay, or endless “I didn’t understand that” comments. While Google Assistant and Google Home can be downloaded onto Apple devices, the software is fully integrated into Android devices and has a smooth and elegant interface with the whole Google suite of life management, making it a breeze to unify an entire home’s needs seamlessly.
Amazon Alexa was first on the scene as a conversational voice assistant—just let a group of fourth-graders loose near an Alexa device and see what it can do! Alexa has the widest range of device compatibility among the platforms, the largest availability of third-party apps that can integrate with the smart-home system, and Alexa components such as hubs, speakers, and smart devices are relatively inexpensive. The Echo products, in particular, are easy to set up and use right out of the box, so Amazon’s offering can be ideal for those who are less comfortable with the technology of setting up the smart home. Worth noting, however, is that Amazon declines any responsibility for third-party apps used with its platform, so unless the customer is planning to stick exclusively with Amazon products, this could be a security gap.
STEP 2: Purchase your preferred smart-home devices, but make sure they’re compatible with the smart-home system you chose.
For many, the entry point to a smart home is just one or two devices: one of the best doorbell cameras, a smart plug adapter to turn on the lights in a dark room, or a single device such as a smart speaker or display. Making the commitment to step up to a full smart home means decisions about how much automation the home’s residents are comfortable with and choices about placement and scheduling. Nearly any appliance or electronic device in the home can be purchased as a smart device or adapted to be “smart” after the fact.
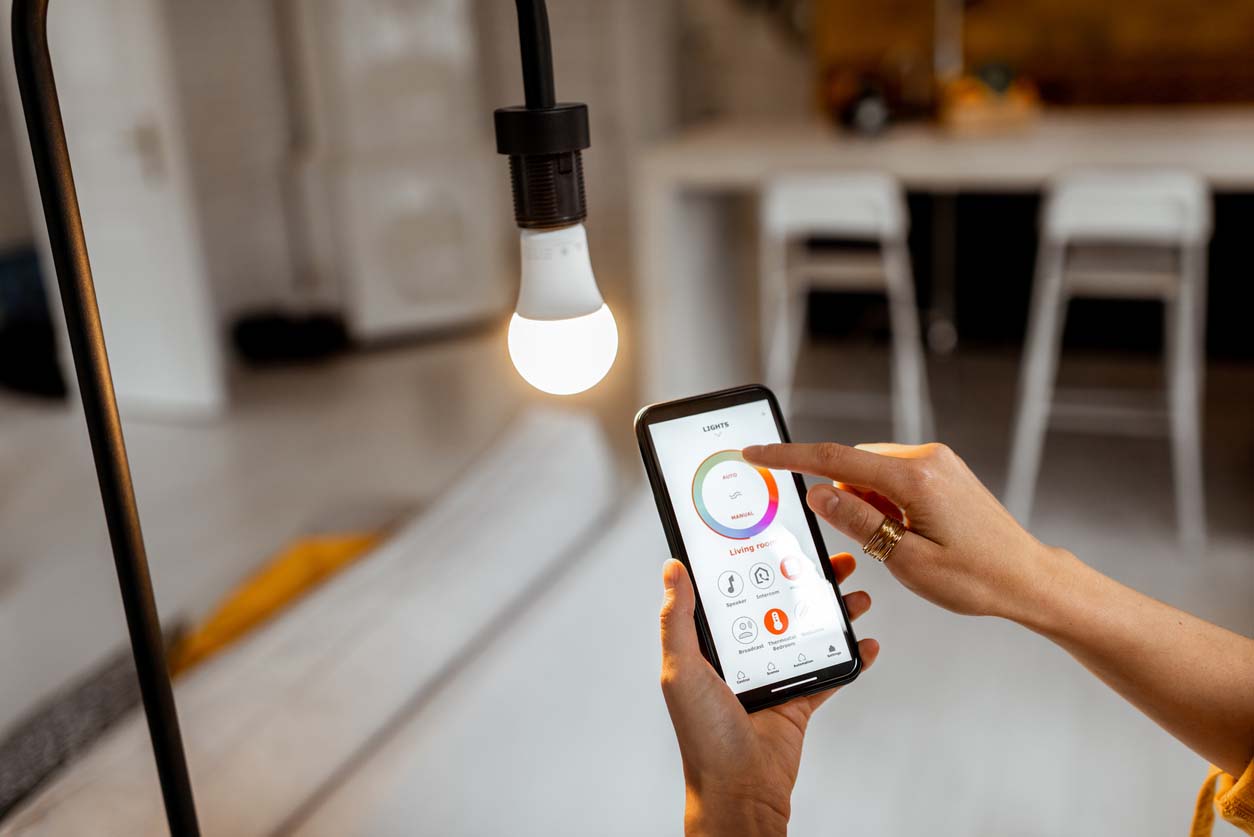
Smart lighting is an easy next step and can be achieved by purchasing smart light bulbs, smart lighting fixtures, or simply a smart plug adapter that plugs into an existing outlet and allows users to turn the power to the light switch on and off. Smart lights can increase the home’s safety by automatically turning on and off even when the residents are not home, and they can adjust the brightness of illumination based on the time of day or visual acuity of the residents. In addition, smart porch lights can be programmed to turn on and off at slightly different times each day, adding security by making it appear as if people are manually turning them on and off. The best smart-home thermostats can do the same for a home’s HVAC system, scheduling or remotely adjusting the HVAC equipment to raise or lower the home’s temperature based on whether or not the residents are home, the temperature outside, or the temperature inside. They can even trigger an alarm to the home’s residents if the HVAC system has failed, leaving pipes or pets in danger. Mapping HVAC temperatures can make a home more energy efficient. One of the best home energy monitors can be connected to a system and actually count and report the amount of energy being used in the home or by a particular outlet or device. These devices allow users to keep an eye on energy usage and can create significant energy savings by alerting users to energy-hogging appliances. Smart thermostats are easy to control, and investing in one may pay for itself in reduced energy costs.
From a security standpoint, a smart home offers a lot of options. Smart lighting can help a home look occupied when it isn’t. As part of the best home security systems, indoor security cameras, outdoor cameras, and video doorbells can help residents monitor the situation at home whether they’re at work, on vacation, or upstairs and hearing a funny clunk from downstairs. These devices can also be purchased from a home security company (consider companies such as Vivint, ADT, SimpliSafe, or Frontpoint) or integrated with a monitored home security camera system, which increases the overall safety in the home and can reduce homeowners insurance premiums. Along with indoor cameras—or independently—smart door locks can go a long way toward helping residents feel secure in their homes. The ability to allow temporary access to babysitters, dog walkers, and repair people without providing them a key that offers permanent access can be very convenient, as can the ability to check at any time to see if the doors are closed and locked. If the garage door and entry doors are not already fitted with smart locks, smart covers or adapters are available to convert the existing door locks and garage door openers into smart devices using built-in Wi-Fi connections. Some smart hubs bridge the gap between DIY and professionally monitored security systems with programs that respond to alarms or voice commands with a blasted message or sound through all connected speakers to deter someone who is breaking into the home. Additionally, Alexa users can look into the Alexa Intruder Alert and activate this service to help increase home security.
Safety-wise, smart devices are available to protect against dangers other than break-ins as well; many smart-device companies are now manufacturing smart smoke detectors. While it may seem as if these tools do not really need to be “smart,” as their primary role is to detect a problem and sound an alarm, there are benefits to connecting the devices to a smart-home system. If nobody is at home, nobody hears a local alarm—but when a smart device triggers an alarm or notification on a mobile device, residents can call the fire department or other first responders immediately, when without the smart device nobody would know to call for help until visible smoke made it to the outside of the home. This can make a significant difference in the amount of damage a fire has time to do within the house. Similarly, time is of the essence when dealing with floods or carbon monoxide leaks, and smart devices such as smart flood sensors and smart carbon monoxide detectors, whether connected to larger smart-home security systems or just to the hub, can make a big difference in that time frame.
Finally, smart-home devices can add simplicity and quality to a home’s atmosphere and remove complications. Tell a voice-controlled assistant that it’s bedtime and watch the lights turn off or dim, the thermostat turn down, nightlights turn on, and doors lock as white noise gently fills the room. Multiroom audio systems can create ambience using music through the home at the touch of a button. Smart devices can set the sprinklers to water the lawn and garden at appropriate intervals, check the temperature of a roast in a smart oven, check the doneness of steaks on a smart grill, and check on supplies in a smart refrigerator. These are extras—not strictly necessary, but nice to have when a system is being built anyway.
Already own devices that aren’t smart? For many products, converters are available to make standard devices smart. Almost any light can be a smart light if it’s plugged into a smart outlet converter or if a smart LED bulb is screwed in and connected, as long as there’s a Wi-Fi network available.
Once the type of devices have been selected, it’s time to shop. Compare the specifications of different options by carefully reading the product description of each device, because it’s critical to be absolutely certain they are all compatible devices with the system selected. There’s no need to stick with one manufacturer as long as the devices fit the needs of the home and work well with the smart-home system that is being installed.
STEP 3: Check your Wi-Fi connection to ensure it can handle your smart-home devices.
A home may have a powerful Wi-Fi signal at the router, but depending on the size and layout of the home, it may not be enough to reach the far corners of the home (even if the home isn’t particularly large!). For a smart-home system to work efficiently, a strong, consistent Wi-Fi signal throughout the entire space is necessary. One way to check is to walk around the home slowly while holding a WiFi-connected phone and watch the signal strength. If there isn’t full coverage, it’s time to look at options.
First, it’s key to be certain that the router supports a dual-band signal for 2.4 gigahertz (GHz) and 5GHz, which are the two bands used by most smart devices. Wi-Fi 6E is becoming more readily available, which will provide stronger and faster Wi-Fi service, but many devices aren’t compatible with 6E yet, so the extra cost isn’t really justified unless the whole system is made up of compatible products. If the router is rented from the internet provider and is single-band, it’s likely an older router and can probably be exchanged for a dual-band model at no cost. If the router is owned by the internet customer, an investment in a new router may be necessary. Some types of house constructions make Wi-Fi transmission difficult, such as older lath and plaster walls or some types of brick, or the home may be laid out in a manner that creates a great distance between the router and the other end of the home. In this case, an inexpensive pod expansion system may be available from the internet provider (pods plug into outlets and relay the Wi-Fi signal through the home); a signal amplifier can be purchased to provide similarly increased signal strength; or customers can purchase a Wi-Fi mesh system with a router and expansion devices already connected.
STEP 4: Connect your smart devices to your smart-home hub.
First, the hub needs to be set up. The method will vary based on the type of hub (speaker, display, phone app, or a combination), but most of them are fairly simple: Download the app if it’s not already on the phone, plug in the devices, and walk through the setup screens in the app.
Connecting devices to the hub is surprisingly simple, even for users who aren’t terribly familiar with smart-home products or systems. First, the devices will need to be activated, often through whatever proprietary app the device’s manufacturer uses, so users will need to download those apps first. The instructions for this process are usually in the box with the device and are typically straightforward, but it’s very important to complete this step before mounting or attaching the devices to walls. Why? Most of the time, the setup in the app requires the user to scan a code or enter a number that is located on a sticker somewhere on the device. This is annoying, but it’s actually a part of good security protocol: It’s much harder for someone outside the home to hack into a device if the setup requires information that is only available on the physical device itself.
Once the devices are set up, the method of connection to the hub will vary based on the platform. In Amazon’s Alexa, users can either say “Alexa, find devices” or open the companion app, choose Smart Home, and then choose “Find Devices.” Apple HomeKit works largely the same way, in that users open the HomeKit app, touch the “+” in the upper-right corner, and then choose “Add Accessory.” Google Home’s app requires users to open the app, touch the menu icon in the upper-left corner of the screen, and choose “Home Control,” then tap the “+” to add a device or accessory. Helpfully, users can ask the voice-control assistant for help with the process by saying “Alexa,” “Hey, Siri,” or “OK Google” and asking their question; the assistants will then talk them through the process. Sometimes the hub can find all the new devices at once, and in other situations the devices may need to be added one at a time. It’s advisable, however, to check each device by giving voice commands to turn the device on or off or using the app to control the device. Test each device prior to installing or mounting it in a location where it will be difficult to reach if it needs to be reinstalled.
Make your home smarter and safer
Get free, no-commitment project estimates from top-rated local smart home installation experts and services near you.
STEP 5: Name the devices using a logical naming convention.
As the devices are being installed, users will be invited to give each device a name. This step actually requires some careful thought, though, and if it’s not an organized process it will be surprisingly difficult to manage the smart home. For this reason, even if the smart home only consists of one or two devices, think through a naming protocol before beginning the process. Perhaps the name of each device could begin with the room where it’s located, followed by a description or a location. For example, “living room blue lamp” will be easier to identify in a list of devices than “Lamp 1.” Any system works, as long as there’s a plan—otherwise the smart-home management list looks like a computer folder that has no names but lists Documents 1-400.
One caveat: If the voice-command hub is within range of a window or door, choose names for any smart locks that are known only to the home’s residents. This prevents a criminal from calling “Alexa, open Front Door!” and gaining access to the home.
STEP 6: Place the devices in their desired locations and check to make sure they have an adequate Wi-Fi signal.
Once the devices are set up, connected, and named, it’s time to place them in the desired locations. For some devices, such as thermostats, cameras, and hub displays, this may require mounting brackets onto the walls and snapping the devices into place. Other devices may need to be plugged in or set in place.
When everything is in place, check the device status in the applicable smart-home app and make certain that the signal strength is strong. Some devices may have a Wi-Fi signal indicator on them, which is another easy way to check.
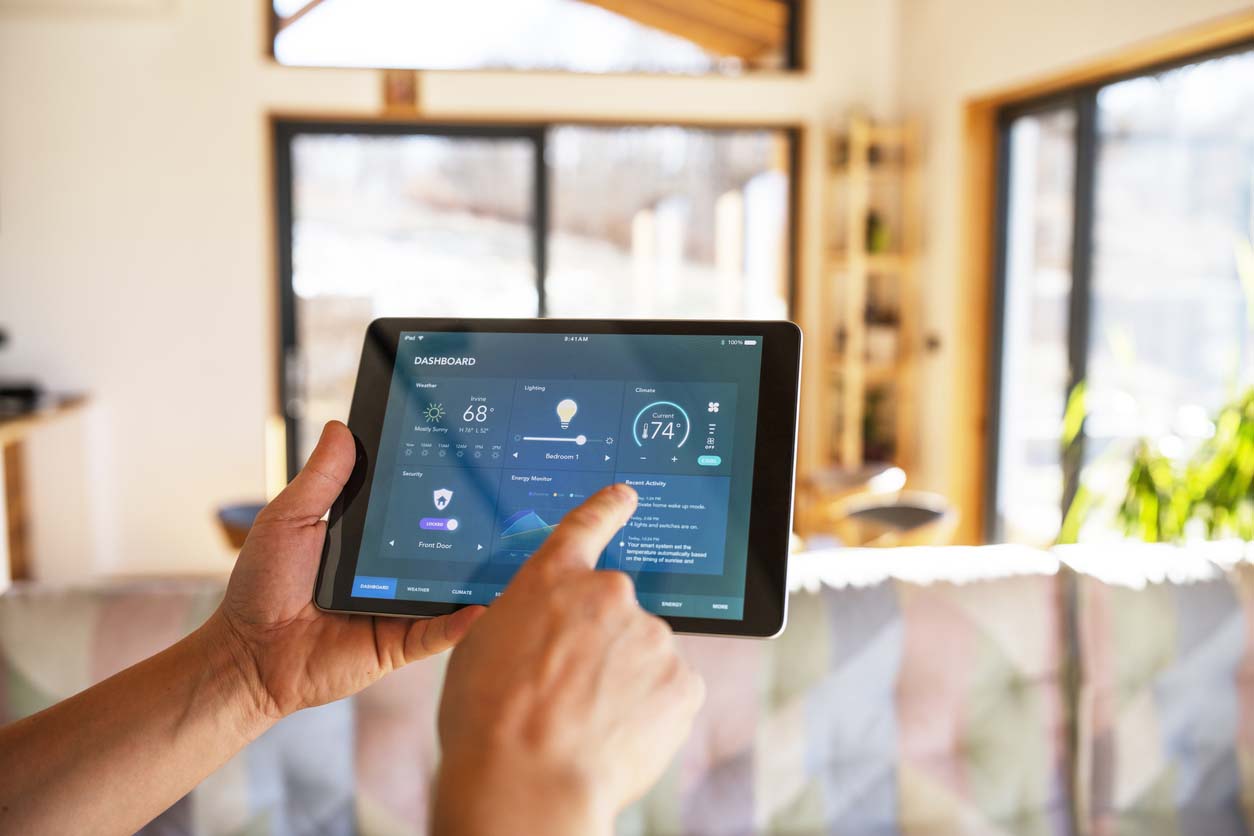
STEP 7: Group devices by room or purpose for easier control.
Each of the major platforms allows users to create groups to facilitate easy use and shortcuts. Once the devices are installed and connected, users can create groups by room or create routines that make it easier and faster to make bulk adjustments. These routines can be as simple as labeling times of day (for example, “Good Morning” could be a routine that turns on lights and peppy music in the kitchen, starts the coffeepot, fires up the smart floor-cleaning robot, and turns on the exhaust fan in the bathroom while tuning a bedroom television to the morning news and adjusting the thermostat to a selected temperature). Other routines could include “I’m Home” to turn on lights, turn up the HVAC, and start the oven preheating for dinner.
If these routines seem a little complex for beginners, there are simpler ways to automate that are easier. The smart devices can be grouped into bunches that make sense, such as “Bedroom Lights,” so that users can voice command or tap “Bedroom Lights On” and turn them all on at one time, rather than specifying individual lights. Groups and routines can easily be added, deleted, or changed, so they’re easy to play with until the user finds just the right combination to automate their home.

STEP 8: Set up multifactor authentication for your smart-home system and devices to bolster privacy and security.
Privacy and safety are the two biggest concerns most people have when considering a smart-home system, and rightly so: Someone who hacks into a smart-home system essentially has control over every device in the system. This can be a terrifying possibility. However, technology has addressed these concerns with powerful protections built into the hardware and software associated with the smart home, but many people don’t take advantage of them. For example, open the Wi-Fi connection app on a cell phone at home. Is the router name still the factory default? Or worse, is it the address of the home or the last name of the occupants? Has the password ever been set or changed? In the majority of cases, the answer to this question is no. Most default passwords are a long string of numbers and letters that are actually quite effective, for a while, but any password that remains the same for too long is inviting a hack. Change the name of the router and passwords regularly on the router, apps, and devices that offer them. All of the passwords should be different—inconvenient and difficult to remember, but home security is serious business and this is important—and whenever it’s offered, choose to enable two-factor or multifactor authentication. This step takes an extra moment when the user is logging in, as the system will text or email a password, call the user, or use an authenticator app on a registered cell phone before allowing a login. It’s important to use these incorporated safety options to protect the home.
Also, keep a list of the devices that are connected, and make sure that the devices and the hub are updated as necessary. Once the devices are connected to their own third-party apps and the platform, users will get occasional reminders to update, which should be completed promptly. Finally, avoid controlling the devices from public or unsecured Wi-Fi. This can potentially open the controlling device to hacking or tracking programs, so when secure Wi-Fi isn’t available when away from home, using cellular service is somewhat more secure.
These steps will make the smart-home system as secure as possible. While no system is impervious, using strong passwords and encryption, keeping the systems updated, and using basic and advanced protection tools will tighten down the safety of the home.
Smart-home systems can be simple tools that make life a little easier, or they can be whole-home control centers that place the security, convenience, and safety of the home in one place. They can be ideal for elderly users or those with physical challenges, as the system allows residents to check the security of the home and control lights, sounds, temperature, locks, and appliances without climbing stairs or leaving the room. They can increase security by adding built-in cameras or communication options to existing structures without the need for elaborate wiring or construction. And installing a smart-home system is a project that, with a little research and planning, most people can take on without hiring a pro. Whether it’s installed all at once and includes multiple components or consists of just one or two pieces installed one at a time, a smart-home system is a great option for most homes.