We may earn revenue from the products available on this page and participate in affiliate programs. Learn More ›
This article has been brought to you by Quikrete. Its facts and opinions are those of BobVila.com.
Concrete is one of the most popular construction materials around, and for good reason: It’s affordable, structurally sound, and versatile enough to use for everything from garage floors and retaining walls to kitchen countertops and decorative objects. While sturdy and durable on its own, it does require some protection, such as a silicone-based surface sealant like Quikrete’s Concrete & Masonry Waterproofing Sealer, to waterproof the surface and keep it looking freshly poured. Without this important finish to any concrete project, all your hard work will be much more susceptible to damage. Moisture and temperature fluctuations can cause cracks to develop in exterior concrete over time, while everyday wear and tear can stain and scratch interior concrete. Fortunately, an easy, early-on application will go a long way toward safeguarding concrete from these stresses. Keep reading to learn how to seal concrete with quality products so you can rest easy that your finished project will keep on looking fresh for years to come.
Tools & Materials
Bobvila.com may earn a commission from purchases made through these links.
- Chemical-proof gloves
- Protective eyewear
- 4-inch paintbrush
- Paint roller frame and cover
- Garden sprayer
- Quikrete Backer Rods
- Caulking gun
- Hammer
- Chisel
- Shop vacuum
- Utility knife
- Small trowel
- Quikrete Concrete & Masonry Waterproofing Sealer
- Food-safe wax
- Quikrete Polyurethane Self-Leveling Sealant
- Quikrete Concrete and Asphalt Cleaner
- Painter's tape
Before You Start, Stay Safe!
When applying any type of concrete sealer or sealant, follow the manufacturer’s safety precautions. Wear chemical-proof gloves and protective eyewear. Good ventilation is essential, so if you’re using a sealer indoors, open the windows. Many sealants are irritants, so avoid getting them on your skin.

Serious Surface Coverage
Wait at least 30 days before sealing a new concrete surface—whether indoors or out—so that it has time to completely cure first. For the best results, the concrete surface should be clean and dry. That means no rain should be in the week’s forecast if you’re working outdoors on a patio, bench, or sidewalk. (You’ll also want to wait until you’re certain that the temperature will stay between 50 and 90 degrees Fahrenheit.)
Apply Quikrete’s Concrete & Masonry Waterproofing Sealer using a brush, a roller, or a garden sprayer. No mixing is necessary; the liquid sealer comes ready to use in one- and five-gallon containers. Coat the surface with enough sealant to evenly saturate the concrete, but not so much that it pools. One gallon will cover approximately 100 to 200 square feet, depending on whether your concrete mix skews porous or smooth (as, for example, countertop mixes tend to be). More porous surfaces require more sealant to fully coat. Though the concrete will naturally absorb the sealant and its waterproofing properties, the sealant will not change the look of the slab.
For added protection, apply a second coat 10 minutes after finishing the first coat, before it has a chance to dry. Two coats of the Concrete & Masonry Waterproofing Sealer are sufficient for penetrating the surface of the concrete. For exterior applications, these two coats can last up to 10 years before resealing is necessary. Interior applications, on the other hand, which are not subject to UV rays or temperature fluctuations, should not require future resealing.
If you’re treating a concrete countertop or tabletop to protect it from acidic spills like vinegar, which can cause discoloration, follow up with a food-safe wax, such as carnauba. Apply this according to the package’s instructions to create a sanitary barrier between the sealed concrete and your food so the surface will be suitable for meal prep.
Need help with concrete sealer?
Discuss your needs with a pro and get free, no-commitment estimates from top-rated services near you.
Sealing Expansion Joints
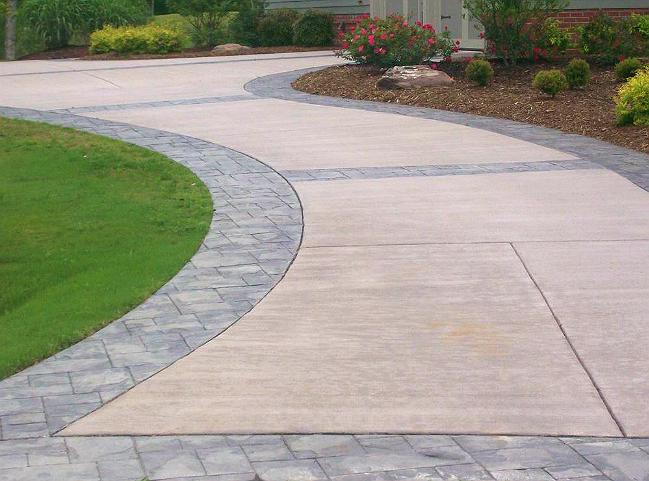
While you won’t see it so much on indoor projects, virtually every large concrete surface outdoors—be it a driveway, sidewalk, or patio—is separated into smaller sections by precut expansion joints. These joints permit the concrete to shift imperceptibly at these predetermined points to accommodate any expansion and contraction that result from temperature fluctuations or shifting ground. These forces could otherwise cause a single large slab to split at random points. You’ll need to seal these joints, too, either before or after you seal the surface, using a high-quality product like Quikrete’s Polyurethane Self-Leveling Sealant to minimize your concrete’s exposure to water.
Again, choose a day when the outdoor temperature is between 40 and 85 degrees and rain is not in the forecast. Ensure that the joints are clean and dry before applying the sealant: You can use a stiff-bristle brush to sweep pebbles and debris from the joints, but if oil or grease is present, use a product like Quikrete’s Concrete and Asphalt Cleaner to remove the residue before proceeding.
Press Quikrete’s Backer Rods—compressible foam rods specifically designed for use in joint and crack sealing—into any joints wider than ½ inch and leave approximately 1/8 inch of space above the backer rod for the sealant. For the sharpest and cleanest lines, mask off both sides of the expansion joint with painter’s tape so that you fill only the joints. Then, use a caulk gun to dispense the sealant evenly in the crack from one end to the other. Force the sealant deeply into the joint. Take care not to leave gaps along the edges, but don’t use so much that the sealant forms a bead above the surface of the concrete. After applying the sealant, while it is still wet, carefully peel away the painter’s tape to reveal perfectly straight lines of sealant.
Stop Cracks in Their Tracks
Over time even properly sealed exterior concrete surfaces and their expansion joints, whether on porches, steps, or slabs, can develop cracks. The sooner you seal a crack, the better: Left untreated, cracks can grow larger, requiring more difficult repairs. For a waterproof fix, the sealant must adhere tightly to the concrete yet stretch without pulling away if the concrete shifts again. Quikrete’s Polyurethane Concrete Crack Sealant won’t sag in the crack, and it can stretch up to 700 percent while maintaining a strong bond—plus, its gray shade closely matches the color of bare concrete so the repairs won’t stand out like a sore thumb. Got a number of cracks to fill? Use this handy online calculator to determine how much sealant to purchase.
Good crack preparation is the key to a successful repair. In addition to starting with clean and dry concrete on a day with temperatures between 40 and 95 degrees, you’ll also need to prepare the crack for best adhesion:
- If the crack is narrow, use a hammer and chisel to open it to approximately 1/4 inch wide, creating a “V” in the concrete. Brush away all debris from the crack with a stiff brush or vacuum it out with a shop vacuum.
- For cracks that are more than 1/2 inch deep, insert a compressible foam backer rod in the crack before filling with sealant. You’ll need approximately 1/8 inch of space above the backer rod for the sealant to adhere properly.
Next, with a utility knife, cut the tip of the sealant tube at an angle so the hole is the same size as the width of the crack you’re filling. Pop the sealant tube into the caulk gun, and use uniform pressure to dispense a bead of sealant into the crack. The sealant should fill the entire crack from edge to edge without oozing over the top of the crack; you can get a good look at the technique in this video from Quikrete. Use a small trowel, if necessary, to remove any excess sealant from the surface of the concrete. Within a couple of hours, the sealant will no longer be tacky to the touch. If you’re planning to paint the surface, wait at least 72 hours before breaking out the can of color—otherwise, consider the job done and your concrete protected!