We may earn revenue from the products available on this page and participate in affiliate programs. Learn More ›
Successfully installing new finished flooring typically requires knowing how to level a floor. Common in older houses, slightly sloping floors often worry homeowners who want to install new rigid flooring materials, such as laminate, ceramic tile, or hardwood.
A sloping floor can be a result of the floor being out of level, or the floor can be sagging somewhere in the middle. While being out of level doesn’t need to be remedied, any low or high points need to be fixed so that the surface is “in plane” and flat before installing rigid flooring. The process of fixing both an out-of-level and an out-of-plane floor is simply known as leveling a floor. Keep reading to learn what you need to know about how to level a floor before taking on this project.
What type of flooring are you installing?
Before getting started with how to level a subfloor, it’s important to consider the type of finished floor that will be installed over it. Each type of flooring has specific characteristics that affect installation, and some require more finicky prep work to make sure the finished floor looks great.
While some types of flooring like vinyl may be a bit more forgiving when it comes to slight variations in the flatness of the subfloor, rigid materials require more diligence in prep work. If an inflexible flooring is installed over a substrate that dips or heaves, various things can go wrong. For example, laminate planks can pull apart, and gaps can appear between hardwood planks.
Since ceramic tile won’t bend to fit a wavy floor, it can suffer from lippage. When the edge of one tile will often sit higher than the edge of the adjacent tile, it forms a “lip.” The undesirable effect is more pronounced with larger tiles. While you might not notice lippage on 2-inch-square tiles if the floor is out of plane, large format tiles such as 8-inch-by-48-inch planks designed to mimic real wood can develop a sizable lip at one end of a plank.

Identifying and Solving Flooring Issues
Floor leveling is a fairly straightforward DIY project. To avoid unsatisfactory results with rigid flooring, read on to learn if, where, and why your substrate might be uneven, and how to deal with these issues.
1. Pinpoint uneven areas.
The easiest way to find out if your floor is out-of-plane is to use the time-honored marble method. Drop a few marbles onto the floor in various areas around the room and then watch them roll. If they consistently roll to the same side, that side is lower than the rest of the floor. If they roll to other areas of the floor and stop, those areas are likely dips that you probably can’t see with the naked eye. High areas in the floor are called “heaves” and low areas are called “dips.”
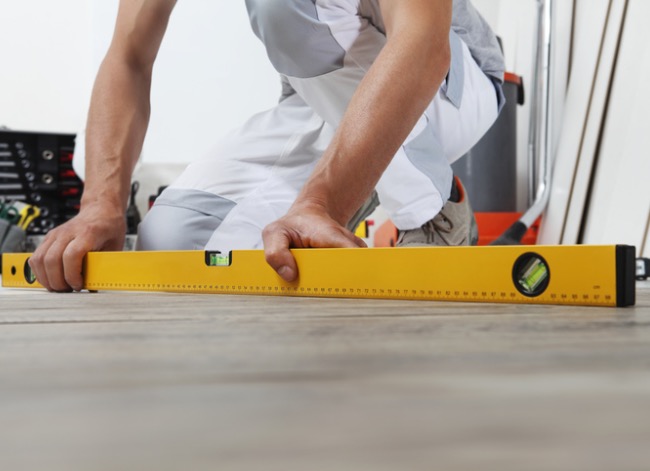
If you don’t have any marbles handy, you can check for dips and heaves with an 8-foot carpenter’s level. Place the level on different areas of the floor, and notice if it lays flat in all spots. If a gap appears under the center of the level, it indicates a low spot. If the level rocks back and forth, it’s a sign of a high spot.
Related: So, You Want to… Level a Concrete Floor
2. Determine the underlying problem.
Before taking steps to level a floor, you must find out why it’s not level. Leveling a floor can be either a do-it-yourself project or a job for the pros, depending on what’s causing the problem. Often, age-related settling results in an uneven floor, which is likely nothing to worry about. In some cases problematic structural issues, including foundation problems, a cracked floor joist, a rotted sill plate (what the joists sit on), or delaminated subfloor can cause the floor to be uneven.

Signs It’s Time to Call in the Pros
In some circumstances it’s best to hire a structural engineer to determine the type and extent of any structural problem and then fix the problem before any floor-leveling takes place. Call in a pro if you see any of the following under the floor when you are checking the condition of the joists and beams:
- Joists appear rotted, cracked, or broken
- Termite damage
- Cracks in the foundation walls
Note: When it comes to concrete floors, height discrepancies are often due to the original concrete finishers not leveling the floor adequately. This is a minor issue and can be fixed using the self-leveling method discussed next.

3. Practice self-leveling underlayment.
If an engineer found no structural issues, you may be able to level the floor by applying a cement-based self-leveling floor product, such as Henry Level-Pro Self-Leveling Underlayment (available from The Home Depot). A dry substance is mixed with water to form a liquid slurry which is then spread over the floor with a gauge rake. Because it’s a liquid, the slurry will naturally settle into low spots, filling them in and creating a level surface.
Self-leveling compound products can be used on concrete floors, wood subfloors that are uneven but still in decent shape, and even over ceramic tile floors—eliminating the task of tearing out the old tiles. Check to ensure that the product you purchase is compatible with your floor. This type of floor-leveling is DIY-friendly and costs approximately $1.50 per square foot when applied 1/8-inch thick. Your cost could be more or less, depending on the size of the floor area to be treated and the depth of the low areas.
RELATED: How to Level a Concrete Floor
4. Know when it’s time to replace a delaminated subfloor.
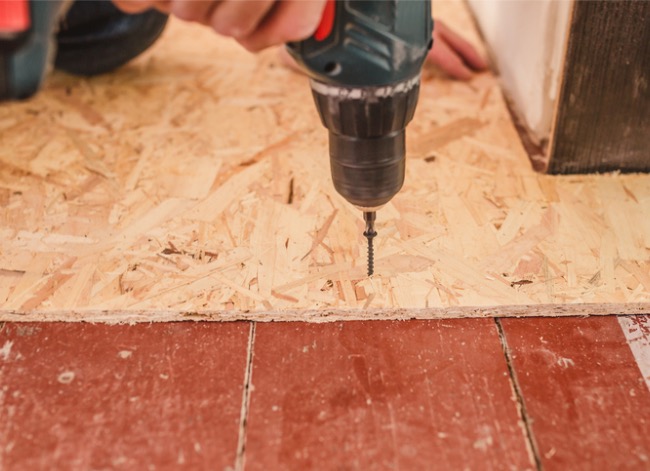
When a subfloor becomes warped or delaminated (swells and deteriorates), it is no longer level or structurally sound. The best remedy is replacing damaged subfloor panels with new ones. The two types of subfloor material, oriented strand board (OSB) and plywood, are both constructed of wood fibers combined with glue and pressed into durable panels that are more than adequate for constructing a strong floor. However, when subjected to constant moisture, such as a steady drip from leaky plumbing, they will eventually delaminate. Once this occurs, you must correct the cause of the moisture condition, and then the affected section of the subfloor can be replaced.
If you’re an enthusiastic DIYer with basic construction skills, you should be able to replace damaged panels to even out the floor. A 4-foot by 8-foot sheet of OSB subflooring costs about $18 to $22 and the same size sheet of plywood subflooring costs about $20 to $24. When replacing a delaminated subfloor, it’s best to remove and replace the entire sheet that’s damaged, rather than trying to piece-in smaller sections.
5. Don’t fear the prospect of planing a heaving joist.
Occasionally, a floor joist will bow upward, creating a heaved area on the floor above. If your marble test indicated a high area where marbles always roll away, it could be that a floor joist has bowed upward. Fortunately, this is one of the simpler structural problems to solve.

It requires removing the subfloor over the bowed joist and then planing the high part of the joist down until it’s level across the top. By popping a chalk line along the side of the bowed joist from end to end (hold it at the top end of the joist), you’ll be able to see the portion of the joist that is too high. A power planer makes quick work of planing away the high area, but you can also plane it by hand with a manual planer. When the subfloor is reinstalled, you’ll have an even floor.
6. Remember that shims can often be used to correct other joist issues.
If the uneven floor is due to floor joists that have warped or twisted over time or were incorrectly installed, the only way to level the floor is to remove the subflooring and shim the joists. Shimming involves attaching thin, wedge-shaped pieces of wood on top of the low areas of the joists to make the tops of the joists even. This requires using a laser level (to pinpoint the low areas) and attaching the shims (working on bare joists above a basement or crawlspace) by gluing and screwing them to the joists. Then plane the area to remove any high spots.
Many homeowners call the pros if shimming the joists is required, which could run between $1,000 and $5,000, depending on the extent of the job. But if you’re experienced with the tools and techniques described above and wish to DIY, a bundle of shims runs about $5 at The Home Depot, and you may need one or more bundles, depending on the number of joists you’re shimming.
7. When it comes to sistering an inadequate joist system, know your limits.
Before uniform building codes were common, some builders used undersized lumber or spaced the joists too far apart when constructing the floor joist system. The result was a weak, saggy, or bouncy floor. A structural engineer may suggest “sistering” the joists, a process whereby new joists are attached to the existing joists to add strength to the floor.
Sistering joists is a job for the pros, who will bolt the new joists to the old joists and position the ends of the joists on the same sill plate that supports the original joists. Sistering is a major project that could cost in excess of $8,000, depending on the number of joists that require sistering and whether plumbing and wiring have to be relocated in order to attach the sister joists.
Related: Don’t Mess Up This First Step When Tiling a Floor
8. Figure out foundation factors.
While the above factors commonly result in uneven floors, a number of other structural problems can occur that result in foundation movement, and subsequently, everything above the foundation moves. This can create uneven floors, cracks in walls, and doors that won’t close. All foundation problems should be inspected and diagnosed by a structural engineer.
Some of the common reasons why foundation footings can sink and basement walls can shift are due to the following:
- Lateral pressure from the soil
- Changing soil conditions
- Tree roots become invasive
- Poor drainage around the foundation
- Floods and earthquakes
Whatever the cause, the fix is typically expensive—usually no less than $10,000 to have a foundation contractor stabilize the foundation. Even when the foundation is repaired, there’s no guarantee that the floors will be level again, but at that point, shimming the joists may be a feasible option.
Related: 5 Signs It’s Time to Replace a Subfloor
Final Thoughts
Depending on the cause of the uneven floor, leveling subfloors successfully can be a relatively inexpensive project that many experienced DIYers can undertake. Most of the work depends upon determining the imperfections in the subfloor and then figuring out the best strategy to solve the issues. For some issues, self-leveling underlayment can be used to correct the highs (heaves) and lows (dips) in the floor. However, there are other issues that require a bit more work. Planing a heaving joist and shimming joists to correct flooring issues may be jobs for some homeowners, but other solutions like sistering joists and fixing foundation issues are usually best solved by professionals.
Whether it’s a DIY project or if it’s a project suited to a professional, once you know what needs to be fixed and how to fix the issues, the subfloor will be ready for the new finished flooring.

FAQs About How to Level a Floor
Now that you know more about how to level a floor, you may have more questions. To help make the project easier, answers to some of the most popular questions regarding leveling a subfloor follow.
Q. How much should it cost to level a floor?
Costs can vary dramatically when it comes to leveling a floor. For simple fixes that require just self-leveling compound, the costs can be as low as $2 to $30 per square foot. If there are structural issues that need to be remedied, then the costs will be greater.
Q. What is the best flooring for uneven floors in an old house?
The best flooring for uneven floors in an old house includes options like carpet and vinyl that aren’t rigid. If a more rigid option like hardwood is preferred, the same steps listed above apply to how to level a floor in an old house as in a new house.
Q. What is the easiest way to level a floor?
The easiest way to level a floor involves using a self-leveling compound, which uses gravity to smooth out any dips in the subfloor. If you need to know how to level a floor without leveling compound to fix structural issues, it can be more difficult.
