
We may earn revenue from the products available on this page and participate in affiliate programs. Learn More ›
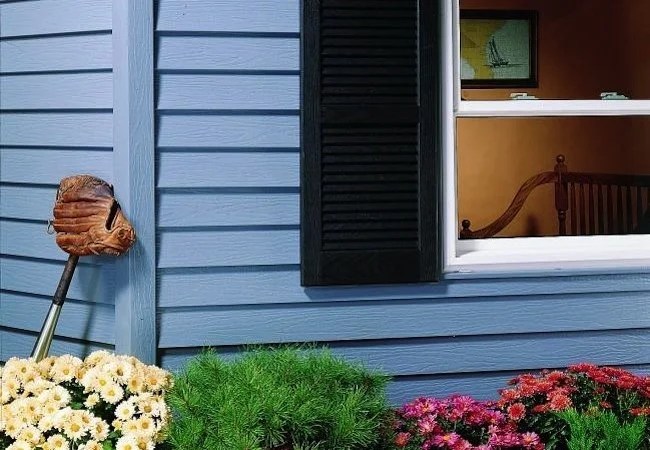
Aluminum siding first became popular in the wake of World War II, when this metal, which had been so crucial to the war effort, became more readily available.
Homeowners valued the material for its weather protection and insulating properties. They also loved that, in comparison with wood siding, aluminum requires little maintenance.
But when vinyl siding arrived in the late 1950s, aluminum rapidly fell out of favor, in part because it was prone to denting and its color faded relatively quickly.
That’s not to say that if you live in an aluminum-clad home, you should replace your siding. On the contrary, those attributes that once made it a favorite are as appealing today as they were in the 1940s. Aluminum remains a low-maintenance, first-rate insulating barrier against the weather.
So long as your aluminum siding is performing to your satisfaction, consider preserving it by cleaning, patching, and painting your siding.
Before You Begin
Before painting aluminum siding, you may find it necessary—or merely desirable—to replace any sections that have been dented or otherwise damaged. After all, one virtue of this cladding material is that it lends itself so easily to repair work. Follow these simple steps:
- Draw a square around the section of damaged aluminum siding that you would like to remove.
- Cut away the section, using tin snips in combination with a utility knife, leaving a clean, square hole to patch.
- Cut the replacement patch to size (three inches larger than the section you initially cut out).
- Use tin snips to take the nailing strip off the replacement patch.
- Spread clear silicone caulk on the back of the patch.
- Press the patch firmly in place, tucking its top behind the row of siding running directly above the area you are repairing.
- Wipe away the excess silicone, using your finger to smooth the joints where the patch meets the original siding.
Prepping the Surface
There’s still more preparation to address before painting aluminum siding. You need to scrape off peeling and flaking paint, and then chisel out any old caulk lines and apply new ones. Scrub away any mildew with a solution of three parts water to one part household bleach. Remove dirt and grime by hand-washing the siding with soap and warm water.
Alternatively, if you want to speed up the job of cleaning, rent a power washer. Just be sure to accessorize the tool with a low-pressure tip, being careful to direct the water stream directly at the siding. Never spray upward; by doing so, you may force water behind the aluminum. If you spot any aluminum oxidation or rust, remove that too before rinsing the exterior surface with a garden hose.
Do not begin painting until the siding has been allowed to dry completely; it should take about three or four days.
How to Paint Aluminum Siding
With painter’s tape and lengths of plastic sheeting, protect items and areas adjacent to the siding. (Once you have completed the paint job, remember to remove the tape as soon as possible so that it doesn’t adhere permanently.)
STEP 1
For best results, begin with an application of galvanized metal etching primer (view example on Amazon). Coat on the product with a synthetic polyester paintbrush, covering the full surface area before allowing the primer to cure for a minimum of four hours.
STEP 2
Next, apply 100 percent acrylic exterior paint. Use a brush at first to paint the edges, then proceed to “load up” the roller. After pouring a few inches of paint into a tray, dip in the roller. Run the tool back and forth over the ribbed area to ensure that paint gets evenly distributed over the roller, with little or no excess to cause drips.
Wield your paint roller from left to right if the siding is horizontal, or up and down if the siding is vertically oriented. Start painting at the top and work your way down. As you go, smooth bumps in the wet paint with a clean paintbrush.
Continue until you have applied paint to the entire area you set out to cover.
STEP 3
Allow at least two hours for the coat of paint to dry. It’s strongly recommended that you add a second coat to achieve a long-lasting and professional-looking finish.
Note: Because they excel in hiding surface irregularities, low-luster (also called satin) finishes usually look better on aluminum siding than do other types of paint.