We may earn revenue from the products available on this page and participate in affiliate programs. Learn More ›
With some love and a bit of elbow grease, wood furniture can have multiple lives. According to the Environmental Protection Agency, Americans throw out 12 million tons of furniture a year, with the vast majority of it ending up in landfills. Consumers can help reduce this waste by refurbishing used items. Previously loved wood tables, dressers, and chairs can often be found either free or at a reduced cost and offer the perfect canvas for creative expression.
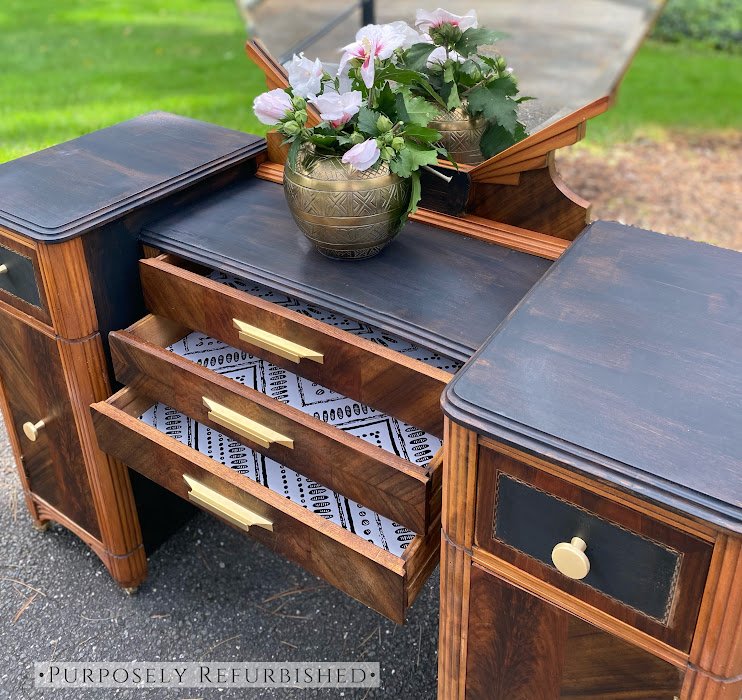
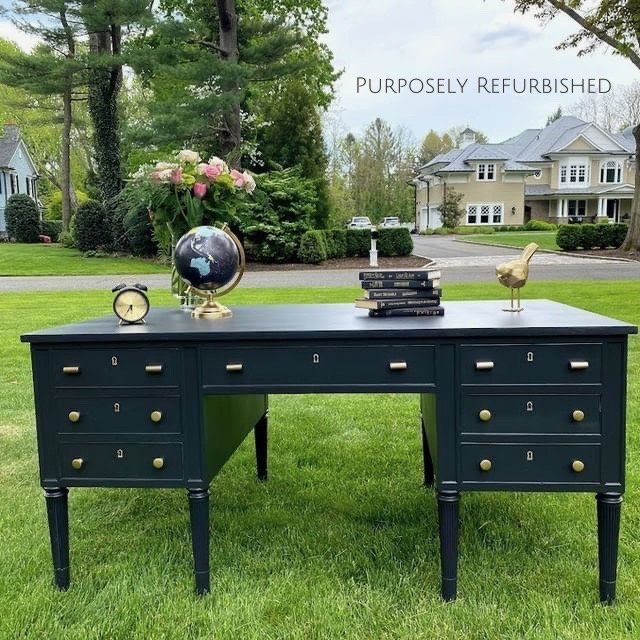
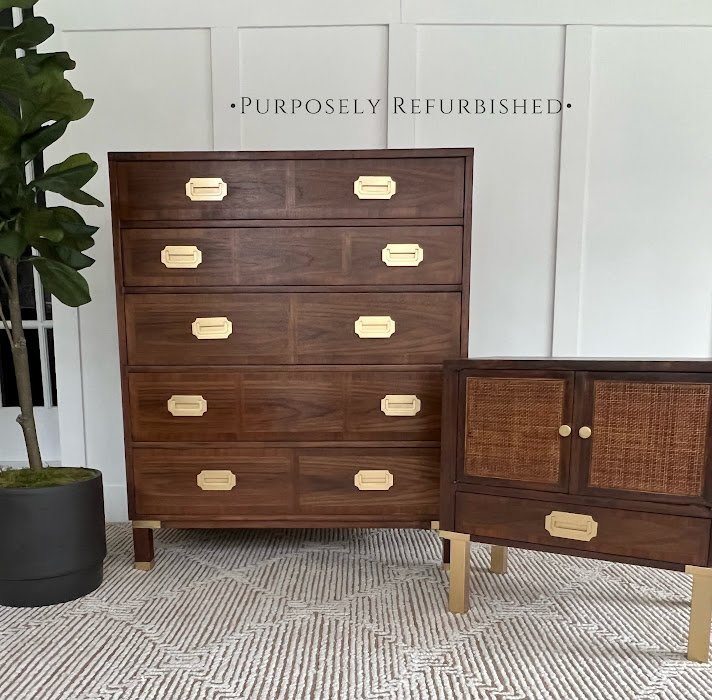
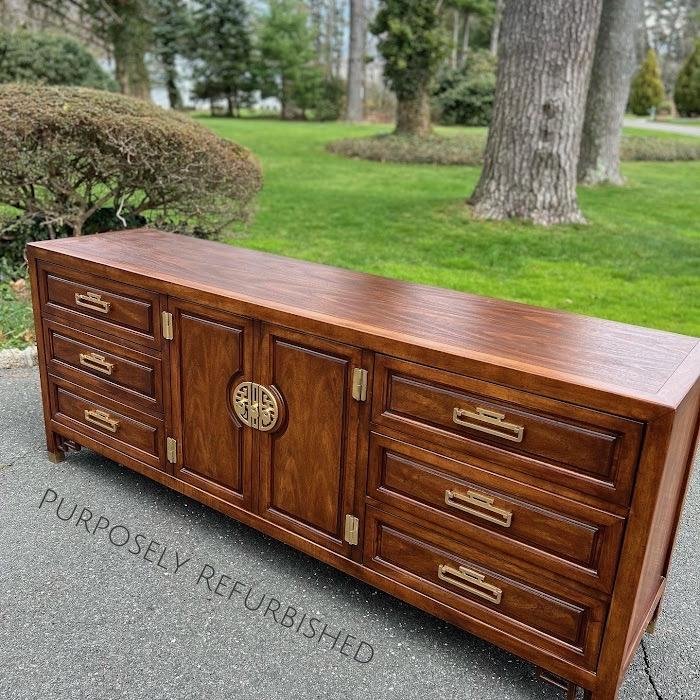
“Refinishing and/or reusing old furniture not only honors our past but respects our future and proves that with a little effort, we can do something inherently good on so many levels,” says professional refurbisher and Instagram influencer Cathy Ahearn, who has rehomed more than 500 pieces of furniture through her site Purposely Refurbished. She says, “These pieces have their own stories. Each has lived a long life and, with a little help, can have many more years to give.”
RELATED: How to Clean Wood Furniture
1. Paint
The most obvious and straightforward option for refurbishing wood furniture is giving it a new coat of paint. Perfect for beginners, painting wood furniture is a reasonably simple process, especially if the pieces are in good condition. DIYers will want to clean their item, use filler in any holes and cracks, sand it until it’s smooth, and then add their coat of paint. Keep it simple with primer and paint in one, and consider sealing it with a wax finish.
RELATED: How to Refinish a Wood Table
2. Stain
Staining is an excellent option for those who want to maintain the beauty of the natural wood grain but refresh the look. Getting started might be intimidating, but it’s a relatively simple process that includes cleaning, removing water stains or heat stains, sanding, conditioning, and staining. Ahearn’s number one tip for DIYers getting started is “don’t be afraid of making mistakes.” She says, “If your initial game plan goes wrong, there are always creative solutions.”
RELATED: The Best Wood Cleaners for Furniture, Floors, and More, Tested
3. Lacquer
For DIYers who want to keep it simple, Ahearn says, “A light scuff with a green 3M Scotch-Brite scouring pad and application of a fresh coat of lacquer will make your piece look more polished.” She likes this option because it requires no special equipment, and lacquer can be purchased in an aerosol can. It will also offer furniture more protection over the years than staining.
RELATED: How To: Strip Furniture
4. Update the Hardware and Legs
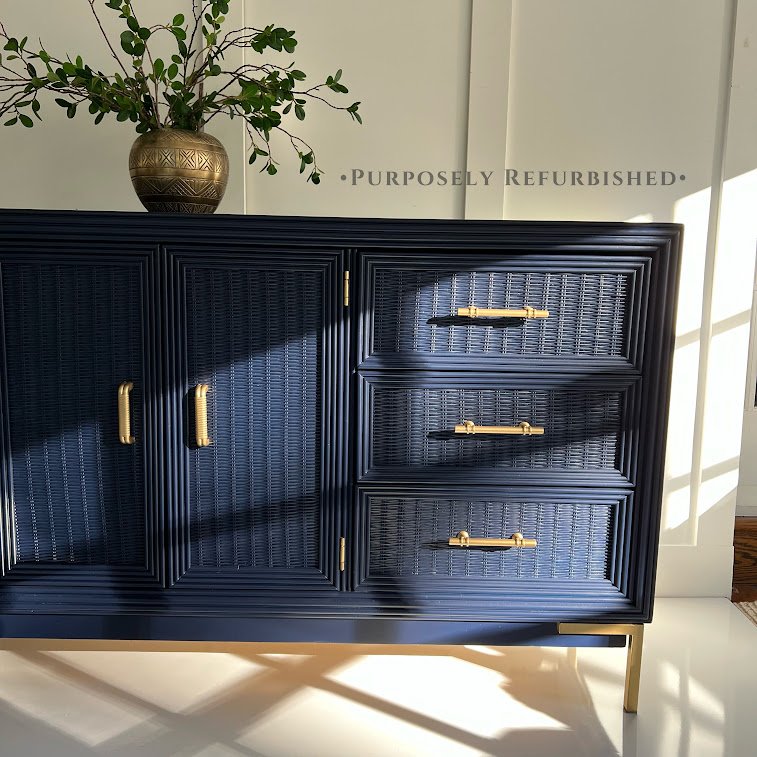
If the paint or stain is still intact but the furniture looks dated, there are simple ways to freshen up the piece. When refurbishing vintage furniture, “painting, cleaning or changing existing hardware can make a huge difference,” says Ahearn. She also recommends changing the legs to give the piece a new look.
5. Decorative Overlays

A decorative overlay will give furniture added dimension and elevate the finished product. Most commonly made from medium-density fiberboard or PVC, overlays are lightweight and easy to apply with a compatible adhesive. DIYers can paint intricately designed panels so they blend in or contrast with the base color. This can give dimension to sizable items such as dressers, cabinets, and buffet tables. We like this Fiona Kit for an IKEA dresser at O’verlays®. Adorn the tops of chairs or a mirror frame with trim strips for a smaller project.
6. Furniture Stamps
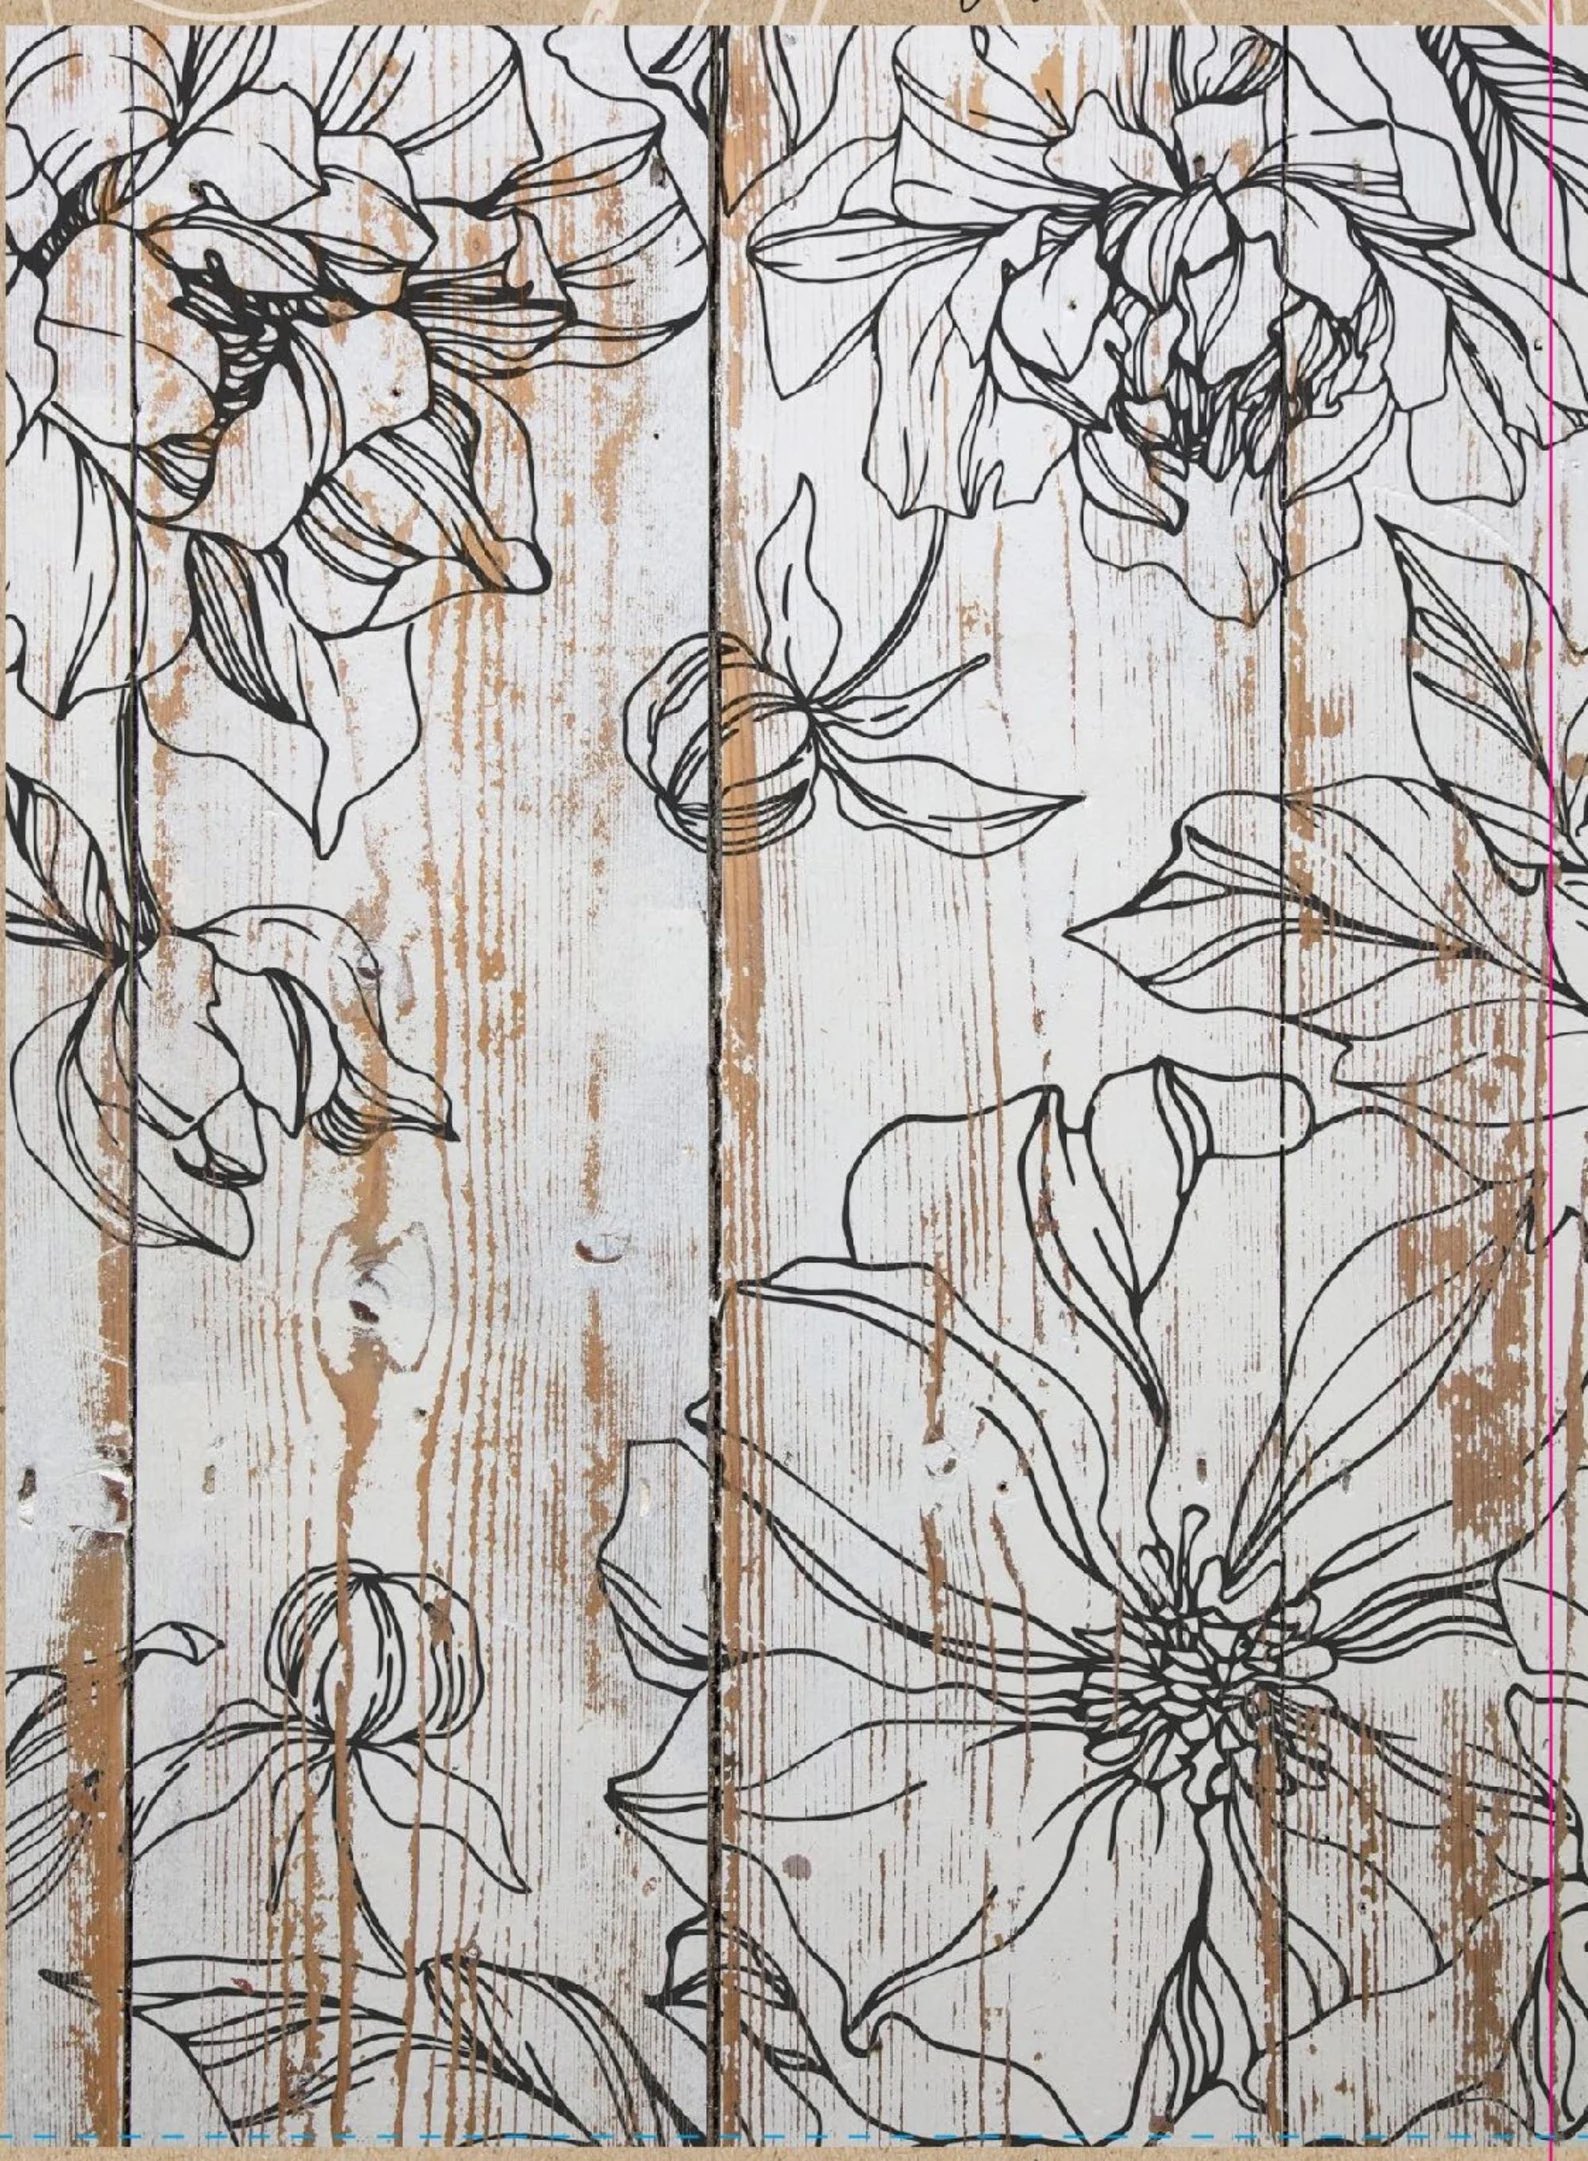
Décor stamps are perfect for DIYers looking for a simple way to add visual interest to an unadorned piece of furniture. They can be used with paint or ink and come in various designs, from wood grain and distressed wood to florals and patterns, like this IOD Peonies stamp by BlueStarAtHome at Etsy. Before using the stamp, a DIYer might need to sand the furniture or scuff it up to help the medium stay put.
7. Stencils
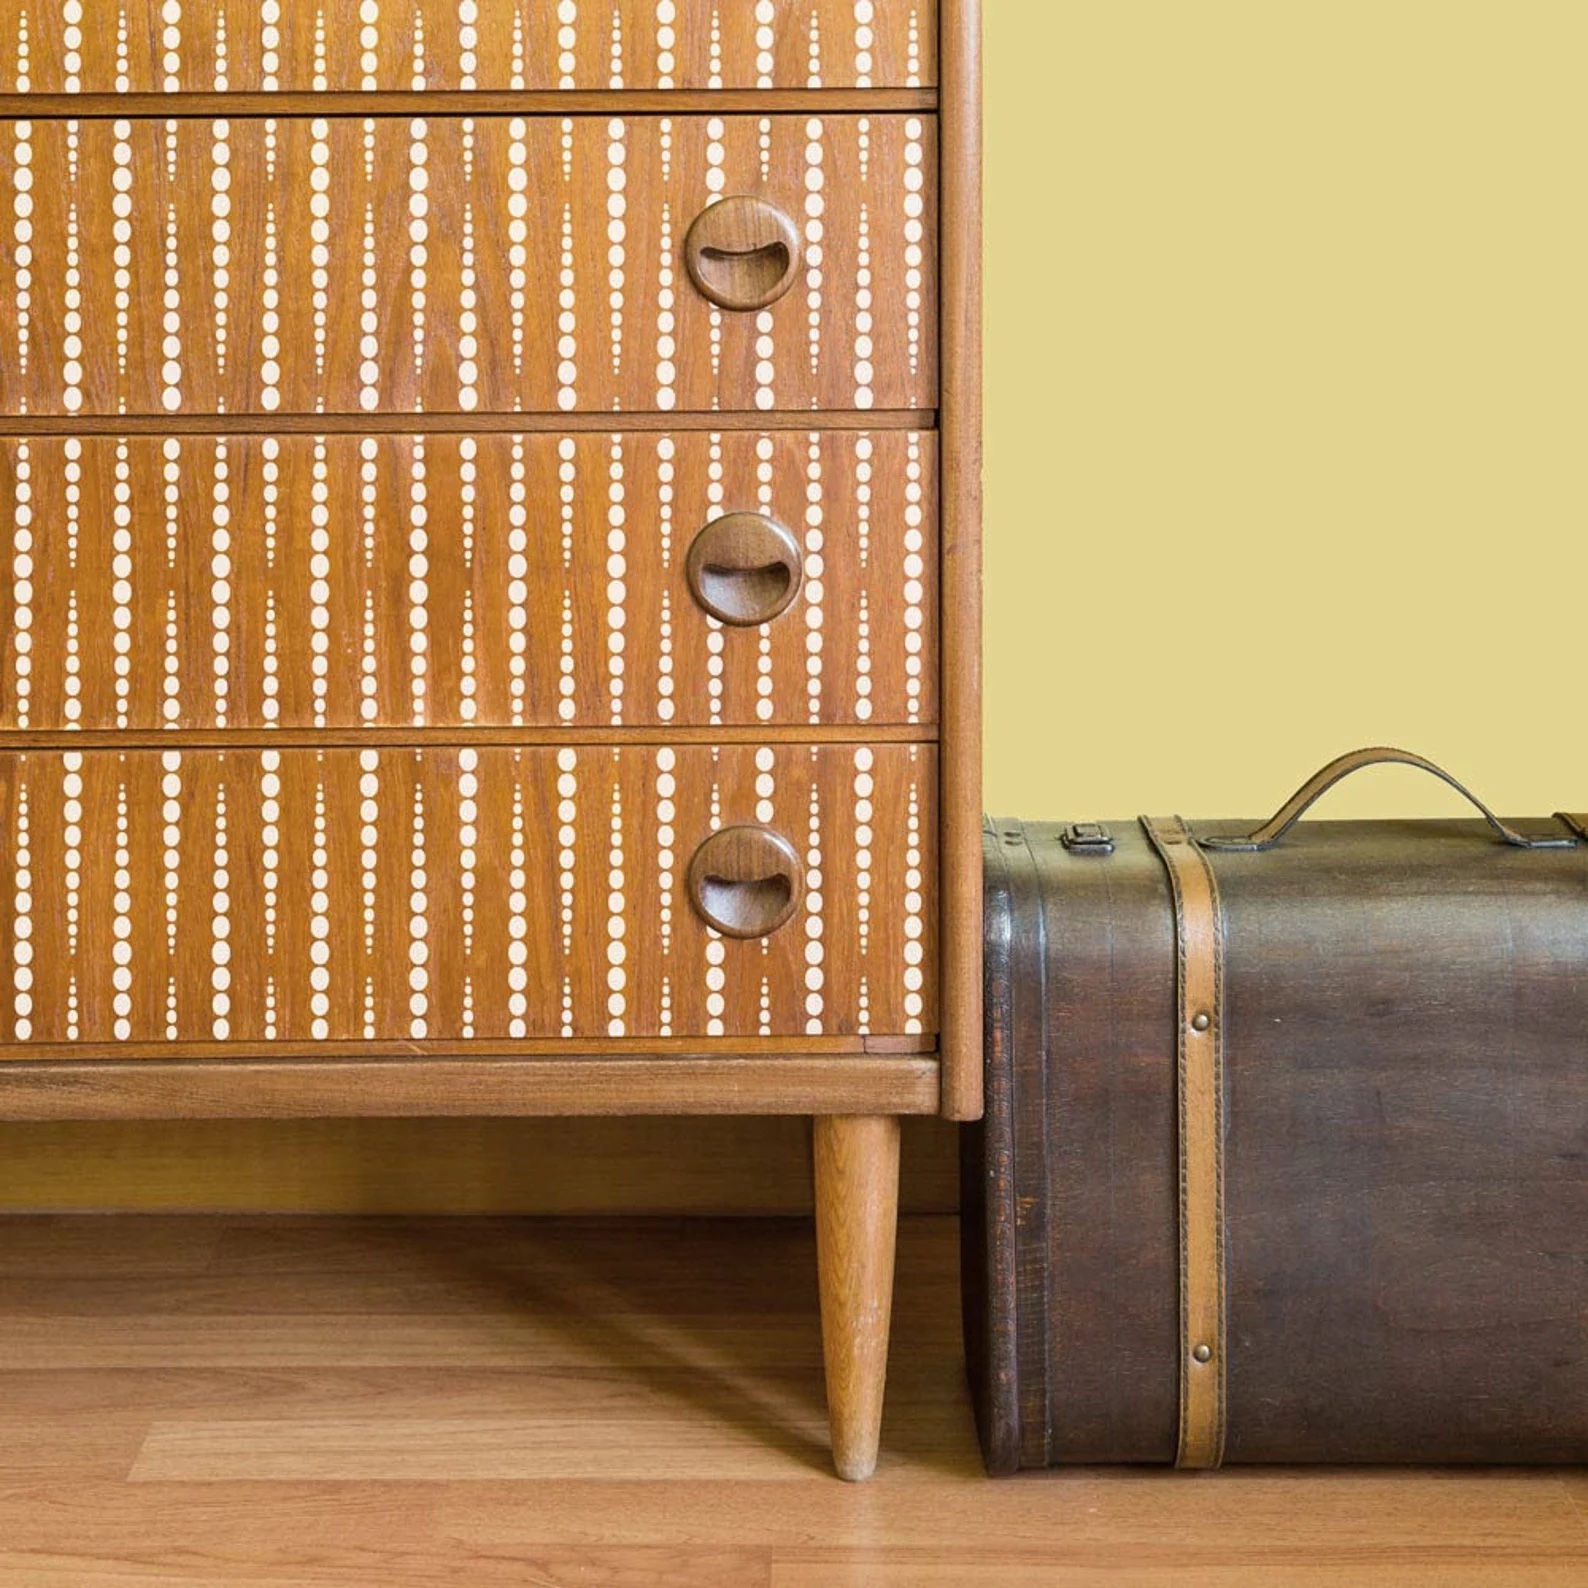
“Stencils are an easy way to give your furniture a new look,” says Ahearn. Perfect for the artsy set, stencils can be used to create a design or pattern on a painted or stained surface. Some work best only on drawers, while others will suit an entire dresser. Stencils like this Bead Craft stencil by CuttingEdgeStencils at Etsy can work on a number of surfaces since the stencil is small and can be applied to small surfaces or repeated on large ones. It’s important to make sure the stencil paint is compatible with the item’s finish and follow the instructions that come along with it.
RELATED: Beyond the Brush: 7 Other Tools You Need to Refinish Furniture
8. Furniture Transfers
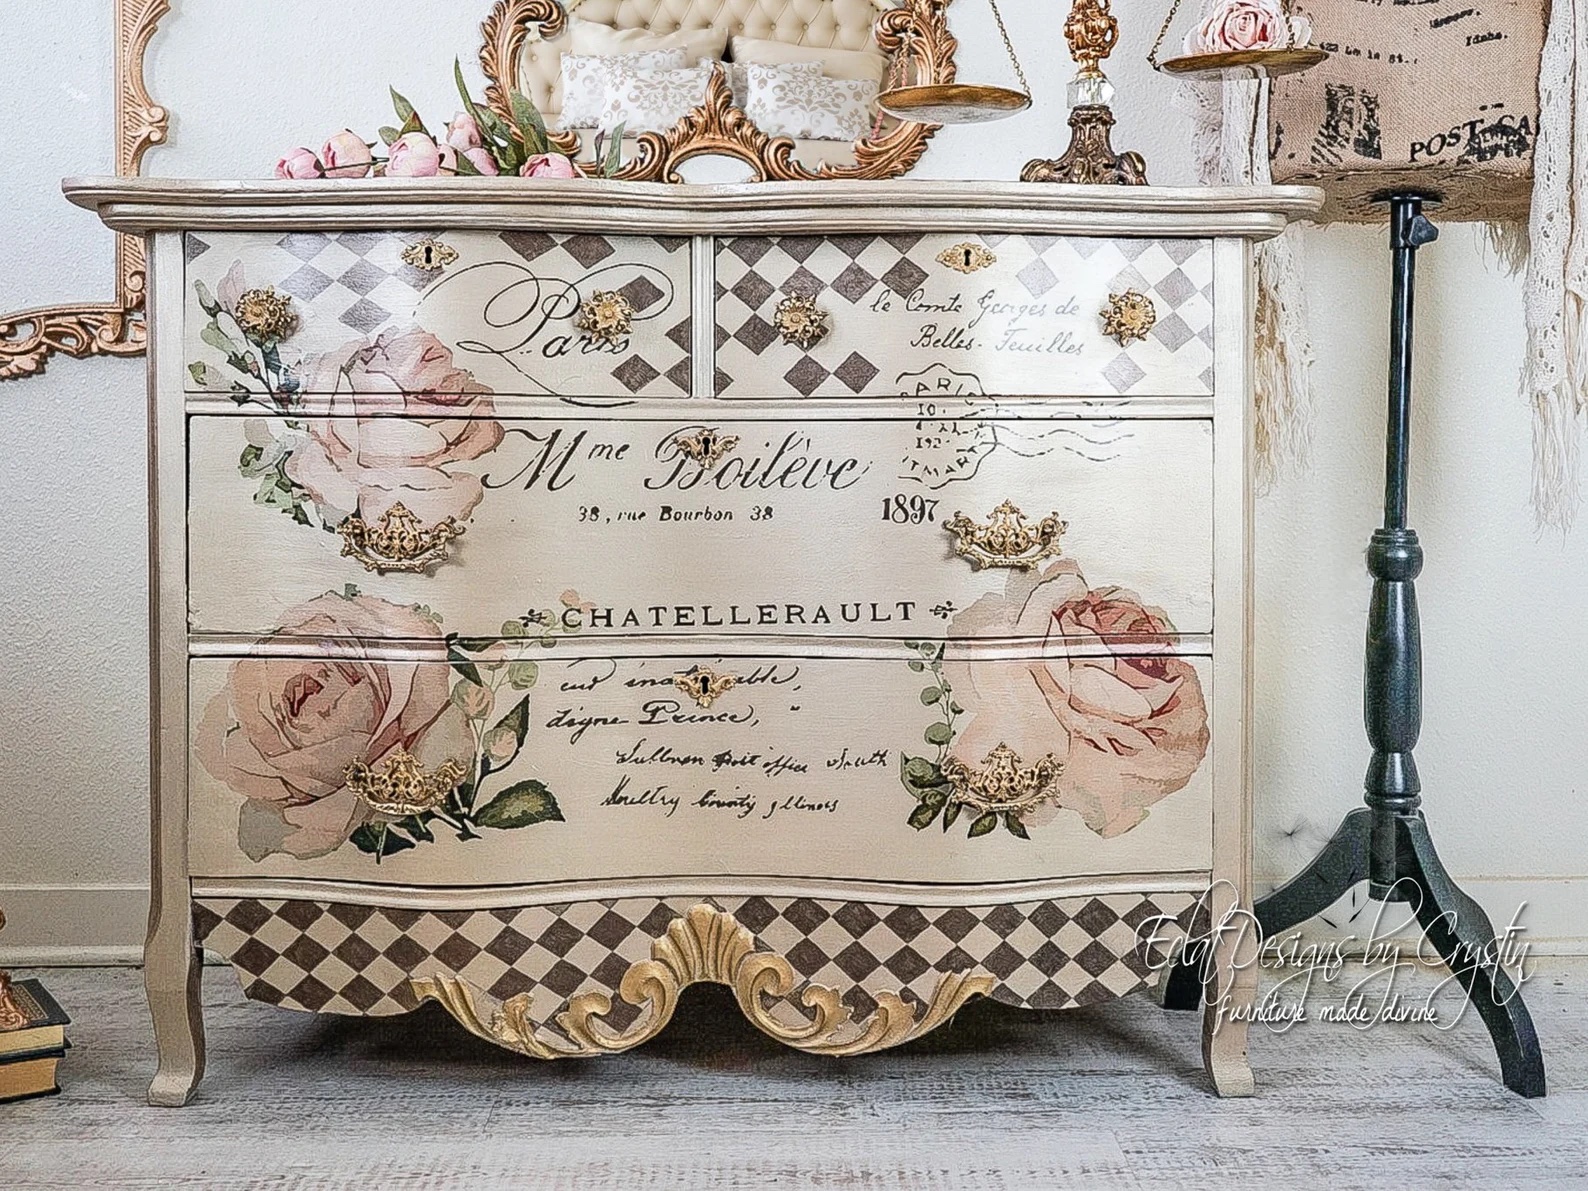
Take a plain piece of painted furniture from simple to special quickly by adding a furniture transfer. This decorative touch uses a preprinted design, including an image, pattern, or words that come on a backing sheet that a DIYer rubs onto the surface of the piece. From floral to French-inspired designs like this Chatellerault Rose transfer by MaikaDaughters on Etsy, the options are limitless.
To transfer the image to the surface, carefully place the design in the desired spot, securing it with painter’s tape, rub out any air pockets from the top down with a flat tool, and carefully peel off the backing sheet. The application can vary, so read the included directions thoroughly.
RELATED: 17 Types of Wood All DIYers Should Know
9. Carved Wood Appliqués
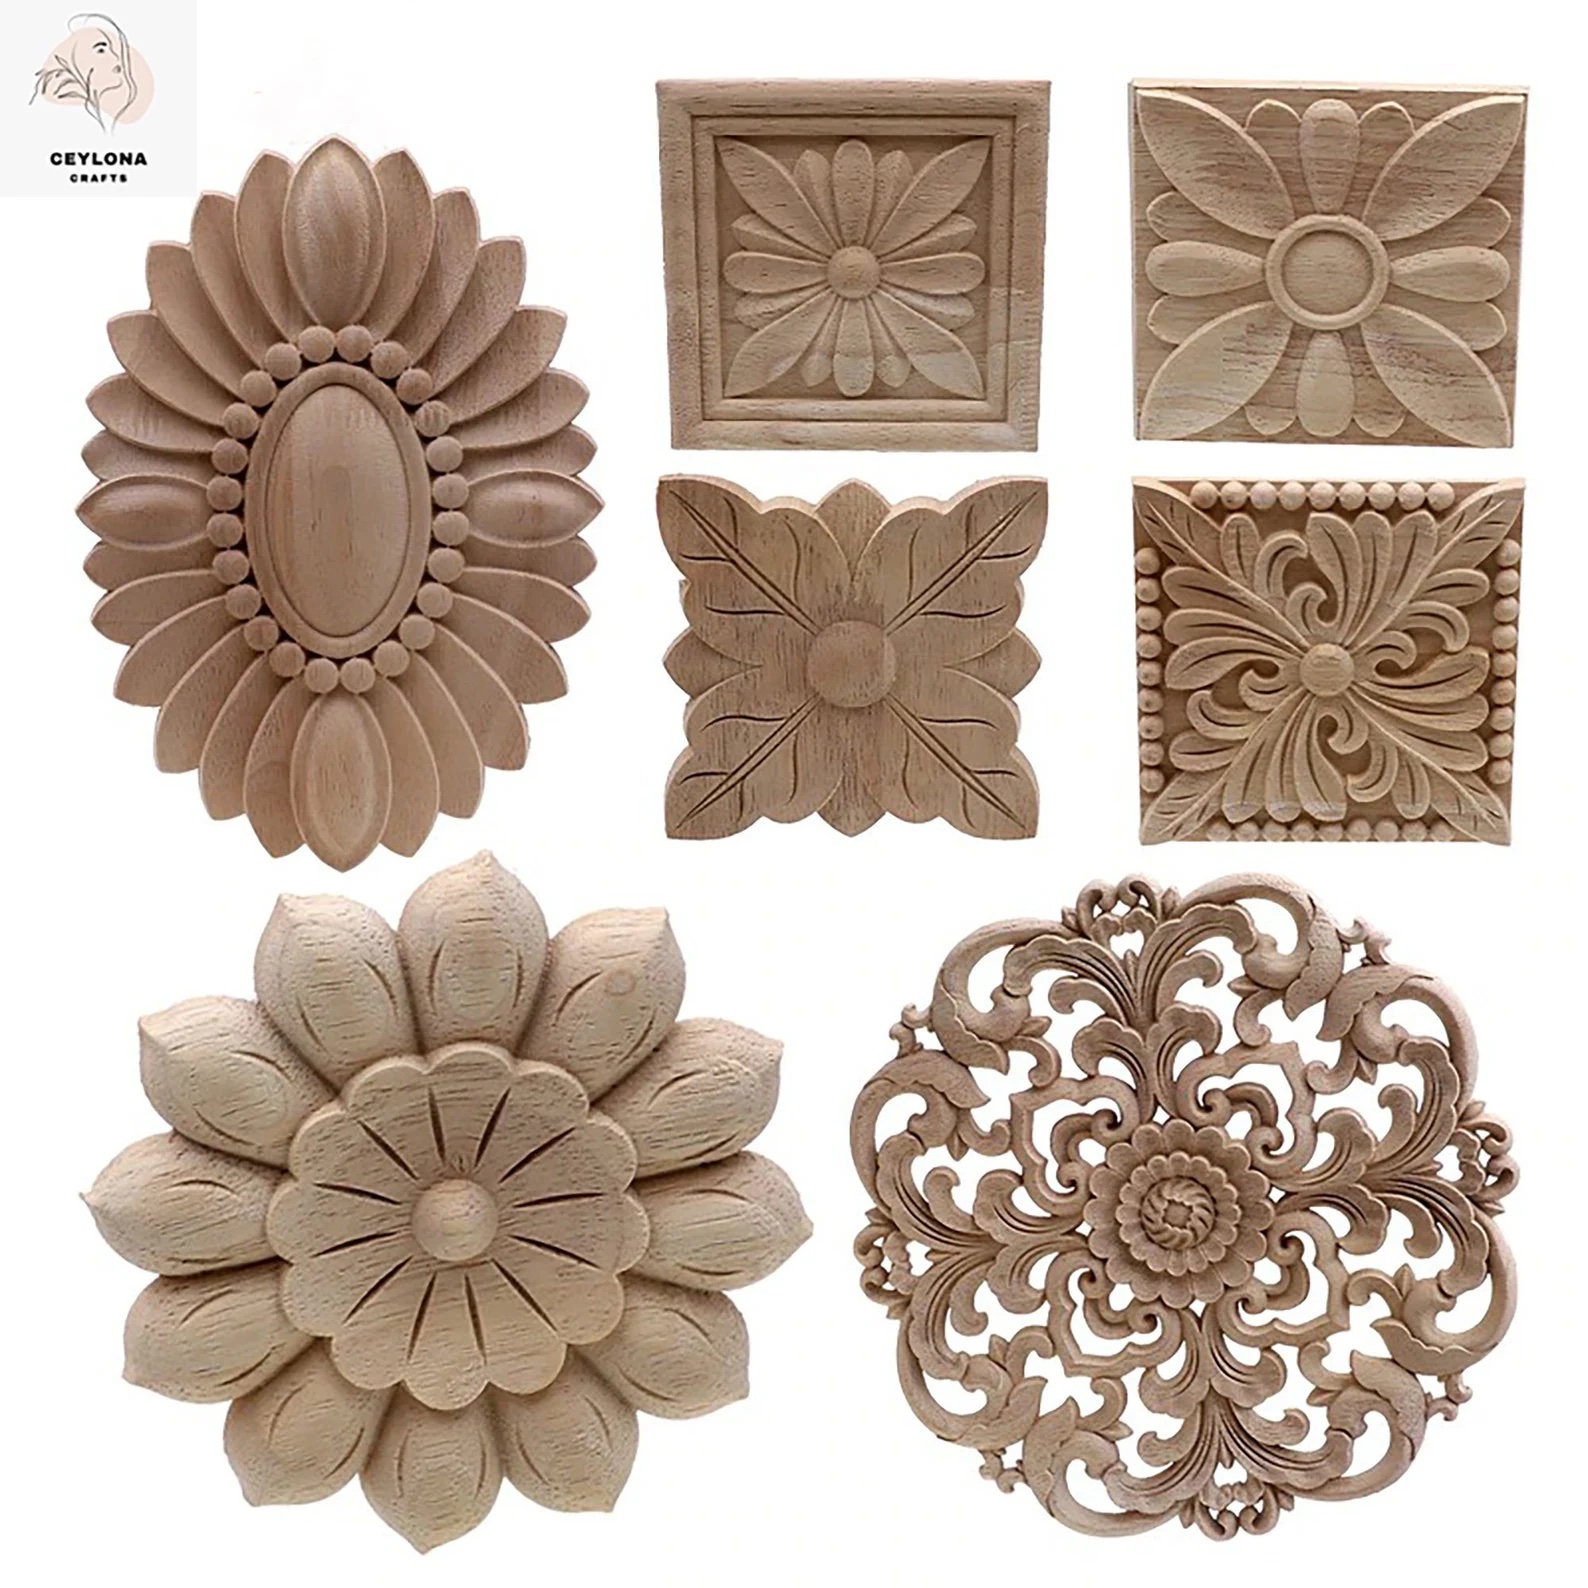
Carved wood appliqués are a simple way to give plain furniture a more traditional or antique look. Appliqués come in many designs and shapes, usually in unfinished wood like these flower carving appliques by CeylonaCrafts at Etsy. They can be attached to the piece before painting if a DIYer intends to keep them the same color as the background. For a contrasting look, stain or paint the appliqué before attaching it to previously painted furniture. Secure the appliqués with either wood glue or small finish nails.
RELATED: Wood Putty vs. Wood Filler: What’s the Difference?
10. Wallpaper or Stickers
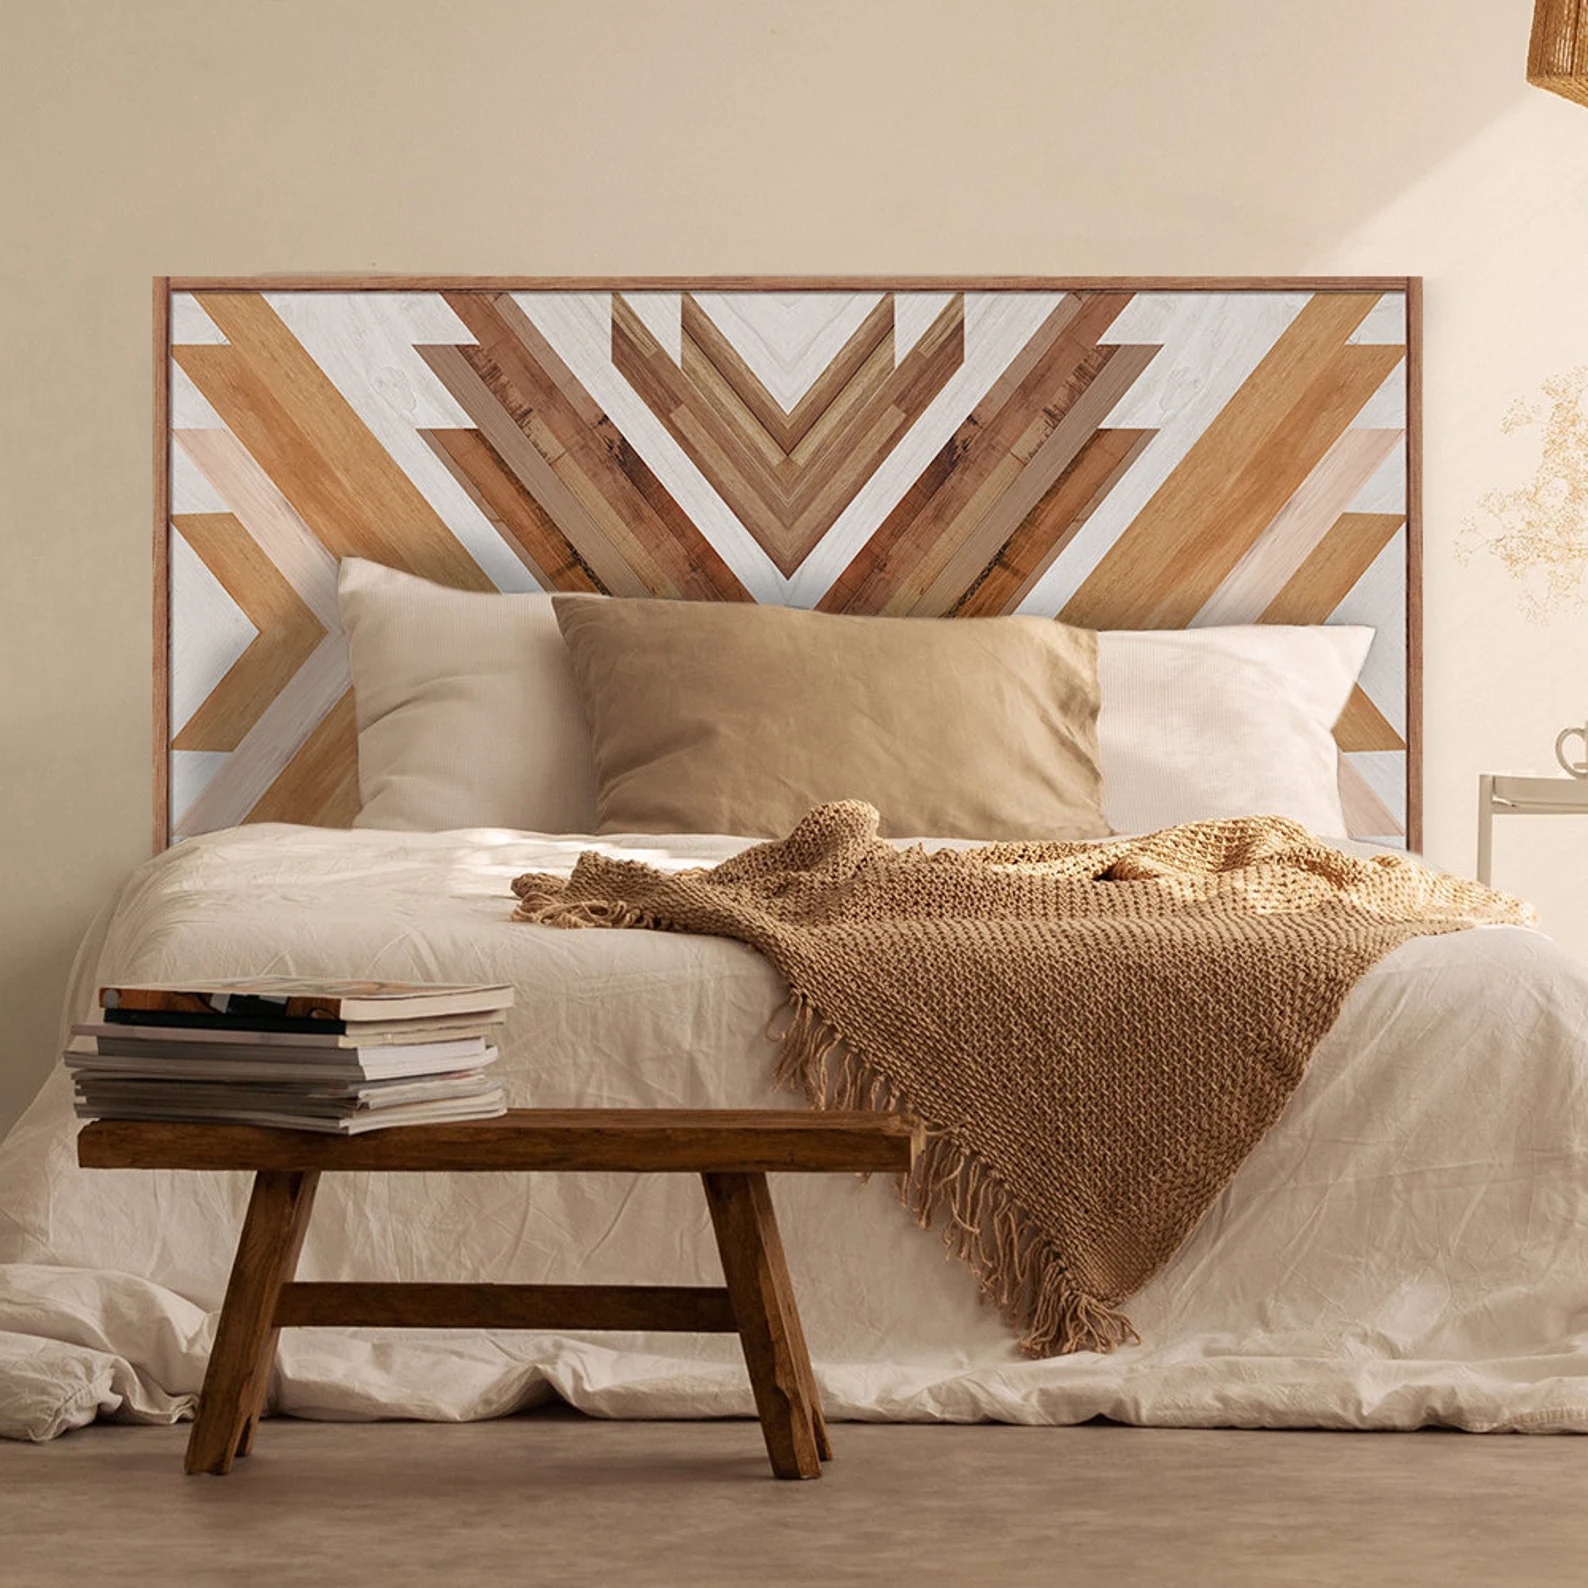
Adhesive wallpaper or stickers will do the trick for those who are short on time. It’s as simple as peeling and sticking. Patterns range from floral to geometric for matching any décor. For a fun accent, Ahearn likes to use wallpaper to freshen up the interior of her furniture pieces. Other options include the front of dressers, the back of shelves, and even beds with peel-and-stick papers like this headboard decal in a herringbone wood pattern by FUNLIFEhomedecor at Etsy.
