We may earn revenue from the products available on this page and participate in affiliate programs. Learn More ›
Highlights
- Tuckpointing costs $1,500 on average, but a common price range is $500 to $2,500.
- The size of the home or brick structure is the biggest factor in determining the cost, along with labor rates, where the structure is located, and whether any additional damage repairs are needed.
- It’s time to schedule a tuckpointing job when homeowners see cracks and gaps in the mortar, persistent dampness, flaking or peeling mortar, or color changes on the bricks.
- Repairing the mortar of a chimney or wall requires knowledge of different mortar materials, experience in applying mortar properly for a strong bond, and plenty of time and patience. Homeowners usually prefer to outsource this labor-intensive job to a pro.
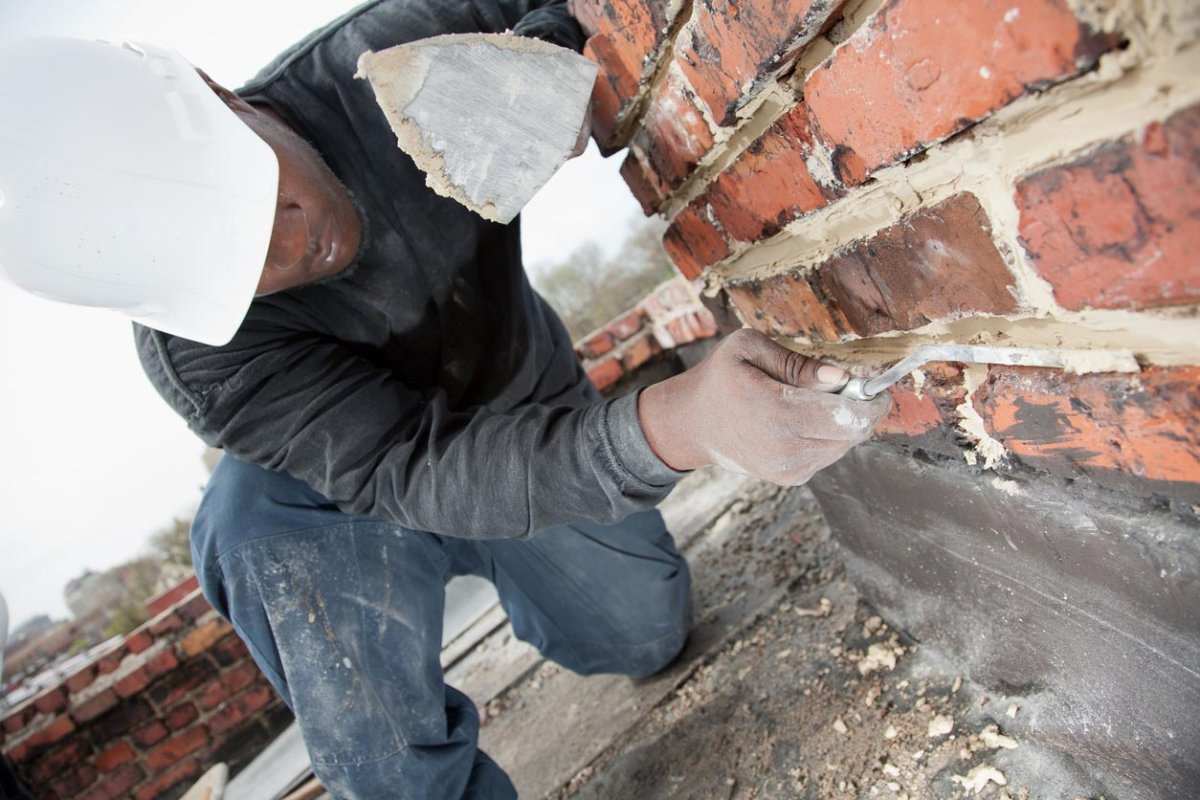
When the mortar between bricks wears out, a solution called tuckpointing is recommended. Tuckpointing involves removing deteriorating mortar from between bricks in a wall or other structure and replacing it with new mortar. This process effectively renews and repairs the mortar joints and extends the structure’s lifespan. Replacing old mortar also helps protect a brick building from water damage and weathering while enhancing its visual appeal.
Tuckpointing costs vary depending on home type, mortar type, and local labor costs. The national average tuckpointing cost is $1,500, though homeowners can expect to pay anywhere between $500 to $2,500, according to Angi and HomeAdvisor.
Those who have brick homes, chimneys, or fences are encouraged to learn more about tuckpointing, including signs that indicate brick-and-mortar repair is necessary. Additionally, there are money-saving tips for regaining structural stability without breaking the bank.
Factors in Calculating Tuckpointing Cost
There’s a lot of variation in tuckpointing expenses, and while knowing the national average cost of tuckpointing is helpful, it’s only one part of the picture for homeowners to consider. It’s important for homeowners to understand the following factors before planning their budget, as these factors heavily influence the final price.
Home Type
The cost to tuckpoint a house is closely correlated to the structure type. For example, tuckpointing a rambler house will likely cost less than tuckpointing a 2-story house. This difference in pricing is because single-story homes are easier to access without scaffolding or extra-long ladders.
On the other hand, taller and larger homes tend to have more surface area. The increased amount of work and materials needed to repair larger home types can lead to higher costs. Finally, homes with complex architectural designs, such as Victorian homes or those with intricate brick patterns, may require more detailed work, which is more costly.
Structure Size and Height
While pricing can vary based on job specifics and mortar conditions, the average tuckpointing cost ranges from $5 to $25 per square foot. Most contractors will charge on the higher end of the range if the structure is 8 or more feet high; homeowners can expect to pay a minimum of $10 per square foot if contractors need to work on high surfaces due to the added complexity and risk.
There’s often a need for scaffolding, which requires additional time and labor to set up. Working at higher heights is also more labor-intensive since workers have to climb ladders and scaffolding while also carrying tools and supplies.
Tuckpointing Material and Mortar Type
| Type of Mortar | Average Cost to Mortar a Chimney (Materials and Labor) |
| Caulk | $750 to $2,500 |
| Cement | $500 to $2,000 |
| Lime putty | $600 to $2,250 |
While homeowners may not know what mortar is made of, bricklayers will be familiar with all the types of mortars available for tuckpointing. Bricklayers may use cement, lime-based mortar, and certain types of caulk, and these prices typically range from $20 to $60 per gallon.
Cement costs between $500 and $2,000 for a standard chimney tuckpointing project. It’s favored for its strength and water resistance. Cement is available in shades of white and gray, making it easy to match colors for aesthetic purposes, but it does have a longer hardening time that can be challenging in certain weather conditions.
Lime putty is a type of mortar that hardens more quickly than cement. It’s a suitable mortar for both brick and stone, and homeowners can expect to pay between $600 and $2,250 to putty a chimney-size area. Caulk is another option, and it’s flexible, watertight, and airtight. It’s also available in various colors, though applying it can be trickier. Latex caulk is prone to breakdown with temperature swings, so it’s better suited for projects other than chimneys. Caulking a chimney costs from $750 to $2,500.
Labor
Unsurprisingly, labor is a significant part of the total cost for tuckpointing. Homeowners can expect tuckpointing contractors to charge between $180 and $800 to repair an 8-foot-by-8-foot wall.
The final labor cost depends on the level of skill the contractor brings to the job and the attention to detail required for quality tuckpointing work. Geographic location can also influence costs, with labor rates tending to coincide with local living costs. The project’s duration can also influence labor costs, with longer projects costing more than minor or simpler repairs. If the problem is affecting the foundation, homeowners may want to consider hiring one of the best foundation repair companies, such as Basement Systems or Ram Jack, to repair the damage and make sure the home is safe.
Location and Accessibility
The cost of tuckpointing can vary based on the specific location bricklayers will work on the property. For example, a chimney tuckpointing repair may cost more than a small fireplace job.
Hard-to-reach areas typically lead to higher costs due to the extra effort and equipment required to do the job correctly and safely. Repairing tall chimneys often requires the use of scaffolding, while working in tight spaces such as cramped basements or attics can slow down the work process and result in increased labor hours.
Preparing the site for safe and easy access can also add to the overall time, such as when a brick fence has been overrun by climbing vines and bushes and needs to be cleared before work can begin. A homeowner may need to budget additional funds if the location of their tuckpoint repair is difficult to access.
Additional Costs and Considerations
In some cases, additional costs may be involved in tuckpointing brick walls that may or may not apply to certain properties. Contractors may need to repair bricks or the foundation if there is significant damage. If homeowners have decorative elements on their brick wall or fireplace, it will cost more to redo those decorations or to add them after the tuckpointing is complete. And any historical preservation repairs may require permits from local authorities before an expert bricklayer can work on the surface.
Tuckpointing vs. Repointing
While the terms are often used interchangeably, tuckpointing and repointing are technically separate processes. Repointing refers to the actual repair process of fixing or renewing the mortar joints in brickwork, while tuckpointing is a more specialized technique that involves applying two different colors of mortar to create the illusion of very fine joints.
Tuckpointing masonry typically requires more materials, which can influence the overall price. It’s also more intricate work and demands a higher level of craftsmanship, resulting in higher costs.
Damage Repair
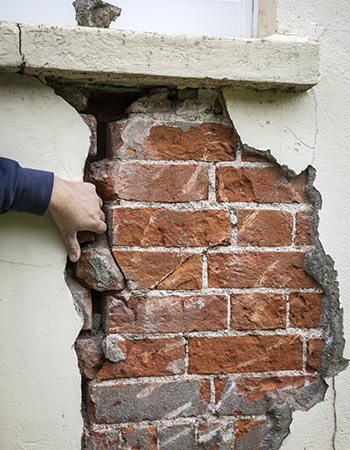
Before tuckpointing can begin, other repairs might need to be prioritized. For example, if bricks are cracked or damaged, they must be repaired or replaced before tuckpointing can be completed.
The cost of preliminary damage repairs varies based on the type and extent of the damage. If an entire basement wall has crumbling bricks throughout, the homeowner will spend much more money to repair it first. A contractor may even recommend simply replacing a deteriorated chimney or wall completely rather than paying for extensive repairs. While it’s an added cost, repairing damage before beginning the tuckpointing is an essential step.
Historical Preservation
Homes classified as historical properties require special attention during tuckpointing. However, the time it takes to comply with various preservation standards often increases the overall cost. Historic preservation often requires the use of specific types of bricks or mortars that may cost more than average.
Additionally, it’s rare for a novice contractor to have the right experience required to work on a historic property. Highly skilled craftsmanship is needed to accurately restore historical brickwork, and this expertise tends to come with a higher cost. Finally, the preservation process may involve obtaining special permits or approval from historic preservation boards, adding to the repair project’s time and cost.
Decorative Elements
Decorative brickwork happens when bricklayers add visually appealing elements to the surface during the original installation. This can be as simple as a small outcropping of bricks for a shelf or a complex design pattern within the wall or on the patio. Homeowners often choose embellishments to enhance the architectural character of a home. Repairing these elements can add to the cost, whether it’s replacing the brick or carefully working the new mortar into circular designs.
Additionally, tuckpointing can be used to add decorative elements and designs in several ways. For instance, using lime-based mortar to outline red bricks with white lines is a popular method that provides an elegant contrast. Decorative tuckpointing is more common when homeowners are updating historical homes, but it can also be used in modern homes.
This type of tuckpointing requires specialized skills and comes with an additional cost. Decorative tuckpointing typically costs between $7 and $10 per square foot.
Tuckpointing Cost by Type of Location
Not all tuckpointing jobs are the same. In fact, the specific location of the repair is one of the most important factors for homeowners to consider, especially when coming up with a repair budget. The cost of tuckpointing can vary significantly depending on which part of a home is being repaired.
| Location of Brick Structure | Average Cost (Materials and Labor) |
| Basement | $1,600 to $8,000 |
| Chimney | $500 to $2,500 |
| Fireplace | $100 to $500 |
| Foundation | $5,000 to $25,000 |
| Patio | $500 to $2,500 |
| Wall | $400 to $2,500 |
| Whole house | $12,500 to $62,500 |
Basement
A basement is a critical part of the home’s structure, so homeowners are advised to keep an eye on any deteriorating mortar and bricks. Basement tuckpointing is a repair homeowners will want to address quickly, as the stability of mortar and bricks directly impacts the structural integrity of the entire home.
The cost to tuckpoint an 8-foot-by-10-foot basement room can range between $1,600 and $8,000. Final pricing depends on many factors, such as how much tuckpointing is required and the overall condition of basement walls. A larger basement or one with extensive brickwork will naturally cost more. The level of deterioration in mortar joints and bricks can also influence the overall price since more labor and materials are required for significant repairs.
Chimney
Chimney tuckpointing is a crucial aspect of home maintenance that directly affects a chimney’s aesthetic appeal and structural integrity. Chimney tuckpointing costs typically range from $500 to $2,500. One key factor contributing to the cost is the height of the chimney. Repairing chimneys often requires additional equipment such as ladders or scaffolding, which increases labor and time requirements.
Moreover, while working on a chimney tuckpointing project, professionals may discover additional issues that require attention. If the brick is severely compromised or the chimney’s structural integrity is at risk, additional repairs may be recommended, further impacting the total chimney repair cost.
Fireplace
Tuckpointing a fireplace directly impacts both the functionality and appearance of this feature in a home. Luckily, the cost of fireplace tuckpointing typically falls within the range of $100 to $500, making it a lower-cost investment for homeowners.
Several factors influence the cost of tuckpointing a fireplace, including its size, the intricacy of the job, and the fireplace’s location within the home. Smaller fireplaces tend to cost less to tuckpoint, while larger or more intricately designed fireplaces often come with a higher price to ensure a high-quality finished result.
Foundation
Tuckpointing the foundation of a home helps ensure the structural integrity and longevity of the entire home. Homeowners can expect to pay anywhere from $5,000 to $25,000 for foundation tuckpointing, making it a significant but essential investment.
The square footage of the foundation heavily influences the cost of foundation tuckpointing, since a 1,000-square-foot foundation requires fewer materials and less labor than a 2,500-square-foot foundation. Additionally, the type of foundation material can impact pricing. Stone, limestone, concrete block, or cinder-block foundations each have unique characteristics and may require different approaches to tuckpointing. It’s important to note that foundation tuckpointing is not a DIY project and should only be completed by experienced professionals.
Patio
The cost of patio tuckpointing can vary based on several factors, but homeowners can expect to pay between $500 and $2,500 for a typical 10-foot-by-10-foot patio.
Smaller patios may fall on the lower end of the price range, while larger or more intricately designed patios tend to incur higher costs. Tuckpointing restores the mortar and adds an attractive contrast between the bricks, enhancing the patio’s visual appeal. And without crumbling mortar on the surface, homeowners are less likely to experience trip hazards.
Beyond the aesthetic benefits, tuckpointing a patio serves a functional purpose by creating a moisture barrier. This helps prevent cracking and shifting issues caused by rain and snow.
Wall
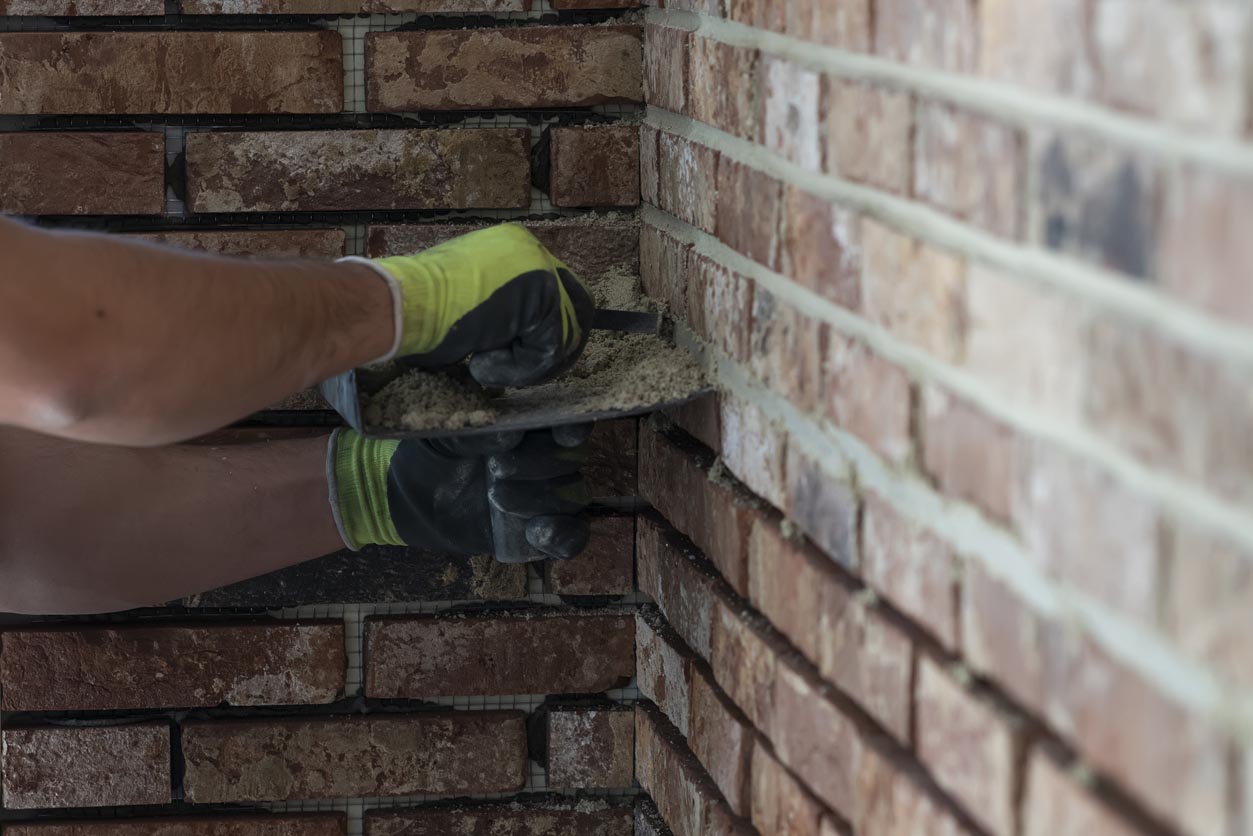
Tuckpointing a wall involves restoring mortar joints between bricks, ensuring they remain strong and resilient against weathering. It’s a preventive measure that can save homeowners from more expensive repairs down the road.
It can cost between $400 to $2,500 to tuckpoint an 8-foot-by-10-foot wall, but several factors can influence the final price. To start, the size of the wall and the extent of tuckpointing needed significantly impact the cost. Repairing larger walls or those with extensive mortar damage usually comes with costs that are on the higher end of the price spectrum. Additionally, the choice of mortar material and the complexity of the brick pattern can also influence costs.
Whole House
Investing in whole-house tuckpointing enhances a home’s beauty and ensures the bricks’ longevity. The cost of whole-house tuckpointing varies significantly, ranging from $12,500 to $62,500 on average, and the cost is affected by several key factors.
The primary factor that influences the cost of whole-house tuckpointing is the total size of the property. Larger homes with more square footage naturally require more labor, time, and materials, all of which add to the cost. The shape and architectural style of a house can also impact pricing, especially if it’s designated as a historical landmark. Intricate designs or unique brick patterns may require more detailed and time-consuming tuckpointing, which will need to be done by expert bricklayers.
The accessibility of the site also plays a crucial role in determining costs. Single-level homes are typically less expensive to tuckpoint, while repairs to upper stories or chimneys require scaffolding and extra time.
Do I need tuckpointing?
Tuckpointing isn’t the most exciting home improvement project, and the need for repairs can often go unnoticed for a while. However, significant cracks or flaking mortar are two common signs that it’s time for a repair.
Cracks or Gaps in Mortar
When the mortar between bricks starts to crack or show gaps, it’s a clear sign that repair work is needed. These cracks or gaps can be subtle thin lines or large, noticeable openings. Many times, they happen due to freeze-thaw cycles and ever-present weathering. House settling and minor earthquakes can also cause cracks or gaps in brick mortar.
These cracks become pathways for water to infiltrate the structure. Once moisture enters a brick, it can quickly cause the brick to deteriorate and eventually break apart entirely. If homeowners notice cracks in their brickwork, they are advised to have a pro complete an inspection. Tuckpointing is likely the solution. If these cracks are ignored, the home could become weak and unsafe in some areas, depending on the location of the cracks.
Signs of Dampness
Unexplained dampness in a home’s brickwork is never good news. Homeowners may notice wet spots or a darker color on their bricks that can’t be attributed to rain or a liquid spill. In some cases, even moss or mold can start growing in a persistently damp area.
The most common cause of dampness is from water seeping through broken mortar or cracks in the bricks. If a water issue is ignored, bricks can crumble and break down over time, leading to more expensive and extensive repairs. Once bricks deteriorate, water can enter a house and cause even more damage. However, tuckpointing can stop the water from getting in and keep the structure more water-resistant.
Flaking or Peeling
Flaking or peeling on bricks or mortar is something homeowners can spot easily. The surface of the bricks might look chipped or like it’s coming off in layers. This problem, also called spalling, happens when water gets into the bricks and freezes then expands to force pieces of the brick to break off.
Spalling is a red flag that the structure is weakened, and tuckpointing may be the answer. In the long run, ignoring peeling or flaking bricks will likely lead to the bricks breaking down even further, which could put the entire wall or structure at risk of becoming unstable and unsafe.
Color Changes
Changes in color on brickwork are more than just a cosmetic issue. When bricks that were once uniform in color begin to look different from each other, it can be a clue that something’s wrong.
A common issue homeowners might notice is their bricks turning white or looking faded. This can happen when minerals from water inside the bricks come to the surface. Fading can also be caused by too much sun. These color changes mean the bricks might weaken, and the issue must be addressed quickly to avoid more severe complications.
Tuckpointing: DIY vs. Hiring a Professional
Tuckpointing is an essential maintenance task for brick homes, fireplaces, chimneys, walls, and fences, but it can come with a high price tag. For this reason, homeowners often wonder if it’s a job they can tackle themselves, or if DIY tuckpointing is too risky or more challenging than expected.
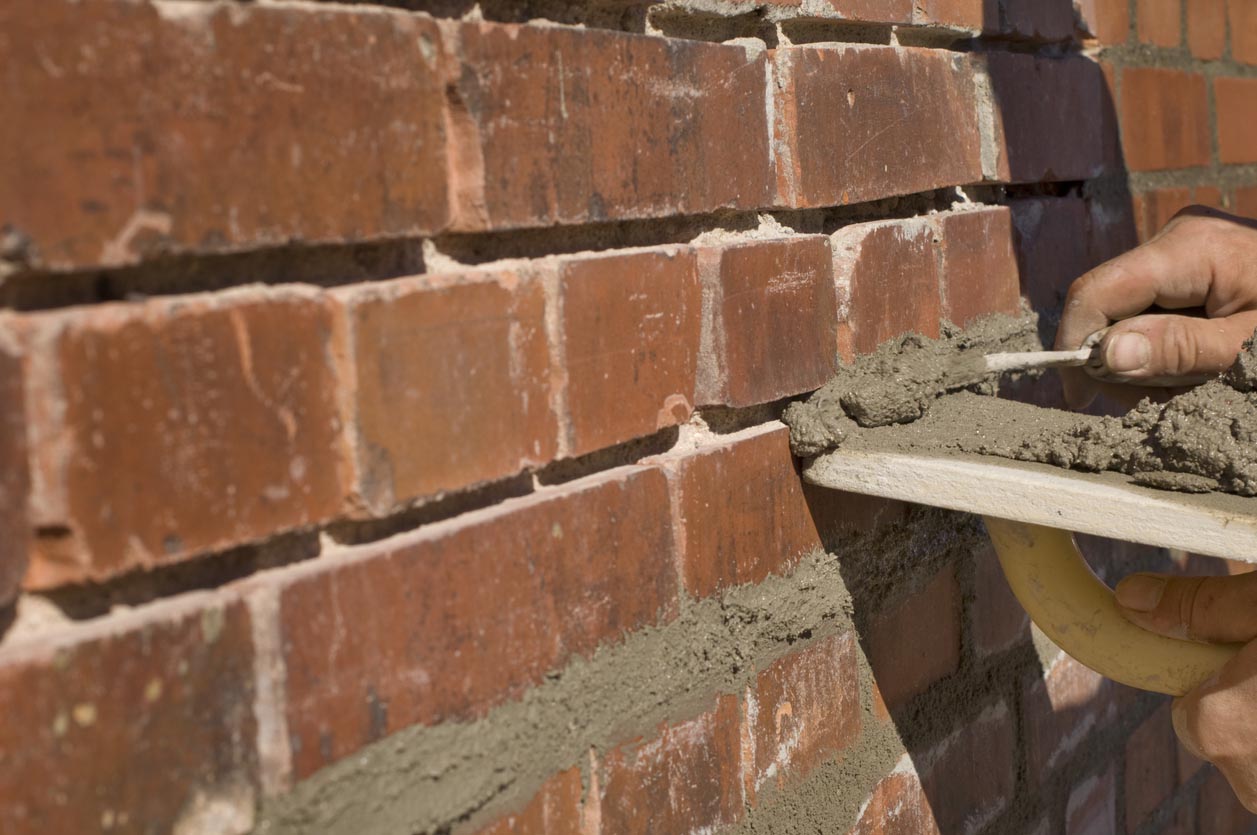
Tuckpointing demands meticulous attention to detail and an understanding of how each type of mortar is applied. A slight error can result in an uneven or crooked appearance, detracting from the aesthetic appeal of the brickwork. While do-it-yourself tuckpointing can be more cost-effective for small, simple projects, most homeowners prefer to avoid risking structural issues and potential damage to the bricks.
A pro brings expertise and the appropriate tuckpointing tools to the project, making sure the work is done correctly and efficiently, not to mention having the time necessary to complete labor-intensive work. Bricklayers know how to assess the condition of a home’s bricks and mortar and can identify any underlying structural issues a DIYer might miss.
Professionals understand that tuckpointing isn’t just about appearance; it’s also about ensuring structural integrity. A pro can distinguish between cosmetic issues and more serious problems and will be able to offer the appropriate solutions.
For these and other reasons, homeowners lean toward hiring a professional, especially for larger or more complex tuckpointing projects. While the DIY route might seem more cost-effective, the potential for mistakes makes it a task best left to experienced hands. Homeowners can reach out to the best masonry contractors in their area for a tuckpointing quote.
How to Save Money on Tuckpointing Cost
As with many home improvement projects, tuckpointing prices can add up faster than homeowners expect. However, there are several ways to save money on tuckpointing costs without sacrificing quality.
- Regular maintenance: Regularly inspecting and maintaining brickwork can help homeowners save on major tuckpointing costs. Tackling small repairs right away prevents larger and more expensive projects in the future.
- DIY minor repairs: Homeowners with the necessary tools, materials, and experience can consider tackling minor tuckpointing jobs to save on professional labor costs.
- Compare quotes: It’s recommended that homeowners obtain quotes from at least three companies to compare services, materials, and costs and find the best deal.
- Consider a shoulder-season repair: Some contractors offer discounted rates during slower periods, such as late fall or early winter.
- Group discounts: Neighbors with similar tuckpointing needs can group together and negotiate a bulk discount from a contractor.
- Choose a cheaper material. Homeowners can ask the pro about the different types of mortars that could be used on their brick surface. If possible, they can opt for the cheaper type as long as it will adequately do the job.
Questions to Ask About Tuckpointing
While getting more than one quote is always a good idea when a homeowner is hiring a pro for a tuckpointing job, there are a few other questions to ask any professional.
- How long have you offered tuckpointing services?
- Are you licensed and insured for this type of work?
- Can you provide a list of references I can reach out to?
- Do you have a portfolio of before-and-after photos of previous tuckpointing jobs?
- Will you conduct a thorough inspection of the potential jobsite?
- What will you look for to determine if my wall or fireplace needs structural repairs first?
- How do you determine which areas need tuckpointing?
- What type of mortar will you use, and how do you match it to my existing mortar?
- What are your payment requirements and schedule?
- What is the expected timeline to complete this job?
- How do you handle unexpected issues during a tuckpointing job?
- Can we walk through the completed job together for a final inspection?
- Will you protect other surfaces in the home from any debris during the process?
- What kind of cleanup will be necessary?
- What type of maintenance do you recommend after the project is completed?
- Do you offer a warranty on your work or materials?
FAQs
Tuckpointing is crucial for prolonging the life of brickwork. Beyond the structural benefits, tuckpointing significantly enhances a home’s curb appeal. Though tuckpointing costs can seem like an unnecessary or inconvenient expense, regular tuckpointing can help homeowners maintain property value and avoid more extensive and expensive repairs in the future.
Q. What is the lifespan of tuckpointing?
Tuckpointing typically lasts between 25 and 30 years. The expected lifespan of tuckpointing is heavily dependent on environmental factors. Homes in areas that experience high humidity, heavy snowfall, or frequent freeze-and-thaw cycles will likely need to have their brick tuckpointed sooner. Contractors may use a high-quality mortar mix and encourage homeowners to avoid high-pressure washing methods to extend the life of tuckpointing.
Q. How often do you tuckpoint brick?
It depends on how exposed the brick is to water. In general, tuckpointing is only needed every 25 to 30 years, but exterior brick may need repairs more frequently to combat annual weathering. Older buildings, especially those over a century old, might need more frequent tuckpointing as well. Regular visual inspections can help determine if tuckpointing is needed sooner than anticipated.
Q. What is the minimum depth for tuckpointing?
The minimum depth for tuckpointing is typically ¾ inch. This depth is necessary to ensure that the new mortar adheres properly. In some cases, deeper removal may be necessary if the existing mortar is in very poor condition. It’s important for contractors to ensure uniform depth and avoid excessive force to help the new mortar adhere with lasting strength.
Q. How long does it take to tuckpoint?
The duration of a tuckpointing project depends on its size and scope. For example, a ground-level tuckpointing job on a 20-square-foot wall typically takes about 2 hours. But several factors can extend the length of a tuckpointing job, such as mortar that is in poor condition, adverse weather conditions, poor site accessibility, or inexperienced workers.
Sources: Angi, HomeAdvisor, HomeGuide, Fixr, Utmost Renovations, Forbes