We may earn revenue from the products available on this page and participate in affiliate programs. Learn More ›
Although my family loves having twinkling lights on the house during the holidays, I dread the chore of hanging them every year. It involves dragging out tangled strands, climbing ladders in frigid weather, and promising myself I’ll figure out a better system next time. This annual hassle is exactly what pushed me to rethink how I light my house for the holidays, and ultimately led me to a solution that completely changed the game.
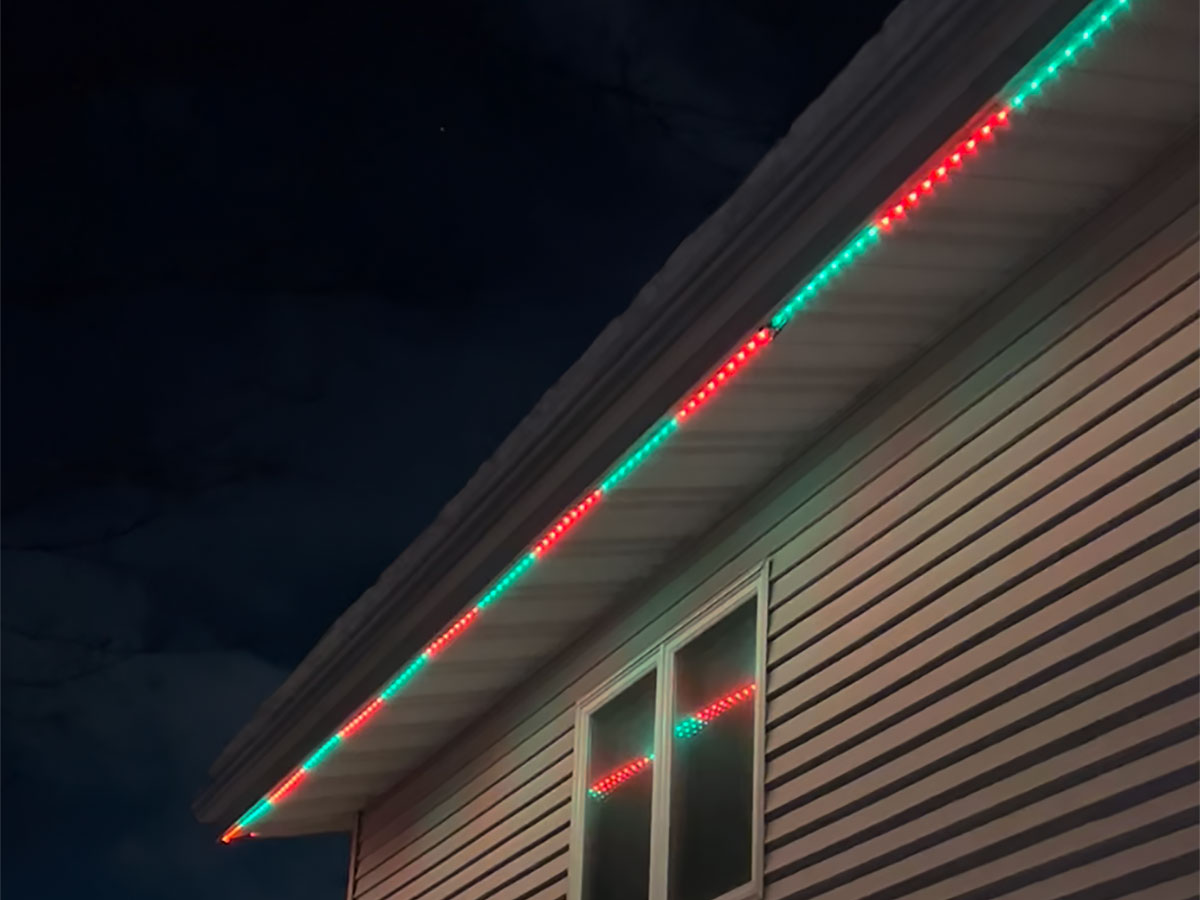
This year, instead of traditional string lights, I mounted permanent outdoor strip lights along my roofline. They’re designed to stay up year-round, blending in during the day and lighting up beautifully at night. Once they were installed, that was it—no more climbing ladders, no more bulky storage bins, and no more racing the calendar to get lights up before the season passes. When December rolls around, all I have to do is turn on my preset Christmas display!
For anyone who loves the look of a lit-up home during the holidays, but hates the tedious setup and takedown, this one-and-done method of how to hang Christmas lights on a house is for you.

How to Hang Christmas Lights The Right Way
Smart Holiday Lights

Govee Outdoor RGBIC Strip Lights
With these smart strip lights, I can set colors and patterns—even fun effects to music—from the Govee Home app without ever using a ladder again.
Buy NowTools & Materials
Bobvila.com may earn a commission from purchases made through these links.
Before You Begin
Take proper safety measures when working outdoors in cold weather. Wear warm clothing and shoes with good traction. If using a ladder, ask a helper to spot you, especially if you’re contending with snow on the ground.
Step 1: Test the lights.

Before mounting your Christmas lights, first connect the strands and plug them in to make sure they work. I downloaded the Govee Home app at this stage, as it’s useful for testing my lights.
Step 2: Measure and plan your layout.

Though you might still need to climb a ladder to install Govee Outdoor Strip Lights, remember, you only need to do it once. That’s it! Be sure to measure carefully and strategize the best layout for strip lights on your house.
Step 3: Install the brackets.

Secure the first bracket in a convenient location for connecting the lights to a power source. For me, it’s the far corner of my garage roofline. The Govee lights come with special plastic brackets and screws. I used a 3/32-inch titanium drill bit to make pilot holes in my aluminum soffits.
Step 4: Snap the strip lights into the brackets.

Thread the strip lights through the initial brackets. If needed, add more brackets and employ the adhesive backing to help the strips lay flat against the mounting surface. The Govee Outdoor Strip Lights can only be cut at the tail end of the strip, and there’s no going back once you cut them. Take care to ensure that you cut the strip at the appropriate location.
Step 5: Create unique light displays.

Once installed, the real fun begins with the Govee Outdoor Strip Lights. My favorite features in the app are Finger Sketch, which allows you to select colors and effects for specific sections of lights, and DIY, which allows you to save and edit truly custom displays. Of course, the app is also loaded with preset scenes for a variety of moods and occasions beyond holiday celebrations.
