We may earn revenue from the products available on this page and participate in affiliate programs. Learn More ›
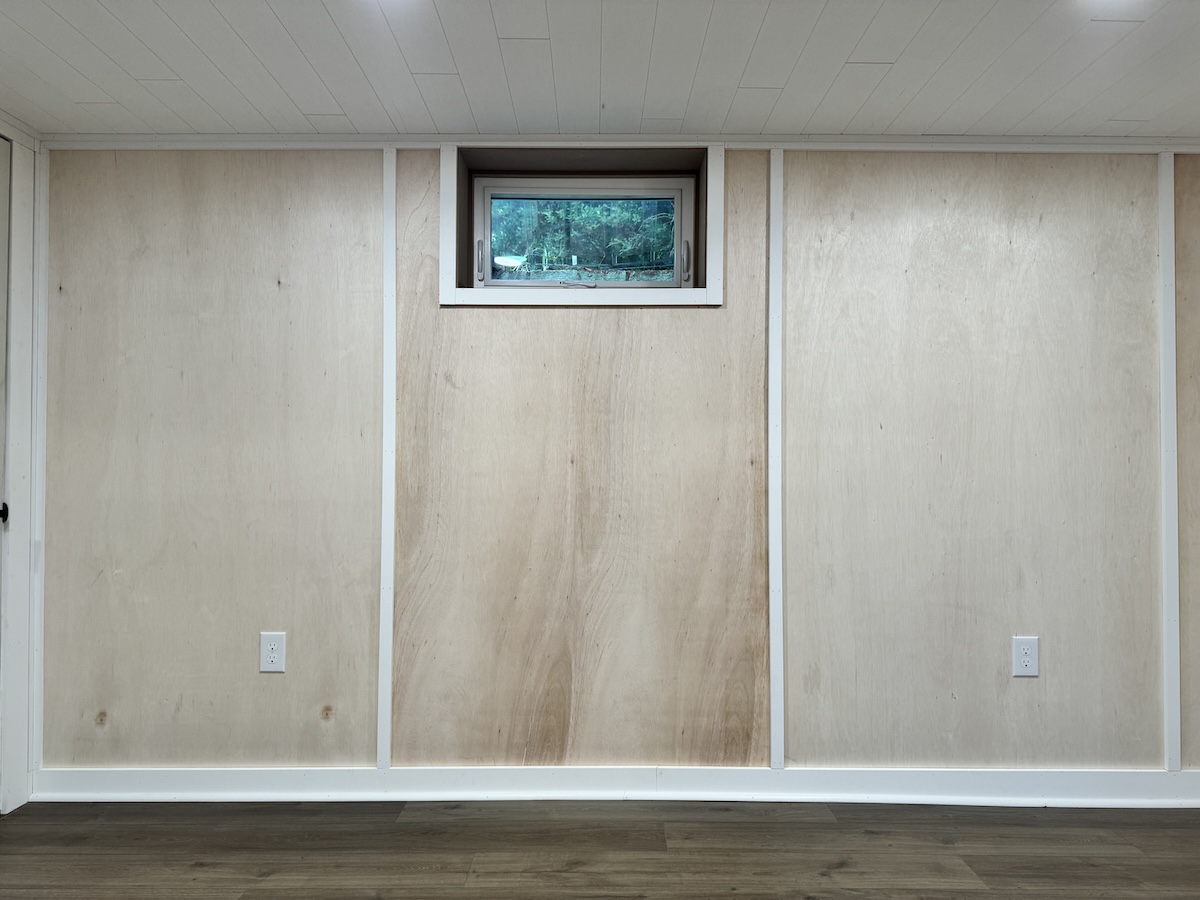
Finishing a basement into a comfortable space that’s ready for a home office, media space, or playroom involves the same general scope of work as remodeling a living room or bedroom but often with a few unique and unavoidable features to consider—like windows that are deeper and smaller than the ones on the main living levels of a home.
If you need to trim basement windows, you’re likely in the middle of a basement update. Either you have recently covered an exposed foundation wall with new wall framing and a wall covering like wainscoting or drywall or you have just installed a new window.
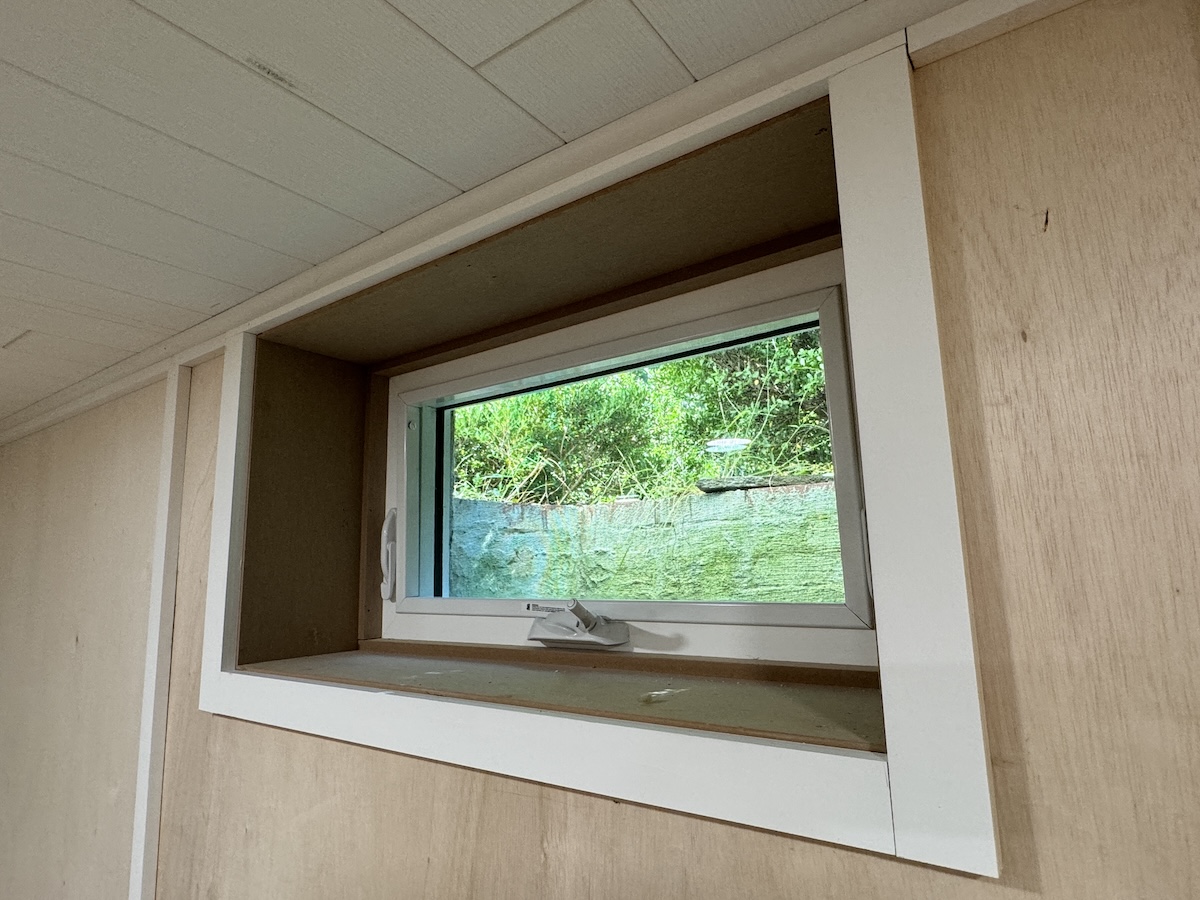
Before the window can be “trimmed” with window casing, you will need a fastening surface for the casing. This new total wall depth (framing/cladding + air gap/vapor barrier + foundation wall thickness) needs to be bridged and trimmed to make the new transition. In carpentry-speak, we’d call this a “jamb extension.” All it is, really, is an open box. The box can be made out of pine boards, composite material, or plywood. After we install the jamb extension box flush with the wall cladding, we trim the opening with window casing.
The following detailed steps will walk you though how to trim basement windows yourself. Stick around to the end to also learn how to trim basement columns, yet another unique feature in many below-grade rooms that can be trimmed out to better coordinate with the overall finished space.
Safety Precautions
Whenever you are working with power tools, make sure to wear personal protective equipment that includes closed-toe shoes, safety glasses, and hearing protection.
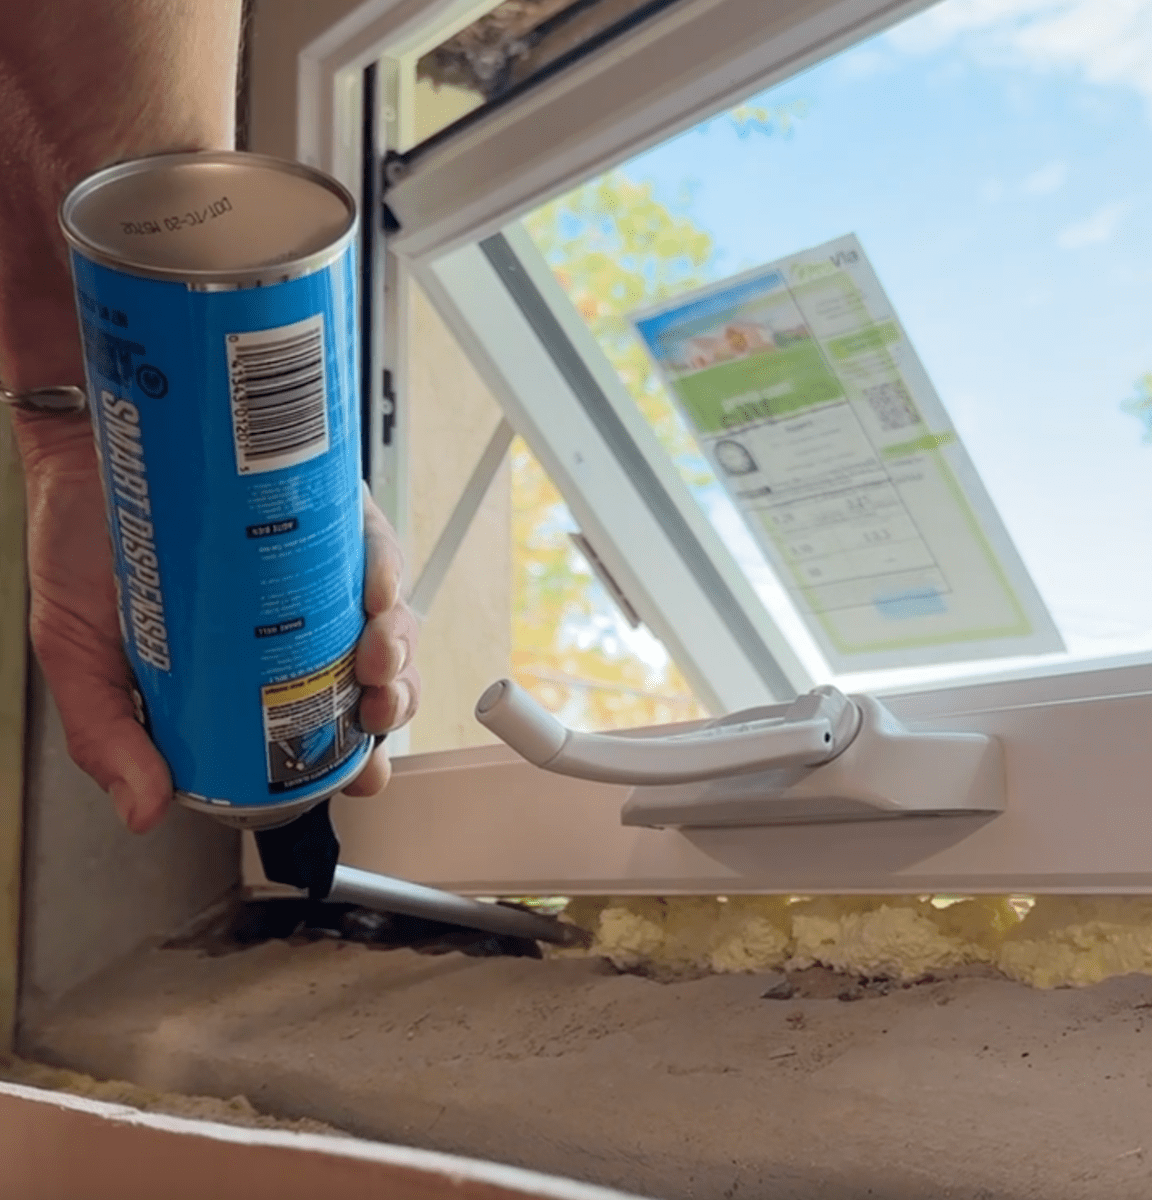
Step 1: Caulk and insulate around the basement window.
If you have just installed a new window or new framing, it’s totally common to have air movement between the back of the new wall or in the window area. Use low-expanding foam (blue can) and seal around the window if needed. Use mineral wool or fiberglass (pink stuff) to stop any drafts that might occur.
Step 2: Measure jamb depth around the window.
Typical basement windows are about 32 inches wide and 16 inches tall. The goal is to cover the outside edges of the window with a box that allows plenty of room for the hardware to operate and to remove the screen easily. To do that, you’ll need to take some measurements.
The measurement from whatever is covering the wall—probably drywall—to the window itself is called the jamb depth. Depending on about a zillion factors, that measurement won’t be the same in all four corners of the window. The wall studs might not be perfectly straight, the window could be installed catawampus, or there could be basic human error or unavoidable site conditions. You’ll need to measure the jamb depth on all four corners of the window to the face of the wall cladding.
The smallest value among the four measurements is the depth of your jamb. The reason? You can caulk the window in, but you can’t have the box project past the wall cladding or the rest of the trim won’t work.
Step 3: Determine the jamb extension box size.
If the window is 16 inches by 32 inches and you build a box with inside dimensions of 16 inches by 32 inches, the box will be too big. Conversely, if you build a box with outside dimensions of 16 by 32 inches, it will be too small.
In most cases the reason for both being wrong is the same: There’s no tolerance for adjusting the box to meet real-life conditions. The best bet is to build it somewhere in the middle like 15½ inches by 31½ inches—as the inside dimension—which will enable you to fudge the box as needed. And you’ll need to.
Note: Account for board thickness. Assuming use of ¾-inch thick material, if you build a box that’s 15½ inches by 31½ inches, you’ll quickly figure out that only two of the boards are the actual measurement. The other two are shorter by twice the thickness of the ¾-inch boards, or ¾ + ¾ = 1½ inches.
It’s easier to make the longer dimensions—the top and bottom of the jamb extension box—the full value: 31½ inches. Then the sides are 16 inches – 1½ inches = 14½ inches.
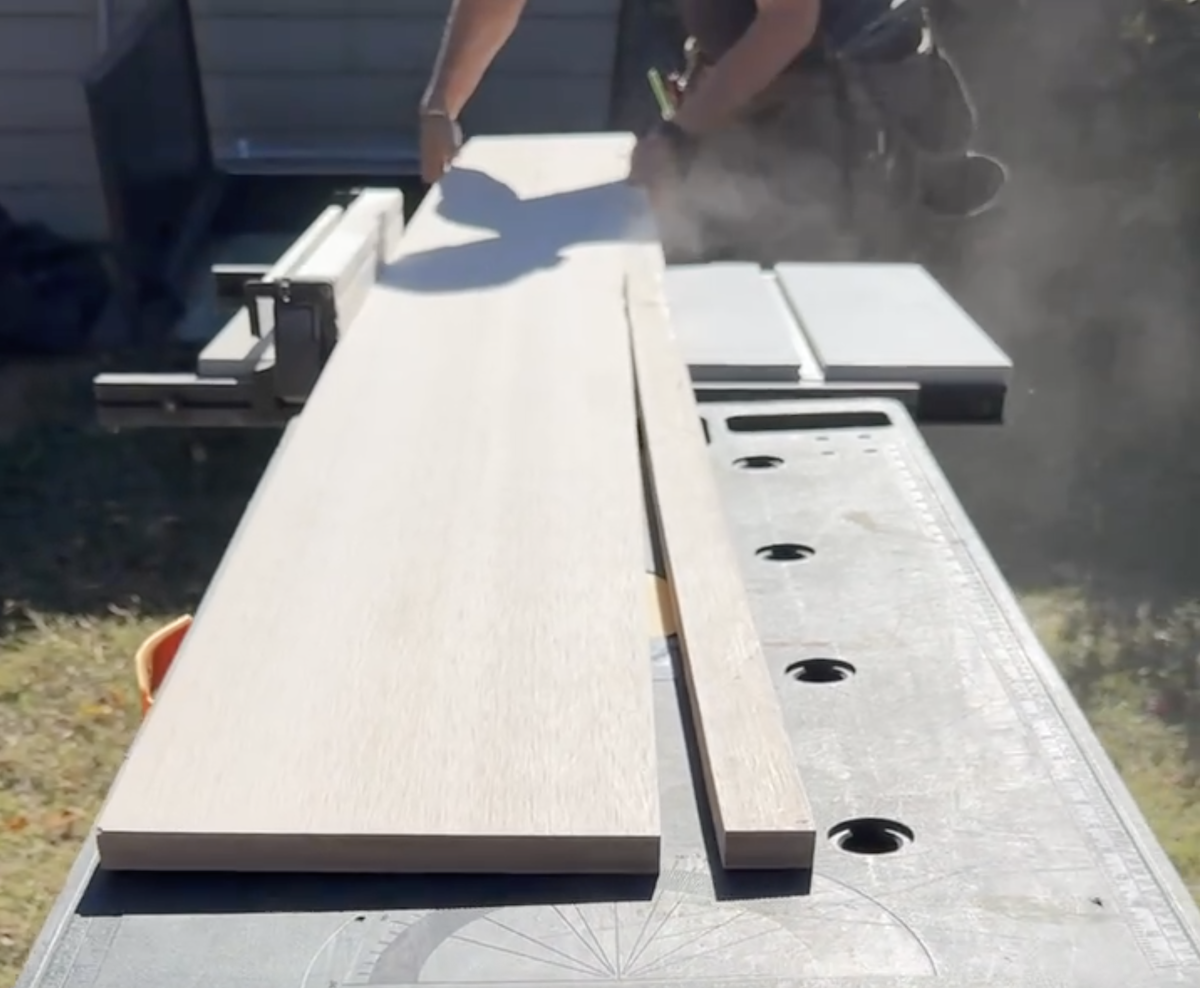
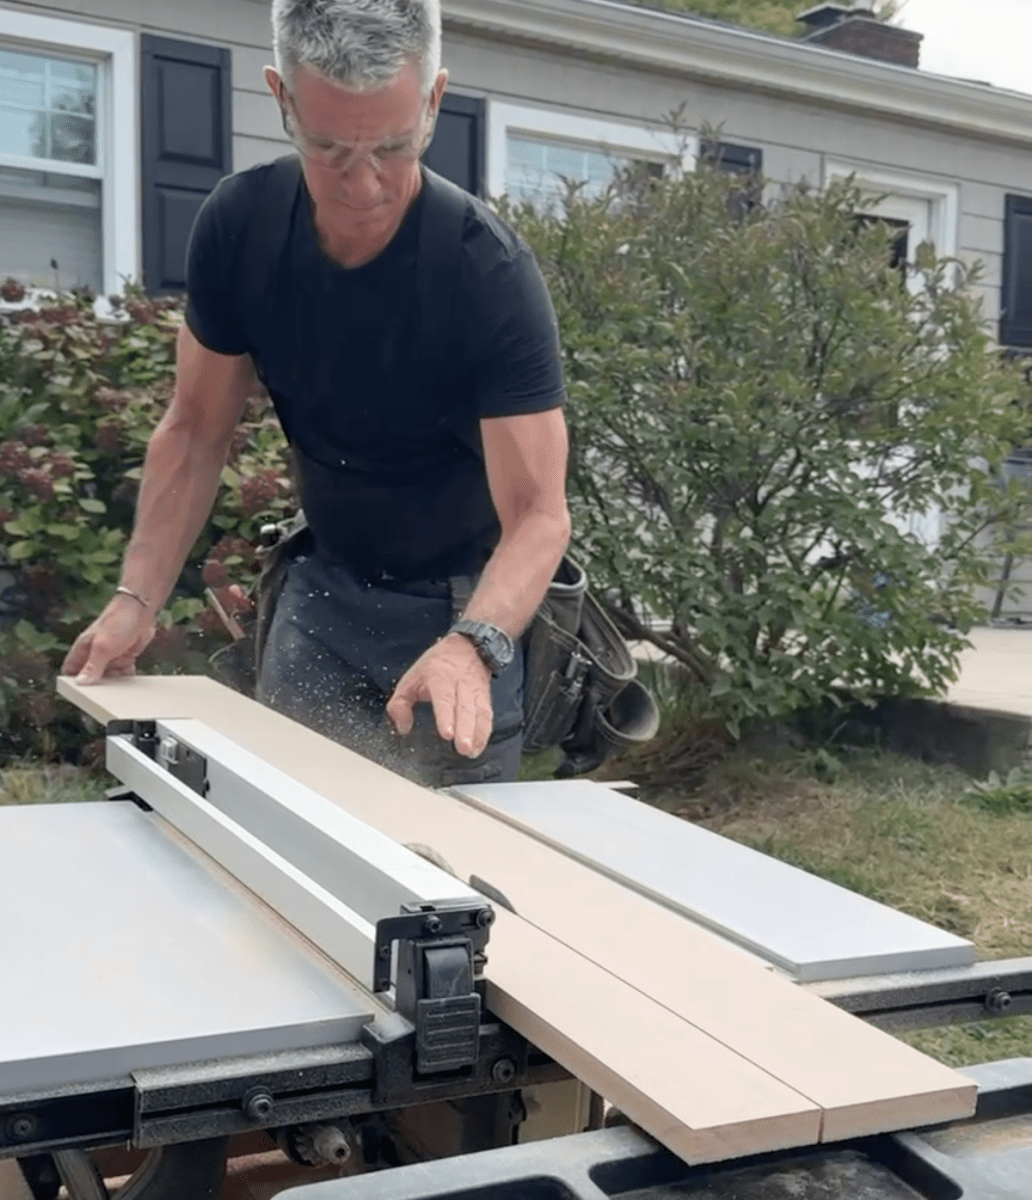
Step 4: Cut the jamb stock to size.
For most window casing and casing profiles, mitering is the way to go when floors are level. Detailed profiles offer an element of elegance. But for a basement window, we like to keep it as simple as possible (elegant, but simple). Assuming the use of typical dimensional lumber or composite like PVC, you probably have to rip some 1x12s (nominal, 11½ inches real life) to size. A table saw is the ideal tool for this.
If you’re breaking down sheet goods (plywood) you can do it with a circular saw along with a straight edge guide, which you can buy or make. It’s the precursor to the track saw, called a shoot-board. A new blade can’t hurt here to help make a smooth cut, either.
Step 5: Assemble the jamb pieces into a jamb extension box.
It’s important that the jamb extension box is fairly square. Assembly is easiest on a flat work table, the flatter the better. A pop-up banquet table can get the job done, but a dedicated work table with a type of stop called bench dogs is better.
Because we’ve done this so many times, we can just pop a few narrow crown staples from the stapler and get the box we want. If we were trimming a basement window for the first time, we’d use #8 2-inch bugle head screws. Countersinking the head just a bit forces the pieces together and squares them up.
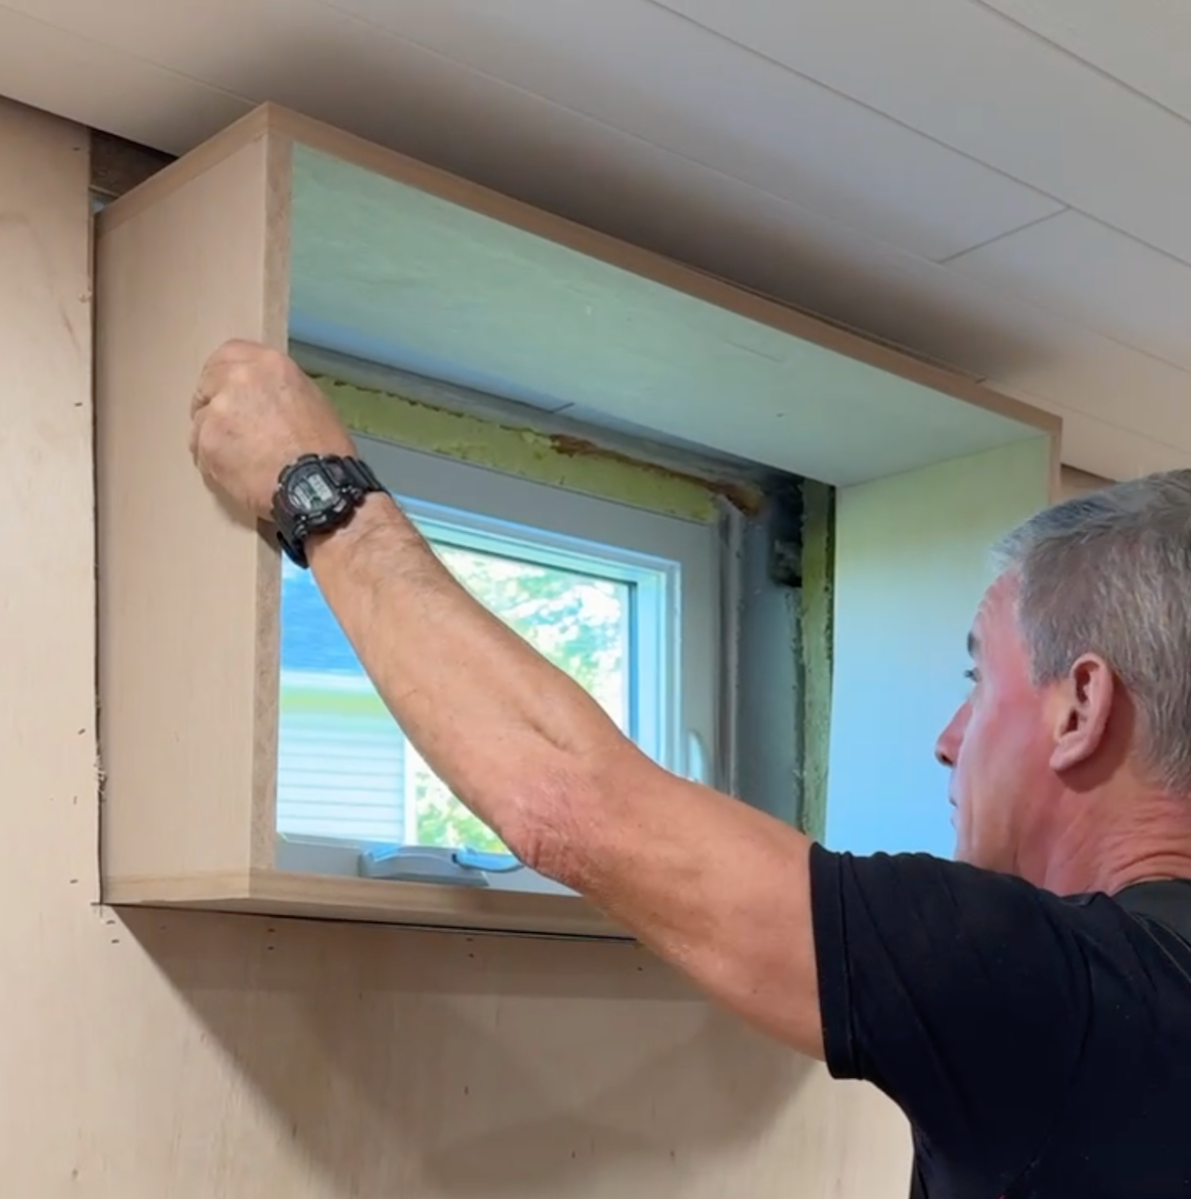
Step 6: Install the jamb extension into the window opening.
With the box built, slide it into the opening. There’s a bit of a dance here transitioning between materials and phases of construction. The good news is, the end result is easy to determine: We want the vertical edges of the box to be flush with the edges of the opening. Secondarily, we want what we call the margins to be the same as each other on all four sides, which essentially centers the box on the window frame.
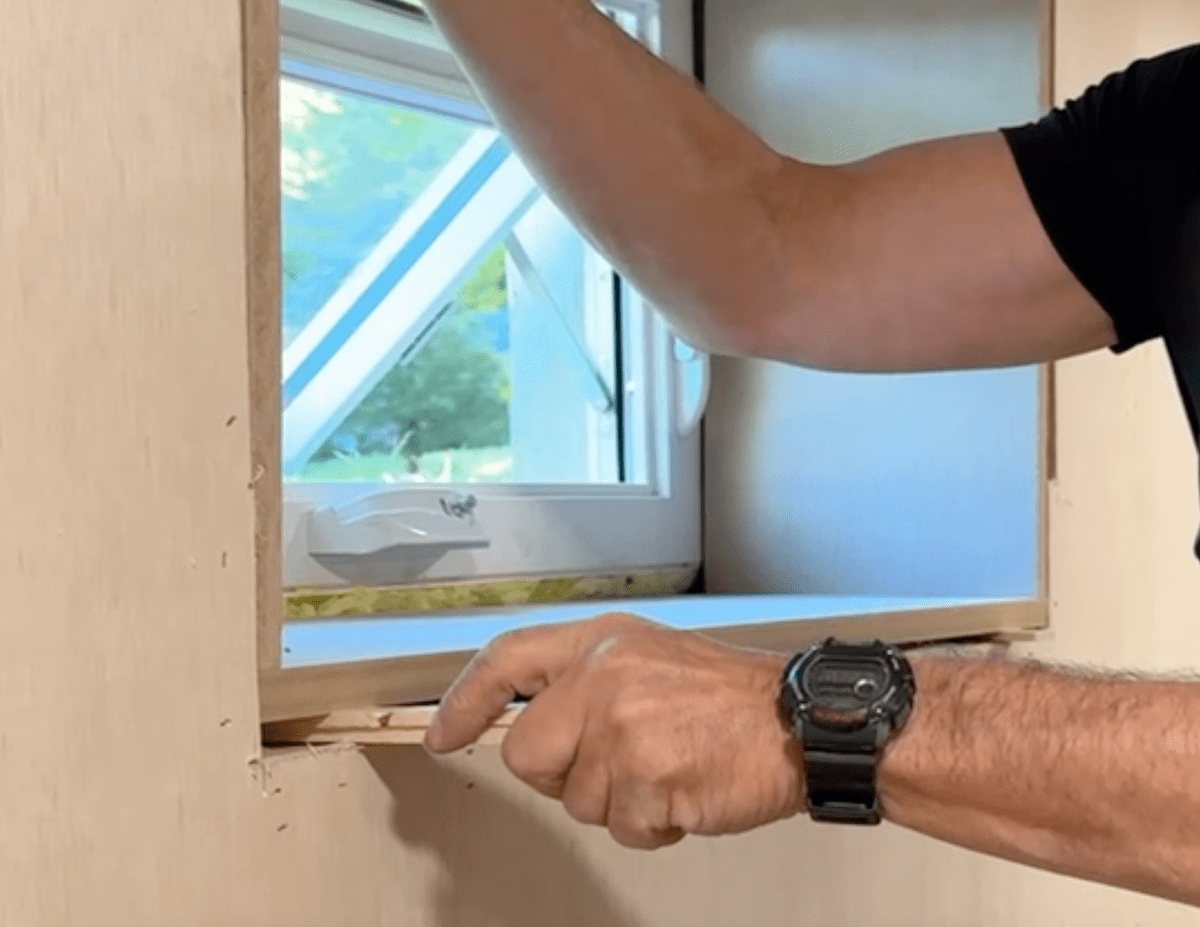
- The rough opening: Assuming new framing, there’s a reason why we call it a “rough” opening. There’s no time to detail every trim nuance beforehand. It’s an inappropriate use of time and effort. The result is that the jamb extension will surely need to be shimmed and manipulated into its final location.
- Fasten: Once located as best as possible, fasten the box to the framing. I like pneumatic brads for this, but if you don’t own that setup, finish (trim-drive) screws are great. If screwing, be careful not to deform the box. Trim-drive screws bite hard and bend the wood when you countersink them. On the other hand, they’re screws, not nails, so they are easier to withdraw and reset.
Step 7: Determine the window casing size and reveal.
After the jamb extension is in place, there are two measurements that you need to know to lay out your window trim: the casing size and the reveal.
- Window casing size: We often make our basement window casings from 1x material to whatever width we think works with the size of the window. Assuming an average basement window, our go-to size trim is 1×2, which is really ¾ by 1½ inches.
- Window casing reveal: Most windows and doors have what’s called a reveal. It’s the exposed edge of the window jamb and it’s there to add a layer of detail, but it also accounts for imperfections in the jambs that the trim is covering. We typically choose a 3/16-inch reveal.
Step 8: Decide on the window casing joint style.
While there are more ways to handle the corners of window casing, like with corner blocks, there are two typical ways it’s detailed in a basement window: butt joints or mitered joints.
- Mitered joints. This is essentially making a picture from molding with 4-mitered corners. On the surface it seems like there are fewer steps, but getting the angles just right can add a layer of trickiness, especially if everything isn’t laboratory flat and square. Also, we’ve found more success when a mitered corner picture frame is made on a flat work table or bench and then installed as a unit vs. as individual pieces.
- Butt joints. Because the jamb extension probably isn’t perfect and because it can get slightly deformed during installation, we prefer to use the butt joint approach. We also find that getting four butt joints tight is easier than managing eight miter joints.
Step 9: Measure and cut the window casing to size.
After marking the jamb extension reveal—a combination square is ideal for this—in all four corners I cut the jamb head (the top piece.) The way we determine its length is a little simple math. Measure between the reveal lines left and right. For argument’s sake, let’s say that number is 32½ inches. Add the width of both jamb legs.
1½ inches + 1½ inches = 3 inches
32½ inches + 3 inches = 35½ inches.
We like a head jamb that covers the jamb legs, so add ¼-inch per side.
35½ + ¼ + ¼ = 36 inches.
Step 10: Install the window casing, starting with the top piece.
Mark the center of the jamb extension and the center of the head jamb. Then align the center lines and the reveals and fasten the head jamb in place. We use a brad nailer with 2-inch brads for this connection.
Step 11: Measure and attach the window casing legs and bottom pieces.
The window casing legs are next. These will be flush with the bottom jamb. So, assuming reveal to reveal is 16½ inches, we add the bottom jamb thickness to that.
16½ inches + 1½ inches = 18 inches.
Cut and fasten the jamb legs in place. Then measure between the casing legs. Cut and install the bottom casing piece.
Step 12: Fill nail holes, sand, and paint the window casing.
After the basement window casing is in place, fill nail holes with joint compound and let dry before sanding smooth. Prime and paint the window casing in a semi-gloss or gloss paint in the color of your choice. Let the paint dry fully before using the window.
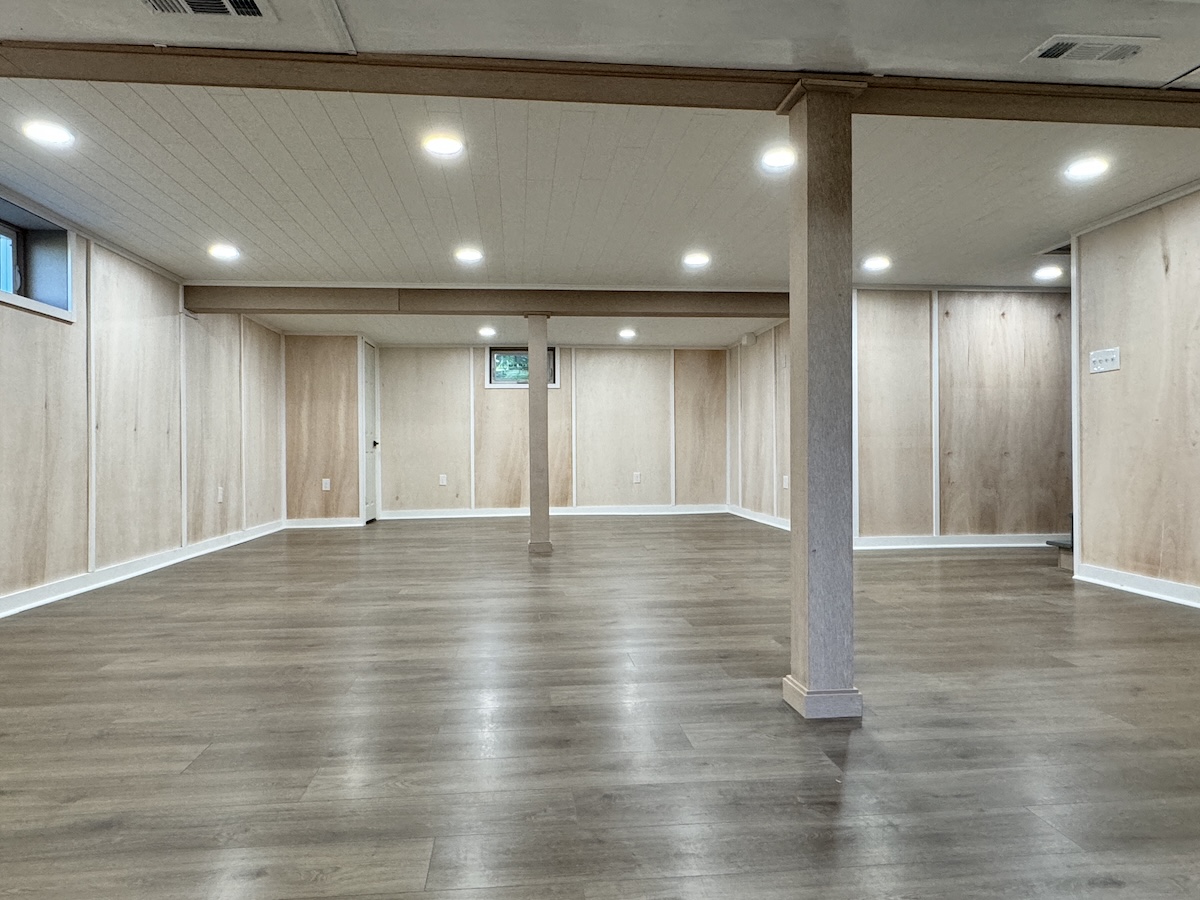
How to Trim Basement Columns
Structural columns in basements aren’t designed for show. Sometimes called lally columns, they are typically steel tubes with gnarly plates and bolts. There are numerous approaches to column wraps in basements at various price points, and you can use a different material and still follow the how-to below, but we have found that using Acre by Modern Mill composite boards is the fastest, easiest and most finish-ready work we’ve done.
The Acre composite 1x boards are part PVC and part rice hulls. Since this combination mills more easily than wood, it enables tighter miters. Since the boards have a subtle pattern, they look good as they are or you can sand and paint them.
Step 1: Assess the column and create a plan.
You really have to map out two aspects of the basement column. There are two different approaches to hiding them behind finished boards.
- First, determine the width of the column so you can choose a material. For this example, we had 4-inch columns. Wrapping them with 1×6 material worked. You might need to bump yours up to 1×8.
- Next, determine how you’re going to hide the bolts. We do that with a capital, which is the trim at the top of our column wrap.
Step 2: Measure and cut test pieces to check the design.
Make test pieces to test that your measurements are solid and because it’s a good warm-up to acquaint yourself with the actual pieces. On the miter saw, cut scraps about 12 inches long. On the table saw, bevel the blade to 45 degrees. Beveled, you can see only the top. The bottom is closer to the fence, but under the work piece. Keep your hands tight to the saw’s fence, especially your thumb. Cut right to the factory-edge of the material. Flip the work piece around. Repeat.
Note on tools: We rely on a table saw with an outfeed support to cut bevels and rip wide material down. The miter saw and our DIY cut station (we use this for everything) are great for cutting parts accurately and as an assembly table. And our go-to fastener is a narrow crown stapler.
Step 3: Assemble test pieces to see how they fit.
On the work table, assemble the test pieces. We use our workbench to support the work and the miter saw fence as a backstop. With two pieces meeting at the miter, hold the narrow crown stapler vertically and upside down so that the staple’s crown is parallel with the board. Fasten.
Install the third side. Place the 3-sided test piece around the basement column and dry-fit the fourth piece. Press hard enough for the miter to close, not so hard that it slips. Inspect how it fits. Make any adjustments necessary. If it fits well, proceed to the next step.
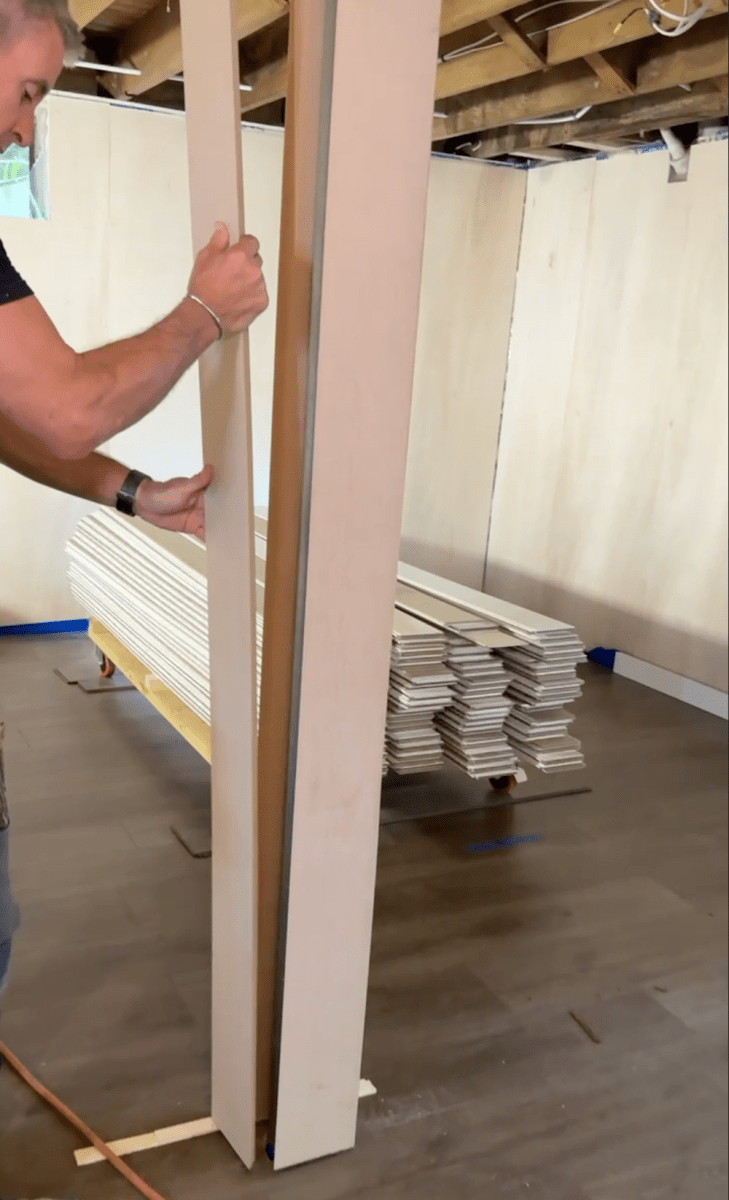
Step 4: Cut and install the column wrap.
Cut 1x6s to length. Remember that they don’t have to fit exactly, and they shouldn’t. If you’ve got an 80-inch tall post, cut the four side pieces 79¾ inches. Like the tops, a molding detail covers the gap. The gap enables shimming later as well.
Make a 3-sided box as with the test pieces. Be mindful that the miter stays nice and closed as you fasten. Insert a staple every 12 to 16 inches. Put the box around the post and install the 4th side. If you’ve got multiple columns, complete this step for all of them.
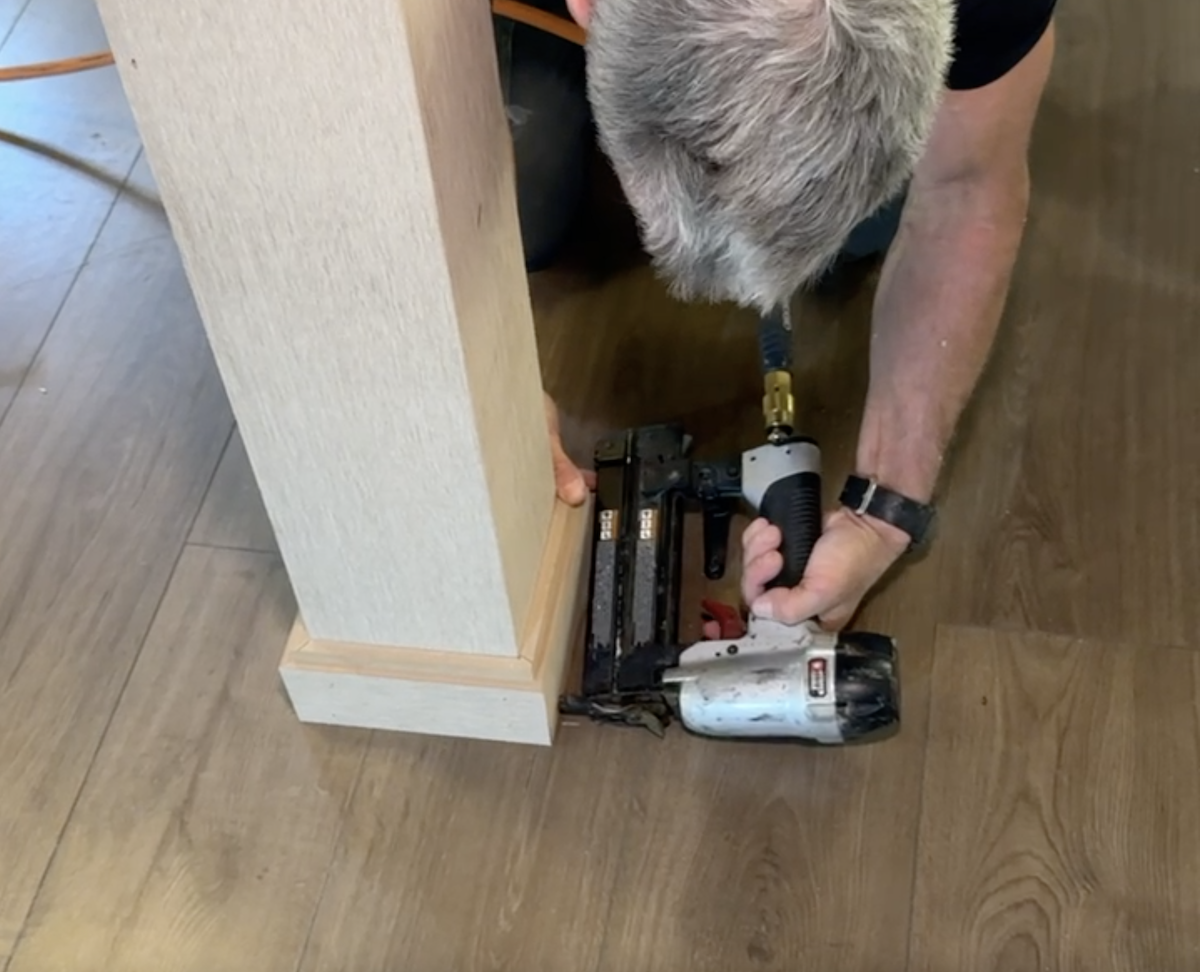
Step 5: Shim and fasten the column wrap.
Slide shims under the column wrap and wedge it into position under the beam. Getting it plumb is ideal, but not required. The closer to plumb it is, the easiest it’ll be to add trim in the next steps. Adjust as needed.
At the top, install fasteners where you can get the most bite. Just a few can keep the assembly from moving. Here, switching to a longer finish nail or trim-drive screw might be easier.
Note: This step pre-supposes that the beam the posts support has been wrapped on both sides and the bottom.
Step 6: Make the trim for the column top and base.
Column tops and base trim cover the gaps and bolts the column wraps themselves can’t cover and they help hide the transition from vertical to horizontal trim. The trim pieces also do some work holding the column wraps still.
The top trim—also called a capital—–is an Acre composite board ripped to 2 inches on the table saw with an edge detail we made with the router and a cove bit. The base trim is the same idea, just 3½ inches tall. Installation is basically the same as we did for the column wraps. Make a 3-sided box that can slide on and cover the last side with the fourth piece. We not only fasten the individual pieces together, we also fasten the assembly to the column wrap so nothing can really move.
Step 7: Add carpentry details to make the column wrap suit your design mojo.
One of the fun things about making trim on-site is that you can add detail and not be beholden to a manufactured molding profile or another trip to the store. For example, you can add a third layer of detail to give the column wraps some more depth and texture, similar to how a chair rail can dress up a room. A third trim wrap could be added about 36 inches up the column by building up trim, making a different assembly, whatever works.

Final Thoughts
A basement remodeling project can be similar to remodeling other rooms in a home, but with a few distinguishing elements like freestanding columns and deeper, smaller windows. Learning how to trim those details so they blend into the overall basement design is important to helping elevate the space so it feels like it’s part of the rest of your home.
