Installing Custom Closets
Bob enters the master suite to observe Marcy Weisberg (from California Closets) installing custom his-and-her closets.
Clip Summary
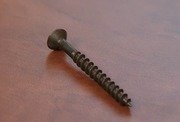
Bob enters the master suite to observe Marcy Weisberg (from California Closets) installing custom closets. The homeowners asked for 'his' and 'hers 'sections in their 12' x 6' closet space. The closet frames are built out of high-pressure furniture-grade particle board with a mahogany finish.First, the installer screws a metal bar into the studs with a tempered screw. After that, he puts in the vertical partitions for strength, then the horizontal members. The hardware on the cam-locking shelf is inserted into the vertical partitions, and the cam locks into place much like a piece of knock-down furniture.
Marcy explains that the closet systems are priced by component-- partitions and accessories. After the system is installed, it will be separated from the rest of the master suite by a Japanese Shoji screen.
Bob Vila: OK, up in the master bedroom now to talk with Marcy Weisburrg and Brad Bendel who are installing the California Closets. Marcy, California Closets means custom, right? Marcy Weisburrg: It means totally custom. Bob: What did our homeowners ask for here? Marcy: The homeowners asked us specifically to divide the closet into a "His and hers" sections, so that they didn't have to bump into each other. Bob: Now this is a relatively large space. It's about 12 by 6, I would guess. Marcy: Yes. Bob: So is it 50/50? [laughs] Marcy: No, not quite. Never is. Bob: Never is. Marcy: Never is, no. Bob: What's the layout? Tell us exactly what happens where. Marcy: We have over here for the "Her" section, we have a long hanging with a couple of shelves above. Some top and bottom hanging that we call "Double hanging". We put in some mid‑length hanging over here, with some shelves above. She can store lots of things on there. She specifically asked for lots of shoe shelves, and that's what she's getting over here. Bob: All of these shelves are put in so close together because they're meant to house... Marcy: Shoes. Bob: ...shoes? Marcy: Correct, and they're fully adjustable so she can move them around for shoes, or boots, or whatever she needs them for. Bob: Now Brad, what is the product itself? I mean it's a wood finish, right? Brad: Yes, it's a high pressure laminate particle board, furniture grade. Bob: It looks like mahogany. Marcy: It does. Bob: How do you go about installing these and hanging them off the walls? Brad: Bob, what we have is similar to what your European cabinets are. Bob: This is the "His" side, right? [laughs] Marcy: That's it, that's all he got. Brad: Attached to the wall. Bob: No, he gets the whole wall, I think. How do they attach? Brad: It's similar to the European cabinet device that we use to attach it to the wall. It's a metal bar. What we do is we screw it into the studs with a two inch tempered screw. Then after we have that on we put the cover onto the rail. Bob: Dress it up. Brad: Goes right on. Now we're ready to install our vertical partitions. [construction sounds] Bob: These partitions are the strength of it all, because it isn't just hanging off of that nail. It's also taking the weight and transferring it against the back wall, right? Brad: Correct, Bob. We hang it on to the suspension bracket. The suspension bracket, once assembled, we can allow it to go in and out and adjust it for levelness. Bob: Let's go ahead and assemble it. So you just hang those two off the sides, and then the horizontals? Brad: Yes. This is what we call a locking shelf. It's a cam‑lock and the hardware's inserted into the vertical partitions. The shelves go right in and it's a full turn. The cam locks it right into place. Bob: Just like lock down furniture? Brad: Yes. Bob: Just two turns and it's locked and then basically the same thing at the bottom? Brad: Same at the bottom. [construction sounds] Bob: Beautiful. Now Marcy, how do you figure out the cost of an installation like this? Marcy: We price by the components. Everything is priced individually, the partitions, the shelves, the drawers, the accessories. Everything is priced individually for the customer. Bob: Every job really is its own. You can't just quote it by the square foot? Marcy: No, we can't. Bob: It's going to be a beautiful job, and of course this will be separated from the rest of the master suite by some Japanese screens. Marcy: Yep. Bob: Very nice, thank you very much. Marcy: You're very welcome, my pleasure.


