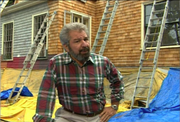
Hi, I'm Bob Villa.
Welcome home again.
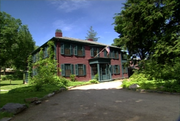
We're in the back yard where landscape is not quite complete.
But today we're working inside.
Barry Driscol, my electrician is hooking up an antique light fixture in the kitchen, and also we are looking at dimmer controls, from Langolier that allows us to dim the lights in different parts of the kitchen.
Bob Riley is here, he's working with Jimmy Shields on restoring the staircase, putting back those ballister's.
In the master suite, we got some beautiful tile from Oregon that's already been installed in my wife's bathroom.
We're gonna grout it today also were looking at some paneling.
Stick around its good to have you home again.
Bob Vila's home again.
These are milk glass shades from an old gas fixture that I've had in storage for probably 20 years and it's an unusual one because it's basically an upside down T-shape.
It came from an old butlers pantry in a back bay Boston building that I converted to apartments in the early 70's.
I've had it all these years.
I've always wanted to use it were gonna put it in this kitchen.
Barry Driscol, our electrician is helping us rewire it.
Now Barry this is an unusual Fixture and you've got two points of light.
What have you done already?
What we had to do is we've had to use this ball and chain and actually sleeve it through the old gas copper pipe, seeing the diameter inside is so small.
Inside this particular pipe.
Yes, we had to run a wire back from the canopy, then the canopy will be at the ceiling back to each socket.
We've use this to pull through this sleeve.
Okay now, what kind of wire is this?
This is just small lamp cord.
Small regular lamp cord.
Ok thats all you need.
We've marked each end with white tape to represent our neutral conductor.
And our regular conductor is going to be our hot.
And the sockets themselves are probably from the early 1900's because this was a gas fixture and then it was converted to electrical use.
Probably around 1910 or 1915.
But these sockets that you see right here are in perfectly good condition.
What we're going to do, Bob, is we're going to put a conductor.
Our neutral on the neutral side.
And our hot on the hot side of the socket.
OK.
Once we secure our conductors down, we're gonna put the top of the socket back on, and push it into our light.
And that snaps shut.
Snaps tight.
And you're done.
OK then,what about the rest of the route through here?
What we're gonna do with the conductors is we're gonna pull them through.
This is again the old gas pipe, which is a very very thin diameter piping.
We are gonna back it off to the left a little bit.
Why is that?
And then thread it back onto the right so that we don't pinch any conductors.
Okay.
Inside of the old pipe.
And then this is basically a decorative brass sleeve that goes over the whole thing, right there?
You got it.
And so were gonna let you put it in there.
We've marked the neutrals on each end.
Just so we have confusion later on when we go to hang the fixture.
OK.
And then of course, the canopy will go up here.
So are we ready to try hooking it up on the ceiling?
We are ready to go.
Here we go.
Okay, now the first thing is to actually attach the white metal bar.
What do you call that?
This is the fixture bar.
The fixture bar to the box.
And that of course bears the weight of the fixture.
This probably doesn't weigh more than a couple of pounds.
OK.
Now which wires go with which up there Barry?
The neutral conductor which is our white will go to both of our whites that we have marked from previously.
Okay, so both of those whites go to the white.
Shorten them up, and then just put a wire nut on them, right?
Now we've made sure to shut the circuit off at the electrical panel.
Yeah .
This is a separate circuit from our recessed lights which is on the ceiling.
Yes.
We'll make up our neutral conductor first, which we always do to make sure there's n o load coming off the light bulbs, which would be in the fixture.
So both the neutrals from the, from the light fixture go to that one white wire.
Yes.
Those are the ones we marked earlier.
Once we connect our hood it will be ready to put our canopy on and lighten it right up.
O K.
We tuck the wires up, get them out of the way.
Once we secure all the wires, we put the canopy right up and we are ready to go.
All right.
And we're ready to put the shades on.
Thanks, Bob.
These are the original milk glass.
And let's try one of these nice, large format bulbs which go very, very nicely with this design.
And we are ready to switch it on.
Ok Bob we are all set , to the honest.
All right.
Oh, thats beautiful.
That's great.
All right next we're going to talk about dimmers .
Now let's meet Penny Henderson our lighting consultant from Lightolier.
Hi.
Hi Bob.
Nice to see you .
Nice to see you.
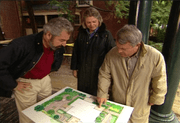
And we really needed your help because as in many re-modelings the architect here has specified well over a dozen points of light throughout the kitchen ceiling in all the different areas.
And your job is to help us figure out how to control them.
Yes it is Bob.
And you do really need lighting control since the same way that you wouldn't buy stereo without a volume control on it you shouldn't have a nice lighting design without having good lighting controls.
Right.
And what kind of what control system have we put in?
We have here a system called multi-set.
It operates with a variety of individual law backs dimmers that are remotely located in your pantry.
Ok.
And then we have these key pads onto which I've programmed some light levels for the activities that are going to happen in this space.
And the keypads can be, we have several of the keypads throughout the room right?
Yes you do, you have one at each of the entrances so that you have convenient ways to turn the lights on.
So how many different options do we have?
This keypad gives you five selections plus off.
And how have you laid it out in here?
I've programed these for the activities that happen in the space.
This top button is your bright , general ambient light level that you would use most days when a lot of the family is working in the kitchen.
Everything's on .
Everything's on, pretty full.
Then what?
On this next button I programmed a light level just for cooking.
It brings the lights down over the dining area and leaves the lights high over the workspace so that the person home alone is cooking with plenty of light.
Now once you've finished cooking what do you press?
As soon as you finish cooking you press the next button and that takes you to a dining scene That brings lights up over the table, and around the beautiful cabinetry, and brings the light level down over the work area, so that even if you leave your pots and pans out there, it's dark , and no one looks at it.
And then what?
The next light level is just for clean up.
It brings the lights up over the sink.
Yeah.
And the last light is your milk and cookies run.
It gives you enough light to get into the kitchen without stumbling over anything late at night.
That's my favorite one.
Yeah.
Sure is.
Thanks for your help.
You're very welcome.
OK.
We've got to break for some messages, and when we come back were gonna be working on the Ballister's in the stair case with Reilly.
Stick around.

