Reconstructing the Stair Rail and Balusters

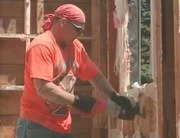
Bob and carpenter Bob Ryley begin to reassemble the stair rail and balusters, demonstrating various techniques.

Clip Summary

Bob and carpenter Bob Ryley begin to reassemble the stair rail and balusters. Ryley demonstrates the various fastening and plugging techniques. Jim Shiels works on another part of the staircase, putting back each spindle in the correct slot. Bob comments that the staircase is one of the nicest details in the house.
Now one of the most intricate parts of the demolition of this house involved , taking the staircase apart and taking all of these balusters and hand rails and having them dipped and stripped and now they are repainted and Bob Reilly is here to help us get it all back together.

Hi Bob.

Not an easy job.

No, it is not, but its not that difficult either.

Well, the difficult thing was cutting these up. These handrails were bolted through.

They were through bolted.

We took it off with a reciprocating saw.

Exactly.

And we are going to put them together with screws now.

OK.

And when there's new up holes and is four inches deep, what I had to do.

And it's hollow.

Hollow, right. So I had to drill some holes on this side here, so that, we'll allow our screws to get through.
OK.

So actually, this is kind of a 2 minute job. If you could just set a mark.

Yep.
Ok. All right. Now repeat the process on the other newer post here, right?

Yeah.

What kind drill is that?

This is a, the basic is a 3 inch bit.

Yeah.

The Forester bit?

It's a yeah.

There you go.

And what I've got here is a hole cutter right there.

Right.

That correspond in size right?

Right, so when we're done, we can fill these holes and which we really don't have to worry about here because it gonna be painted. But if.

But basicaly it's a hole cutter.

Yeah.

And a plug cutter so that you can plug them up after you have driven the screw in.

OK, so how is that? Does that look centered?

That is centered.

OK.
Ok.

Sounds good.

Yeah.

Ok.
So now are you going to plug those up?

Yeah. Put a little glue on them.

This, as you were saying, it's not that important to use the same wood if it is painted.
But if we were having used, using natural wood, you want to match it up.

We'll let that set and come back and sand it.

Ok. Now Riley, some would say that this is backwards. How are we going to get the spindles in here, the balusters into the pre-cut holes in the floor and in the bottom of the rail?

Right. Well, what we've done is cut the dowels down so we have just basically three sixteenths of an inch or so, on the bottom.

And the actual hole So much deeper that that.

I see it's that all we need the security.

Yes.

And we cut it so that we
can get it up, get the top up in there into the slot of the rally.

I mean just pull it down.

And that's it,

and I want to cool that in.

And you want to drop a bit of glue into each one of these holes.

Right.

OK.
Yes. Right.

That's going to hold it.

Keep on, keep it over.

On this side, with Jim Shields who's working on a similar problem but Jim these all involved curve as well as an angle how you putting the men here?

Well just slimming among these came originally putting in same order they came.

That's the most important thing.

When we removed all of these, we took them out in order.

We put numbers on each spindle so that when they went to the strippers they had a number engraved into the top of each one.
so clearly the most important element is having them fall back into the exact location.

They fit in only about, barely an eighth of an inch.

So here we do have to

give it a couple of tacks.

Toughest one to fit.

Yes.

There you go.

Good.

Yes this is one of the prettiest details in the whole house I think.

And that looks real good Riley.

Thanks.

Couple more to go. We gotta break for some messages.

When we come back , we're going to be seaming a carpet.

Stick around.
Share