Now, the panels that we are using here in the dressing area are from Brazil.
It's a type of mahogany that's laminated on a chipboard product.
And you know, this is the 90's.
A lot of these products no longer have outgassing situations in the using glues that are quite safe so, it makes it easy to create rooms like we doing here.
David Ives is working on this one.
Hi David.
Hi, Bob.
And, in order to make everything kind of blend together with the doors of the closets, what David is done, is to take the panels and cut them into these rectangular sizes.
Then fit them against the plywood that we had put on the studs, and close everything in with.
This is real Honduran mahogany, right David?
Yes, it is.
And I guess what you've done is, you've run everything through and milled it, so that you've gotta wrap.
Put on either side.
Right.
So that's a cover over my cuts.
Gives you a very nice covering.
It's a very nice design because it really creates a kind of a banker's paneling in here.
Yeah.
How are you dealing with this above the door?
Well we are just getting that in now.
And what we're doing is adding a little adhesive to it.
Because it's set so that it's got a good, good seal behind it.
So that's a panel adhesive .
Yes.
This is a really strong, they use it for putting down floors.
Right.
And this should work really well here.
Keeps it from warping or bowing and in time from temperature change.
And you face nailed it.
Just barely little tacks here so I make sure that they are covered by my trims.
But it's really the adhesive that's doing the job.
Oh yes, that's really important because it will hold it against the panel set, the plywood wall .
Now, you're not putting any adhesive behind the mahogany trim.
No, in this case here, I'm gonna use the nails to do that.
Because I have a good stud behind there, and the glue really doesn't have the strength for that type of whole in the mahogany.
Yeah, 'cause the mahogany has a thicker dimension.
It's pretty strong.
Yeah, exactly.
And then one vertical piece,
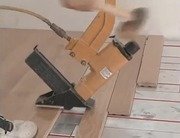
It shoots right in there.
Nifty.
And that's gonna continue right through the room.
Yeah, now of course, these are just the details that the architect brings to the job.
He's spent a lot of computer time, doing not only the paneling layout but also ordering things such as this door.
This particular door is the same exact design as the original doors in the house, but because everything here is mahogany, We had it milled and what's interesting is, that from the point of view of getting a custom door made, this is under three hundred dollars.
That's comparable to, you know, what you have to spend on just sometimes on a good solid flush door.
So David, will you be putting these pieces over here next?
Yeah, as we going to continue around the room, and I have some angle pieces here in rough form.
They're going to have to be finished up a little bit better, but they're going to come in.
It's a 22 degree angle, we are gonna clean them up and tighten them right in there.
Okay.
And get some more paneling throughout.
So we've got to rip a few more piece.
Yeah.
Good.
Not bad.
Okay.
So, if anybody out there who likes to do this kind of work gets the wrong idea, we've really had David working for five to six hours, and that's a talented craftsman.
You get this far along, this is fine work it's fun work but you got a take it slowly.
And of course, when this is farther along, we'll get the other artisans in here to put a stain on to match the pre-finished mahogany.
Thanks a lot.
Take a break.
Okay.
We are going to break for some messages.
When we come back we'll check in with Kim to see see how the faux finishes are coming along.
Wow, Kim!
This looks fabulous.
Thank you.
It really does.
Thanks a lot.
And, of course, again in real time, it's been more like six hours of working.
Yes.
And you've gotten all of this dormer wall in.
Now, why didn't you just continue across here?
Well basically what we want to avoid is having the wet wall against the wet wall.
And working these tight corners, what's gonna happen is your knuckles are gonna hit the wet paint and it's gonna damage the finish.
I got you but you did get over to the other side.
Yes.
So that you basically done fifty percent of the room, and this looks terrific.
Great.
Thank you.
Thank you very much.
Thank you.
OK, we're running out of time.
Come home again next time, when we're going to be meeting our interior designers who will show us some schemes for the entire house.
Don't miss it.
Till then, I'm Bob Vila.
It's good to have you home again.


