We may earn revenue from the products available on this page and participate in affiliate programs. Learn More ›
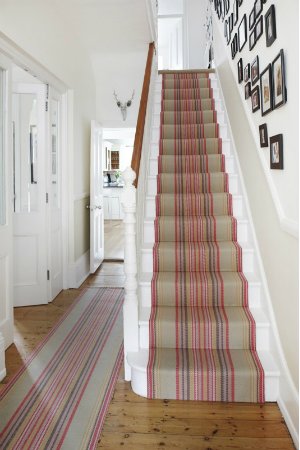
Showcase the beauty of wood stairs without sacrificing the comfort of carpet with this clever compromise: a carpet runner. This narrow rug runs down the center of the staircase, leaving some wood exposed on each side of the tread while still providing all the benefits of carpet, such as additional grip, shock absorption, and noise reduction. It’s the best of both worlds! Plus, it’s possible to complete this installation project in only a few hours. Just take it one step at a time.
Tools & Materials
Bobvila.com may earn a commission from purchases made through these links.
Step 1
Before you get started installing your carpet, you first need to determine the look you want in your home. There are two ways of installing carpet on stairs: the Hollywood method and the waterfall method.
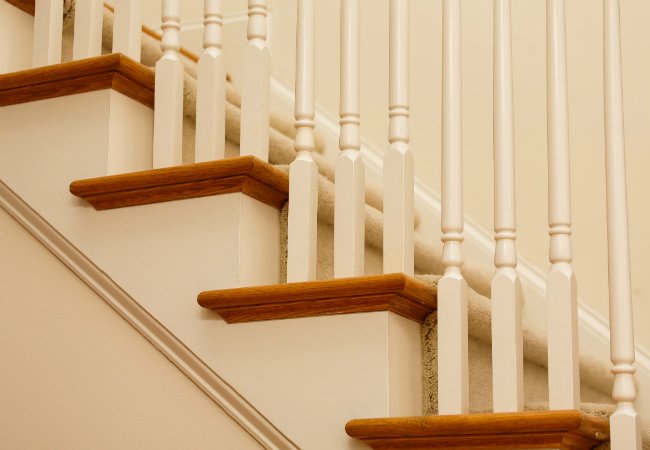
- The Hollywood method tightly wraps the carpet over the edge the tread and around the nosing (or the front edge) of each step, then fastens it down on the riser for a clean and contoured appearance. Its tailored look makes this a popular choice for the most visible stairways in the home, such as those leading up from the living room or foyer.
- The waterfall method, on the other hand, offers a simpler installation, in which the carpet is adhered to the edge of the tread, then dropped straight down to meet the back of the next tread—all without securing it to the riser. This more casual, cascading style is often reserved for basement stairs or projects involving thick, nubby carpet that is harder to manipulate.
Step 2
Next up: Time to choose a carpet. Of all of the options available to you, a machine-hemmed, prefabricated stair runner is the most convenient choice for easy installation. Carpet runner can, however, be cut and hemmed from any wall-to-wall carpet roll; just know that each side must be stitched with a border to prevent fraying before you start. This hemming process requires a special sewing machine used by carpet professionals, so you’ll need to hire a pro and provide full measurements (see Step 3) for a custom cut.
Step 3
Whether you plan to pick up a runner that is ready to go, or craft something totally custom, you’ll first need to collect all your necessary measurements. Start with the ideal width of your runner. Pre-hemmed runners are usually sold in one of a few widths, most commonly 27 and 32 inches, so choose the one that fits your tread size with as much (or as little) wood showing as desired. If you plan to have a runner custom cut (or if you need help visualizing how your stairs would appear partially covered with a carpet runner), try draping brown kraft paper or a flat sheet folded lengthwise to determine the right runner width.
Next, to calculate the length of your stair runner, add your measurements for the depth of the stair tread and the height of the riser, then multiply this sum by the number of stairs. If you want the Hollywood style of carpeting, you’ll need a little extra length in order to have enough give to fasten the runner completely; add one inch for each nosing and at least 18 extra inches for spare.
Step 4
Prepare your stairs for carpet installation by installing tack strips, thin pieces of wood resembling yardsticks with tacks pointing upward. These will grip the carpet backing and hold it in place.
Cut your tack strips into lengths that are four inches shorter than the width of your chosen runner, then count out two strips for each stair. Nail one on each riser, centered, ¼ inch from the bottom, and one on each tread, ¼ inch from the rear, also centered. Make certain that the strips angle in toward each other, so that the points of the tacks will come close to touching.
Step 5
To provide each of your wooden steps with a little more cushion, lay down a base of carpet padding. You can find this material in many shapes and sizes, but remember that high-quality stair padding is thicker than wall-to-wall padding. Good padding is worth the investment, because it can extend the life of the carpet on this highly trafficked corridor.
To begin, use a utility knife to cut the padding into rectangles that are the same width as the length of each tack strip (to ensure that the padding won’t stick out under the carpet), and three inches longer than the depth of the tread. These pads should not cover any of the tack strips, however. Secure one end of the pad just in front of the tack strip on the tread, using a hammer tacker and stapling every three inches across. Then, pull the padding tight around the stair nosing and staple it underneath (onto the riser), again spaced every three inches. Trim the pad where the nosing and the top of the riser meet and, if using the waterfall method, clip the corners so you won’t see the pad. Repeat this process for the entire length of the staircase.
Step 6
With all the padding in place, it’s time to install the runner, working from the bottom of the stairs to the top. Center the runner so that there are equal amounts of wood on each side, then press it into the very first tack strip (at the bottom of the riser), using a carpet awl to get a clean look between the bottom of the stair riser and the flooring. The carpeting should be even with the floor, but if not, just trim the edge with a carpet knife. Then, secure the runner to the riser just beneath the next tread with staples, spaced roughly three inches apart.
For the tailored Hollywood look, also secure the runner to the underside of the nosing, spacing each staple three inches apart.
Step 7
Recenter the runner, then push the carpet back over the nosing and toward the next tack strip. Place the front part of a knee kicker (a professional carpet tool available for rent from your local big-box hardware store) about two to three inches from the second riser, then give it a jolt with your knee to tighten the carpeting along the edges. Start at the middle, and work your way to each edge to minimize any bubbles in the middle. Remember: If the runner begins to buckle, pull it up from the tack strip and begin again. No bumps allowed!
Step 8
Once you are satisfied with the runner’s position, use a carpet awl to push it tightly into the seam between the tread and the riser, and into your tack strips. Then, staple the runner into the crease where the riser and tread meet on either end of the strip as well as each outer edge, two inches from the bottom of the riser.
Step 9
Repeat Steps 7 and 8 for each stair until you reach a landing or the top riser.
Step 10
When you finally reach the top riser, fold the carpet’s upper edge back on itself and staple it just underneath the overhanging lip of the flooring.
Kick back and relax now that the work is done. Your classy, comfy stairway is ready to make its grand entrance at your next celebration. Is this a good reason to schedule a house re-warming? We think so.