
We may earn revenue from the products available on this page and participate in affiliate programs. Learn More ›
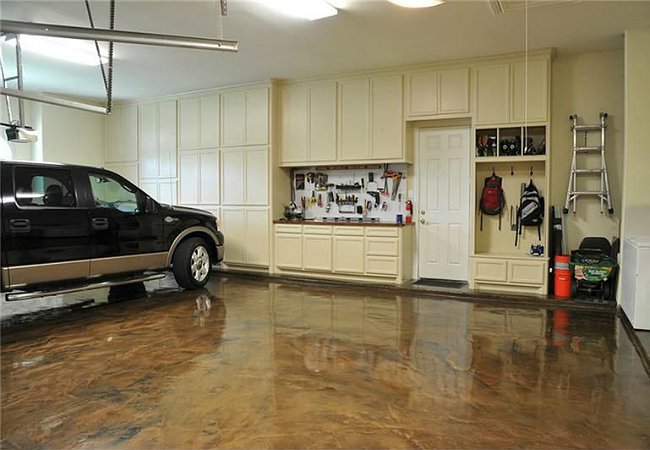
Part-time workshop, storage center for outdoor equipment, shelter for the family cars—the garage is a do-it-all space. Given all of the foot traffic (not to mention mess) that happens here, that space deserves as much attention as any other room in the home. Fortunately, one easy update can both refresh and preserve your multipurpose zone: painting the floor.
Good for more than just coloring your concrete, epoxy paint can make the surface easier to clean and act as a shield against grease and oil stains, both of which are common garage spills. The key to an expert application? Hold out for mild weather—like the crisp and dry temperatures that arrive in the fall—before getting to work on this weekend project. Then, follow these steps for how to paint a garage floor carefully and you’ll be rolling over and walking on glassy floors in no time.
Tools & Materials
Bobvila.com may earn a commission from purchases made through these links.
- Rubber gloves
- Dust mask
- Safety goggles
- Stiff-bristled broom
- Metal-bristled scrub brush
- Pressure washer
- 5-gallon plastic bucket
- Long-handled paint roller
- Nylon paintbrush
How to Paint a Garage Floor
STEP 1: Ensure good ventilation in the garage.
Make sure the work area (your garage) is well ventilated since you will be working with epoxy paint and bleach, both products that have strong fumes. Open a window—or your garage door—to ensure that air is constantly circulating through the space. Next, pull on the proper protective gear: rubber gloves, dust mask, safety goggles, as well as a set of clothes you don’t mind splattering paint on.
STEP 2: Clear the floor of dust and dirt, which may prevent epoxy paint from sticking.
Sweep the floor, and wash away all stains using a mixture of bleach and water so that it’s completely clean and clear of dust and dirt before you start painting. (Follow the product instructions to get the ratio of bleach to water exactly right.) If you encounter any stains that are especially stubborn, switch from a standard scrub brush to one with metal bristles to work them out.
When you’re done, rinse the entire area with clean water—this is where renting a pressure washer may come in handy.
STEP 3: Fill in any imperfections in the concrete floor.
If you notice any cracks in the floor, you’ll want to fill them in before painting over the full surface, otherwise they would leave noticeable dents in your renewed floor. Use a concrete filler to take care of smaller cracks and a concrete patch for larger ones. Just be sure the cracks are completely clean and dry before applying the compound.
STEP 4: Apply concrete etcher to prep the floors for epoxy.
After everything has dried—both the bleach solution and any filler you may have used—check to see if you’ll need to etch the floor’s surface (a process that will help the paint absorb better) by sprinkling a few drops of water onto the floor. If it absorbs quickly, you’re good and can move onto the next step; if the droplets don’t absorb quickly, your best bet is to apply a concrete etcher to the surface.
You can pick up a concrete etcher from your local hardware or home improvement store. Following the package’s instructions, dilute the concrete etcher with water and mix it in a plastic bucket. Apply it to the entire floor using a stiff-bristled broom to move it around. Let it stand as long as the product requires, scrub with the broom, then rinse and mop up the extra water. In the end, your floor will have a texture similar to that of a medium-grit sandpaper. allow the floor to dry overnight before you begin painting.
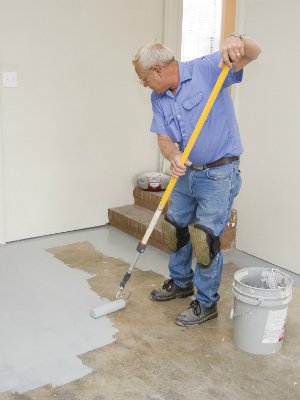
STEP 5: Prime before you paint.
Next, just as you would on walls or furniture, apply a primer coat of paint to your dry garage floor. To take the back-breaking bending out of the application process, though, swap a standard paintbrush or roller for a long-handled paint roller instead.
Let it dry for six to eight hours before moving on to the topcoat.
STEP 6: Lay down two coats of epoxy for extra protection.
Mix the epoxy paint well, and apply the first layer using a nylon brush and a water-resistant roller cover. Give that first coat 24 hours to dry before applying the second one.
Then, wait at least five days before walking (or driving) on the floor’s surface. A week later, when you’re rolling your car over the new floor, you’re sure to agree that this is one refresh well worth the wait.