We may earn revenue from the products available on this page and participate in affiliate programs. Learn More ›
Q: I’ve been trying to improve the look of my lawn, but I’ve been noticing more and more bare spots and areas of patchy grass. I’ve tried so many products and techniques, but nothing seems to be doing the trick. What’s causing these bare spots, and how can I fix them so I can actually start using and enjoying my outdoor space?
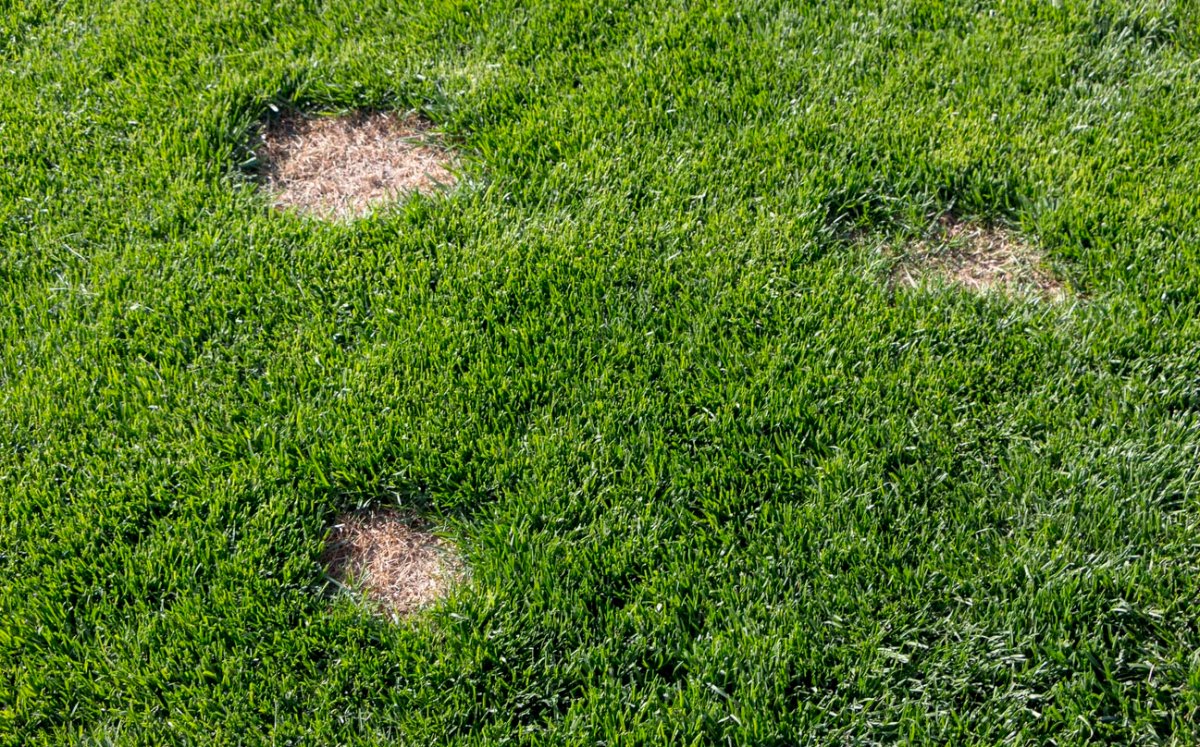
A: The average gardener will find immense satisfaction in seeing brown grass turn to green as winter fades and spring arrives, but it can be understandably frustrating when that grass doesn’t look as healthy as it once did. Lawns can be plagued with a multitude of problems, one of them being the development of bare spots. It is a relatively common issue with many possible causes, but the good news is that fixing patchy grass isn’t rocket science. In fact, some bare spots can be fixed with a few garden tools and some fast-growing grass seed—however, before repair work can start, knowing the root cause of a patchy lawn is key. This will help prevent the problem from recurring, or even worsening. Keep reading to troubleshoot the causes of bare patches in a lawn, and find out how to repair them.
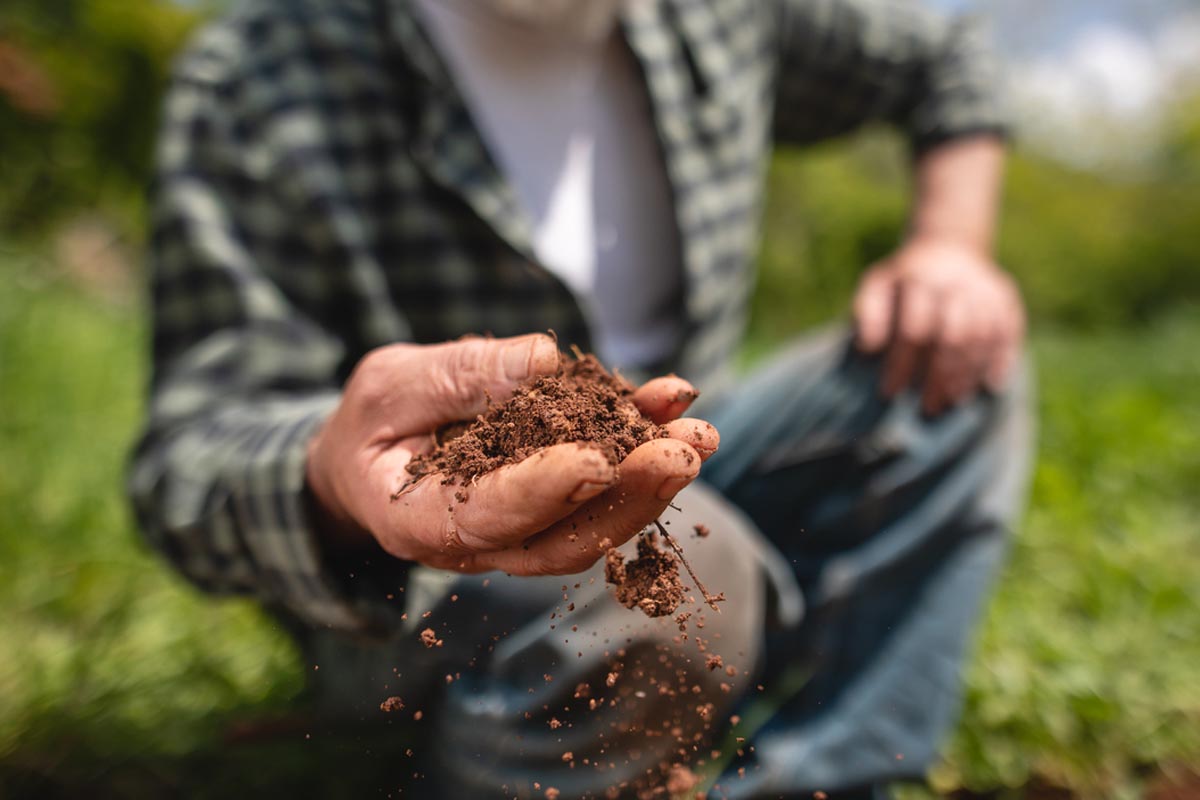
Poor soil condition can cause bare spots in a lawn.

One common culprit behind bare spots in a lawn is poor soil condition. Simply put, grass gets its nutrients from the soil, so if that soil isn’t providing the right minerals and nutrients at the correct levels, grass can struggle to grow—thus leading to that dreaded patchiness. A simple soil test can reveal a lot about the soil in which grass grows, but most importantly reveals the pH of the soil. The pH of soil (between 0 and 14) is important, as it’s a strong indicator of health: Grass grows best in nutrient-dense soil with a pH at the midway point of around 6.5 or 7 pH. Typically, yellowing, thinning grass and overall poor growth result from a higher soil pH, so steps to lower the soil’s pH are best completed before attempting any lawn repair.
If the pH of the soil is the issue causing the bare spots, enriching the soil with compost and fertilizer can be the key to keeping grass growing green. A rich planting mix with plenty of compost is ideal for patching lawns and stimulating growth. Whether reseeding bare spots in the lawn or replanting an entire lawn, using the right fertilizer for new grass is critical. Starter fertilizers have higher levels of nitrogen to stimulate growth, but these higher levels can also burn any established grass, so it should be applied carefully. Once the turf is established, keeping a regular grass-fertilizing schedule is crucial for the health of a lawn.
Debris buried in the grass may be creating thin spots.
Patches of thinning grass could be caused by debris (both organic and not) buried beneath the surface. This can be problematic for two reasons. First, debris buried beneath the grass that hasn’t decomposed could be inhibiting the growth of the grass by making it difficult for grass seeds to take root. It can affect drainage as well as the chemical makeup of the soil, depending on what is buried. Second, debris can cause soil subsidence, which is the gradual settling or sudden sinking of an area due to the shifting of materials beneath the surface. In other words, tree roots, stumps, and other items buried under the grass decompose, and the earth shifts as a result. This causes soil collapse and can affect the roots of grass as well as the nutrient density of the soil. It may be worth investigating what’s lurking beneath the surface of soil to rule out debris as the issue causing bare spots in the lawn.
Using dull mower blades, cutting the grass too short, or not dethatching might lead to patches in grass.
Believe it or not, lawn mowing mistakes are one of the most common issues when it comes to lawn care. Like any other type of blade, mower blades can dull and require sharpening from time to time. How do you know if your mower blades are due for a sharpening? Look at the grass after you’ve mowed. If the grass blades have a clean cut, your mower blades are sharp; however, if the cut looks jagged or torn, it’s time for a blade tune-up. Grass that has been left with jagged and uneven cuts is more susceptible to disease.
Cutting grass too short is another possible mistake you’re making that’s leading to bare spots. When grass is cut too short, it’s hard for leaves to photosynthesize, which results in stunted growth, thinning grass, and patchiness. A good rule of thumb is to aim to cut no more than one-third of a blade’s height at once.
Another common cause of patchy grass is a buildup of thatch. Thatch is organic matter such as leaf mulch and dead grass that if left unchecked can stunt the growth of grass. Luckily, the process of dethatching is straightforward, though it’s potentially labor intensive. A dethatching rake or an electric dethatching tool can help clean up the grass in less time.
Fungal disease or insect infestations can damage a lawn.
There are a number of types of lawn fungus and insect infestations that can turn a once-green lawn into a patchy mess. While fungi spores are a natural part of any soil makeup, a lawn that has been overwatered, underwatered, or neglected is susceptible to lawn fungus. By taking small steps to improve lawn health, such as engaging in proper mowing practices, regular fertilizing, and watering earlier in the day, it’s fairly easy to get most types of lawn fungus under control.
Insect infestations are another common cause of bare spots. While many insects are harmless and even beneficial, there are a few common pests that can cause major damage to grass. White grubs devour the roots of grass, especially fescue and bluegrass; the hairy chinch bug sucks the nutrients from grass blades; and sod webworms creep from the soil at night and eat away at the grass. All of these insect infestations can result in unsightly grass patches of brown or yellow.
Drought and erosion may cause patchy grass.
Periods of drought, especially when water restrictions are in place, can cause grass to dry out and even die in patches. During a drought, cut back on the frequency of mowing and allow grass to grow longer; this will help shade the soil and maintain moisture. During a drought or otherwise, the best time to water a lawn is in the early morning. Evaporation is slower, and more of the water will reach the roots.
Soil erosion can cause uneven surface area, resulting in water either pooling or running away from that area. This means those grass patches aren’t getting the same amount of water as the rest of the healthy lawn. Maintaining these good practices can reduce the likelihood of patches developing in the lawn or prevent existing ones from worsening.
Grass thinning can be caused by excessive foot traffic, pet urine, or chemical spills.
If your lawn sees a lot of foot traffic, check to see if those patterns coincide with the areas where patches are appearing the most frequently, or where they are the hardest to get rid of. If an area in your lawn repeatedly thins due to excessive foot traffic, a low-cost solution for an ugly section of lawn is to embrace it. Rather than fight a losing battle, consider transforming the area into a footpath with stepping stones, gravel, or mulch.
Sometimes, the cause of bare patches in a lawn may be a little out of your control. It may come as no surprise to pet owners that pet urine, with its high-nitrogen content, is one of the most frequent causes of yellowing or dead patches in an otherwise healthy lawn. Similarly, certain chemicals, including high-nitrogen-based fertilizers, can also cause dry, burned patches on grass. Consider discouraging a pet from using your lawn as a bathroom to confirm your suspicion that pet waste is the primary cause of the patches.
There are many reasons that can contribute to the appearance of bare spots in the lawn, and not all are obvious.
Bare spots on a lawn can be caused by any of the above issues, but those aren’t the only culprits.
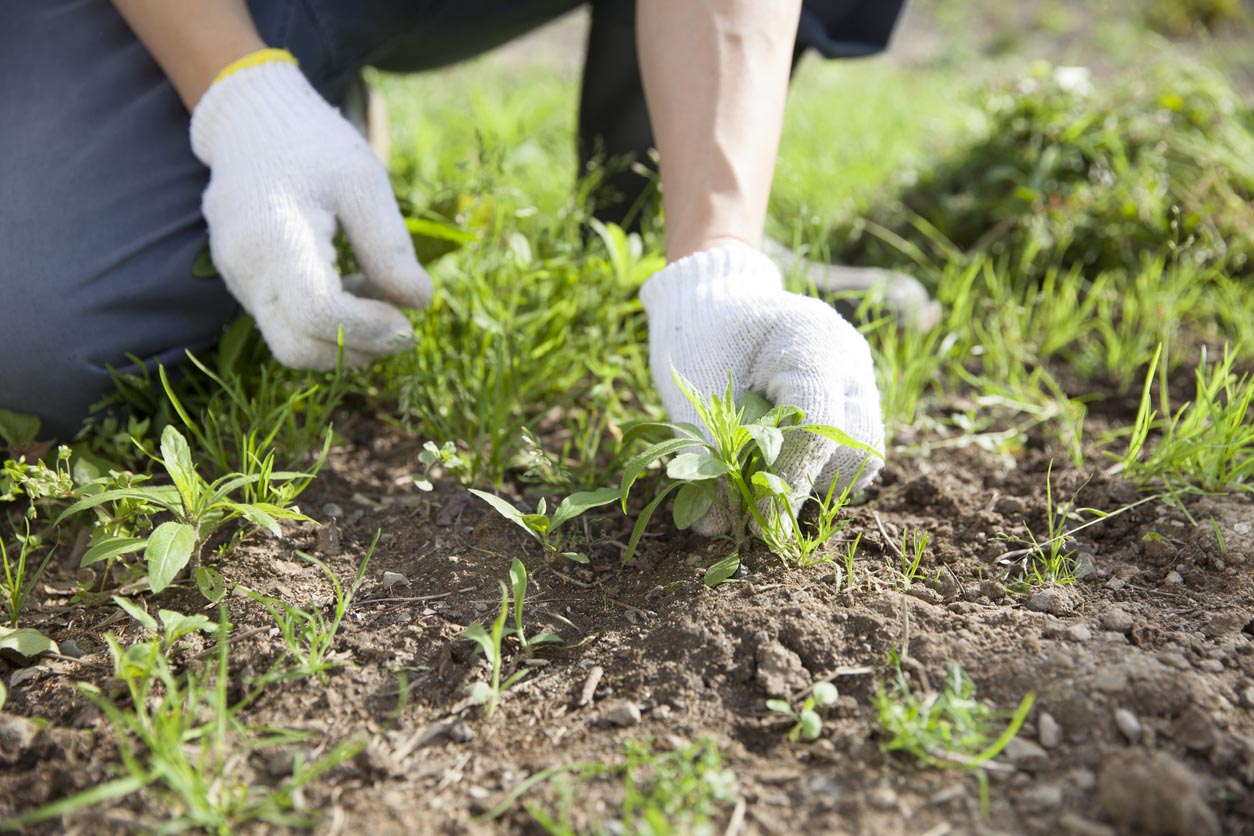
- Lawn weeds: Common lawn weeds like creeping Charlie, dandelions, and crabgrass, if left unchecked, can take over a lawn and compete with grass for nutrients in the soil.
- Grass seed type: You may have planted the wrong kind of grass seed for the growing conditions. Before you plant new grass, make sure it’s the right type. There are many kinds of grass, including cool-season versus warm-season grasses, as well as grass blends more suited to partial shade or full sun.
- Wild animals: Animals such as skunks and raccoons can create bare patches in a lawn when digging for insects and grubs. Rabbits, moles, and voles can create problems when tunneling underground.
- Animal waste: Animal waste such as pet and wild animal urine can be the cause of bare spots in the lawn. Feces from wild geese and ducks can also cause patchy lawns.
- Chemicals: In areas where winter ice is controlled using salt or de-icing chemicals, the runoff can cause patches in the grass, especially along the edges of sidewalks or near roads.
- Watering woes: Insufficient sprinkler coverage may result in areas of the lawn just not receiving enough water or moisture. Make sure you have a good-quality sprinkler, and avoid running it in the middle of the day.
With all of these possible causes, it can be difficult to know exactly what is happening to cause the patches in your lawn. The good news is that many of these causes can be addressed with the same solution. The following will help guide you with a step-by-step guide on how to repair bare spots in a lawn.

DIY Lawn Care. Simplified.
Not sure how to turn your lawn around? Sunday’s Smart Lawn Plan and products take the guesswork out of achieving a green and thriving yard.
How to Repair Bare Spots in the Lawn
There are several basic tools that can help gardeners patch bare spots in a lawn. If most of the tools are already in the garden shed, the only lawn care cost considerations will be seed, soil, and, eventually, an all-purpose lawn fertilizer, which minimizes the cost of the overall project. However, the cost can increase based on the size of the area that needs fixing. Newer gardeners with fewer tools or gardeners without the correct tools may face a high up-front investment. It’s worth noting that a decent dethatching rake will set you back only about $50, but an actual aerator can cost closer to $200. For larger lawns, one of the best lawn aerators is a good investment, but these can also be rented once or twice a year to get the job done.
Time required: 1 to 2 hours
Difficulty: Beginner
Estimated cost: $45 to $450
Tools & Materials
Bobvila.com may earn a commission from purchases made through these links.
- Hand tool for digging (like a small spade or a hori hori knife)
- Dethatcher or dethatching rake
- Lawn rake
- Garden aerator
- Hose
- Sprinkler
- Nutrient-dense planting mix
- Grass seed
- Seed spreader (optional)
- All-purpose lawn fertilizer
Before You Begin…
Reseeding bare spots in a lawn doesn’t take a lot of fancy equipment or expensive supplies, but there are certain tools that are best for the most efficient and effective grass patch repair. The task is also not the most time-intensive; an afternoon should do the trick for the brunt of the labor. Be aware, though, that results likely won’t appear until about 6 weeks later, when the grass seeds finally grow in. Repairing bare spots in a lawn is a DIY task accessible to the average gardener with the right tools and guidance.
Tips for Repairing Bare Spots in a Lawn
- Having the right seed for the growing conditions is crucial. Consider factors such as grass seed for shade versus sun and warm-season versus cool-season grass seed.
- Lawn repair can happen anytime during the growing season, but the best time to repair lawn patches is as early as possible.
- A starter fertilizer can be used to help encourage faster growth, but caution is advised around existing grass: The high-nitrogen content of starter fertilizers can burn healthy grass.
- Watering should ideally occur in the early morning before the sun’s rays reach the grass.
STEP 1: Examine the lawn and identify the reason for patchy grass.
Look at the bare patches in the lawn and try to identify obvious signs of a cause. For example, excessive growth of mushrooms or slime may indicate a lawn fungus. Distinctive spots of yellow in an otherwise lush green lawn may indicate pet-urine damage. Consider taking additional steps to avoid worsening the problem, such as watering less often (if overwatering) and preventing pets from urinating on the lawn.
STEP 2: Rake the area and remove any debris.
Before applying any grass seed, be sure it’s easy for the grass to sprout and take root. If there is dead, brown, or yellowed grass, dig it out with a hand tool such as a hori-hori knife.
Next, remove any debris, such as large branches or stones, by hand. Then, dethatch the entire lawn with either a dethatching machine or a heavy-duty dethatching rake. Once you’ve removed larger debris, do a thorough raking of the entire lawn to further remove debris such as leaves, small sticks, and the detritus from the dethatching process.
STEP 3: Prep the soil.
Next, perform some aeration to be sure that the entire lawn, and especially the patches you are repairing, has adequate drainage. In the area you are patching, be sure to till the soil and double-check for any rocks or debris. The soil should be worked at least an inch to ensure young seeds will be able to take root. Consider performing a soil test to make sure that patches in the grass were not actually caused by improper pH and nutrient levels. If the test reveals significant deficiencies, then consider taking additional steps to change the pH and nutrient levels in the soil.
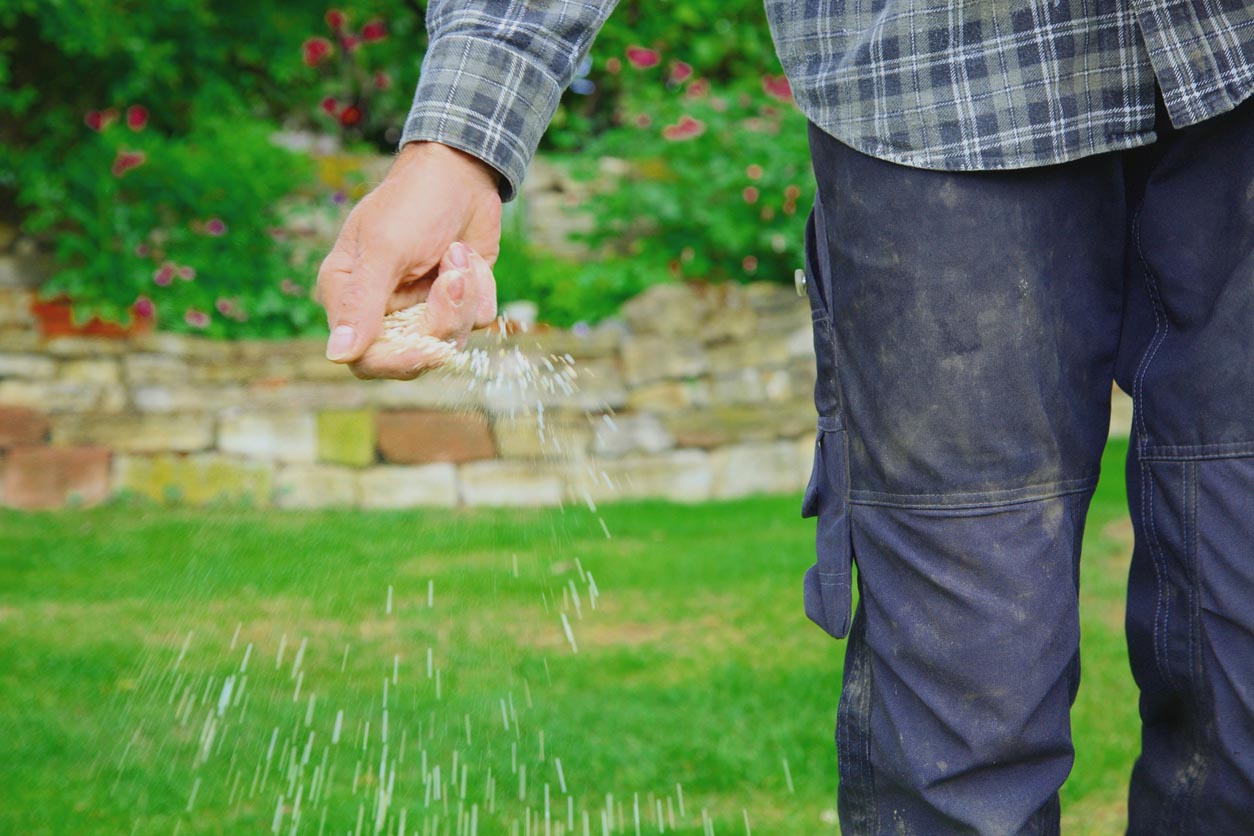
STEP 4: Scatter grass seed or lay sod over the bare spot.
Once the soil is prepped, it’s time to scatter the grass seeds. Using a seed spreader will give the most even results, but for smaller patches, hand seeding is perfectly acceptable. Grass planted from seed takes longer than grass planted from sod, but it will grow deeper roots and tends to cost significantly less. Plus, most grass seed is sold in bags that will more than cover the smaller areas you need to patch, which means there will be some on hand for future use. Finally, with grass seed there is a much lower risk of introducing diseases or pests to the garden due to the absence of thatch layer.
It’s worth noting that lawns can be patched using sod. While sod does provide faster coverage, it is not always the most economical or practical solution. Sod is typically sold in large rolls designed to cover more square footage and it doesn’t keep well; sod needs to be planted right away. For this reason, it can be an expensive solution to bare patches in a lawn. Installing sod is a labor-intensive project, making it not the most DIY-friendly option.
STEP 5: Top-dress and water the area.
Once the seeds have been spread, it’s a good idea to top-dress the repaired patches with a rich mix of equal parts soil, compost, and sand. Not only will this provide additional nutrients for the seeds as they grow, but it will help keep the seeds in place when gusts of winds come through.
After top-dressing any seeded areas, water well. Use light pressure or a sprinkler to make sure the area is evenly moist, but do not flood the areas—this will disrupt the seeds’ growth and cause them to settle unevenly or even float away. Be sure to keep the patches moist throughout the growing process. In the beginning, this will mean watering at least once a day (if local laws allow it). In some cases you may need to water twice a day to prevent the area from drying out too much. After about 2 weeks, the grass will begin to establish itself, which means you can cut back on watering to every other day—but use the weather as your guide: Hotter, drier stretches of time may require you to water at a higher frequency.
STEP 6: Limit traffic until new grass is established.
In order to allow the new grass to grow undisturbed, avoid food traffic on the patched areas. This may mean limiting access to the entire lawn in general. If you are able, mark the spots on the grass that have been repaired so that it’s easy to know where to provide water and spot checks.
STEP 7: Allow grass seedlings to solidly take root before mowing and applying products.
This step is a test of patience, as some types of grass seed can take 6 to 8 weeks to germinate. However, there are many varieties of grass that germinate much faster and reach a mature turf height within 5 to 6 weeks. Regardless of the type of grass you plant, wait until the new seedlings are at least one-third higher than the height of the existing grass before you mow.
When planting an entirely new lawn from seed or sod, starter fertilizer is commonly used. When patching grass, however, it’s best to wait until the grass has grown in completely, then apply an all-purpose lawn fertilizer to the entire lawn. Using a fertilizer for new grass can be tempting, but starter fertilizers contain higher amounts of nitrogen to stimulate growth, and this formula burns existing grass.
STEP 8: Maintain the lawn’s health by mowing and watering correctly for your grass type, choosing the right type of fertilizer, and more.
The secret to a truly lush and green lawn doesn’t end with patching the grass. The best things you can do for your lawn include establishing a regular lawn maintenance schedule that involves regular mowing, proper watering techniques, and using the right kind of fertilizer at the right time of the year. It’s also important to dethatch and rake as well as mulch, and regularly test your soil to make sure the lawn stays healthy. While this may seem like a lot of work, the reward is obvious: a beautiful lawn to call your own.
From troubleshooting the cause of those pesky bare patches in a lawn to using the right method for grass repair, following the steps above will put you well on your way to a healthy lawn. While it’s definitely possible to fix patchy lawns on a smaller budget, the biggest investment will be the sweat equity you put in. Just remember to have patience as you watch the grass grow!
DIY Lawn Care. Simplified.
Not sure where to start? Create a Smart Lawn Plan that’s tailored to your yard’s unique conditions and needs, or choose one of Sunday’s other top-tier lawn care, plant, pest control, or gardening products for a happy and healthy yard.
FAQs
When it comes to repairing patches in a lawn, there are a number of questions that come to mind. Here are some of the most frequently asked questions and their answers pertaining to fixing patchy lawns.
Q. How do I fill holes in the yard?
Fill holes in the yard by blending a planting mix with sand or compost. Be sure to do an even blend of planting soil and other materials, such as sand and compost, to create a rich, fertile place for grass seeds to grow.
Q. How do I get grass to grow in bare spots?
First, identify the problem and find out what is causing the bare spots in your lawn. Then follow the steps above for grass patch repair.
Q. Why do bare spots show up in my lawn?
Bare spots in a lawn have a number of potential causes, including poor soil conditions and lack of nutrients, improper watering, fungus, insects, animals, pet urine, erosion, chemical spills, and excessive foot traffic.
Q. Should I water my bare spots in my lawn?
When repairing lawn patches, any area that has been reseeded or repaired should be kept evenly moist until the seedlings have sprouted or the sod has taken root. How often you water will depend on the weather. Be sure to keep the areas consistently moist but not soggy, and be mindful of the rain and heat.
Q. Will bare spots go away on their own?
Whether or not your patchy lawn will repair itself depends on the type of grass. Grass that spreads with runners—either rhizomes, which are underground runners, or stolons, which are above-ground runners—grows laterally and is therefore more likely to spread out and fill in bare patches on a lawn. Some types of grass are clumping, and these types will not spread and cover any bare spots. This type of patchy grass will require reseeding for lawn patch repair.
Q. Are bare spots in the lawn sign of a disease?
Yes, bare spots in a lawn can be a sign of a disease, but they can also be the result of chemical spills, pet urine, insects, poor lawn maintenance, and incorrect watering, among other issues.
