
We may earn revenue from the products available on this page and participate in affiliate programs. Learn More ›
Around the home, you won’t frequently run into situations that require you to cut metal, but there are a few DIY projects that will have you facing this obstacle, and you need to know what to expect. Metal work can pop up when replacing or repairing HVAC ducts, restoring the metal flashing on a roof, or while preparing for a metal crafting project, such as building an outdoor shower or creating an accent wall.
No matter the project, the tools used for cutting metal and the material itself can cause a significant safety risk. To keep your project safe and successful, remember these six helpful tips, suggestions, and reminders.

1. Make sure you wear appropriate safety gear.
While this may seem like common sense, it happens all too often that a professional or an experienced DIYer gets comfortable enough working with the materials that they neglect their personal protective equipment (PPE). When cutting metal, you should be wearing gloves to protect your hands from the vibration and excess friction that can occur. You should also wear safety glasses to protect your eyes while providing clear visibility, and a face mask to guard against any stray fibers being blown around. Steel toe shoes are never a bad idea, and a simple set of earplugs will save you from hearing damage that begins to occur at just 85 dB. For reference, a miter saw or chop saw can be as loud as 100 dB. Don’t sacrifice your hearing for comfort, take precautions.
2. Choose the right blade for the right material.
To adequately cut through your desired material—and to avoid exposing yourself to chips, nicks, and other dangerous breaks that can send metal pieces flying across a workstation—it’s important to select the correct blade.
Cutting and grinding wheels are designated either ferrous or non-ferrous. Ferrous blades are ideal for cutting metals that contain iron, such as stainless steel or cast iron. Choose a non-ferrous blade when cutting softer metals, like aluminum or copper.
For the best results, use a diamond blade that’s rated to cut the type of metal you are working with. Their superior strength and hardness will help you make neater cuts, and your blade will last longer.
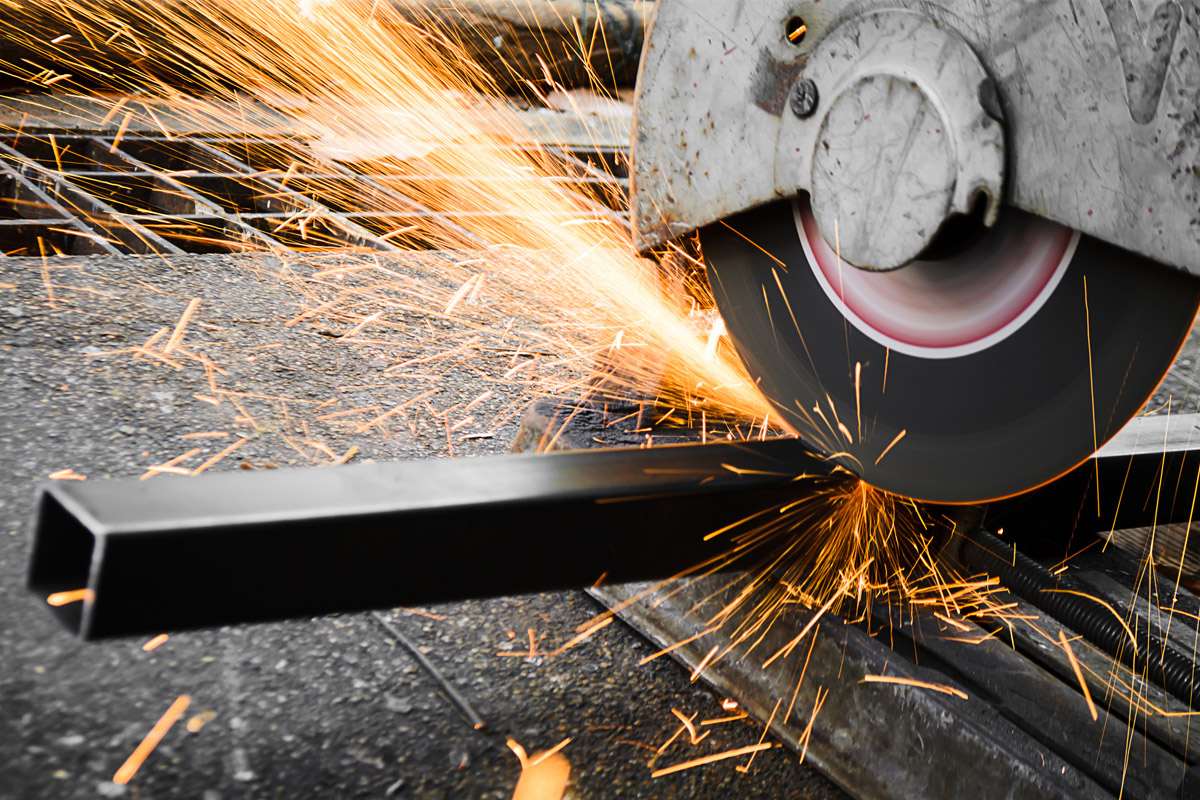
3. The chop saw is the DIYer’s best overall choice for cutting metal.
Cutting metal can be a tricky process, but it can be made easier by selecting the right tool for the job. While the chop saw doesn’t make the best option for working with large sheets of metal, it is the best overall tool in terms of setup, cutting time, stability, ease of use, portability, and the finish of the cut. Designed to cut carefully measured angles, you can easily adjust the blade to come down in a straight line, or on an angle of 45 degrees or less.
The base allows you to concentrate on the placement of the material for the perfect cut, instead of trying to position your hand correctly with a circular saw or grinder which can easily lead to mistakes. Its versatility allows the chop saw to sit on a workbench, or even the floor, to provide a fixed cutting area for your project.
Chop saws can be used with an abrasive blade, though these tend to wear down quickly and do not provide as good a finish as carbide-tipped blades. Carbide metal cutting blades come in a variety of sizes and types, including both ferrous and non-ferrous ratings. They cut down on sparks and debris, and generally last longer, though they do come with a higher price tag.
4. Choose the technique for quality results.
Each type of metal requires a slightly different technique to ensure that the material is held in place and is adequately supported, however, there is a basic formula that you must follow to get desired results.
- Before beginning, decide on the type of blade and type of tool you will be using. Choose a ferrous or non-ferrous blade depending on your metal, and a tool appropriate for the type and size of metal you are working with.
- Remember to wear your PPE during set up and while cleaning up to avoid accidents that can occur outside of the actual cut. Once you have chosen the correct tool for the job, measure your material and mark the area you want to cut with a shop pencil, or erasable marker.
- Lay your material down on a flat surface and fasten it with one or more clamps to ensure that it will not move. If using a chop saw, or any other stationary power tool, the metal should be lined up with the blade, prepared for you to begin cutting. If using a handheld tool, then you will need to find the best place to begin your cut. Carefully, check where the blade of your tool will cut on your material, and if you are confident that it lines up with the mark that you made previously, you can begin to cut the metal.
- Take your time and pay attention to the accuracy of the saw. Thicker materials will require a slower cut, so be careful about trying to push your blade through the metal too quickly. If you are free handing the cut with an angle grinder, jigsaw, or circular saw, accuracy will likely be your biggest problem. Provided you are using the correct blade, tool, and work area for your material, you can also better control the outcome of your project by remembering to cut slowly while ensuring the material does not move.

5. Know when portability is preferred.
While the chop saw comes out on top in almost every category, there are a few limits to its use. The first is the price and the second is the portability. Cutting metal pipe, or other long, narrow pieces of metal is simple with a chop saw, but if you are working with sheet metal, you will have a difficult time trying to run the entire width of the metal through a stationary chop saw. This is when the angle grinder comes into play.
Angle grinders are both cheaper and more portable than a chop saw. They can easily be held in your hand and are especially effective when they are used for cutting small, precise pieces out of larger material. Angle grinders can be fitted with either a grinding disc for thicker metal or a cutting disc. Just be sure that you have matched your ferrous disc to a ferrous material and non-ferrous disc to a non-ferrous material.
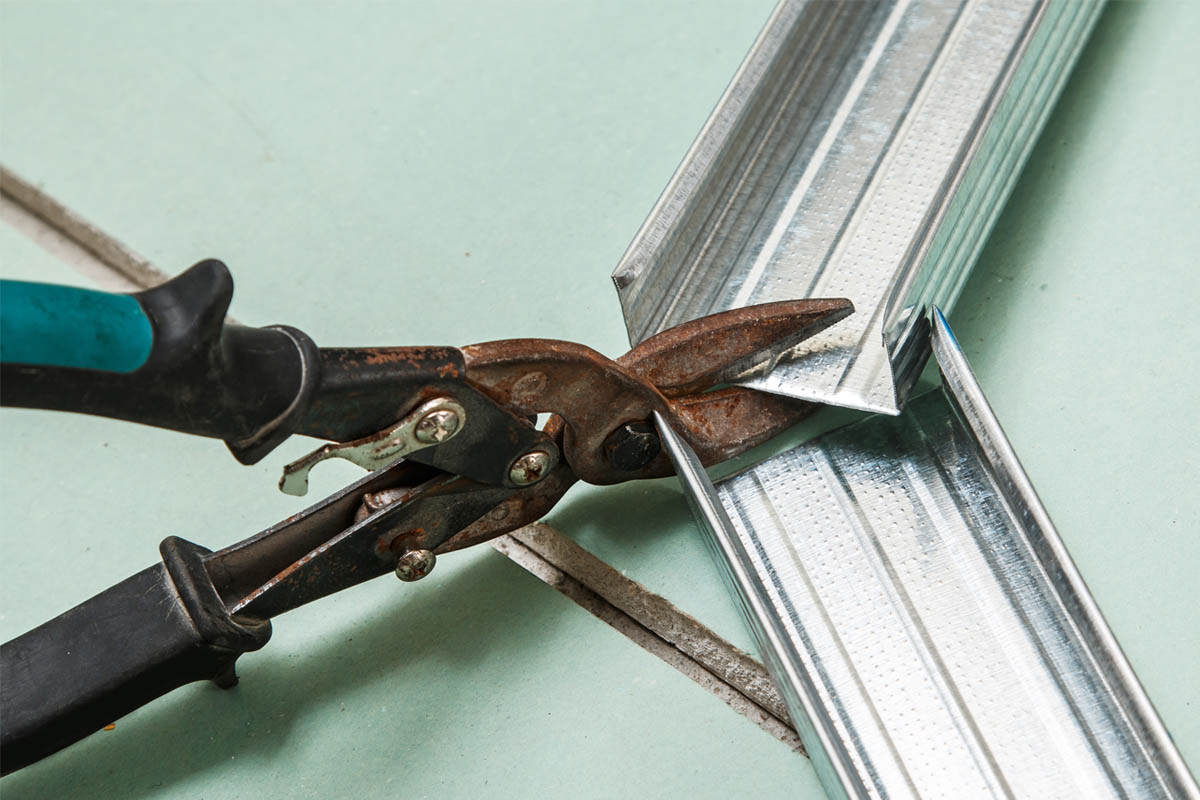
6. Select the right manual metal cutting tools.
For the DIYer that may be looking for a one-time alternative that won’t empty your wallet, a manual approach to cutting metal may be better. The best manual metal cutting tools you are going to find are the tin snips (for sheet metal) and the hacksaw (for cut-off duties on pipe, tube, angle, etc.).
Tin snips resemble scissors and work in much the same way. They are durable, inexpensive, and easy to use, making them the perfect choice for any DIYer working with sheet metal. However, these handy tools are not great at cutting metals thicker than 18-gauge. This is where the hacksaw comes in.
Hacksaws are amazing for getting into tight spaces, cutting metal on weird angles, and working on pre-existing materials that can’t be laid on a workbench. When they are fitted with a metal cutting blade, they can be used on steel, aluminum, copper, and almost any other metal. They are inexpensive and simple to use, but the main tradeoff that comes with almost any manual tool is the amount of effort you will need to put into using them. Expect to put in a workout if you are using a hacksaw for an extended period of time.
