We may earn revenue from the products available on this page and participate in affiliate programs. Learn More ›
Instead of trying to decorate a blank wall with pictures and other decor, consider creating a modern wood accent wall that can elevate a space by adding drama and dimension to the room. While many feature wall ideas can require a sizable budget, keen carpentry skills, and long hours of work, this DIY accent wall design does not.
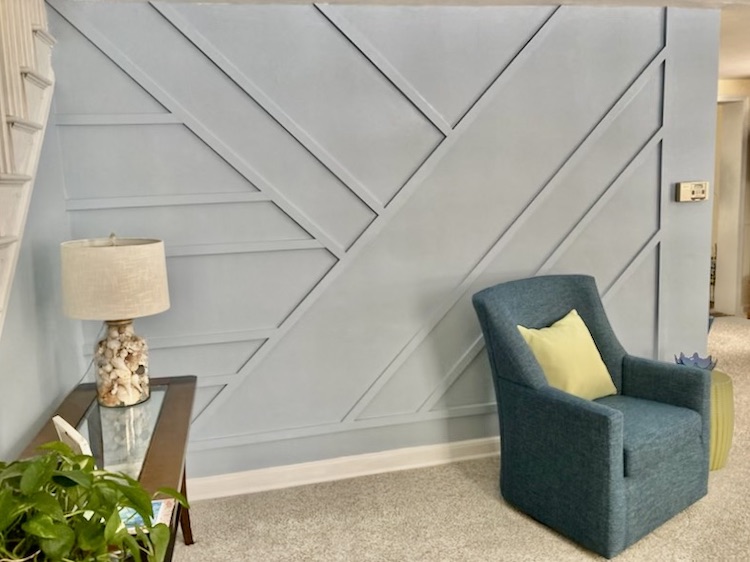
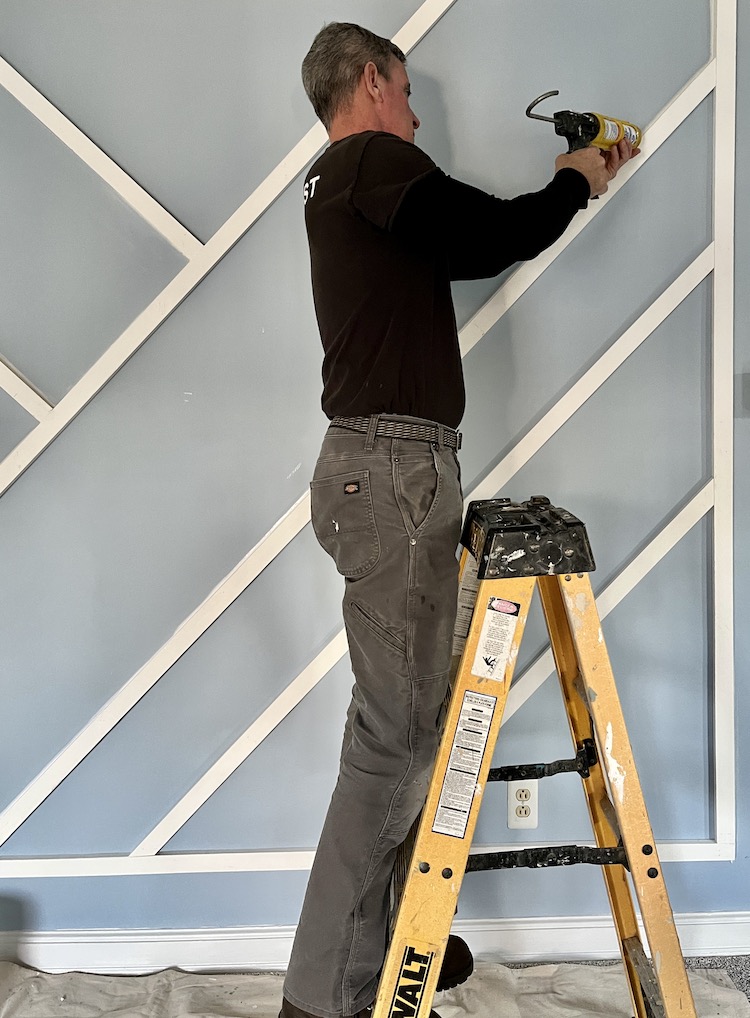
This feature wall is a pleasing array of 1×2 boards with a somewhat random spacing radiating across the wall surface thanks to its 90-degree and 45-degree direction changes. It’s an easy project for anyone with basic DIY skills, and (assuming you have most of the tools required) an inexpensive way to add some detail, texture, and shadow lines to a vacant wall.
Tools & Materials
Bobvila.com may earn a commission from purchases made through these links.
- 1×2 finger joint primed pine
- Step ladder
- Table saw
- Random orbit sander
- Jointer
- Level
- Miter saw
- Brad nailer
BEFORE YOU BEGIN
The wood used to create this feature wall effect is, nominally, 1×2. However, some retailers are destocking certain materials, material lengths, and other SKUs that (until recently) were baseline products. There were 1×2 boards on the shelf, but they were much more expensive PVC and not the more budget-friendly FJP (finger joint primed pine). MDF is another option for this project.
To get the 1x2x10 boards necessary for this project, they had to be purchased as 1x4x16, cut down in the store for transport, and milled on site into 1×2. A dedicated lumber yard will likely have these items in stock, but it’s always best to call first.
How to Resize the Boards
Resizing lumber is often required when doing custom trim projects, so we’ll briefly walk through how to cut the wood to size. To get a nominal 1×2 (1 11/16 inches shown here), rip a 1×4 in half on a table saw. While 3 1/2 inches divided by 2 is 1 3/4 inches, the blade’s 1/8-inch thickness comes out of the center, leaving each piece 1 11/16 inches.
Alas, the best way to make hard-to-see saw marks more visible in a freshly cut piece of wood is with paint. The pieces can also be sanded out with a random orbit sander, or by hand if you don’t have a sander. Use 80, 100, and 120-grit papers consecutively to get a smooth finish.
Pro Tip: To remove those saw marks so each edge of the lumber is as smooth as possible, run it on a jointer if you have one.
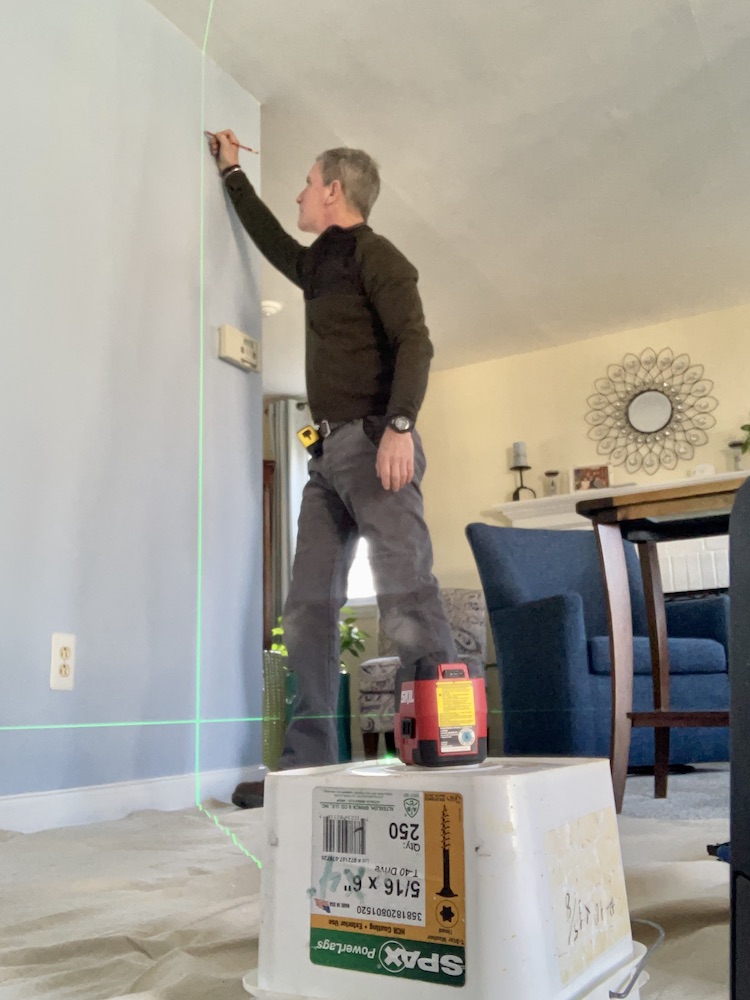
STEP 1: Use a level to lay out the first horizontal piece on the wall.
The key to this design is also part of its aesthetic. The bottom leg (level) and the right side leg (plumb) both look good and serve a purpose. Because there is nothing on the bottom or right hand side to terminate the molding into, those boards must be put in place first.
Using a handheld level or laser level, establish a level line. Look for obstructions like vents, thermostats, outlets, switches, or other fixtures that might obstruct the pieces’ locations. To avoid crowding the base molding, place the level piece an inch or two higher. Space these pieces similarly away from light switches or other obstacles on the vertical leg, and leave a couple of inches of space to avoid crowding.
STEP 2: Fasten the first horizontal piece.
After the placement of the horizontal piece is determined, cut a 1×2 to length on a miter saw. Then, fasten the cut piece in place on the wall with a brad nailer and 2-inch brad nails.
It can’t hurt to locate the studs on a wall clad with drywall–especially for hand nails–but isn’t required on plasterboard or plaster. Pneumatically driven 2-inch brads bite hard enough into any cladding, and they leave a small head to fill later. Securing the boards with two brads every 16 inches or so is a good rule of thumb.
For walls that do have hollows in them, pressing the piece into the hollow can help close the gap and minimize the need for caulking later.
Tip: If working alone, drive a scratch awl or screw just above the level line to serve as a holder. Fasten the loose end, and then remove the awl or screw. Next, place the piece on the line and fasten. Lastly, nail the rest of the board, spacing the brads about 16 inches apart.
Related: The 25 Smartest and Smallest DIYs You Can Do for Your Home
STEP 3: Use a level to lay out the first vertical piece on the wall.
With the level leg fastened in place with brads, install the plumb piece. No need for a miter here —use a butt joint. It is important that these pieces are level and plumb, regardless of whether the floor and wall are level and plumb. This is because these two pieces need to form a 90-degree angle such that the miters in the next step close nicely.
Tip: Wall surfaces that appear to be flat can undulate considerably, especially older plaster and plasterboard walls (like the wall in the below photo). Before fastening completely, make sure the material is actually right on the plumb line.
STEP 4: Install the first diagonal piece.
After the first horizontal and vertical pieces are attached, it’s time to cut and install the first large diagonal board. This piece has miters on both ends, so make sure to measure, mark, and cut the 1×2 using the tip-to-tip distance as the reference point.
The first diagonal (array) piece installed on this feature wall is about 32 inches long, from long point to long point of the 45-degree miters on each end. The criterion for making sure that this piece is installed “correctly” is that the miters close up in the corners—they should butt the bottom and right leg nice and flush.
Related: 30 DIY Home Projects Absolutely Anyone Can Do
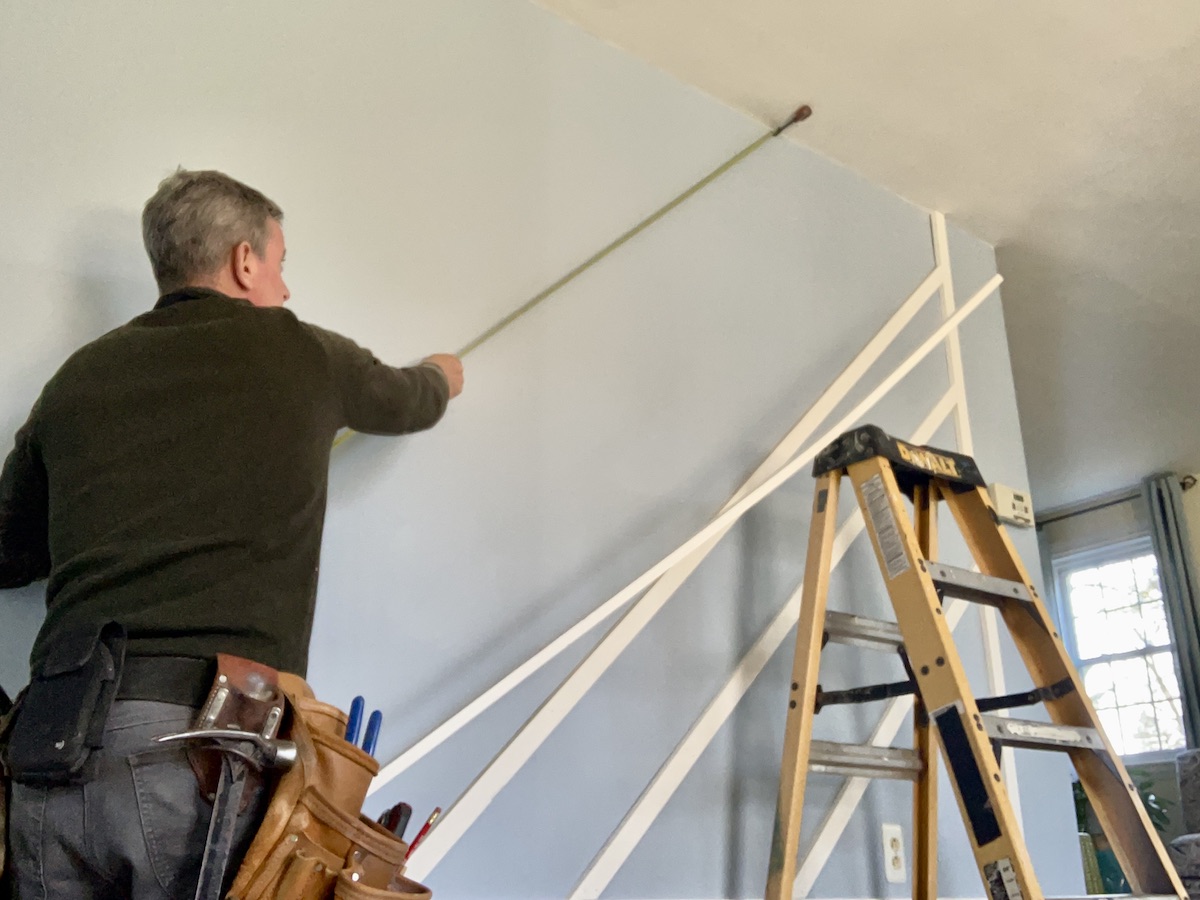
STEP 5: Check that each diagonal piece runs parallel.
As each array piece is installed, check that the boards are parallel with the others. To ascertain this, use a tape measure or framing square to measure at a right angle from the previous piece to where the next piece goes. Measure along the pieces at three locations. If all three measurements are the same, then the pieces are parallel. It can be quite helpful if someone else holds the tape measure or square, especially when working on larger walls.
Tip: When measuring alone, setting a screw or scratch awl between the wall and ceiling can serve as a place to hook a tape measure.
There are no real guiding “rules” here in terms of spacing or placement of the array pieces, other than one’s sense of proportion. It can be helpful to scan the internet for images of a feature wall that will work in the space and use that as a baseline or guide.
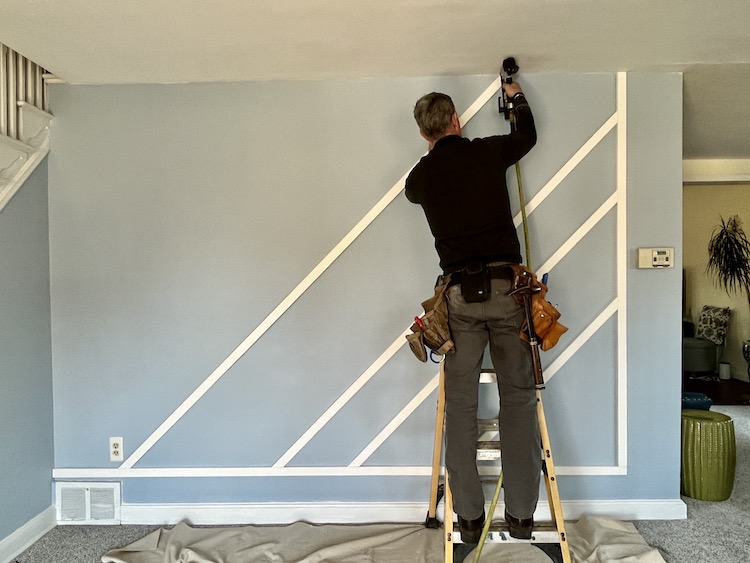
STEP 6: Array the rest of the pieces.
All of the pieces up to the center board run from the bottom left to the top right. The center piece is where the array changes direction, at which point the pieces run bottom right to the top left.
Upon making this transition, use a speed square to double check that the pieces are running square to the center piece. This is easy to do by setting a layout square on the point where the boards connect. This ensures that subsequent pieces will be as parallel as possible to one another and prevents oddball angles from entering the picture.
It’s important to do the same right-angle check for the level pieces. However, instead of using a square to check, use a torpedo level.
STEP 7: Caulk, fill nail holes, and paint the wall.
The last steps for this wood accent wall are the finishing touches. First, run a bead of caulk along the edges of the wood pieces, where the wood meets the wall. Make sure to smooth the caulk with a wet finger (water or rubbing alcohol work fine).
While the caulk is curing, fill the nail holes along the tops of the wood pieces with wood filler. After the wood filler is dry, either sand it smooth with a sanding sponge or use a damp cloth to wipe the surface smooth. Next, prime the wall, and then paint it. Painting the wood strips the same color as the wall provides a modern dimensional look to this statement wall.
Tip: “Sanding” wood filler with a damp cloth works just as well as sanding with a sanding sponge, but it produces zero dust.
Final Thoughts
Using an array of 1×2 boards spaced in a somewhat random yet pleasing position relative to one another is a fun, budget-friendly way to transform a blank wall that merely exists into a modern accent wall. Build this feature wood accent wall without breaking the bank or requiring lots of finicky finish work. Requiring typical tools that experienced DIYers regularly use, this project is also good practice for taking on other DIY trim jobs around the house.
Related: 26 Insanely Easy Home Improvements You Can Do in 1 Hour
