We may earn revenue from the products available on this page and participate in affiliate programs. Learn More ›
You’ve no doubt heard the carpentry proverb “Measure twice, cut once” and may even have made it a mantra for your own projects. But unless you know how to use a tape measure and correctly read its markings, your best efforts can be slightly off—and, unfortunately, any amount of “off” just won’t do. What’s more, this seemingly one-note tool can actually be used for tasks besides simply measuring the length between point A and point B. This guide explains how to use a tape measure properly, including how to measure the inside width of a bookshelf to how to draw a perfect circle.
Reading a Tape Measure
Plenty of DIYers (and even some experienced professional carpenters) may not be aware of all of the information contained on a retractable metal tape measure. Discover the parts and measurement increments you’ll find on a tape measure.
Locate the housing, tang, lock, and blade.

- Housing: The plastic or metal housing holds the tape. It can act as a quick measuring tool in itself by using the base of the housing to measure short distances (the length of the housing appears on its base for easy reference).
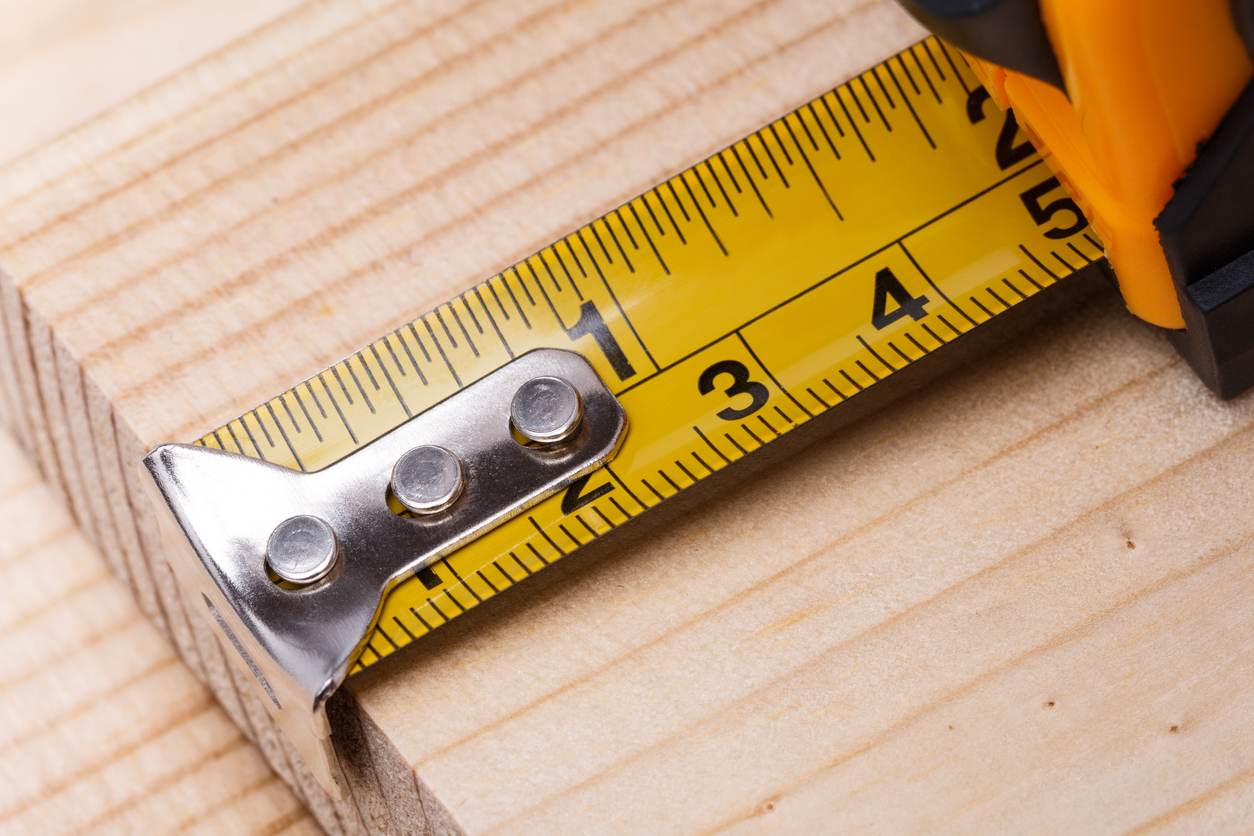
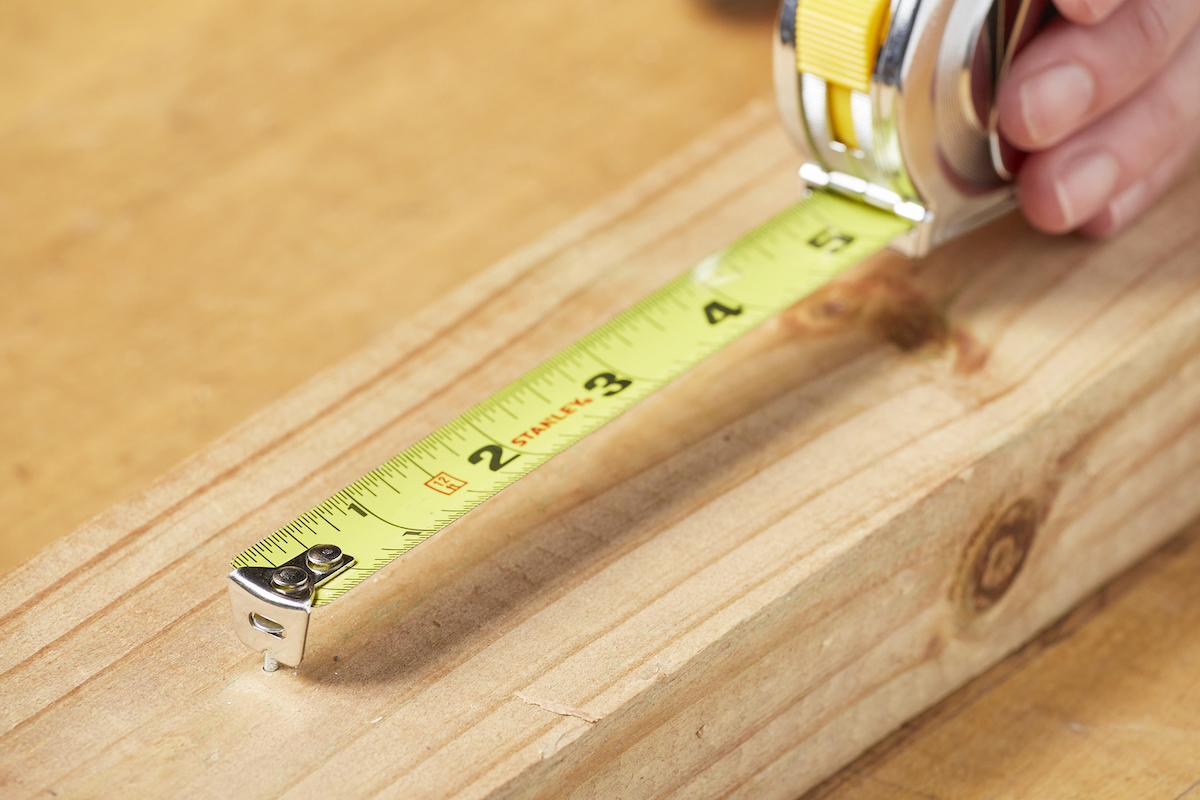
- Tang: The metal clip at the end of the tape, also known as the clip or hook. When reading the tape measure, the tang indicates zero.
- Lock: The button on the front of the housing locks the tape in place when pressed, preventing the tape from being pulled out further or retracting.
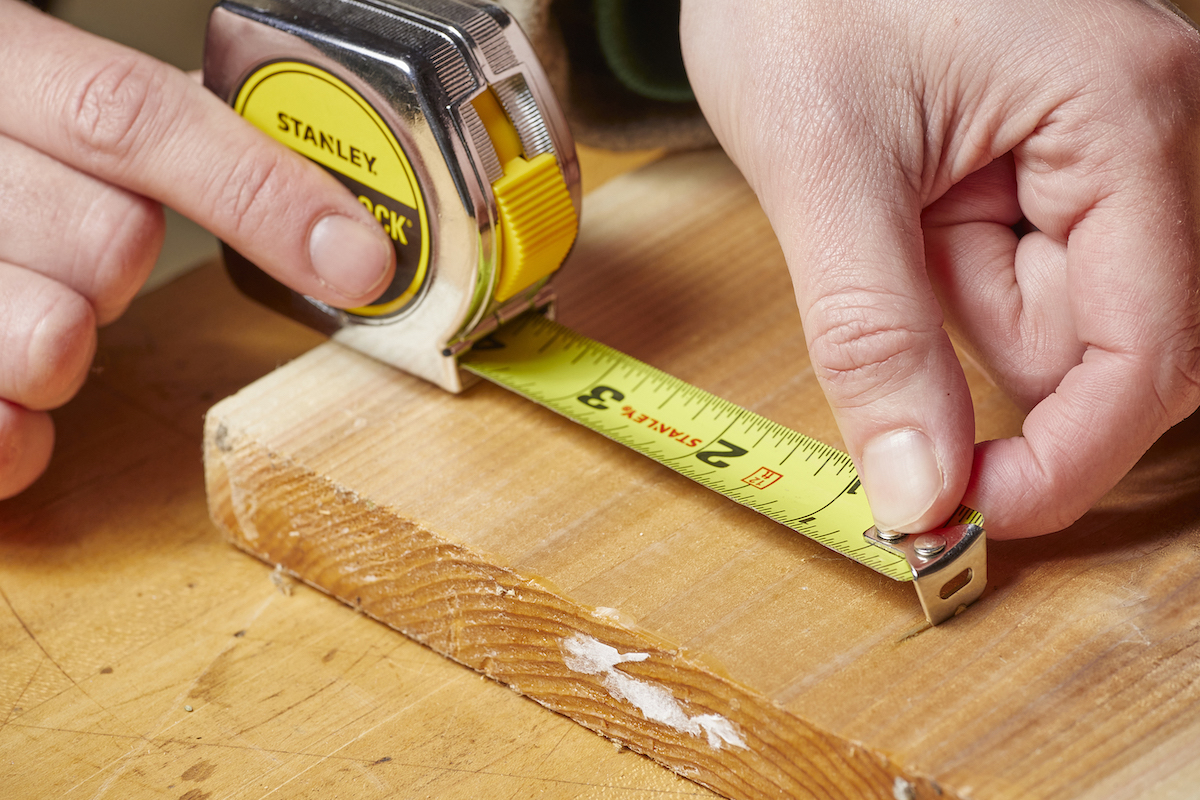
- Blade: The technical term for the tape itself, the blade is used by pulling the tang, stretching the across the distance to be measured, and reading the numbers and symbols on the face of the blade.
Read a tape measure’s incremental marks for the imperial system.
In the United States, the imperial measurement system is normally used on a tape measure, though some models may have both the imperial and the metric system. A tape measure with both inches and centimeters usually has the imperial measurements in red on the top of the blade, while the metric measurements are in black on the bottom of the blade.
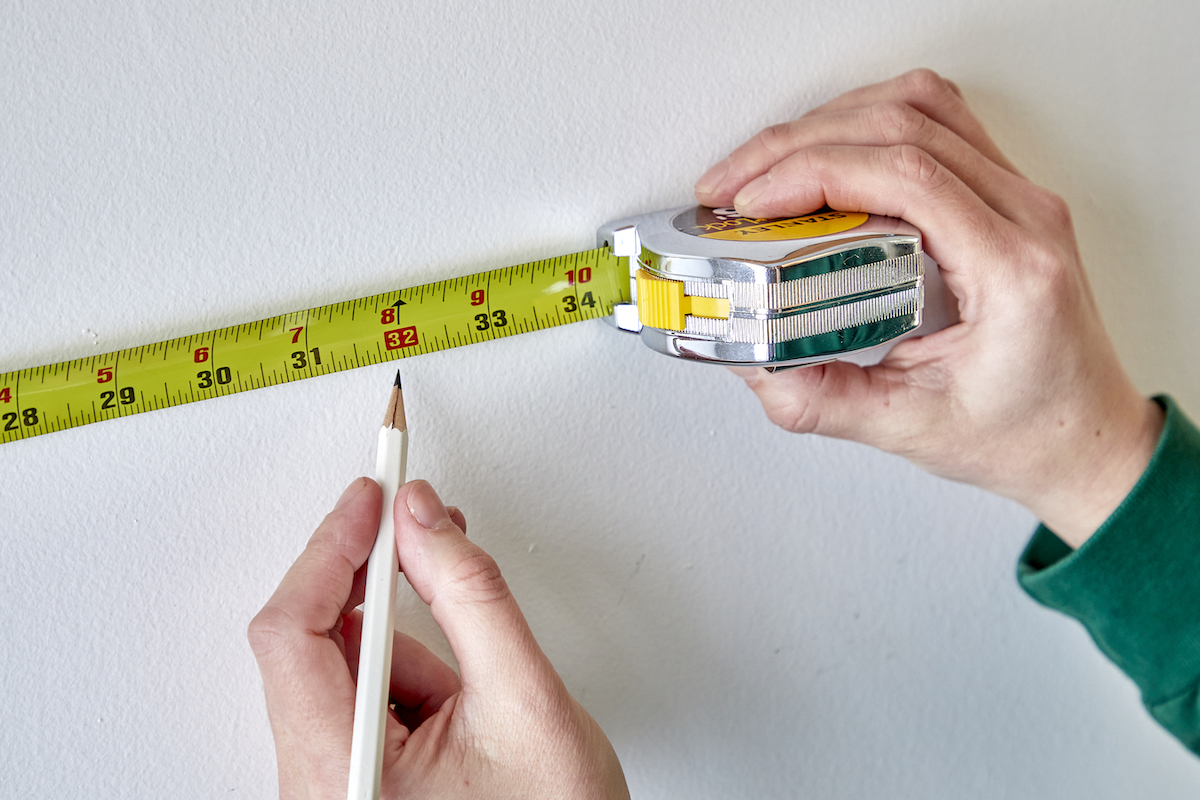
- Foot or 1’: The foot measurement shows up on the 12th inch and is written as 1F. This measurement is normally in a black box with a small triangle or arrow pointing to the inch line that it falls on. Example: 1F=1’, 2F=2’, 3F=3’
- Inch or 1”: The inch measurement is the longest vertical line on the imperial half of the blade. This line is indicated by a large number sitting to the left of the line. Example: 1=1”, 2=2”, 3=3”
- Half or ½”: The second longest line is the half inch measurement. Some measuring tapes only show the line as a measurement indicator, while others will show the line and the fractional representation of the measurement. Example: ½=1/2”
- Quarter or ¼”: The mid-size line is the third longest and the third shortest on the typical tape measure. This line measures a quarter inch. It may also be indicated with a fractional representation, similar to the half inch. Example ¼=1/4”, ¾=3/4”
- Eighth or 1/8”: The second shortest line on the imperial measurements is listed as an eighth of an inch. This line may also be indicated by a fractional representation. Example: 1/8=1/8”, 3/8=3/8”, 5/8=5/8”
- Sixteenth or 1/16”: The shortest line on the imperial measurements indicates a 16th of an inch and doesn’t normally have a fractional representation.
Read a tape measure’s incremental marks for the metric system.
- Meter or 1m: The 1-meter marking is located at the 1/100 centimeter marking or 10th decimeter marking. It is indicated by a 1m. On some tape measures, the centimeters will begin at one following the meter marking. Example: 1m=1m
- Decimeter or 1dm: The 1-decimeter marking is normally shown at a red numeral of 10. This measurement is located at every 10th centimeter line. Example: 10=1dm, 20=2dm, 30=3dm
- Centimeter or 1cm: This measurement is indicated by the longest line on the metric side of the blade and a large number. This measurement can be found at every 10th millimeter marking. Example: 1=1cm, 2=2cm, 3=3cm
- Millimeter or 1mm: The smallest metric measurement on the blade is the millimeter. It is not indicated by a number or fraction, but simply by the smallest line on the metric side of the blade, with every fifth millimeter line being slightly longer to indicate the halfway point between centimeters.
Understand these important additional measurements.
- Stud measurements: Red squares every 16 inches indicate on-center wall stud spacing. So if, for example, you’re installing baseboard trim, you can lay the measuring tape across the wall and use the red squares to locate the studs behind the drywall. Keep in mind that the second stud in a wall is installed 16 inches from the end of the wall, not from the center of the first stud.
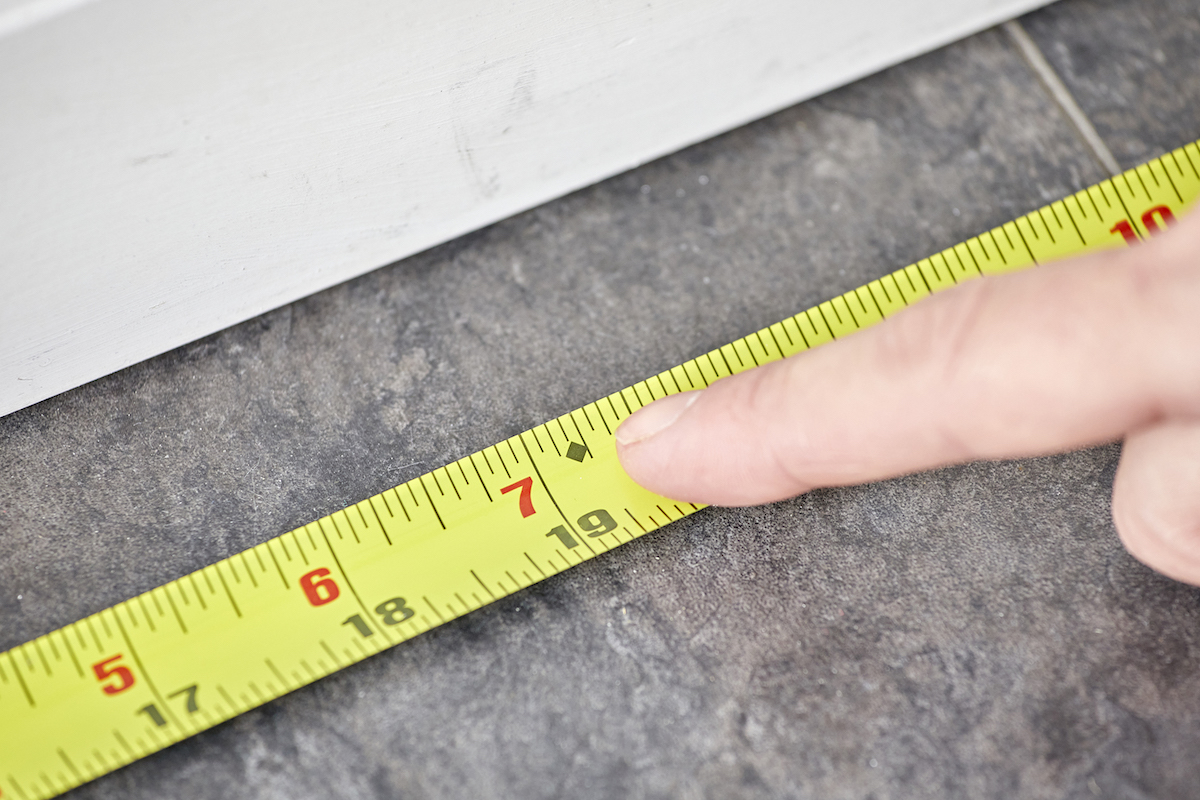
- Joist measurement: Black diamonds located every 19 3/16 inches indicate on-center joist spacing. This lets you quickly identify joists without using a stud finder, helpful when nailing floorboards.
Using a Tape Measure
Follow these directions for how to use a tape measure effectively.
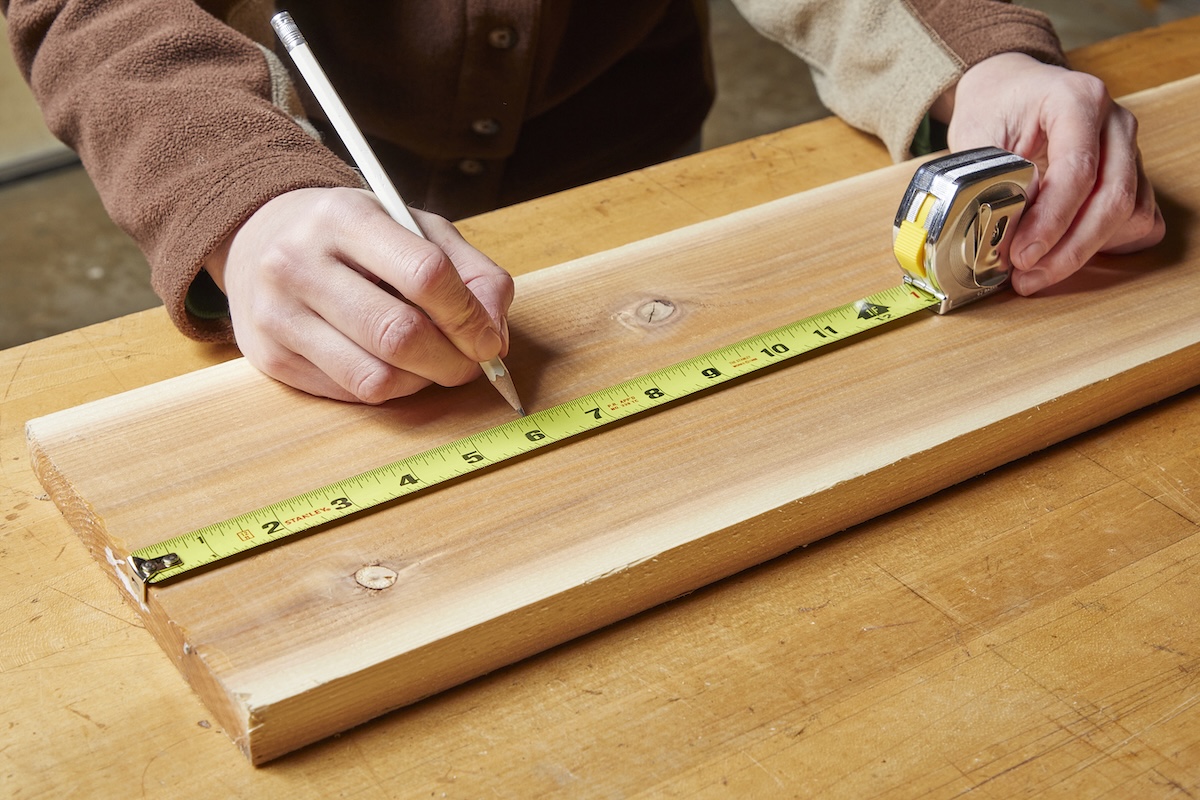
To use a tape measure, pull the tang out from the housing and hook it on the edge of the object to be measured. Stretch the blade across the object, press the lock, and then observe where the blade meets the end of the object. The nearest line on the blade to the end of the object is the final measurement. Once you have noted it, unhook the tang, holding the blade with your hand so that its recoil won’t cause injury, then press the lock to release the blade. Slowly allow the blade to return to the housing.
The true zero hook feature will keep measurements accurate.
The first inch on a tape measure is actually short by 1/16 inch, because the metal on the tang is exactly 1/16 of an inch. So for measurements taken from the inside edge of an object, such as measuring the length of a wall from corner to corner, the tang slides back against the blade and the metal of the tang is added to account for the “missing” 1/16 of an inch.
However, this would leave you 1/16 inch short for objects that are measured from the outside edge, such as a deck board. To account for this, the tang slides out 1/16 inch when it is hooked onto an object, allowing the true measurement to be taken. Always ensure that the tang is fully extended when hooked onto an edge.
Round up to err on the side of larger.
When reading a tape measure, the edge of the object may fall between two lines on the blade. To avoid cutting too short, always round up to the larger measurement. At worst, you will need to measure and cut again, but that is far better than wasting a piece of material that’s 1/16 of an inch too short for your needs.
Use the housing for inside measurements instead of bending the tape.

It’s a common mistake when taking inside measurements (such as the inside width of a bookshelf) to pull the blade out further than necessary and then bend it to fit against one side of the object while the tang is pushed against the other side. Bending the tape can lead to an estimate instead of an exact measurement. Instead, sit the base of the tape measure against one side of the object to be measured. Pull the tang out and hold it to the other side of the bookshelf. Take the reading from the tape and add it to the length of the housing (noted on its base) to get an accurate reading. This practice also prevents the tape from being bent repeatedly, which causes damage and premature wear.
The curve of the blade improves tape rigidity.
Tape measure blades are slightly concave to increase the blade’s rigidity when in use. This curve lets the blade be pulled out further without losing stiffness, helping take longer measurements with more accuracy.
Use the serrated scribing tool at the end of the blade when a pencil is not at hand.
The dull serrated edge on the end of the tang can also be used as a marker. If you don’t have a pencil or marking tool handy, run the serrated edge back and forth across the material being measured to mark the spot.
Don’t mistake the nail and screw grab for a simple hole in the tang.
The tang also has a small hole in the end, just above the serrated edge, specifically designed to be hooked onto a nail or screw, which is very helpful when measuring a flat surface and working without a partner. Simply insert a nail or screw to the side of the surface, grab the head of the fastener with the hole of the tang, and pull out the blade to take a quick, accurate measurement.
Use a tape measure to draw a perfect circle.

The hole in the tang can also be used to make perfect circles, great if you’re crafting a lazy Susan, or round tabletop:
- Insert a nail or screw in the middle of the material to be measured, then hook the tang to the head.
- Pull the blade out to the desired radius (half the diameter of the circle) and press the lock.
- Using a pencil, mark the initial measurement and keep the tip of the pencil sitting lightly on the surface of the material at this point.
- Rotate the tape measure a full 360 degrees, keeping the tang firmly attached to the head of the nail or screw.
- Complete the rotation and you have a perfect circle.
