
We may earn revenue from the products available on this page and participate in affiliate programs. Learn More ›
Marble—a white or uniquely variegated type of limestone that has been exposed to extreme heat and pressure—has a long history of being favored by artisans and builders, from Michelangelo’s David and Moses sculptures to The Taj Mahal. So it’s no wonder that marble in the modern home is both prized and expensive. Its natural beauty, depth of pattern, and unique markings make it an elegant, luxurious choice for flooring, countertops, tabletops, and vanities.
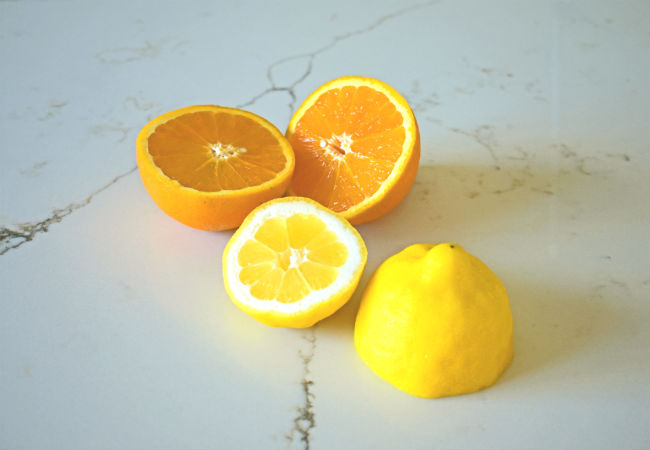
However, soft and porous marble counters have their downsides, and chief among them is their tendency to stain or etch. The latter problem, etching, refers to dulled spots that sometimes appear pitted and feel slightly rough to the touch. These may occur after exposure to acidic or highly colored foods (red wine, tomatoes, vinegar, and citrus) and even acidic or abrasive cleaning products. While a matte marble finish can minimize the appearance of imperfections, the glossy finish that most homeowners prefer on their countertops often shows off every etch and stain.
Still, the beauty of marble—and the value it adds to your kitchen or bathroom—makes it worth a bit of extra trouble. When your marble surfaces have lost their shine, the following procedures will bring back the glory of this classic stone.
Before You Begin
Before tackling the cleaning and shining of your marble counters, it helps to understand the two different marble finishes before you fruitlessly try to restore a shine to one that’s not designed to be glossy.
- Honed marble has been sanded to create a velvety finish—not quite matte, but definitely not shiny. Less slippery than polished marble, honed marble is very well suited for floors. Some homeowners also prefer honed marble for their countertops, as it’s less likely to scratch than polished marble and hides etching better than a shiny surface.
- Still, polished marble is the more common choice for the kitchen countertops or table inlays. The less porous option, this finish won’t stain as easily as honed marble might and does not demand the same frequency of sealing. Plus, its shine offers a semi-reflective surface that is both attractive and helps to make a small kitchen appear larger than its footprint.
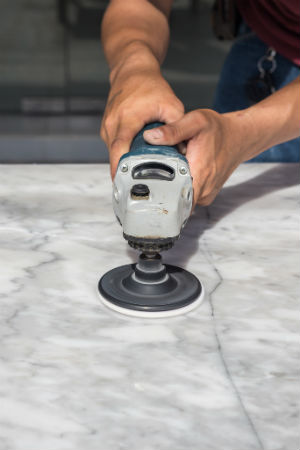
While it is possible to transform a polished marble counter into a honed surface, or vice versa, the project requires skill and experience and special equipment—in other words, it’s best to leave this job to a professional with a stone polishing machine. If you’re looking to restore shine to your polished marble counter or tabletop, though, you can do so with these accessible supplies and steps.
Tools & Materials
Bobvila.com may earn a commission from purchases made through these links.
- Commercial marble cleaner
- Mild dishwashing liquid
- Ammonia
- Hydrogen peroxide
- Baking soda
- Marble polishing powder
How to Polish Marble
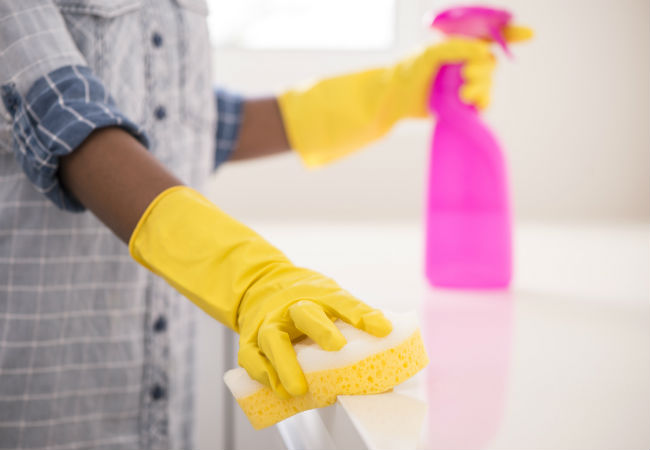
STEP 1: Start with a clean slate: Brush off crumb and dust particles, spray with a mild cleanser, and wipe.
The first step to restoring your marble’s shine is to clean them. Of course, you probably whisk away crumbs regularly and quickly wipe up any spills or splatters, but when it’s time to really polish up your marble’s finish, you’ll go a little deeper than that.
Wipe your marble with a soft dry rag to remove dust and crumbs, then wet the surface with a damp sponge. Next, apply a manufacturer-approved commercial marble cleaner or, alternatively, add a couple of drops of mild, nonabrasive dishwashing liquid to your damp rag to use as a cleaner. Whichever you choose, distribute the cleaner across the marble, buffing away any spots of food or other debris.
NOTE: Never use vinegar, bleach, scrubs, or other harsh chemicals to clean your polished marble. Doing so can etch the polish, leaving you with dulled spots.
RELATED: 10 Ways You’re Accidentally Ruining Your Countertops
Use a clean, damp rag, wipe the cleaner off the marble. Dry with a chamois or an unused microfiber cloth.
STEP 2: Remove stains with a commercial or homemade poultice left to sit overnight.
If your marble counters have discolorations left behind by food or other household items, you’ll need to treat them before moving on to polishing. While there are commercial marble stain removers—often called poultices—you can also make your own by slowly mixing one tablespoon of ammonia into a half-cup of hydrogen peroxide and slowly adding just enough baking soda to make a thick, creamy texture.
Now, spread the poultice over any stained areas using a clean paintbrush and cover with plastic wrap (edges taped down). Leave the poultice in place for 12 to 24 hours, after which you can remove the plastic wrap and leave to dry out completely.
Carefully scrape the crumbly poultice away with a razor blade without gouging or digging at the marble surface. Clean away any remaining poultice residue with a damp cloth, and then wipe the marble dry.
STEP 3: Buff out etching with a polishing powder.
While very severe etching requires a professional’s touch, you can often remove minor etching from acidic foods and cleansers yourself with a polishing powder from any old home improvement centers (just be sure to check with the marble manufacturer on which they recommend). Wipe the etched areas with a water-dampened cloth, and sprinkle a small amount of marble polishing powder onto the etched spots. Gently buff the powder into the blemishes with your damp cloth according to the product’s instructions. Follow with a clean, damp rag to remove the powder residue, then wipe the marble dry to reveal its restored shine.

STEP 4: Seal the marble for shine and resistance to future staining and etching.
While sealing won’t completely prevent staining, this act will help your marble resist major stains and boost its glossiness. Generally, you should seal your marble counters at least twice per year, although performing the task each season will keep your counters looking their best. Consult your countertop’s manufacturer for product and application recommendations specific to your marble.
Read the directions on your marble sealer carefully, and apply as directed. Most specialty marble sealers (available from the manufacturer and at home improvement centers) spray or pour directly onto the marble’s surface. Spread the sealer across the entire marble countertop with a clean, dry cloth and let the sealer soak into the marble for the length of time specified on the product’s container (typically less than five minutes).
Use another clean, dry cloth to buff the sealer into the marble, using circular motions. Continue to buff the marble until the sealer is completely soaked into the stone, and the marble feels dry. If the surface has a tacky or sticky feel, continue to buff until the marble is smooth to the touch, and has a high level of shine.
