

We may earn revenue from the products available on this page and participate in affiliate programs. Learn More ›
Are your neighbors so close that it feels like you practically share a backyard? There’s no need to fence off your property! In fact, we may have an even easier solution that defines your outdoor space, establishes privacy, and even creates some extra shade in an otherwise sunny garden. Simply follow our step-by-step and you can build yourself a suitable privacy screen and canopy—all out of less than a dozen wooden planks.
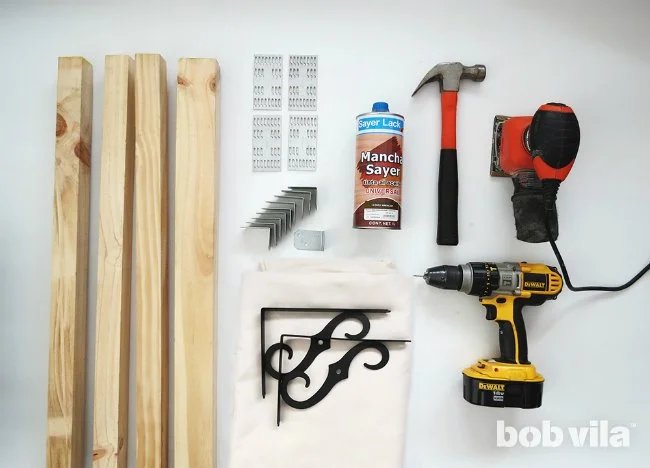
MATERIALS AND TOOLS
– 8-foot-long 2×4 lumber (6)
– 8-foot-long 2×2 lumber (5)
– Measuring tape
– Pencil
– 2-inch metal brackets (16)
– 3-1⁄2-inch screws (44)
– 1-1⁄2-inch screws (98)
– 12-inch ornamental brackets (8)
– Cordless drill/driver
– Wood tie plates (8)
– Palm sander
– Brush
– Exterior wood stain
– Varnish (optional)
– Outdoor fabric (2-1⁄2 yards by 8 yards)
– Ribbon (2 yards)
– Sewing machine (optional)
STEP 1
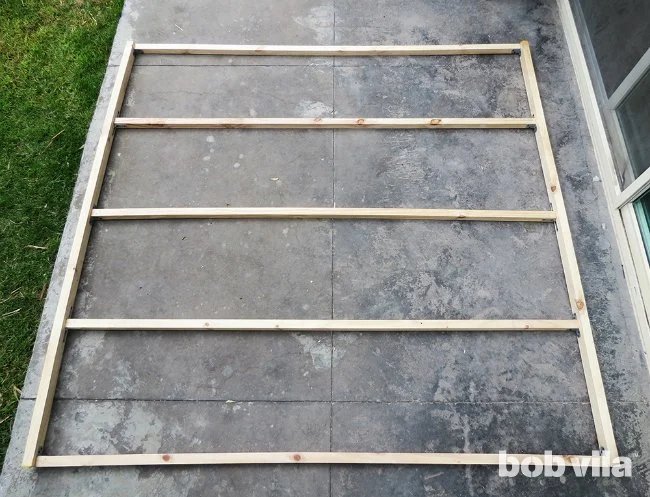
Let’s start by making the roof out of five 8-foot pieces of the 2×2 lumber and two 8-foot pieces of 2×4. For easiest assembly, find a flat surface large enough to accommodate the finished 8-foot-square DIY outdoor privacy screen.
Place the two 2×4 lumber parallel so that 3-1⁄2-inch sides (remember, a 2×4 isn’t exactly 2 inches by 4 inches) face one another and the narrow 1-1⁄2-inch sides lie flat against the ground; separate them by 8 feet. Then, set the five 2×2s perpendicularly in that open space—these will connect the 2×4s. Check against a measuring tape to ensure that you space them equidistantly, leaving 2 feet between each. Position a 2-inch metal bracket inside the corner of each rectangle you’ve created.
STEP 2
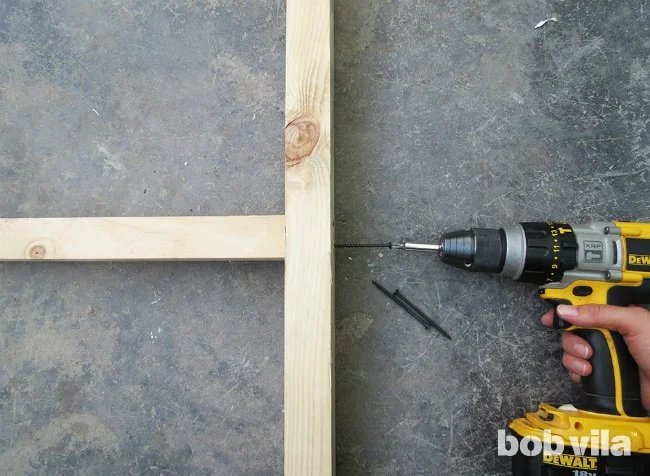
Take note of how, laid out on the flat surface, the 2×2 lengths are about two inches shorter than the 2×4s on either end—that’s not a mistake! Keeping the bottoms flush will ensure the positioning is the same at every intersection and that your roof doesn’t inadvertently end up crooked.
Where each end of a 2×2 meets with a 2×4 wood plank, fasten using two 3-1⁄2-inch screws. (Tip: Whenever you’ll be inserting screws in this project, first drill pilot holes in order to help guide the fasteners and prevent the wood from splitting in the process.)
Work your way down one length of 2×4 and then repeat along the other to build the top of your DIY outdoor privacy screen.
STEP 3
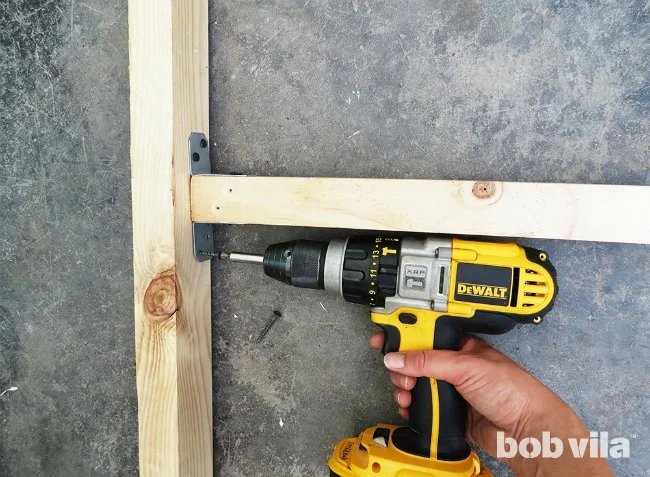
Screw 2-inch metal brackets at every intersection of lumber. Two brackets (which use four 1-1⁄2-inch screws apiece) will secure both sides of every 2×2 end, except at the outer corners where you can only place one.
STEP 4
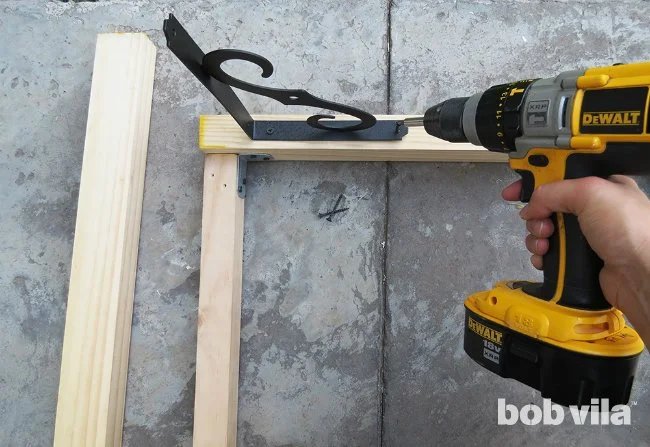
The four remaining 2×4 planks will make the DIY prviacy screen’s legs. Cut a foot from each length so that they’re only 7-feet tall. (You can get this done at a big box hardware store at the time of purchase, or saw them off yourself at home.)
Then, while the roof is still laying on the floor, prepare to attach the legs to it using eight 12-inch ornamental brackets, or two in each of the structure’s corners.
• Start by attaching the ornamental brackets to the roof’s 2×4s. Pencil a mark 3-1⁄2 inches from the end of one of the 2×4s in order to leave enough space for a leg. Position one bracket so that its corner aligns with your pencil mark (the decorative part will face the opposite end), and attach using 3-1⁄2-inch screws. Repeat at the opposite end of this length, then complete the second 2×4 in the same manner.
• Next, place the remaining 12-inch brackets at the ends of the outermost 2×2s; they’ll be perpendicular to the ones already installed. Push each right to where the 2×2 intersects the 2×4, and use 1-1⁄2-inch screws to fasten to the roof lumber.
STEP 5
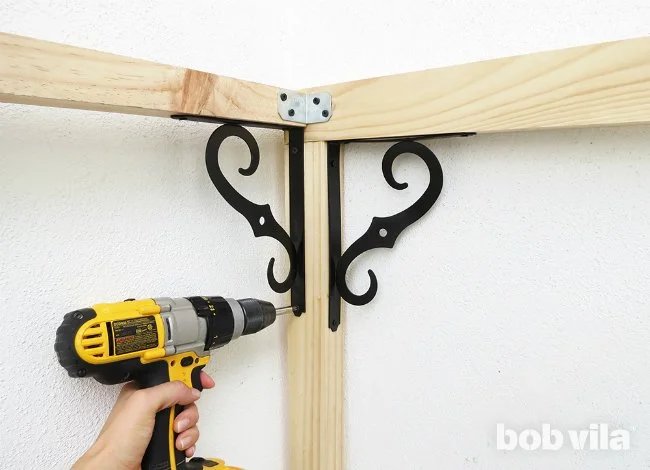
Now, you will need help of at least two strong friends for this step. Raise the roof structure and flip it so that the ornamental brackets face down. Ask your assistants to hold the roof structure while you attach the exposed halves of the brackets to the four legs with 1-1⁄2-inch screws. (The lumber should fit neatly in the space you left for each leg in Step 4.)
STEP 6
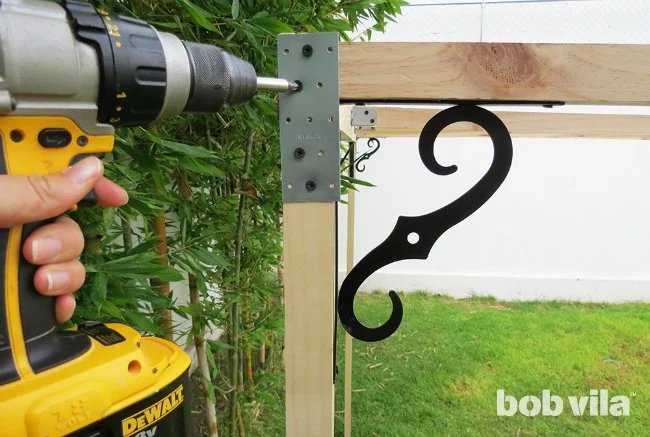
Reinforce the structure where the roof and the legs meet by screwing 2-inch by 4-inch wood tie plates over the outside of each corner, one on each side. If you can use an L-shaped tie plate, even better!
STEP 7
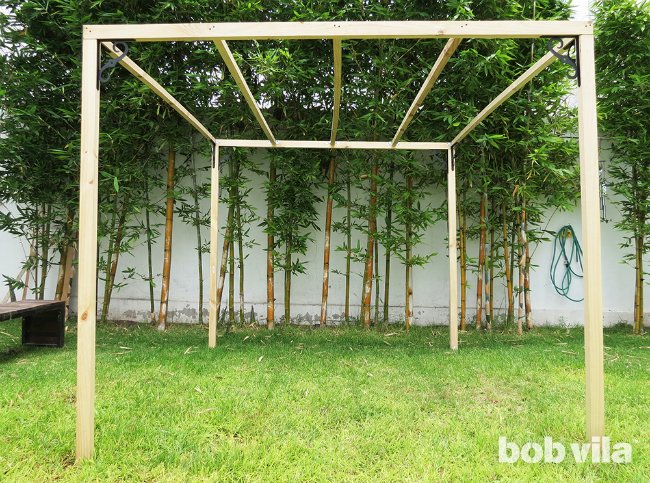
Congratulations! You’ve just built the bulk of your DIY outdoor privacy screen, and you’ll be sitting shaded from sun and neighbors soon enough. Round up your friends, and—each one taking a foot—move the soon-to-be shelter to its destination in your yard.
STEP 8
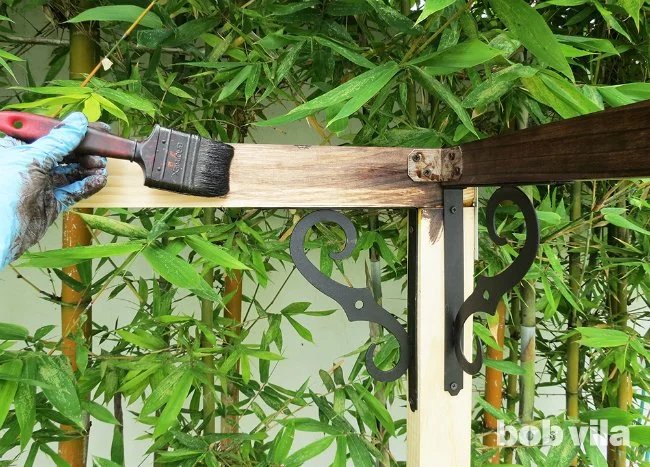
Sand the entire structure, then apply a coat of exterior wood stain in the direction of the grain. The brush you use to do so will depend on your stain of choice: Work with a natural-bristle brush for oil stains and a synthetic-bristle brush for latex stains. Stir the stain periodically so that the color remains well mixed as you apply it to the large structure. Then, leave the wood to dry for the product’s recommended amount of time (likely 24 hours).
If you don’t have a specially formulated exterior wood stain to help weatherproof your backyard project, you can choose a standard stain followed by at least two coats of varnish to protect it over the outdoor season.
STEP 9
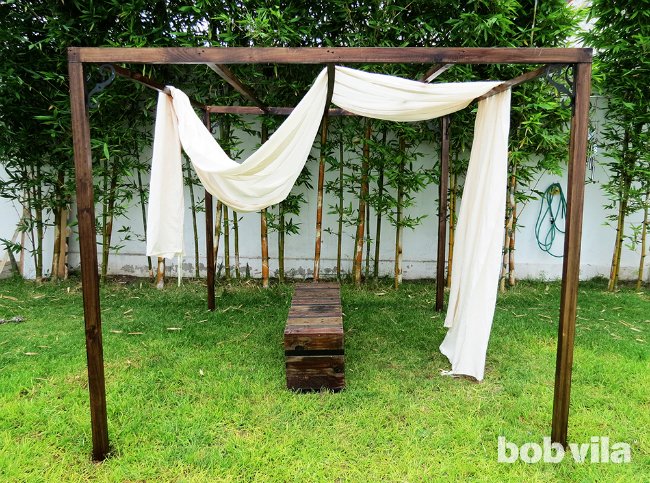
In order to cover not only the sides of our backyard privacy screen but also shade the top, we purchased a piece of fabric that was 2-1⁄2 yards wide by 8 yards long. A simple cotton fabric works well, but outdoor fabric—resistant to fading, stains, and mildew—is even better for this sort of use.
Sew a small, 1⁄2-inch seam all along the fabric edges to avoid fraying. (If you don’t own a sewing machine, check if your fabric store might for a small fee.) While you’re at it, attach a 20-inch ribbon at each corner to tie down the fabric around your canopy’s feet.
STEP 10
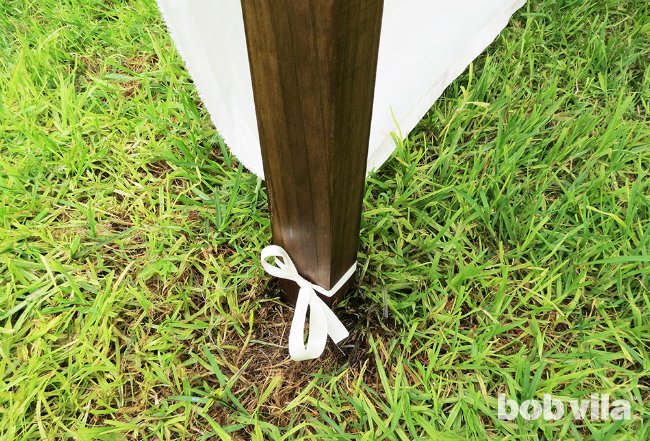
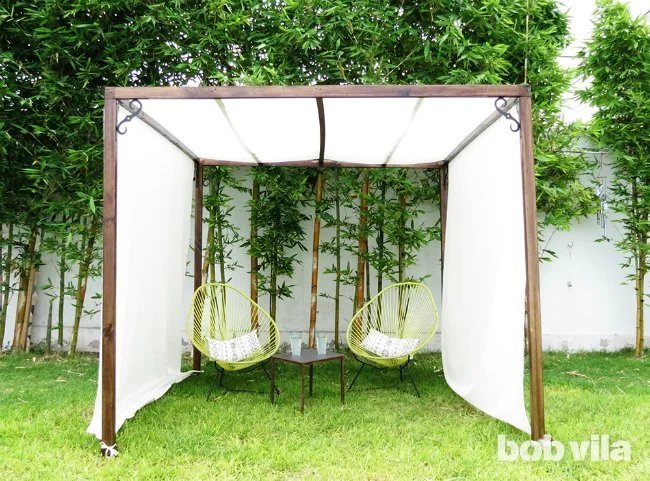
Finally, attach the canopy by weaving it through the 2×2s in the structure’s roof (over one, under the next, and so on). Drop the fabric on the sides and make a knot with the ribbon around each foot to hold the shade in place. With that, your private outdoor room awaits! And whenever you want to invite a large party of guests over to admire your latest backyard addition, simply raise one fabric side and tie it to a tree to increase the shaded area. (Trust us, you’ll want to invite the guests over.)

Ama is a DIY addict and the creative mind behind Ohoh Blog. She likes home decor, lighting, and furniture projects that may involve painting, sewing, drilling…no matter the technique! Whatever she has on hand is inspiration to create, and fodder for her serious addiction to upcycling.
