We may earn revenue from the products available on this page and participate in affiliate programs. Learn More ›
Crafty Coasters
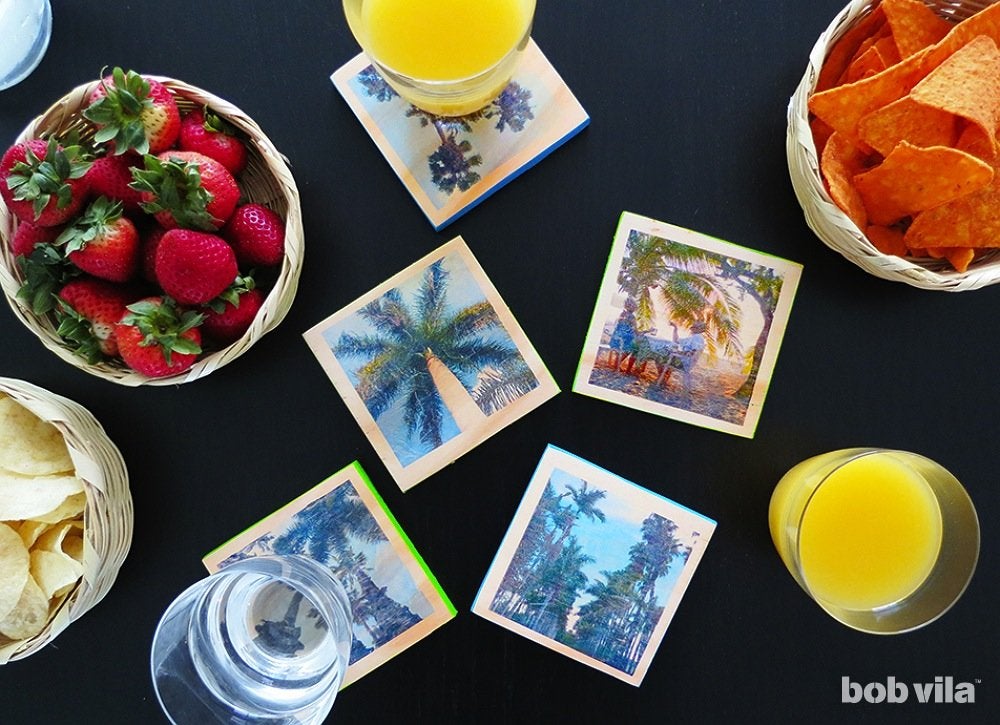
Ohoh Blog for bobvila.com
This project is a sure-fire way to test out your DIY skills. Craft a personalized set of coasters that transform favorite photos into tiny home accents using little more than scrap wood, paint, wax paper, and a printer. Get started with this simple
step-by-step guide.
Removable Light Fixtures
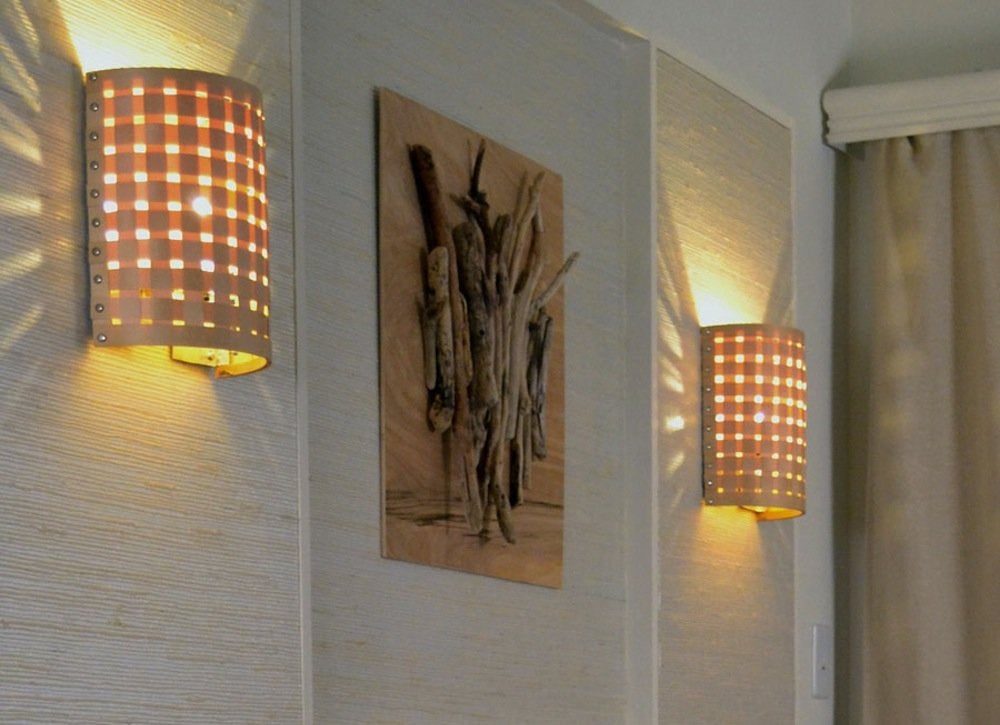
Engineer Your Space for bobvila.com
You don’t need to be an electrician to revamp your home’s lighting scheme. In fact, this homemade wall sconce couldn’t be easier and requires no more than an afternoon to complete. Commitment-phobes and renters will love that it can be mounted without leaving holes in the wall, and novice crafters will appreciate the easy-to-follow instructions. Head on over to Bob Vila Academy for a step-by-step video tutorial.
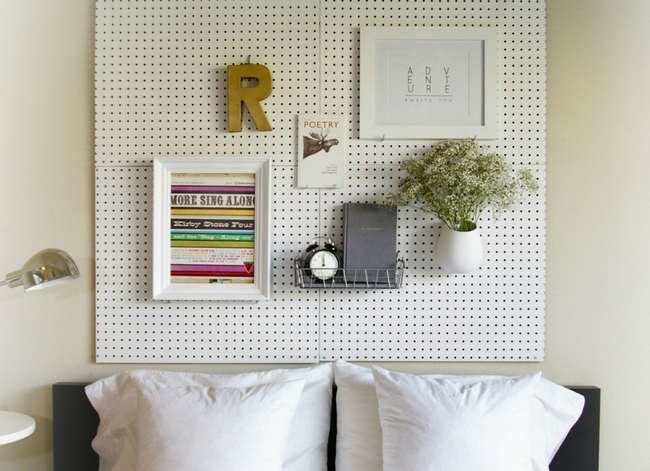
Pegboard Headboard
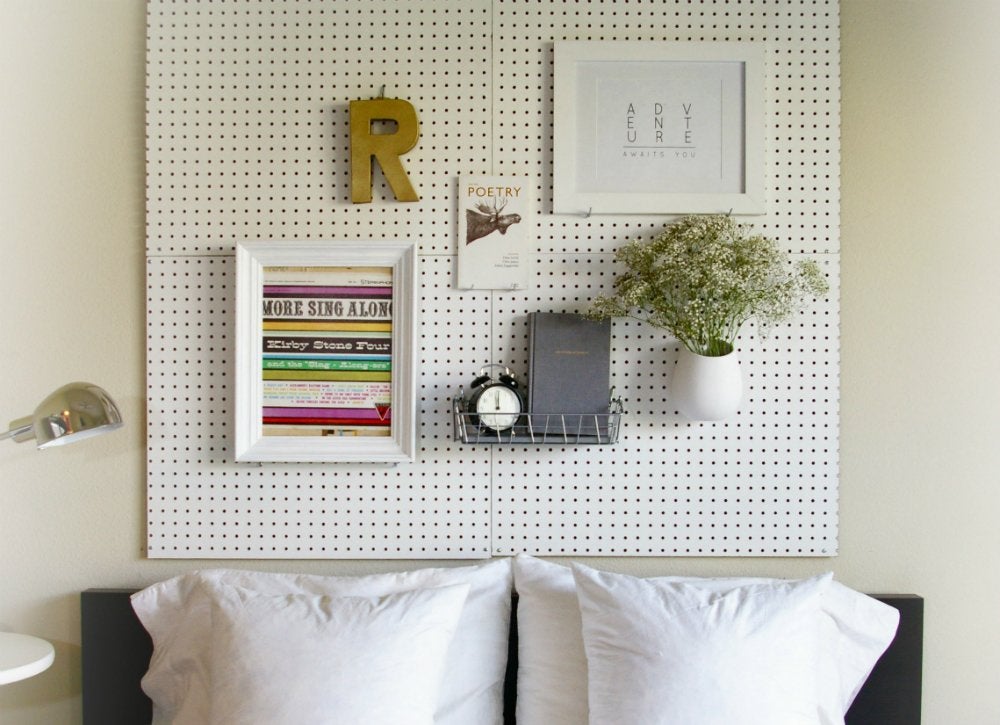
Pegboard is the perfect material for DIY experiments, as this stylish, functional, and amazingly simple headboard proves. Not only are the sections of pegboard easy to paint and mount, they’re also ideal for personalization, leaving you free to rearrange baskets, picture frames, and other decorative accents as your tastes and DIY skills grow.
Spray-Paint…Anything!
There’s a reason your Pinterest feed is overrun with spray-paint projects—a few coats of this hardware-store staple can achieve practically effortless, pro-quality results in no time flat. Available in countless colors and in an expanding variety of finishes, spray paint offers a no-fail path to a successful DIY project.
Try it out on something small like a vintage vase, or on a larger-scale item like an old piece of furniture.
Simple Shadowbox
Take your wall art to the next level with minimal effort. You can give large, ornate frames the shadowbox treatment with 1×4 boards, and turn a selection of your possessions into a stunning visual display. Just use wood glue and a nail gun to join medium-density fiberboard together into a box the same size as the opening of your frame, and then glue the box to the frame. Fill the shadowbox with cherished mementos or tchotchkes, then hang it up to spotlight your collection.
Rope Rug
Rugs can be an expensive purchase, so why not minimize cost (and maximize style) by making your own? Gather a few feet of rope and your trusty glue gun to craft this beautiful, sinuous floor covering yourself. You’ll love how it livens up your decor, and knowing that you were the creative mastermind behind the project will make it that much more valuable.
Refinished Furniture

JNoonan for bobvila.com
If you have an old dresser or coffee table that no longer suits your decor, try refinishing it to match your current style. Strip the piece down, then apply a stain that will transform the piece, leaving it better than new. If you want to take your DIY skills up a notch, consider building a new tabletop from a stash of 2x4s and staining them a few different, complementary shades for a stunning, entirely custom result.
Blooming Box
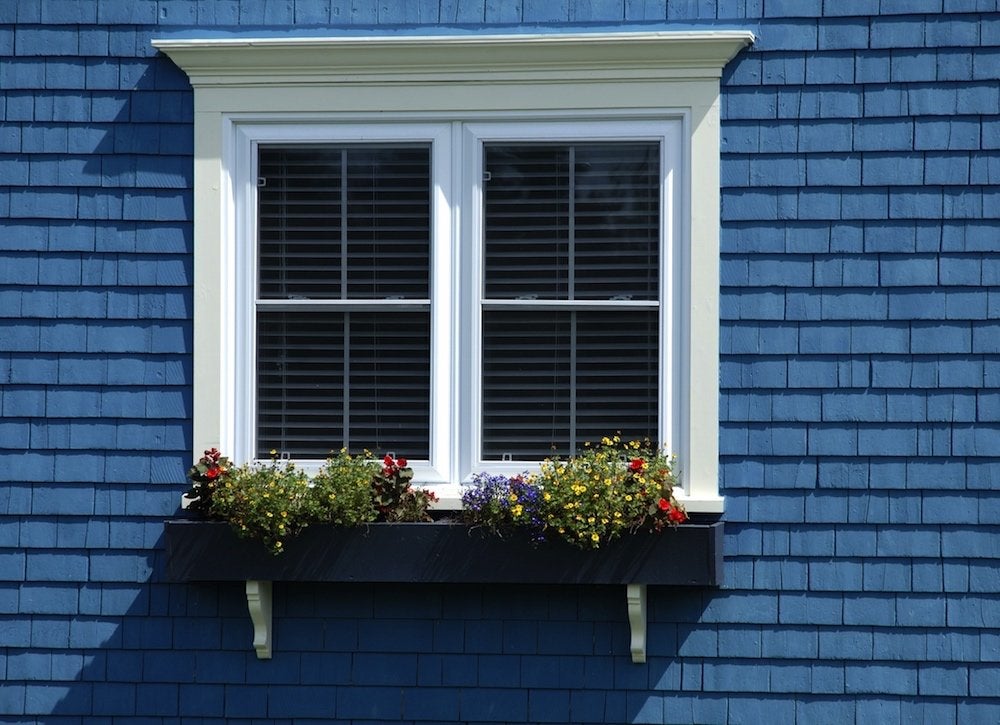
Overflowing with colorful plants, window boxes add life and visual interest to a home’s exterior, significantly boosting curb appeal. But apart from their aesthetic virtues, there’s yet another reason to love window boxes: They provide a wonderful introduction to the rewarding world of woodworking. With tools no more sophisticated than a miter box and power drill, you can bring the garden to your windowsill and learn a few basic skills along the way.
Pricey-Looking Plant Stand
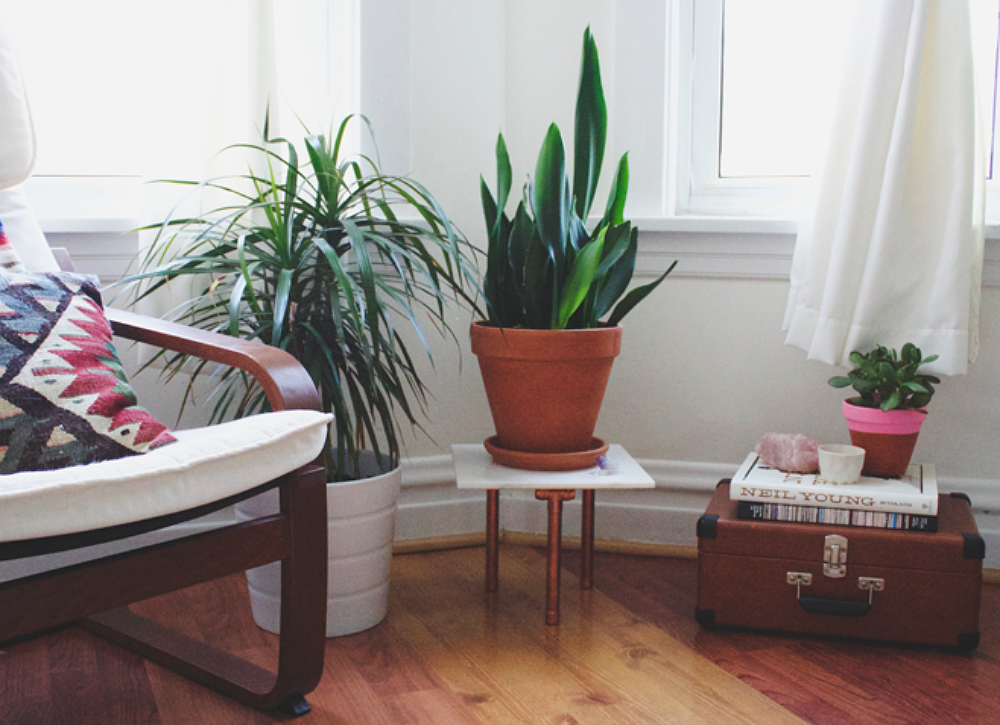
Just because you can’t afford marble countertops doesn’t mean you can’t incorporate the look of this luxe stone in other places throughout your home. A few inexpensive materials and an afternoon are all you need to build your own version of this charming plant stand that adds a modern accent to any room. Try it today!
