
We may earn revenue from the products available on this page and participate in affiliate programs. Learn More ›
Like most home cooks, you probably love whipping up meals but hate cleaning up afterwards. If you neglect tidying up your trusty electric stove top, however, the leftover grime, grease, and dirt will build up and harden over time—and trying to chip it off could damage the coils and the surface. Fortunately, electric stove tops are easier to clean than their gas-fueled counterparts, plus you needn’t worry about clogging the igniter. Glass-topped versions respond to a quick swipe with a dish soap-soaked rag and a baking soda scrub. One with metal-coiled burners require a bit more attention—especially if it’s been a while since you’ve tackled it—so we’ve outlined the best way to go about it. You’ll be done in no time and ready to try out a new recipe, no matter how messy it might be.
Tools & Materials
Bobvila.com may earn a commission from purchases made through these links.

Step 1
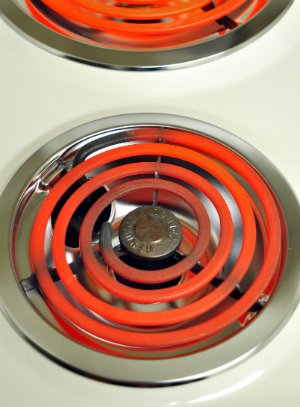
Electric stove tops are designed to be self-cleaning. To banish spills, first wipe gently with a clean, lint-free cloth damp with water (an old T-shirt works great!). Then remove all cookware from the stove, turn burners to high, and leave them on for two to three minutes. The high heat will burn off most of the mess. When the stove top has completely cooled, wipe off any remaining residue with a fresh cloth.
Step 2
Next, remove the burner coils from the socket with a quick tug and lift motion. If they don’t come out easily, refer to the cooktop user manual for removal tips. (Don’t despair if you can find it, since most manuals are available online. Simply search with the stove’s make and model number.)
Step 3
Soak a dishrag in a solution of warm water and dish soap. Squeeze out excess and gently scrub the burners, taking care to avoid wetting the socket—it is electric, after all! Follow with a swipe of a clean, moist, lint-free rag to rinse. If your burners look spic and span, go to Step 5. If not, continue to Step 4.
Step 4
Still confronted with crud? Mix 1/2 cup baking soda with 3 to 4 tablespoons of water to create a thick, spreadable paste. Coat the burners with this gentle scouring agent and give it up to 20 minutes “dwell time.” Then moisten a clean, lint-free cloth and use it to remove the paste, rinsing after every few passes and making sure to avoid the socket.
Step 5
While the baking soda paste is doing its work, clean the surface below the coils. Carefully remove food residue with a cooktop scraper if necessary, and then scrub the surface with a gentle cleaning pad and a bit of baking soda paste (see Step 4 for quick instructions on how to whip this up). Remove the paste with a clean, moist rag, and dry with a fresh cloth. Finally, plug the clean, dry burners back into the sockets, and you’re ready to cook!
Get in the habit of wiping up spills as soon as the cooktop cools, and give it a thorough cleaning once a week. This way no one will know your messy little cooking secrets—unless, of course, you accidentally spill the beans!
