We may earn revenue from the products available on this page and participate in affiliate programs. Learn More ›
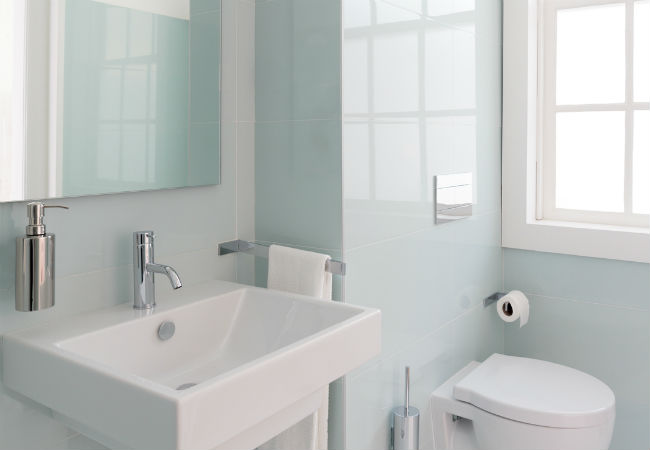
Chrome is distinctive, modern, and cool—all reasons to love it, whether it’s as the bases of your ’50s-style bar stools, door hardware, light fixtures, or your bathroom faucet. But tastes change. One day, you might find yourself drawn to the idea of matte black metal instead. Whether your chrome fixtures feel dated or have rusted, you don’t need to immediately shell out for a replacement. Painting over chrome fixes either problem for a fraction of the cost if you’re equipped with the right tools and technique.
Yes, chrome’s trademark shiny surface and its tendency to oxidize make it critical to get the prep work done correctly. One wrong move and your paint could peel off or rust from beneath! Thankfully, we’ve got you covered with all the need-to-know on how to paint chrome.
Tools & Materials
Bobvila.com may earn a commission from purchases made through these links.
- 5-gallon bucket
- Protective goggles
- Dust mask
- Disposable gloves
- Small disposable spatula
- Paintbrushes
- Foam paint brushes
- Utility knife
- Garbage bags
- Degreasing liquid dish soap
- Cotton cleaning rags
- Sandpaper
- Liquid metal filler
- Painter’s tape
- Rust-inhibiting paint primer for metals
- Automotive metal primer
- Paint for metal
- Automotive enamel
Step 1
Mix liquid dish soap and, for extra grease-cutting oomph, warm water in a bucket, and wash the chrome with that soapy water and a clean cloth. You may want to use a toothbrush to scour into nooks, crannies, and crevices. Rinse well with clean water, then dry with a separate rag.
You want to get any and all grease and dirt off, so repeat this step if it’s not glisteningly clean.
Step 2
Put protective goggles on and, if not in a well-ventilated area, definitely a dust mask to minimize lung damage from accidentally ingesting airborne chrome dust. Starting with heavy-grit sandpaper, like a 120-grit, begin scouring chrome.
The heavy grit will scratch the slick surface up so that paint can more easily adhere rather than flake. If it’s easier to work in a side-to-side motion when sanding, do so for now. Ultimately, though, the finishing technique (using 320-grit) will require circular motions to produce a smooth, scratchless surface.
Once you’ve scoured all the chrome thoroughly, you have the option to do a second pass with 240-grit to reduce any noticeable grooves and ensure that you’ve dulled the chrome’s sheen.
Step 3
Use a clean rag to wipe away the dust to inspect whether the chrome has been adequately buffed down. Pay particular attention if there were rust spots when you started (or cracks, if your object is chrome-plated), look them over—you should see the bare metal now and that cracks have softened.
Has all the chrome been scratched up and dulled so the surface can bond with a primer? If not, keep sanding with the 240-grit.
Step 4
Switch to 320-grit sandpaper for the smoothest finish, and use a circular motion going from one side to the other or top to bottom of your chrome fixture. Remove all the scratches and gouging created with the rougher sandpaper in Steps 2 and 3.
Periodically wipe away the dust with a clean rag and run your fingers over the metal. Is it smooth? If so, you can move on to Step 5. If not, keep going until it is.
Step 5 (optional)
After sanding, it’s best practice to fill any gouges or cracks in your chrome-plated fixtures or furniture before attempting to paint the metal so that these imperfections don’t show through your paint job or hamper its success. For this, you’ll use a liquid metal filler like that from Permatex, which you should be able to find at brick and mortar automotive centers or online priced around $6.50 for 3.5 ounces.
Wipe down the chrome with a wet rag to make sure all the dust from sanding has been removed, then thoroughly dry the spots to be filled. Apply the metal filler per manufacturer instructions. Typically, this involves wearing work gloves or latex gloves for protection, simply squeezing some filler into the spot that needs it, and spreading the filler out either with your latex-gloved fingers or a disposable spatula.
Dry time can be as little as an hour for some brands or overnight for others, so follow the manufacturer’s specifications carefully.
Once dry, if it hasn’t smoothed out well, you may need to sand it with the 320-grit sandpaper to get a consistent surface.
Step 6
Using a clean rag and a bucket of fresh water, wipe down all of the chrome to remove remaining dust. Rinse out the rag often to ensure you’re getting a clean surface. If the bucket of water gets too dirty, replace with clean water and give your project a final pass with a clean rag.
Dry it thoroughly with fresh rags.

Step 7
If any parts of the chrome will connect to other surfaces (like wood, glass, or marble) and therefore don’t need to be painted, go ahead and cover them. Smaller sections can be masked with painter’s tape while larger surfaces might be covered with newspaper.
Step 8
Protect the floor of your work area from overspray or errant paint drips by laying out some old newspaper.
Step 9
Go ahead and apply a coat of primer to the metal. Choose a rust-inhibiting primer, such as Rust-oleum, from your paint store or home improvement center—unless you plan to paint a faucet. Because bathroom and kitchen fixtures are meant to come into contact with water, you’ll need to use an automotive metal primer (and finish with automotive enamel in Steps 10 and 11), which is designed to withstand exterior conditions.
- If using a spray primer, shake the container frequently, spray from about a foot away, and work in sweeping side-to-side coats that extend past the edges of the chrome object. Read more about spray painting metal here.
- If using a brush or foam applicator, brush paint on in light coats lengthwise, up and down, and keep an eye out for any drips. It’s better to apply a light coat, allow it to dry for up to a day, and then apply another coat than to apply too thickly and risk having drips and runs down the product. (Those would require sanding before final painting.)
Allow the primer to dry thoroughly. This will vary depending on the season, the temperature, and the humidity where you are—and that’s on top of the manufacturer’s recommendations—but it should take less than a day. Overnight should suffice.

Step 10
Once the primer is dry, apply an acrylic or latex metal paint in your color of choice, or automotive enamel if you’re coloring a faucet. Here, too, either spray-paint or painting with a bristled or foam brush work.
- When spray-painting chrome, remember to apply in a steady sweeping motion side to side or up and down. Watch out for drips or runs!
- If brushing, you’ll still have to watch for excess paint and dripping. Paint in up-down or side-to-side strokes using light coverage. When painting in the nooks and crannies, check back after a minute or two, because these often create dribbles and runs, so mop up any excess with your brush. (It’s easier to catch the excess paint and smooth out these drips after you’ve already applied all the paint that’s on your brush or applicator.)
Step 11
Allow the paint to dry. If it needs an extra coat for complete coverage, use the same techniques in Steps 4 through 10.
Again, depending on temperature and humidity where you are, dry time for a coat could take just a couple hours up to a full day. Consult your paint’s package for recommendations, and let the final coat cure for a full day before doing anything with it.
Step 12
Remove any masking tape without taking off your paint job by first scoring along the paint-facing edge. Then, pull it off slowly to make sure your cuts have allowed for a clean removal. Discard along with any used newspaper in garbage bags.
After you take out the trash, move your formerly-shiny item to its new home and enjoy the satisfaction of another great project completed with a pro’s finesse.
