We may earn revenue from the products available on this page and participate in affiliate programs. Learn More ›
Do-it-yourselfers live by the rule of “the right tool for the job,” but just as important is maintaining those tools so that they can do their jobs. Case in point: Keeping twist drill bits sharp. When bits get dull, your natural inclination is to push the drill harder, which inevitably causes bits to break and could even result in personal injury.
Though there are gadgets specifically designed to put a precision point on drill bits, you can easily get the job done using the bench grinder in your workshop. Pointed drill bits make safe, easy work of many projects. Though it takes a bit of practice to hone them like a pro, there’s no better time to learn how to sharpen drill bits than before you start on your next task.
Before You Begin
You’ll need to check the tip of the drill bit’s angle before you begin to sharpen it so that your sharpening maintains the proper angle. Use a stainless steel adjustable angle protractor to determine the angle and then recheck the angle after you sharpen the drill bit.
Beyond having the right tools, safety is an important part of preparing to sharpen drill bits. Make sure to wear safety goggles to cover your eyes and a long sleeve shirt, long pants, and shoes to protect your skin from potential metal shavings. Gloves are also a good idea, but make sure they are tight-fitting. Loose gloves could impair your ability to maintain a safe grip while you work.
Note: Some find that wearing work gloves impairs the ability to get a safe grip on a drill bit. Because it’s crucial to have a firm hold on the bit while grinding, gloves are listed as optional. Safety goggles, however, are a must.
1. With a Bench Grinder

SUPPLIES
Stainless steel adjustable angle protractor
Safety goggles
Work gloves (optional)
Bench grinder
Bucket of ice water
Step 1: Pick the proper grinding wheel.
Examine your dull bits. Your goal is to remove only enough metal to get a sharpened edge. Many bench grinders have two grinding wheels, one coarse one and one fine. If the bits are really ravaged, start with the coarse wheel, and switch to the finer one later in the process; if your bits don’t look too bad, begin with the finer grinding wheel.
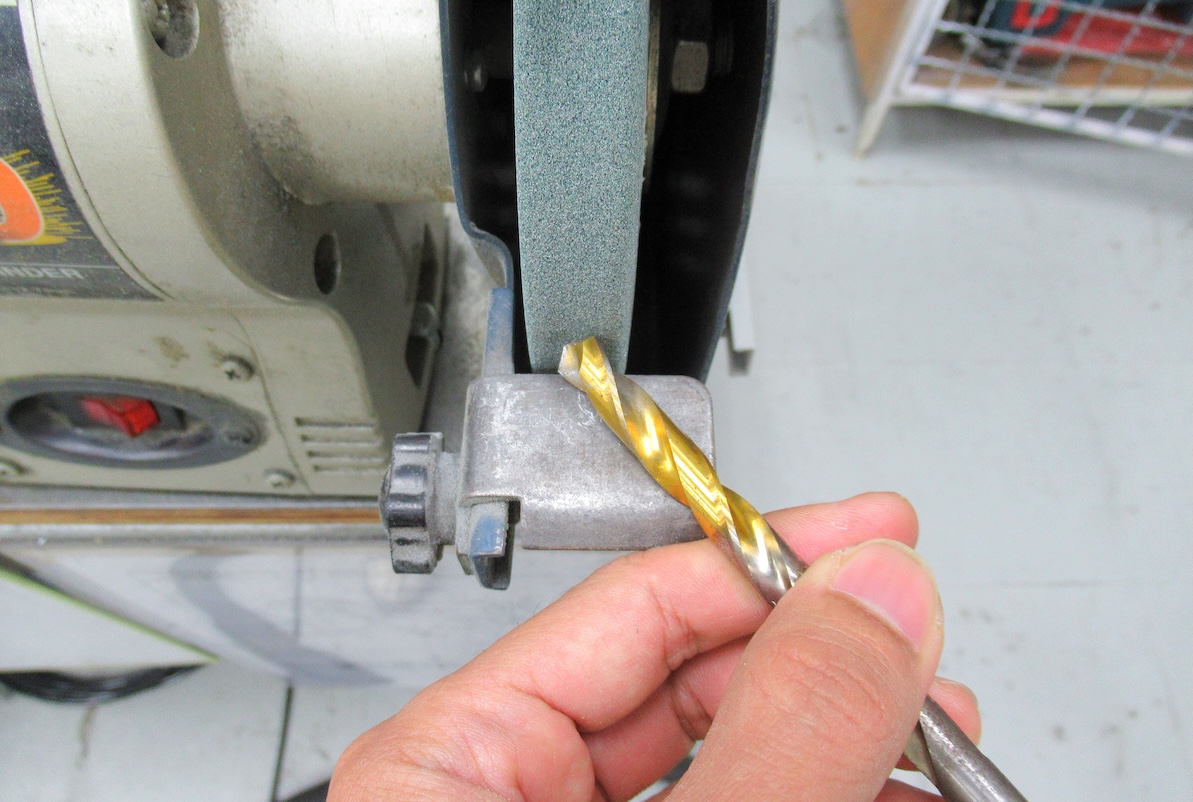
Step 2: Hold the drill bit parallel to the grinding wheel.
Don your goggles and turn on the bench grinder. Get a firm grip on your drill bit and hold the cutting edge precisely parallel to the front of the grinding wheel.
Step 3: Slowly grind the drill bit at a 60-degree angle.
Slowly, carefully, move the bit until it contacts the wheel. Do not turn or rotate it; simply keep it straight and held at the original factory angle of 60 degrees. Hold the bit at the 60-degree angle against the wheel for no more than 4 to 5 seconds.
Remember: Your objective is to simply grind the dull surface away, not wear down the bit. Focus on grinding the heel of the bit, where the tip meets the twisted shaft—not the edge—to achieve the ideal angle. If the angle isn’t steep enough, the drill bit won’t bore smoothly.
Step 4: Cool the drill bit in ice water.
Pause after 4 to 5 seconds of grinding and dip the drill bit into the ice water to cool the metal. Failure to do so will cause the drill bit to become too hot to hold and even wear down the metal faster, shortening the effective life of the bit. Once the bit is cool to the touch, inspect it to see if it’s honed to a good point on the side you just worked.
Step 5: Grind the other side of the drill bit.
When satisfied with the point on the first side, turn the drill bit 180 degrees and use the same grind-and-cool process for the opposite side of the tip. Aim for that 60-degree angle, and an angle and point that’s the same width on both sides of the drill bit, to enable the tool to bore straight holes. To help ensure equal sharpening, some people opt to sharpen a little on each side, holding the drill bit in their dominant hand and flipping it 180-degrees after every few seconds of grinding.
Step 6: Test the drill bit by hand.
Once the drill tip meets in a finely honed point, and both edges are sharp and the same width, give the bit a test run. Hold the tip perpendicular against a piece of scrap wood and twist the bit by hand. Even with this light pressure, a well-sharpened drill bit should create the beginnings of a hole. If not, re-examine your tip and return to the grinding wheel. Again, strive for that ideal 60-degree slope on the point, with equal widths on either side. Don’t be disheartened if you return to the wheel several times—that’s part of the learning curve.
Step 7: Test the drill bit in the drill.
Once you’re confident in the sharpness of the bit, insert it in your drill, grab that scrap wood, and begin drilling. It should “bite” the wood right away with minimal pressure and, when you extract the drill bit from the wood, it should fling wood chips as it emerges.
2. With a Bench Grinder and a Sharpening Jig

Using a sharpening jig helps to make sure the drill bit is at the precise angle for sharpening. It also frees your hands so you can have better control over the sharpening process. The steps are similar to the steps for using a bench grinder on its own.
SUPPLIES
Stainless steel adjustable angle protractor
Safety goggles
Work gloves (optional)
Drill grinding attachment
Step 1: Set up and secure the sharpening jig.
After setting up the grinding wheel (see Step 1 above), set up and secure the sharpening jig with a bolt through the base so it doesn’t move. The bolt is recommended to be about 2¼ inches from the front of the grinding wheel.
Step 2: Position the drill bit and angle.
Insert the drill bit inside the jig’s trough so that it overhangs the cutting edge. Then, tighten it to secure it in position. Set the cut angle.
Step 3: Grind the drill bit.
While wearing safety goggles, gently swing the sharpening jig back and forth against the grinding wheel. Don’t try to go quickly or apply too much force.
Then, follow steps 4 through 7 from above.
Best Sharpening Jig
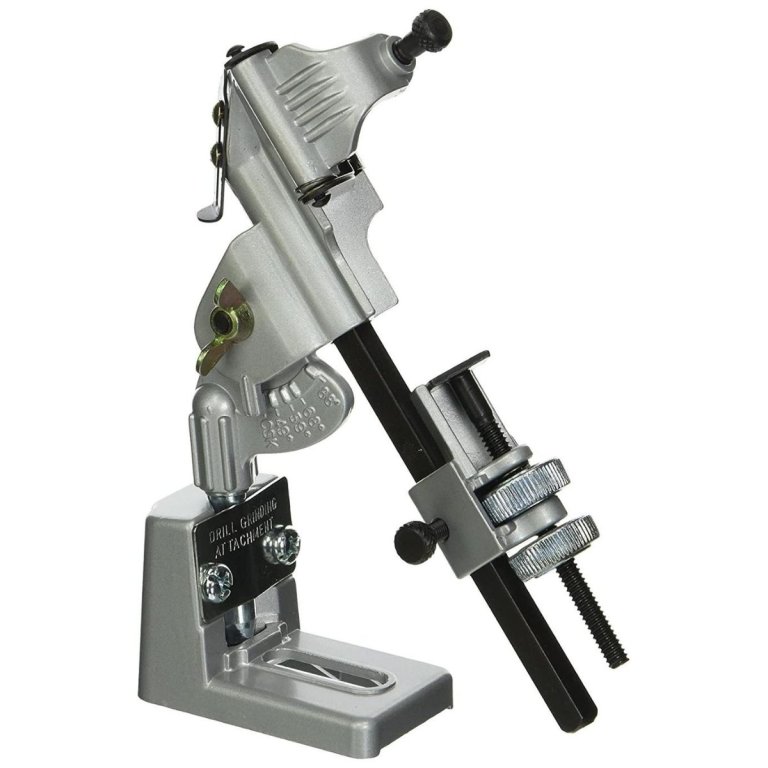
General Tools 825 Drill Grinding Attachment
See ItFor DIYers who already have a bench grinder, the General Tools 825 drill bit sharpening jig is an affordable way to resharpen a pile of dull drill bits. The jig bolts to the worktop and uses the side of a grinding wheel to create sharp edges on old drill bits. This jig works with bits between ⅛ inch and ¾ inch, and adjusts for numerous drill point angles.
3. With a Drill Bit Sharpener
A drill bit sharpener doesn’t just sharpen—it can also split point bits and control point and relief angles of a drill bit.
SUPPLIES
Stainless steel adjustable angle protractor
Safety goggles
Work gloves (optional)
Electric drill bit sharpener
Step 1: Set the point angle and adjust the take-off knob.
Before sharpening, the point angle needs to be set to the correct angle. You can use an adjustable angle protractor or the point angle gauge on the drill bit sharpener. Insert the drill point in the point angle gauge to find out the angle. Use the angle to adjust the material take-off knob.
Step 2: Align the drill bit.
Loosely insert the bit into the chuck jaws so the drill bit can slide in and out. Press the alignment button and then insert the chuck to match the sharpening point angle. Make sure the clamp arms are on the bit’s narrowest part. Then tighten the chuck knob.
Step 3: Check the alignment.
Press the alignment button and remove the chuck—with the drill bit inside—from the alignment tube. Make sure the chuck jaws are aligned. If they aren’t, then adjust the jaws so they line up.
Step 4: Sharpen the bit.
Twist the bit inside the sharpening port against the diamond sharpening wheel inside. Adjust the port angle to the desired sharpening angle.
Step 5: Split the point of the bit (optional).
Keep the bit in the chuck, and then align the white line on the chuck with the splitting port. Then insert the bit into the splitting port. Rotate 180 degrees and then remove it.
Best Drill Bit Sharpener
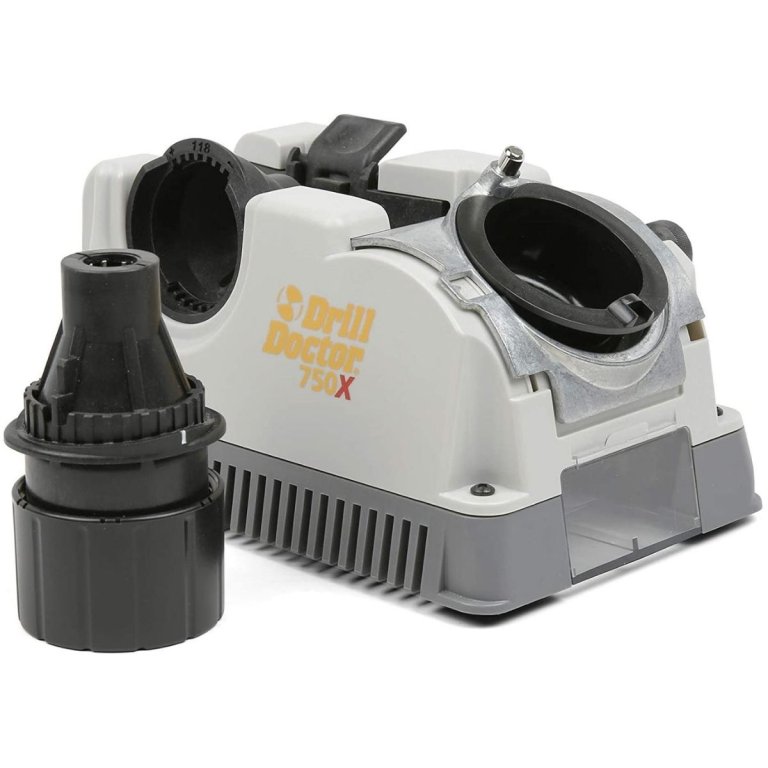
Drill Doctor 750X Drill Bit Sharpener
See ItThe Best Overall pick in our tested guide to the best drill bit sharpeners, the Drill Doctor 750X is the most widely adaptable system we tested outside of freehand sharpening. The diamond grit sharpening wheel works on all types of bits, including tough cobalt drill bits and carbide tips. It’s also capable of creating or renewing split points. The sharpening process was fast and easy from one bit to the next, with no need to recalibrate the machine in between.
Tips for Keeping Drill Bits Sharp
Once you’ve successfully mastered how to sharpen drill bits, maintain a cutting edge with these three best practices.
Keep two complete sets of drill bits. Some pros rely on a like-new set of drill bits only to start a hole, and then, to keep that better set sharper for longer, switch to their older, sharpened bits to finish the task once the drill hole has been established.
For every inch or so that you drill, pull out the bit and blow off any flakes or chips of wood. Otherwise, these chips will get packed into the flutes of the bit, becoming very hot. The hotter a drill bit gets, the faster it dulls, requiring more frequent sharpening.
Make the stop-and-cool technique a habit, especially when drilling hardwood. Simply keep a container of cold water nearby and dip the drill for several seconds between every few inches of drilling.
