We may earn revenue from the products available on this page and participate in affiliate programs. Learn More ›
Whether your wood fence is years old or newly installed, it can benefit from a single inexpensive addition: stain. Applying wood stain to the slats can improve its design appeal and prolong the lifespan of your hardworking outdoor structure.
For long-lasting, professional-quality results, work with a semi-transparent oil-based stain designed for the exterior. These stains elegantly accentuate the natural patina of the underlying wood with a subtle tint, and, as a bonus, boast formulas that slow the growth of mildew and rot as well as protect the wood from ultraviolet light exposure.
With basic cleaning and staining wooden fence supplies, and this straightforward tutorial on how to stain a fence, you can refresh your wooden privacy wall in as little time as a weekend. and reap the benefits right away.
Tools & Materials
Bobvila.com may earn a commission from purchases made through these links.
- Stiff-bristle brush
- Garden hose
- Power washer
- Bucket
- Rubber gloves
- Paint brush
- Power sander
- Paint tray
- Paint roller
- Paint sprayer
- Painter’s tape
- Drop cloth
- Wood stain stripper
- Sandpaper for orbital sander
- Exterior wood stain
- Wood sealant
- Bleach
Project Overview
Working Time: 30 minutes per fence panel
Total Time: 1 hour per fence panel
Skill Level: Beginner
Estimated Cost: Starting at $200 for 550 square feet of fence
Before You Begin
While there is less prep required when staining a new fence, there are still several steps needed before you can get started with applying stain. Here are some key factors to consider before fence staining begins.
Select the stain.
Beyond just considering the hue, there are stains that are transparent, semitransparent, and opaque. Some are designed for indoors and others are exterior stains designed to protect wood outside. Always check the label before purchasing stain and confirm that it provides the protection your fence needs. You will need 2 gallons of stain per every 550 square feet of fence. Remember, there are two sides to every fence.
Check the weather.
Before staining a wood fence, scan the weather forecast and select a day with temperatures between 50 and 80 degrees, low to moderate humidity, and no precipitation expected for 24 hours.Extreme cold or moisture can prolong the drying time of wood stain, while the opposite extreme can dry out stain too quickly and leave behind unwanted lap marks on the fence.
Prepare wood for staining.
Depending on the current condition of your fence, you may need to strip or sand the surface. If the fence was previously stained or finished, apply wood stain or finish stripper to the slats according to the manufacturer’s instructions, then scrub the slats with a stiff-bristle brush to loosen the old varnish and slough off upright wood fibers.
If you want to stain a new fence, check the surface to make sure the stain will penetrate the wood with this water test. Lightly spray a small section of the fence with a garden hose. If water beads form on the slats, lightly sand the slats in the direction of the wood grain. Water successfully penetrating the slats, though, indicates that your wooden fence can readily absorb the stain.
Clean the fence.
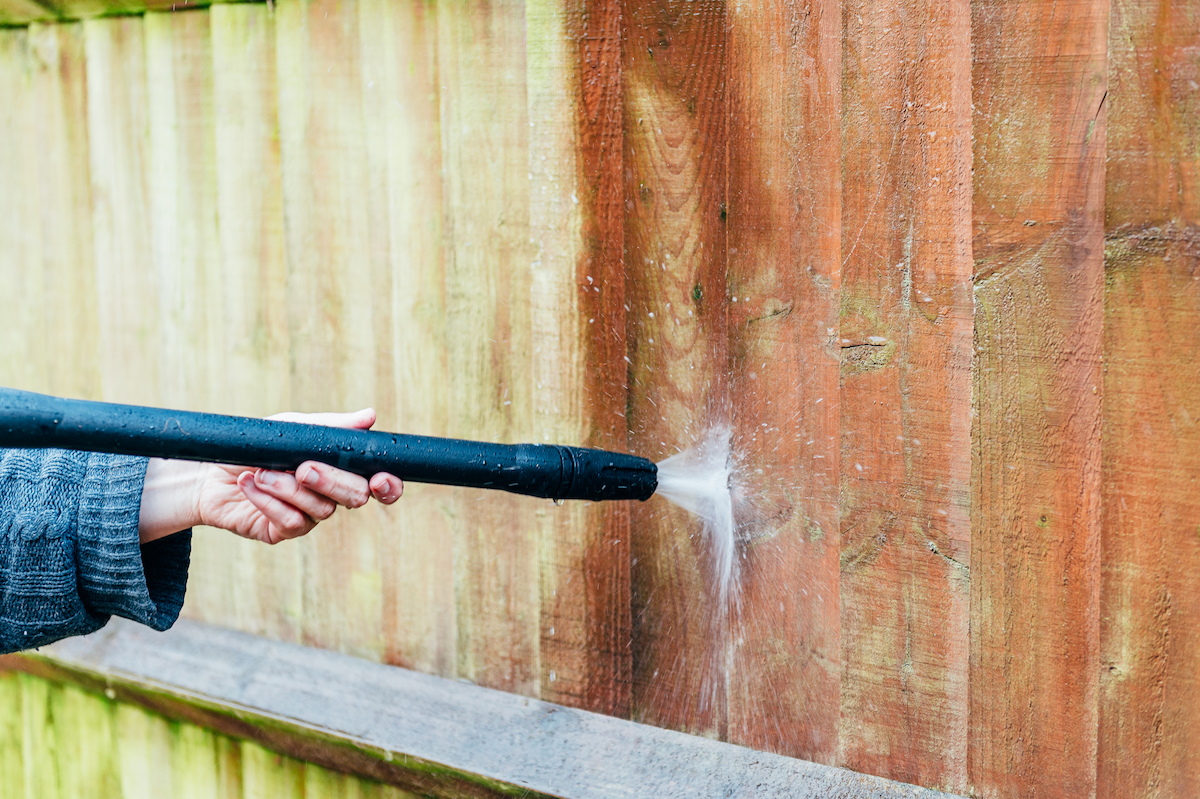
Clean the fence with water from a high-pressure spray nozzle attached to a garden hose (or use a power washer). This will remove light to moderate dirt accumulations and complete the job of the wood stain stripper in blasting away any old varnish from the fence, if applicable. If using a power washer, opt for a low-powered unit operating at no more than 2,000 psi so as not to weather the wood slats and always start on the lowest setting. Make sure to let the wood dry out completely before continuing.
Protect the area.
Nearby plants and parts of the fence not to be stained benefit from protection. Use painter’s tape to protect areas of the fence you do not want to stain. Similarly, protect surrounding vegetation at the foot of the fence by covering it with drop cloths.
Treat imperfections.
If you spot mold or mildew deposits on the fence, prepare a solution of bleach diluted with water in a bucket. Donning rubber gloves, apply the bleach to the slats with a garden sprayer, allowing it to settle into the slats for a few minutes before rinsing the fence clean with a high-pressure spray nozzle or power washer. Again, make sure to let the wood dry out completely before continuing.
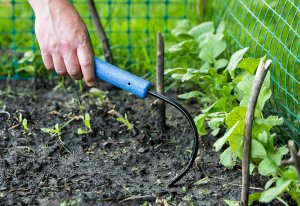
If there are imperfections in the fence slats, fix them before starting the staining process. Repair chips, gouges, or cracks in the fence with wood filler. If needed, replace damaged slats.
How to Stain a Wood Fence
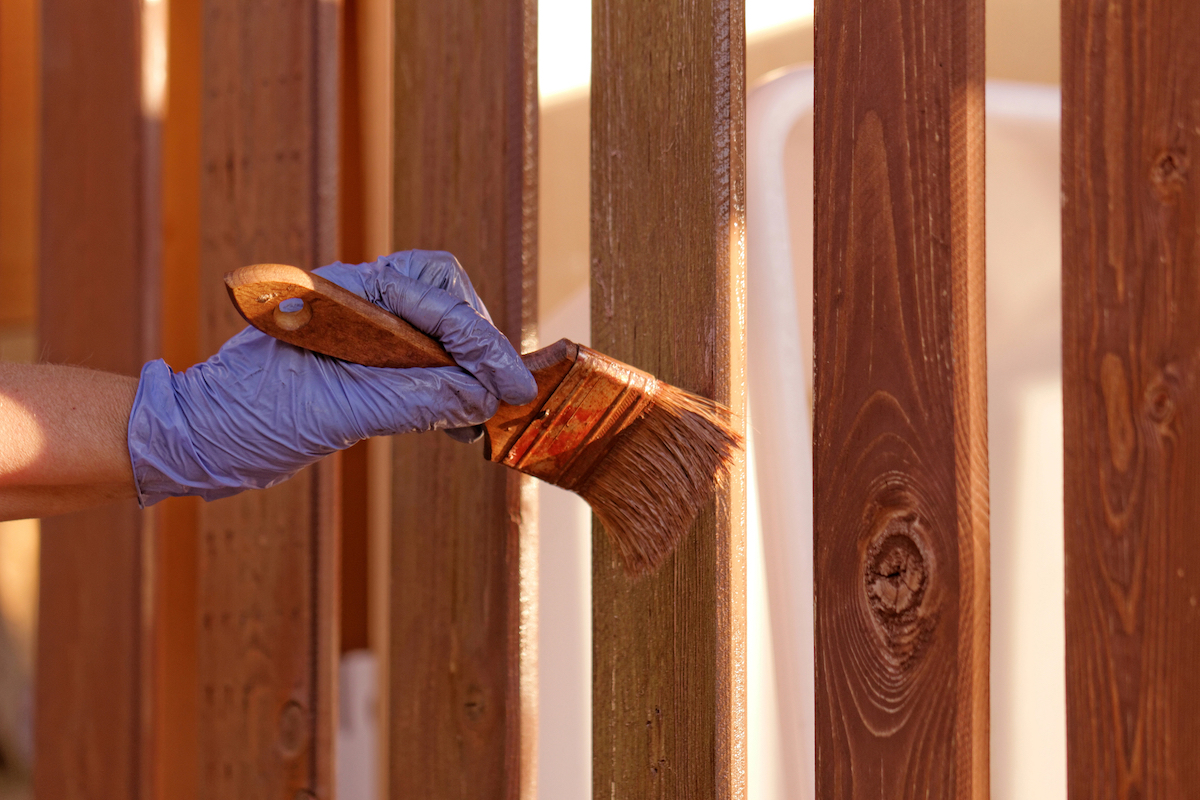
Step 1: Apply stain to the fence slats.
Employ a brush, roller, or sprayer to stain the wood slats of the fence.
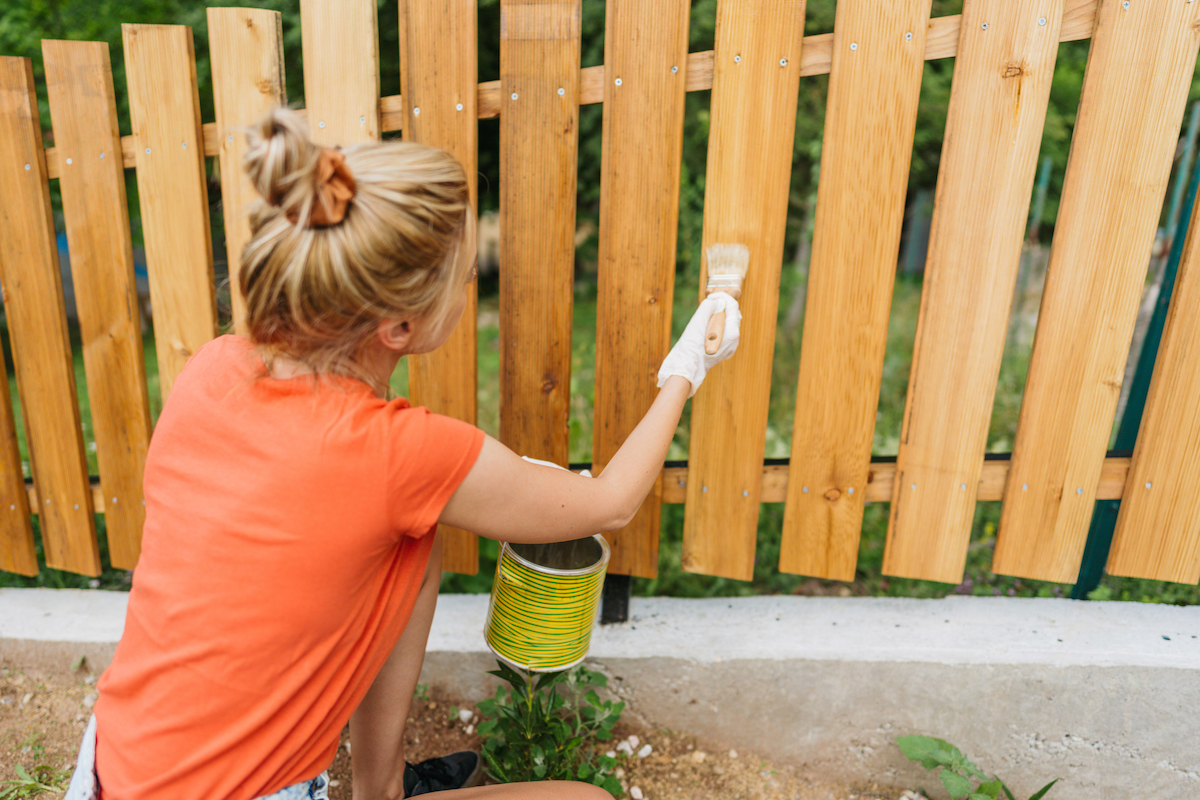
How to stain a fence with a brush
A wide natural-bristle brush or a hybrid natural-synthetic brush are the best ways to encourage an oil-based or hybrid wood stain to permeate wooden fence slats.
- Dip the tip of the brush into a can of stain, then coat any horizontal slats of the fence from left to right.
- Work your way from bottom end grain to the top along the entire length of each vertical slat, maintaining a wet tip at all times.
- Stain one to two slats at a time to prevent lap marks from forming. One you reach the top of a slat, stain the end grain.
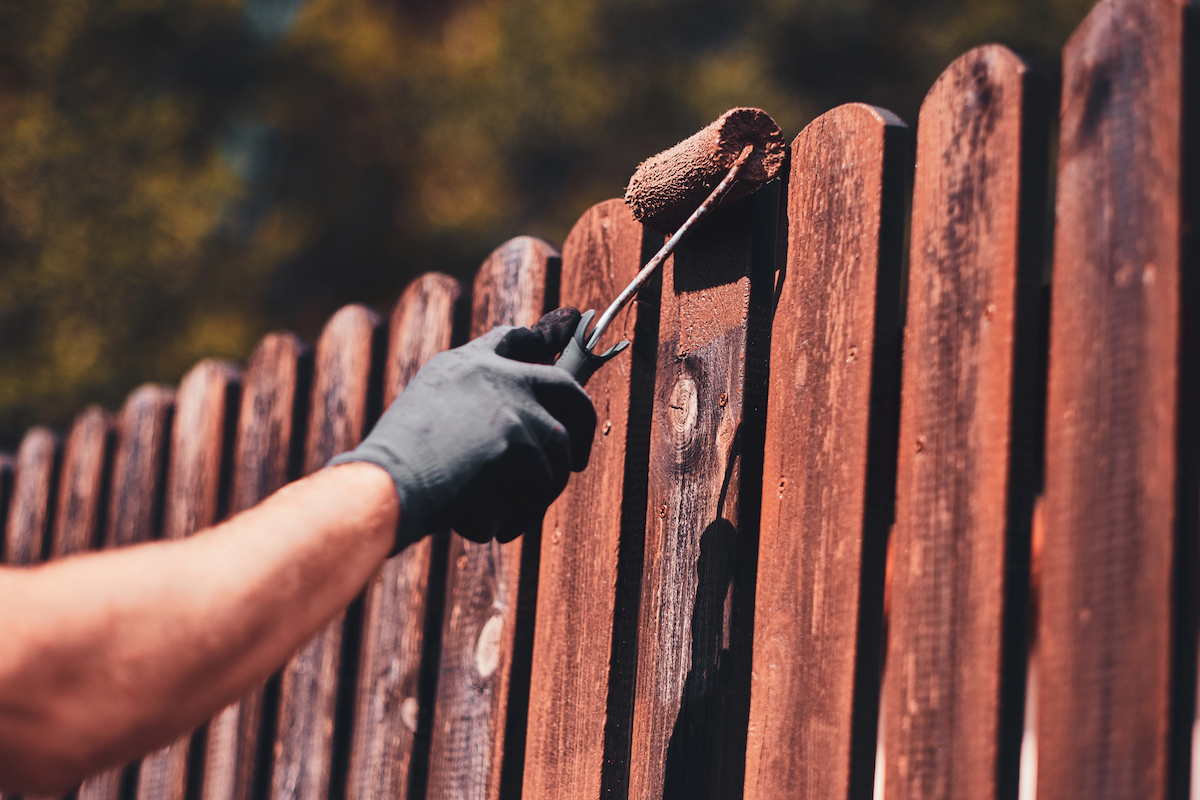
How to stain a fence with a roller
- Opt for a medium, ½-inch nap roller cover, then fully saturate the nap with the stain.
- Apply the stain in 2- to 3-foot sections of the fence at a time, taking care to back-brush, or re-paint over uncovered areas left by the previous stroke, with a wide brush. This will allow the stain to enter hard-to-reach grooves and recesses, and ensure an even coat free of lap marks.
How to stain a fence with a sprayer
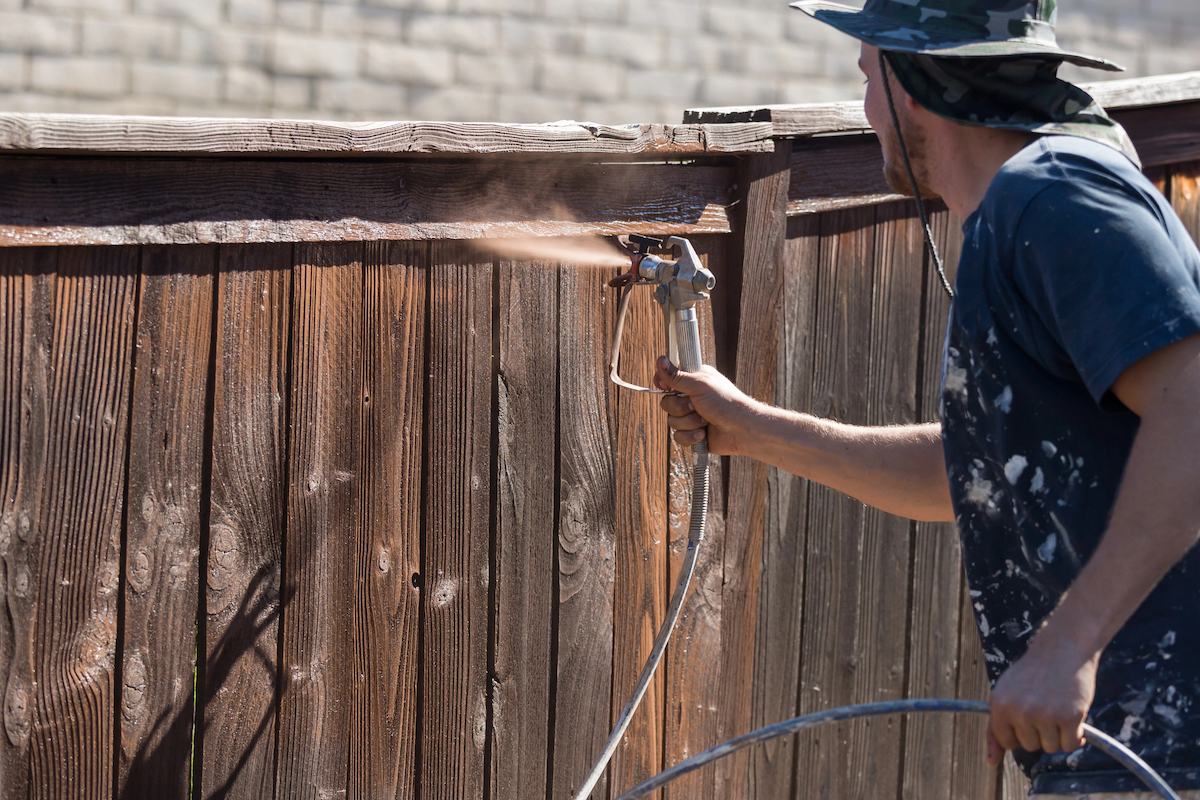
- If you’re using a sprayer, follow the same approach as you would for staining a fence with a roller, but stand back a comfortable distance from the fence to apply color. Our guide to how to use a paint sprayer provides specific instructions.
Step 2: Let the stain dry, then apply additional coats as desired.
When the entire fence has been stained, let it dry according to the stain manufacturer’s instructions. Apply additional coats of stain as needed to achieve the desired depth of color. A single coat should be sufficient for a new wood fence or one that you also plan to seal, but we suggest always applying two coats in case any spots were missed during the first pass.

Tried-and-True Advice
The first time I stained a wood fence I applied the stain as if I was painting, using long, smooth strokes. The result—a very uneven stain job, with darker spots where the strokes overlapped and lighter spots between—was disappointing. I eventually learned that staining a fence is not like painting a fence. As far as brushstrokes go, staining wood requires a different technique, namely short, fast strokes rather than long, smooth ones. This ensures that the stain goes on even, with a consistent layer across the wood. If your fence needs two coats, I’ve found that it also helps to apply them on the same day to ensure they blend well and to prevent light or dark spots.
—Chase Brush, Contributing Writer
Step 3: Finish the job with a coat of sealer.
While a good quality stain alone is sufficient to protect your fence from everyday wear-and-tear, applying a durable sealant over the stain can prolong the finish, and the life of your fence. For best results, apply a single coat of clear, weatherproof sealant by brush, roller, or sprayer. Quickly back-brush unsealed grooves and recesses with a wide brush to achieve a uniform appearance. Allow the sealant to dry completely.
Step 4: Clean up.
Dispose of soiled drop cloths, remove the painter’s tape from the slats, seal any unused stain, and reveal your freshly updated wood fence.
Tips for Staining a Fence
How to choose the right stain
The best type of stain for a wood fence depends on the kind of wood and personal preference. Water-based stains tend to be less expensive, dry more quickly, and offer more color options than oil-based stains. They also provide the flexibility of leaving a paintable surface. Still, oil-based stains are more durable, tend to coat more evenly, and offer more transparent options. Hardwoods like walnut and mahogany have tighter and smaller pores, making it tough to absorb water-based stains. Pine and cedar absorb stain quickly, so you’ll use less of an oil-based stain.
How often to stain
Staining a fence isn’t a one-and-done DIY project. While stains can last anywhere between 2 to 5 years, extreme temperatures and precipitation can prematurely age the finish. Don’t rest on your laurels too long and risk potential weather damage: Aim to stain your fence every 2 to 3 years to preserve its sheen and weather-protective qualities.