We may earn revenue from the products available on this page and participate in affiliate programs. Learn More ›
MIG welding is extremely popular with both beginners and professionals. It is undoubtedly the easiest to learn of the four main types of welding, and it can produce clean, strong welds in a variety of different metals. MIG—which stands for Metal Inert Gas and is also known as Gas Metal Arc Welding (GMAW)—is often confused with TIG welding, though the two are actually quite different.
This article will guide beginners to take their first steps in MIG welding by investigating the different types of MIG welders, looking at welding safety, and explaining how to use a MIG welder for any number of different DIY projects.
Important MIG Welder Parts
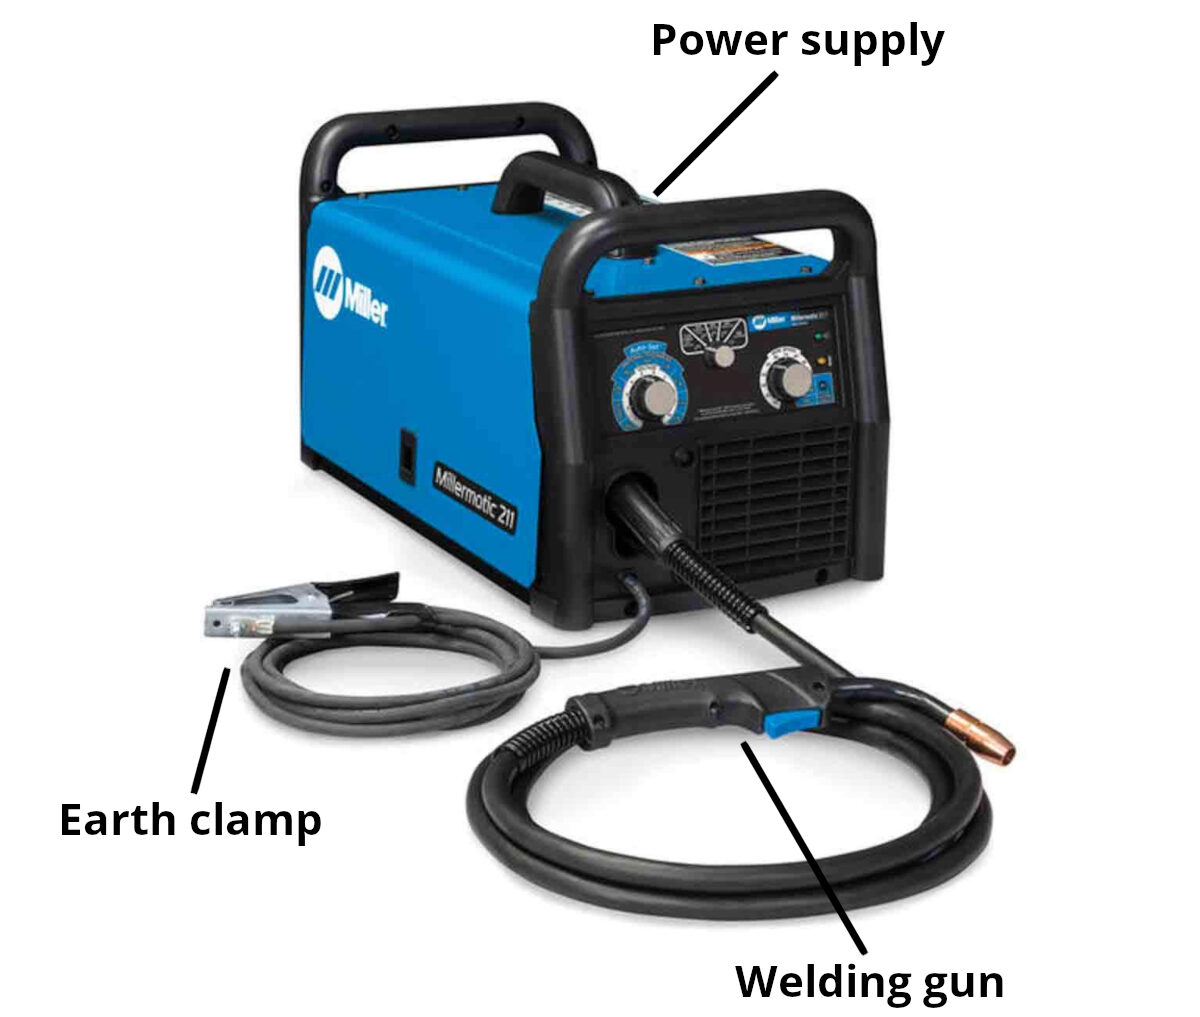
Although there are a few different types of MIG welding machines, they all share the same four or five key components.
- Power supply: This is the main box that houses all of the MIG welder controls. It converts input power (usually from a household outlet or generator) into the voltage necessary to weld different thicknesses of metal and sets the feed speed for the welding wire.
- Welding gun (torch): This is the handheld device that creates the electrical arc to start the welding process. It supplies both the gas to protect the weld and the wire that melts the metal, and it also creates the weld.
- Earth clamp: In order to create the welding arc, an electrical circuit is required. Part of this circuit is the earth, or ground. The earth clamp is fixed either to the metal being welded or a suitable metal workbench.
- Welding wire (not pictured): The MIG welding process supplies current along a consumable metal wire, which is technically an electrode. This creates the welding arc that melts the metal, and it also acts as a filler between the two pieces being joined.
- Gas supply (not pictured): MIG welding uses gas to create a protective shield around the weld. This keeps out impurities that might otherwise cause weaknesses. MIG welding gas is usually supplied from a bottle which can vary in size from 20 to 300 cubic feet (cu ft). Gasless MIG welding doesn’t need a bottle, though as we’ll see a little later in this article the term ‘gasless’ is slightly misleading.
3 Types of MIG Welders to Know
Though performance can vary considerably between one MIG wire welder and the next, the key difference is whether the machine is gas, gasless, or both.
1. Gas
Gas MIG welding requires a separate supply of bottled gas to create the protective shield. This flows through the welding gun via a connecting hose. Flow rate is controlled by a regulator on the top of the bottle.
While the gas bottle can be a little inconvenient, gas MIG is more versatile than gasless. It can be used for welding mild steel, stainless steel, and aluminum. However, gas MIG cannot be used outdoors because the shield gas would be blown away.
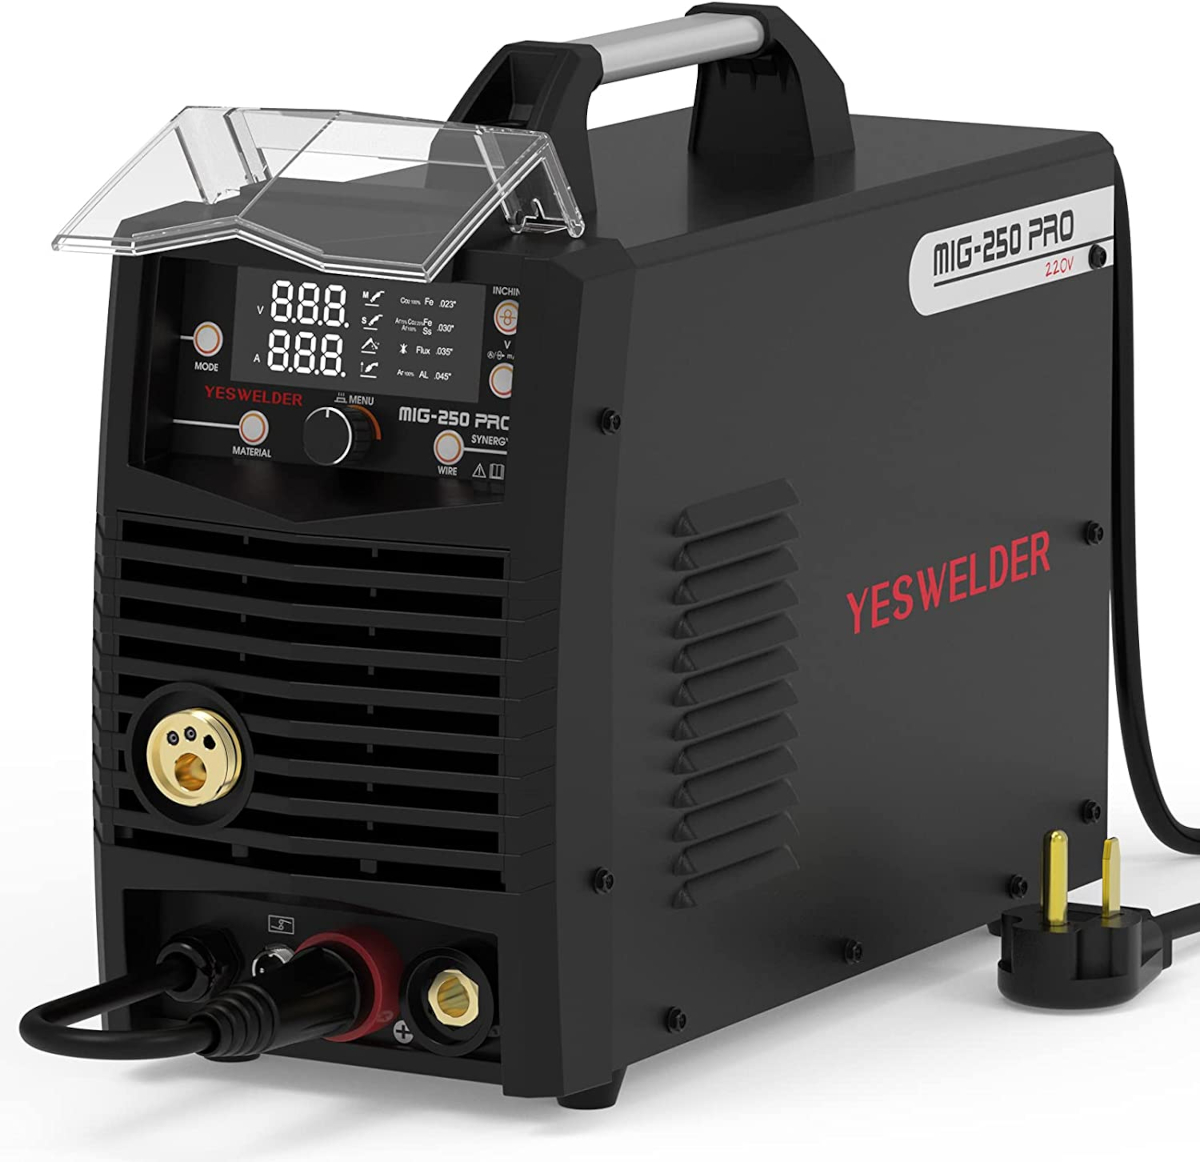
Our Recommendation: YesWelder 250A Aluminum MIG Welder on Amazon for $499.99
For a machine that will tackle just about any DIY welding task, this 3-in-1 YesWelder is spool gun-compatible and offers performance and versatility at a competitive price.
2. Gasless
Gasless MIG welding, also called Flux Core Arc Welding (FCAW) or simply flux core welding, uses a self-shielded wire. In other words, the electrode being fed into the weld is combined with a flux that melts in the arc, and forms its own gas shield. It isn’t truly gasless, but it doesn’t need a separate supply. As a result, it is easier to set up than gas MIG welding, so it’s often recommended for beginners.
The ability to create its own shield means gasless MIG welding can be used outdoors. However, while it is possible to find flux core wire for stainless steel and aluminum, the process tends to produce untidy, poor quality welds, and is not recommended. As a result, gasless MIG is normally only used to weld mild steel.
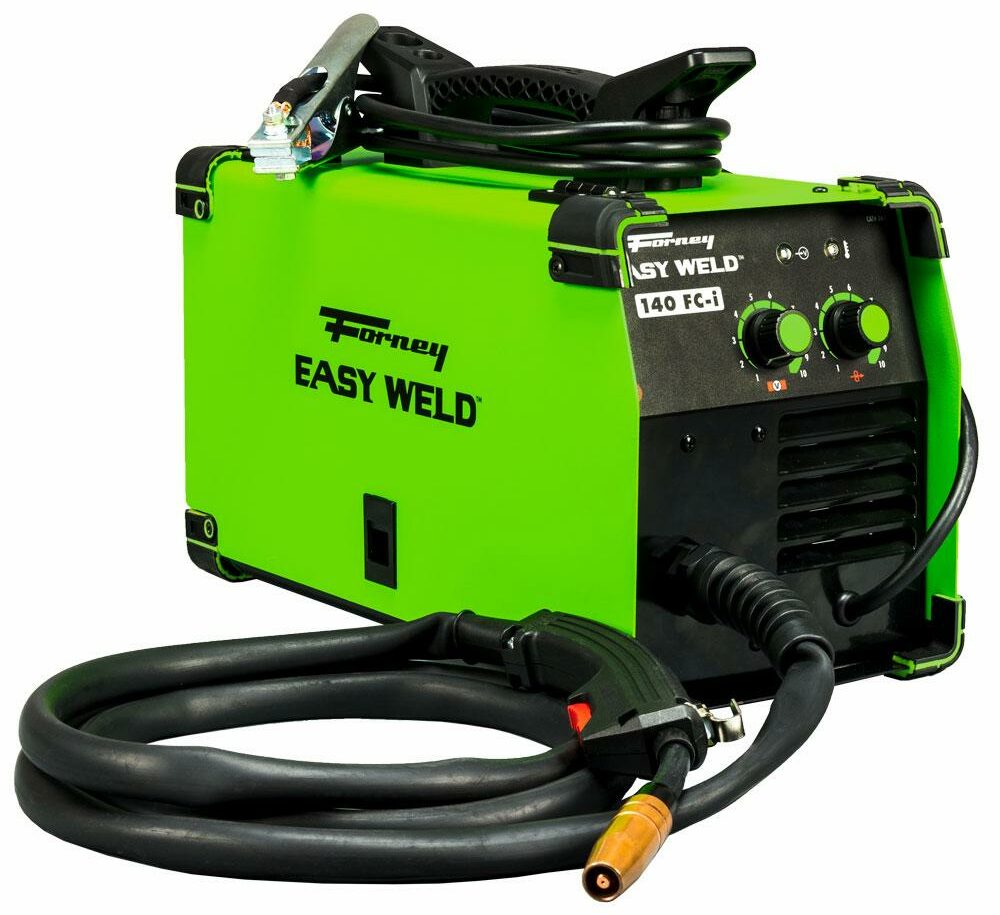
Our Recommendation: Forney Easy Weld 140 FC-i Flux-Core Wire Welder at The Home Depot for $248.70
Often ranked by independent reviewers as the best welder for beginners, this Forney machine is an affordable, easy-to-use, and reliable introduction to gasless MIG welding.
3. Gas & Gasless
Gas and gasless MIG welding combos aim to offer the best of both worlds, and most do so very successfully. They switch easily from one type of MIG welding to the other, seldom making any compromise in terms of performance.
These can be expensive, but they’re the best MIG welders on the market for those looking for adaptability.
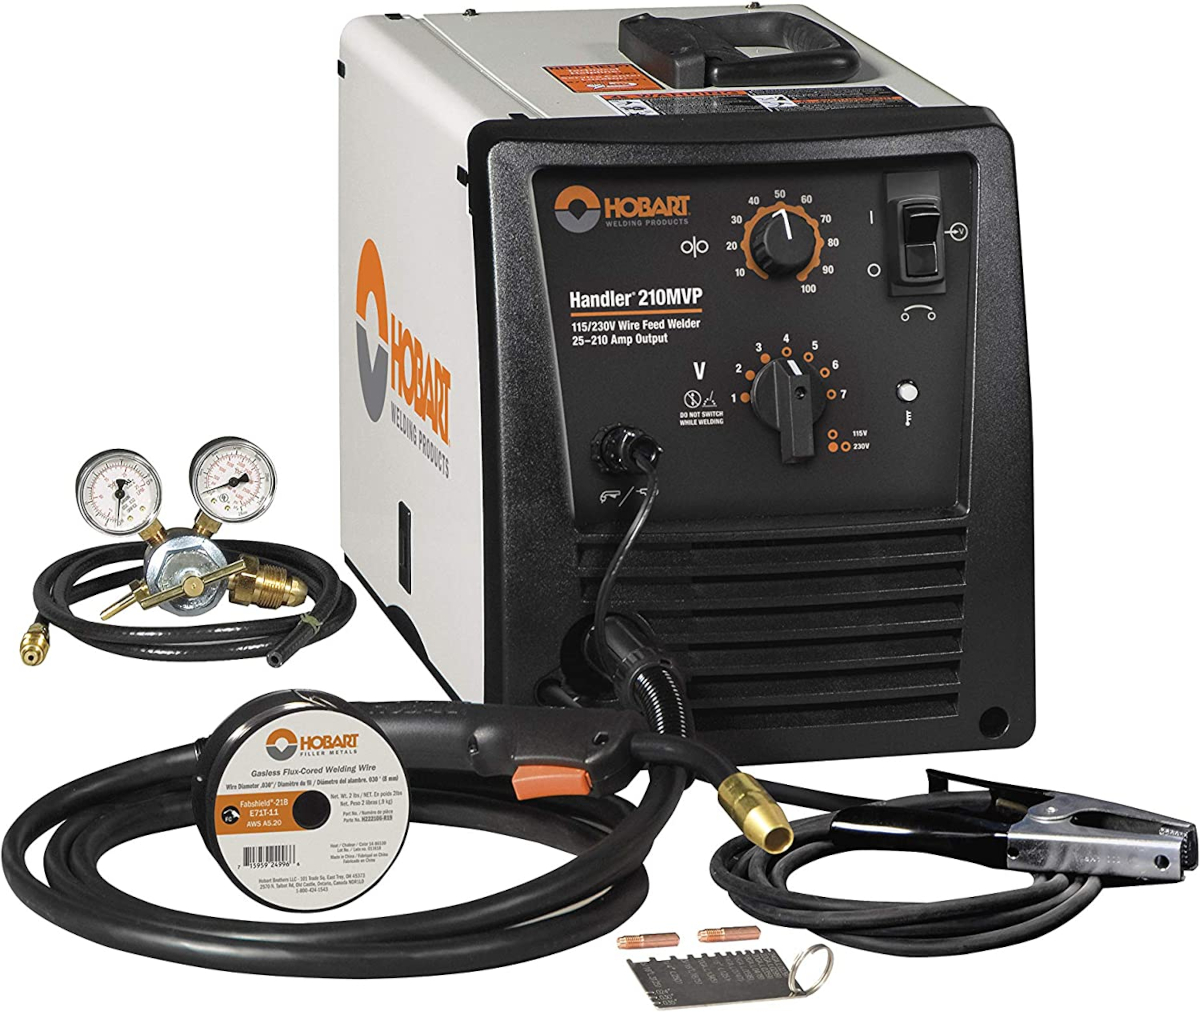
Our Recommendation: Hobart Handler 210MVP MIG Welder on Amazon for $1,149.99
Hobart is one of the world’s leading welding equipment brands, and this model offers professional performance and versatility.
MIG Welding Safety Tips
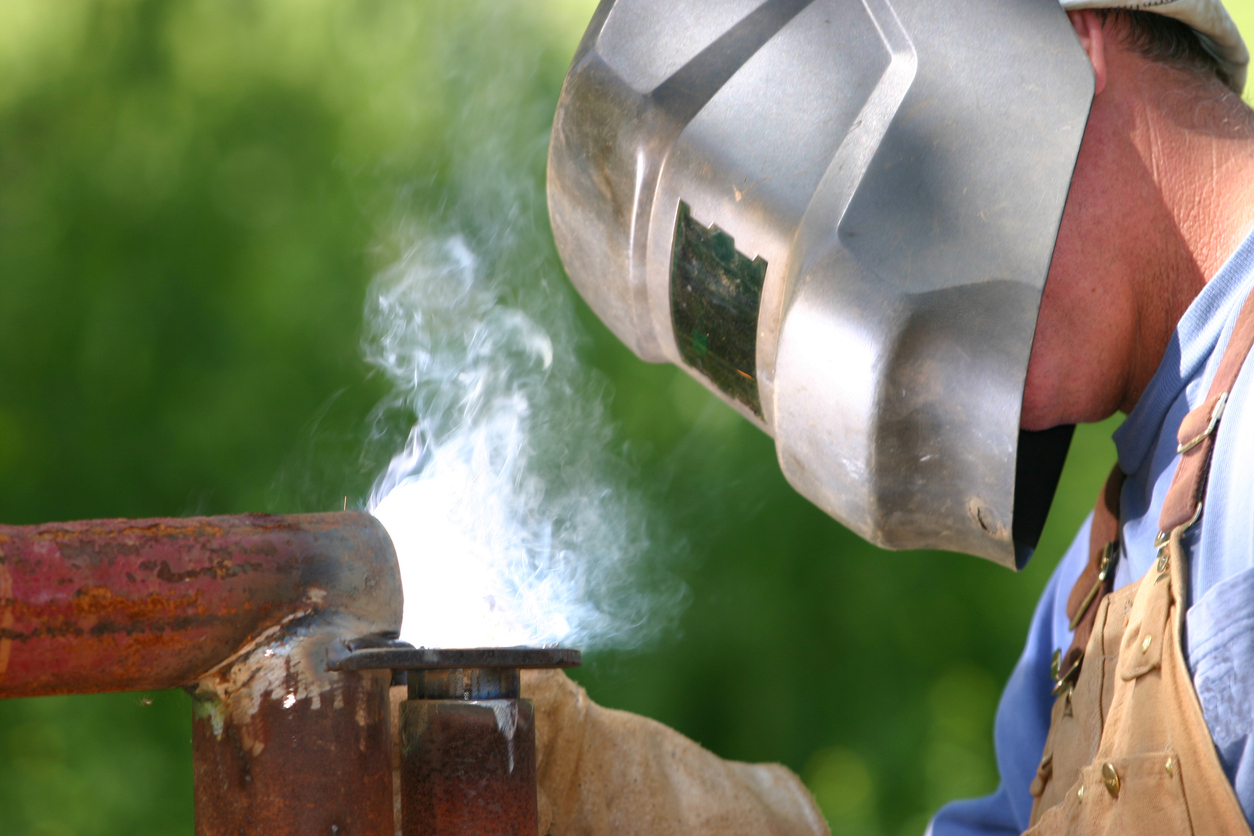
Given the temperatures and brightness involved in metal welding, there is always the potential for injury. However, a few simple precautions will maximize welder safety.
- Always wear personal protective equipment (PPE) and clothing, including overalls or an apron, a high-quality welding helmet, and proper welder’s gloves.
- Make sure you understand your equipment, especially how to quickly turn the welder off in the event of an accident.
- Clear the area of any flammable materials.
- Ensure the work area has adequate ventilation. Welding fumes can make people drowsy.
- When welding at home, keep children and pets away from the area where you are working.
- For further reference, the Occupational Safety and Health Administration (OSHA) produces a number of safety recommendations. While these are aimed at commercial organizations, they are relevant to all welders.
Wire Basics
One thing that makes MIG welding easy is that the welding wire is fed automatically, at a rate set by the user. However, not all welding wire is the same.
Gas MIG wire doesn’t contain the flux required by gasless welders. Conversely, flux core (gasless) wire cannot be used in gas MIG welders. Different types of welds (mild steel, stainless, and aluminum) also demand specific wires, and wire diameter changes to suit material thickness.
It’s important to understand the above in order to produce good welds. Fortunately, the information is readily available from equipment and consumable suppliers.
Shielding Gas Ratios
The most common gas supplied for MIG welding is argon (A). This is an inert gas, and as such contains no contaminants that might weaken welds.
While 100 percent argon is sometimes supplied, it is usually mixed with carbon dioxide (CO2) in a ratio of 75 percent A to 25 percent CO2. Carbon dioxide is considered semi-inert, cheaper than argon, and improves weld penetration. However, the finish can be less even. According to Vern Lewis Welding Supply, this ratio can account for around 90 percent of a seller’s welding gas sales.
Helium is sometimes added to argon and carbon dioxide to create what are called “tri-mixes.” These are often used when working with stainless steel. Specific ratios change depending on the material and welding process, so consult your gas supplier for more information.
How to Use a MIG Welder to Join Metal
Where possible it’s always a good idea to have professional instruction when learning how to weld. If local classes aren’t available, online welding courses can be an excellent alternative.
The following is a brief overview which applies to the two main MIG welding methods.
STEP 1: Decide whether you want to push or pull.
There are two basic MIG welding techniques: to pull the weld towards you, or to push it away. With gas MIG, you can do either. With gasless MIG, you can only pull, because pushing breaks through the shield.
Pulling is easier and faster. The weld isn’t as neat but can penetrate more, so it usually provides a stronger weld in thick metal. A pushed weld usually looks neater, is more consistent, and takes less work to grind down afterwards if a smooth finish is required.
Either method can be used for steel. Aluminum should be pushed using gas MIG. Aluminum welding is more prone to contamination, and this method maintains a good gas shield.
STEP 2: Set up the MIG welder.
The correct voltage needs to be set for the thickness of metal being welded, and the feed speed of the wire. Charts with the relevant information are always provided, often permanently fixed to the machine itself. In some cases this is semi-automated in that you only need to set certain parameters, and the welder works out the rest.
Gas needs to be turned on, and the correct flow rate set. Fix the earth clamp to the workpiece or welding table if you have one.
STEP 3: Put on your PPE and perform a safety check.
Everything you do now should be done with safety equipment in place. Put on your welding helmet, and make sure it is working properly. Put on your gloves. Welding gloves can feel clumsy at first, but the protection they provide is essential.
Run through the safety checks mentioned above in “MIG Welding Safety Tips.”
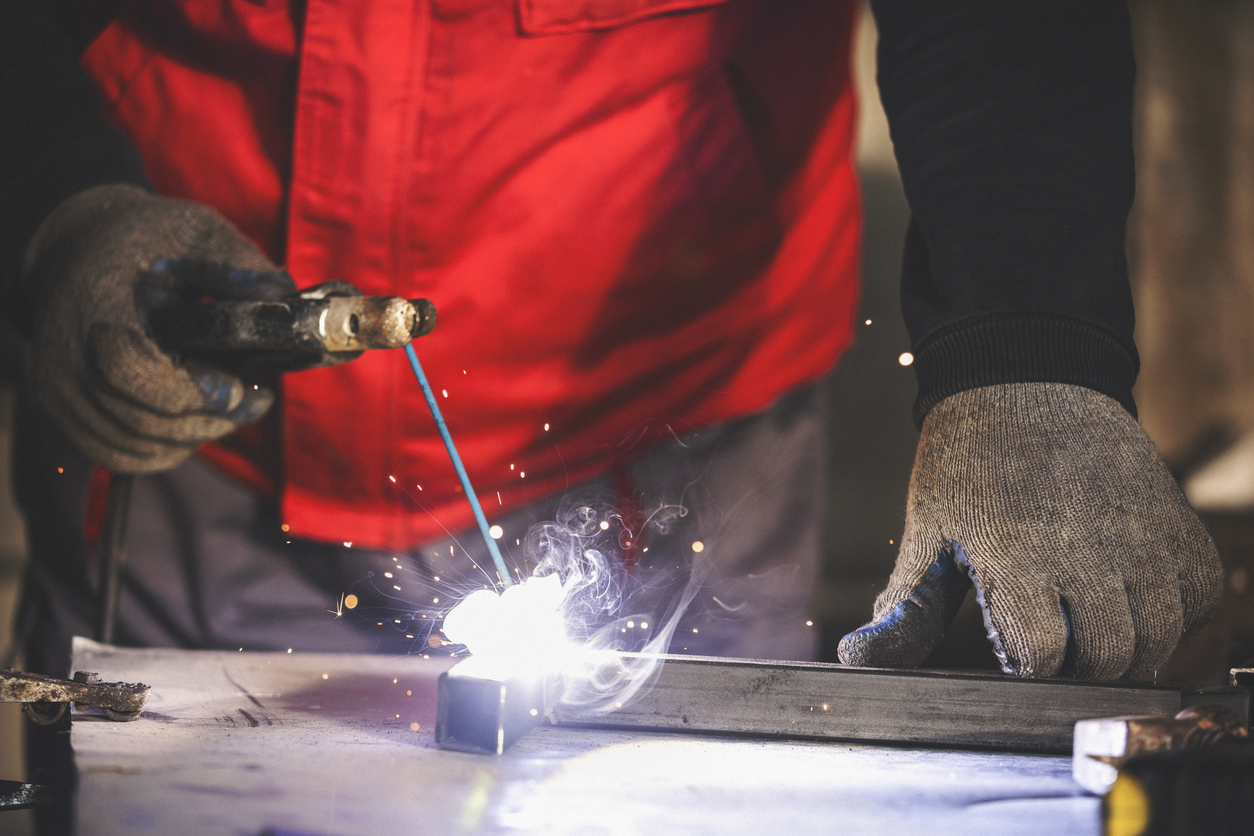
STEP 4: Strike an arc and lay a bead.
Practicing on a piece of clean scrap metal is a good idea while you get accustomed to welding. Rather than trying to weld two pieces of metal together, just concentrate on striking the arc and creating a line of metal (called a bead) on the surface.
Striking an arc and starting to weld is usually done by scratching the wire electrode along the metal surface, creating a spark. Imagine how you would strike a match on a matchbox. Once the arc is struck, pull the gun away slightly. Welding doesn’t happen with the electrode (wire) in contact with the metal. Instead, it should be about ⅛ of an inch away from the metal surface.
Some machines create an arc by tapping, but this is a more difficult technique. It can sometimes cause “freezing,” where the wire sticks to the metal rather than creating a weld pool. Scratching is recommended for beginners.
Once you are confident that you can strike an arc and control the bead, you’re ready to weld. Whether pulling or pushing, the gun should be held at an angle of around 15 to 20 degrees. Concentrate on the molten metal (the weld pool), working as smoothly as possible.
Going too slowly can create holes right through the metal. Going too quickly results in weld that isn’t formed properly, meaning it will have weaknesses. Be patient with yourself when learning how to lay a bead. Getting it right takes a little practice.
STEP 5: Clean up the finished weld.
Allow plenty of time for the weld to cool. Don’t be tempted to dip the metal in water or pour water on it; doing so can cause fissures and distortion. Once it has cooled completely, the amount of cleaning up the metal requires depends on whether or not the weld will be visible.
A few minutes’ work with a wire brush may be sufficient. In cases where the metal will be painted, it will often be necessary to grind away excess bead to produce a smooth finish.

Common MIG Welding Mistakes and How to Avoid Them
The most common MIG welding mistake is insufficient preparation. It’s understandable that people want to start welding as soon as possible, but rushing to get a job done often results in welds that fail.
- Always wear all eye and body protective equipment when welding.
- Start small with small projects whenever possible before taking on major projects.
- Make sure the materials to be joined are clean and free from paint, rust, grease, or other contaminants.
- Invest in quality equipment and materials.
- If in doubt, get advice. Taking a welding course is always a good idea. Equipment and consumables suppliers are usually happy to help, too.
MIG Welder Maintenance Tips
Always follow the manufacturer’s recommendations for care and maintenance of MIG welding equipment. Generally speaking, this will cover the following:
- Keep it clean. Welding shops can become dirty environments quite quickly. When finished welding, wipe down your welder and store it away from dust and dirt, or at least store it under a cover. Keep the welding gun off of the floor.
- Purge the shield gas by turning off the gas and pulling the gun trigger until the regulator hits zero. This extends the life of hoses, valves, and other parts. Cut off and dispose of any wire that feeds through.
- Regularly check the hose and fittings for damage. Replace them immediately if leaks are found.
- Check that electrical connections are secure and that any cables are not damaged or frayed.
Final Thoughts
Welding is a fascinating hobby, which involves developing skills that can be both useful and creative. The information above provides a useful foundation for any beginner who wants to know how to use a MIG welder.
If you haven’t already bought a welding machine, consider the differences between gas and gasless welding very carefully. For those with the budget, a combo machine has clear advantages.
Pay particular attention to safety precautions. Welding burns can be particularly unpleasant, and not wearing a quality helmet can result in severe eye injuries.
The prices listed here are accurate as of publication on October 31, 2022.
