We may earn revenue from the products available on this page and participate in affiliate programs. Learn More ›
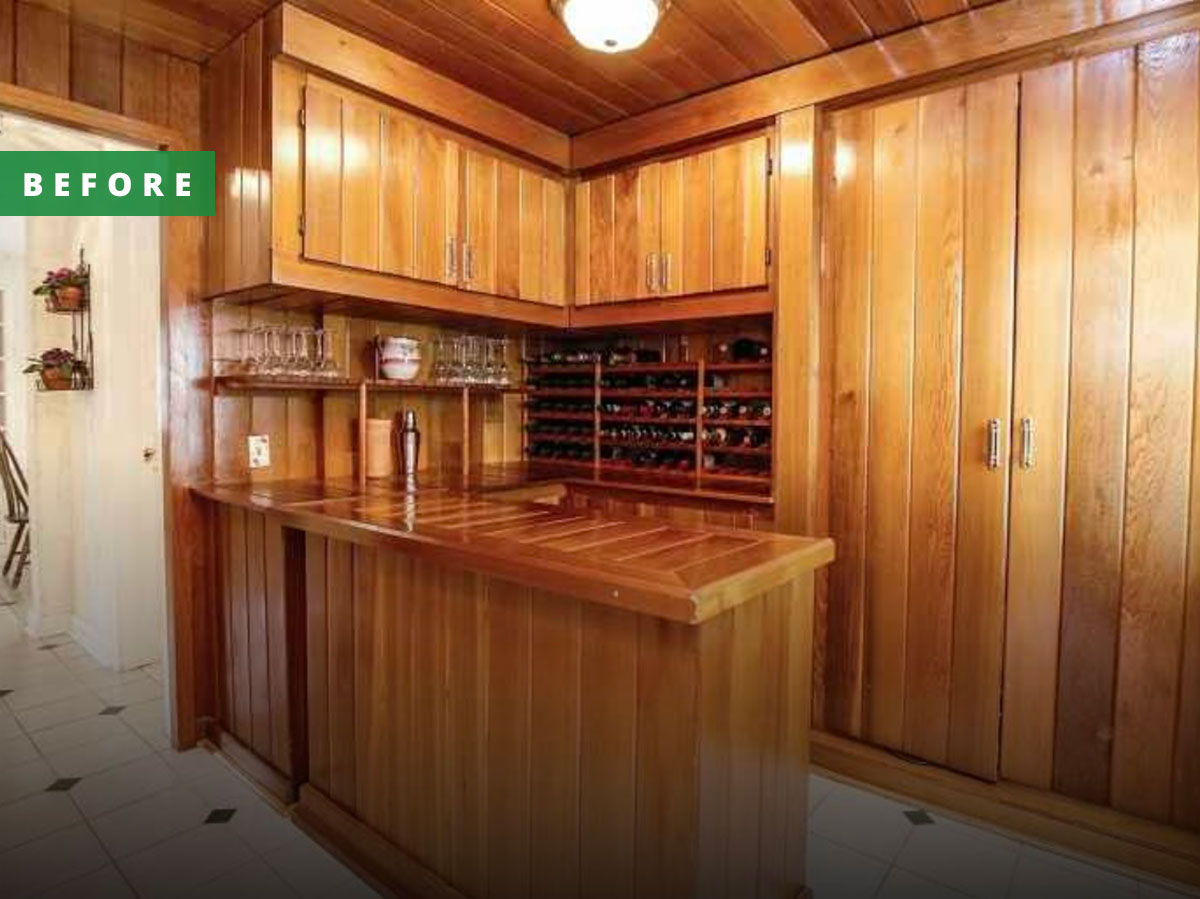
The first time I stepped through the door of our home, I immediately noticed the wood-paneled bar off the entrance. It reminded me of a scene from the show Mad Men with major 60s and 70s vibes. It turns out, the space does have an interesting history. One of our house’s former owners was a co-founder of the Arizona Iced Tea empire, so I pictured him sampling iced-teas at the bar. Rumor has it, he added wood paneling to this area, and a few other rooms, to create a yacht-like atmosphere.
As much as I appreciated the nostalgia of the space and dreamed of hosting fancy cocktail parties, the desire for more functionality won out. The room had quickly become a collection spot where we dropped our belongings as we entered the house. As a family of five, I knew we needed the additional storage for coats, shoes, and other accessories, so we set out to create a functional space that also suited our modern farmhouse style.
Vision and Inspiration
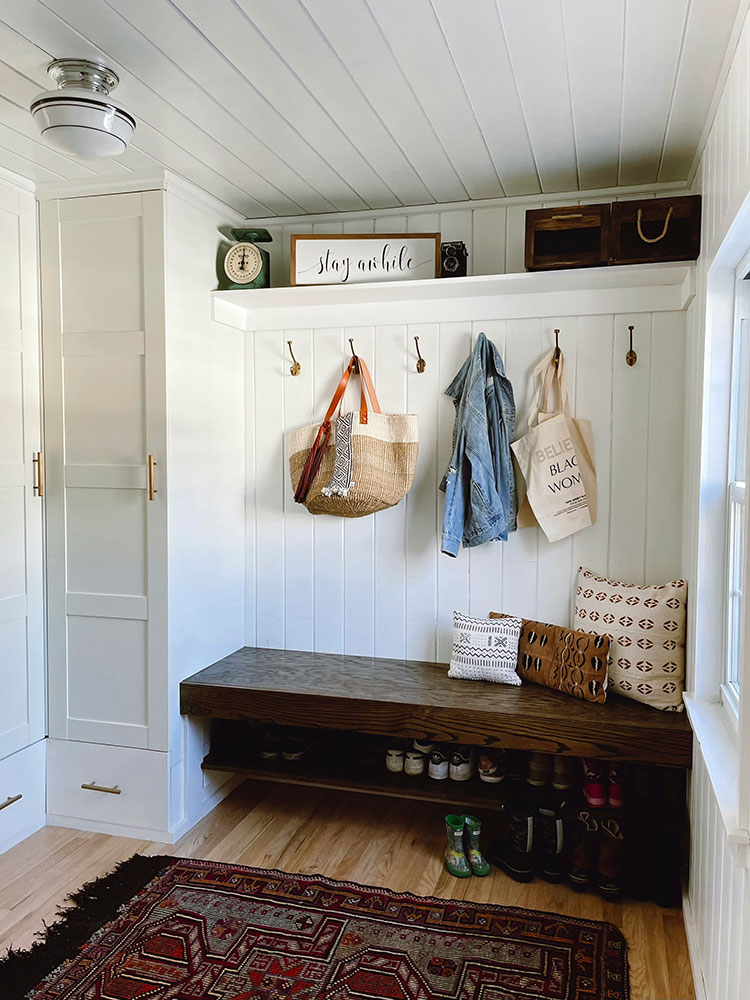
The room needed to include hooks for everyday coats and bags, a closet for other jackets and accessories, and shoe storage, all while staying within a modest budget. After browsing Pinterest, I became inspired by the creative IKEA hacks I had seen, especially those that used the company’s affordable closets to look built-in. I was also taken by the floating benches that would accommodate extra shoe storage underneath. We began to envision a space that featured these two elements, along with some fun hardware and accessories for the mudroom of our dreams.
Bye Bye Bar
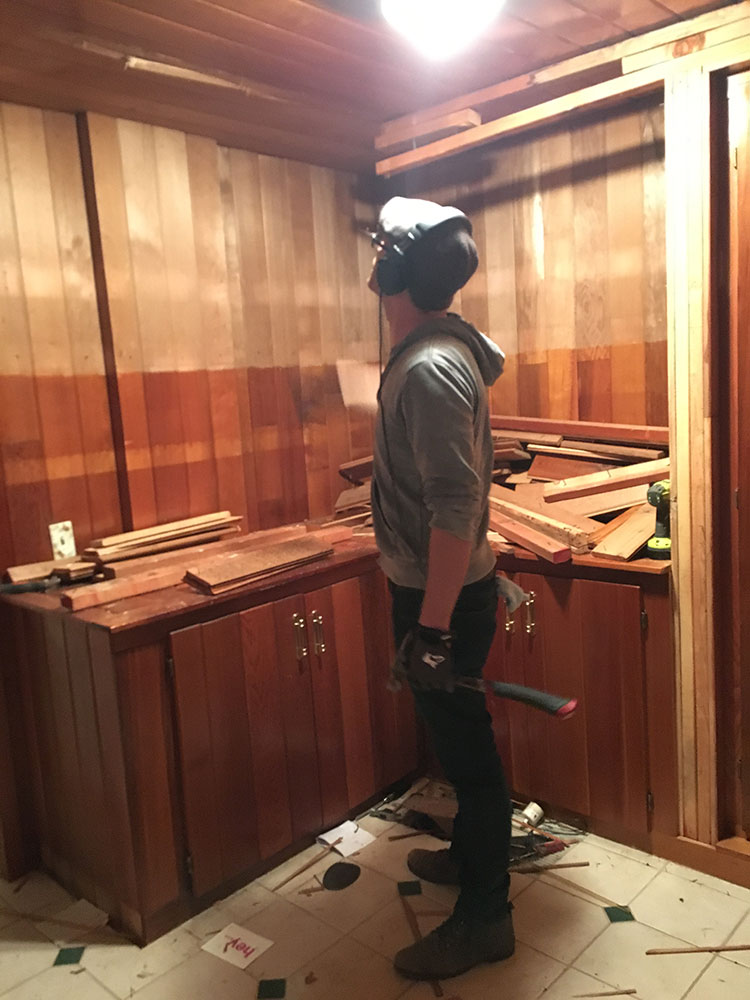
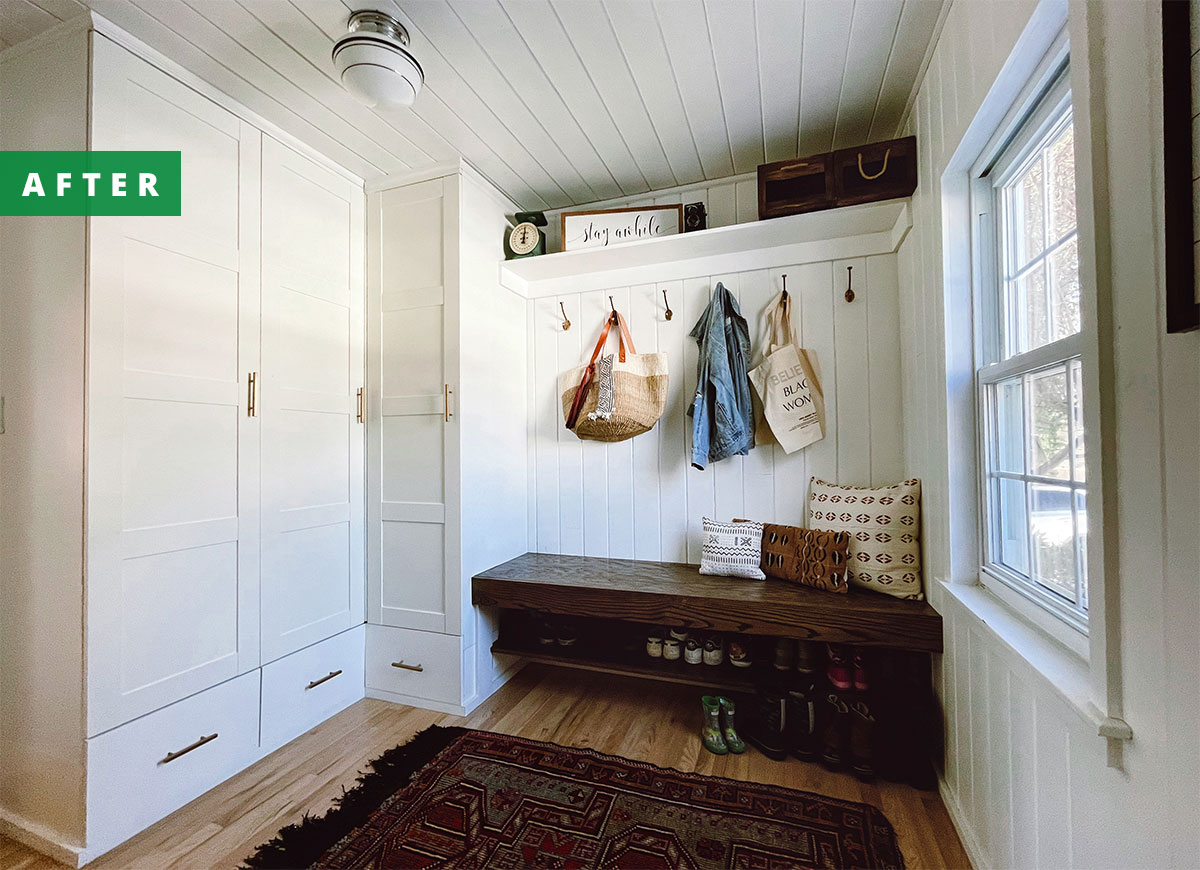
The first step was gutting the room. We decided to keep the paneling on the walls and ceiling and paint it white, so the goal was to remove the cabinets and closet without damaging those surfaces in the process. This wasn’t totally doable, so once the built-ins were out, we needed to mend some of the broken paneling, which was a bit of a challenge when working on the ceiling.
To do this, we repurposed pieces of wood from the closet to fill in the gaps. Once the mending was complete, it was time to scuff and sand the paneling, which was probably the most taxing part of the job. Once that was complete, we used three coats of primer and two coats of semi-gloss white paint to cover the walls. The color alone drastically changed the feel of the space, taking it from dark and closed in to bright and airy.
RELATED: The Best Pry Bars for Your Tool Kit
The Essential Elements
Next was the cabinet, which required a trip to Ikea. In order to make sure we left the mega store with all the necessary items, we measured twice before our trip. Even with the extra preparation, it still took us an hour to put together the correct configuration to suit the corner space. After spending a day assembling the mudroom storage cabinet, now it was time to make it look as if it were customized for the space as a built-in closet. To do this, we first added a sturdy wood platform to set it on, which we made to look like fake drawers on the exterior by adding fronts and hardware. Next, we added crown molding in the space between the top of the unit and the ceiling and a simple molding at the base. The leftover gaps were small enough that we could use white paintable caulk to fill them.
For the floating bench, we had seen a photo on Pinterest of one that incorporated a shelf for shoes and decided to build that version. It entailed anchoring a wood frame to the wall studs and along one side of the closet, over which we laid plywood. A slim bench front and the lower shelf finished it off. For more details, check out this blogger’s tutorial, which helped us with the process.
Challenges
We hadn’t factored in the need to tamper with the electrical, but the closet came out just far enough to cover the light switch, so it had to be relocated onto the cabinet.
In the after photo above, you’ll notice the sleek gold handles on the closet doors. I’ll let you in on a secret; the one on the door directly next to the bench is fake. The closet actually opens from the opposite side of the handle, and only when the door next to it is open. However, putting the pulls next to one another would have looked wrong, so we added it to the hinged side of the door for aesthetics since it functioned just fine either way.
RELATED: 17 Design Inspirations for Mudrooms and Entryways
Our Favorite Part
I really love this whole room for its combination of style and functionality, but I would have to say my favorite part is the mudroom bench. Stylistically, I love the modern look and the warmth of the wood, but it’s also perfect for storing shoes and sitting on to pull on boots or tie sneakers. A few carefully chosen throw pillows add warmth and texture while above the bench, the gold hooks and the shelf offer the perfect finishing touches for added storage and styling.