We may earn revenue from the products available on this page and participate in affiliate programs. Learn More ›
A garage door spring may not get much attention—until it breaks and the door won’t budge. While some homeowners consider tackling this repair themselves, experts strongly recommend leaving the job to a professional. “Generally, it’s the lack of knowledge of just how much stored energy is contained in the spring(s), and—if improperly handled—they can get seriously hurt before they even realize they made a mistake,” says George Shaw, Director of Systems at Precision Garage Door Service, a Neighborly company, which has locations across the US.
Garage door springs are rated for a set number of open-and-close cycles. After years of regular use, they’ll eventually need to be replaced. Hiring a pro for this task costs around $150 to $350, but it ensures the repair is done safely and quickly. Before deciding whether you will attempt to change out garage door springs or call in a pro, here’s what homeowners should know about this dangerous project.
Is it dangerous to replace garage door springs yourself?

Yes, replacing garage door springs is among the riskiest DIY projects that a homeowner can attempt. It may sound fairly simple, but keep in mind that springs are under immense tension, holding exactly enough energy to counterbalance the weight of the large and heavy garage door. If that energy is released suddenly, it can cause severe injuries. “If the wrong tools or technique are used, all of the potential stored energy in the spring can be released instantly, and has resulted in cuts, broken bones, head injuries, and even death,” explains Shaw.
While professionals use hardened steel winding bars or specialized tools like the Surewinder to safely manage this tension, most homeowners don’t have access to such equipment. Attempting the job with makeshift tools greatly increases the risk. Unless you have professional training and the right gear, calling a pro is the safer, and ultimately more cost-effective, choice.
Who to Hire to Change Out Garage Door Springs
When a garage door spring fails, the safest solution is to call a qualified garage door technician. Look for a company that specializes in garage door installation and repair rather than a general handyman, since trained technicians have the tools and knowledge to handle high-tension springs. “A professional should be done in roughly an hour, while I wouldn’t even venture a guess at how long it might take a DIYer, even if they were able to source the correct spring,” says Shaw.
To find a reliable pro, check for companies that are licensed, insured, and well-reviewed online. Referrals from neighbors, home service directories, and national providers are good starting points. In addition, The Home Depot can connect you to a local garage door spring replacement pro, but Lowe’s doesn’t offer this service. A trustworthy technician will also recommend regular inspections to catch worn springs before they fail completely.
How to Know When to Replace Garage Door Springs

Even the best garage doors can have issues from time to time. While some garage door issues can be remedied by using a garage door lubricant, others are more complex and can become dangerous quickly.
It’s frustrating when a garage door stops working correctly, and even more so when it isn’t clear why the door is malfunctioning—most of us aren’t expert enough in this arena to identify the spring as the problem. Since garage door spring repair isn’t possible, then the entire spring will need to be replaced.
Watch out for any of these several signs that a spring needs to be replaced.
- A loud snapping noise. This sound can signal broken garage door springs. The noise can be loud and sudden, almost like a car backfiring or a gunshot.
- The door won’t lift. When the garage door spring is worn out, it becomes much harder to lift the garage door.
- A straining sound is heard while using it. Homeowners may hear the door-opening mechanism straining when activated, which is a sign that it’s time to replace the door springs.
- The door closes too fast. If a garage door spring breaks when the door is open, the door is likely to close suddenly or violently.
- The door is uneven. If one spring has broken, the garage door may appear uneven. Even if the spring isn’t the cause, it’s wise to get a garage door inspected if you notice this sign.
- The springs are stretched out. The garage door springs appear to be stretched out and not coiled as tightly as they used to be. This is a sure sign that the springs are on their last legs.
- The garage door won’t open. If the springs have broken completely, you will notice that their garage door won’t open at all.
If you notice any of these signs, you will want to plan on replacing their garage door springs as soon as possible to avoid injuries and issues accessing or closing the garage.
Average Cost to Replace the Springs on a Garage Door
On average, homeowners can expect to pay between $150 and $350 to have a professional replace garage door springs. The final price depends on the size and type of spring (torsion or extension), the number of new springs you need, and local labor rates. While DIY might save you the labor cost, it also comes with significant safety risks and the possibility of ordering the wrong parts.
Types of Garage Door Springs

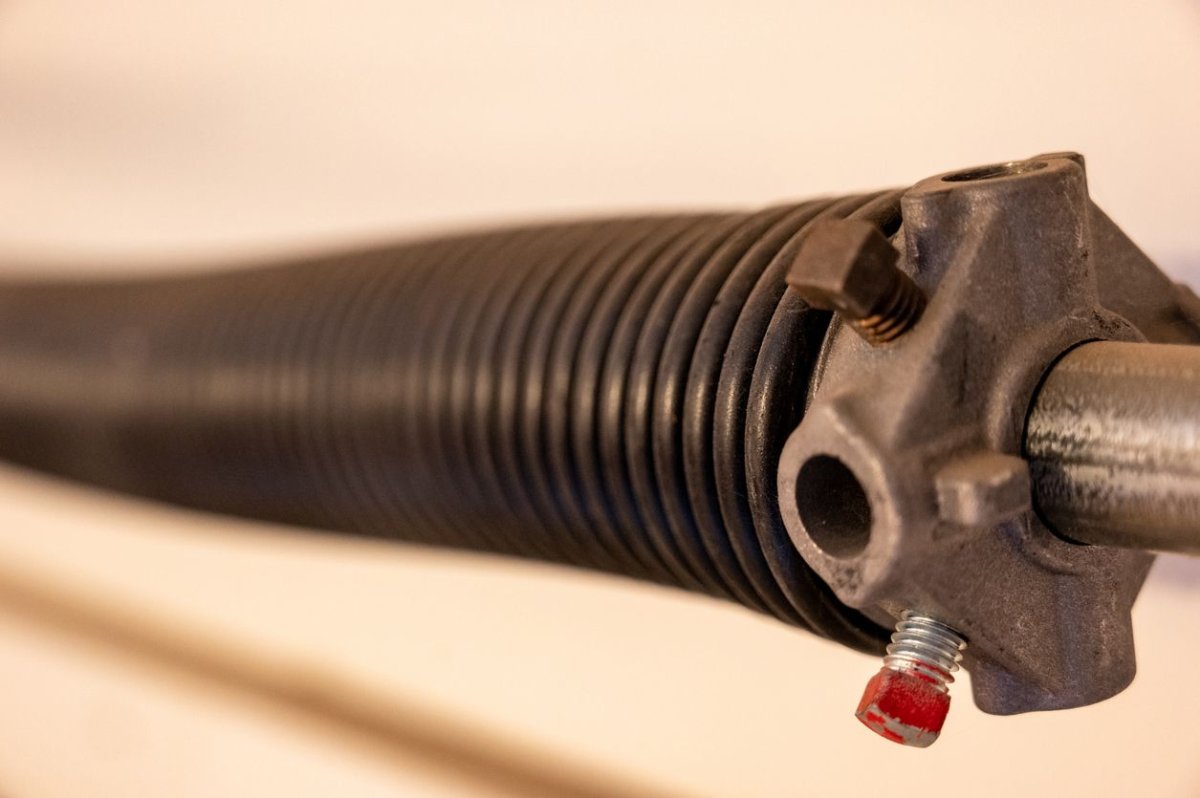
Garage doors typically use one of two spring systems: extension springs or torsion springs.
- Extension springs are long, narrow springs that run along horizontal tracks. They store energy by stretching when the door moves, and come in variations such as open-looped, double-looped, and clipped-end.
- Torsion springs, on the other hand, sit on a metal shaft directly above the door and store energy by being tightly wound. Most residential garage doors use standard or early-set torsion springs, while heavy-duty versions like steel rolling-door or torque-master springs are more common in commercial settings.
Both types are under high tension and can be extremely dangerous to handle. As Shaw notes, “Extension springs have their stored energy created by stretching and contracting, while torsion springs have their stored energy manually wound on them. They both present their own inherent risks.” For most homeowners, identifying the type of spring is as far as they should go—replacement is best left to a trained technician.
How Often to Change Garage Door Springs
Most garage door springs are rated for a set number of cycles. Each cycle is one opening and one closing of the door. Standard springs usually last 7 to 9 years with average use, but homes with heavy daily use may wear them out sooner.
Shaw recommends inspecting springs annually, especially if a door is used more than 10 times a day. Extension springs may start to show visible gaps between coils, while torsion springs are harder to spot when worn. Homeowners may also notice the door opening more slowly or feeling “heavier” to the opener—both signs of failing springs.
While replacement should always be left to a professional, you can extend spring life by keeping springs and other moving parts lubricated to reduce stress on the system.
Why You Should Hire a Professional for Garage Door Spring Replacement
While small maintenance jobs like lubricating moving parts are safe for homeowners, replacing or fixing garage door springs is another matter. These springs are tightly wound with enough energy to balance the full weight of the door, making them dangerous for anyone without proper training and tools. As Shaw cautions, accidents from DIY spring replacement have led to “cuts, broken bones, head injuries and even death.”
Hiring a professional may cost more up front, but it ensures the job is completed quickly, safely, and correctly with the right parts. A trained technician will not only replace worn springs but also inspect the entire garage door system, giving homeowners peace of mind that their door will operate smoothly for years to come.
