We may earn revenue from the products available on this page and participate in affiliate programs. Learn More ›
Out-of-the-Box Icebox

instructables.com via Matt2 Silver
Reinforced with scrap pallet wood and laid horizontally with its doors facing up, a dead fridge gets a new life in the yard as a rustic-looking cooler. With the addition of rope catches to help keep its lid open, the old freezer compartment becomes a prime spot to stash cold beverages, while the other section can be filled with condiments and snacks or used as a prep or serving station. Heavy-duty metal handles on both compartments, along with casters affixed to the base, make this hefty warm-weather essential more portable.
Chalk It Up
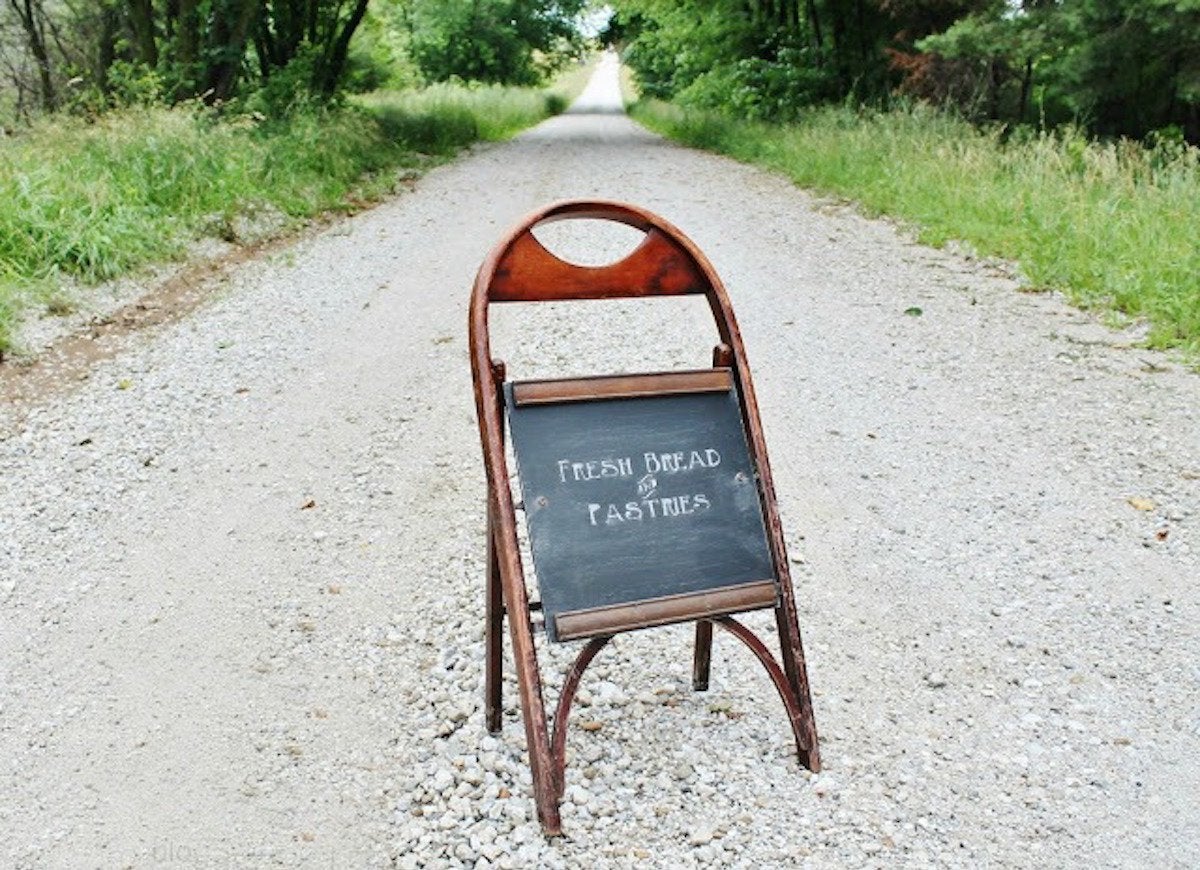
Sagging or torn seat covers may signal that your wooden folding chair is no longer a seating option, but they mark the beginning of its new life as a clever chalkboard sign. Remove the seat covers and enlist a few bolts to retrofit the chair frames with chalkboard-painted MDF squares. Voilà—you now have your very own sidewalk-style chalkboard for use indoors or out, the perfect place to display today’s menu or announce a yard sale.
Sublime Steps
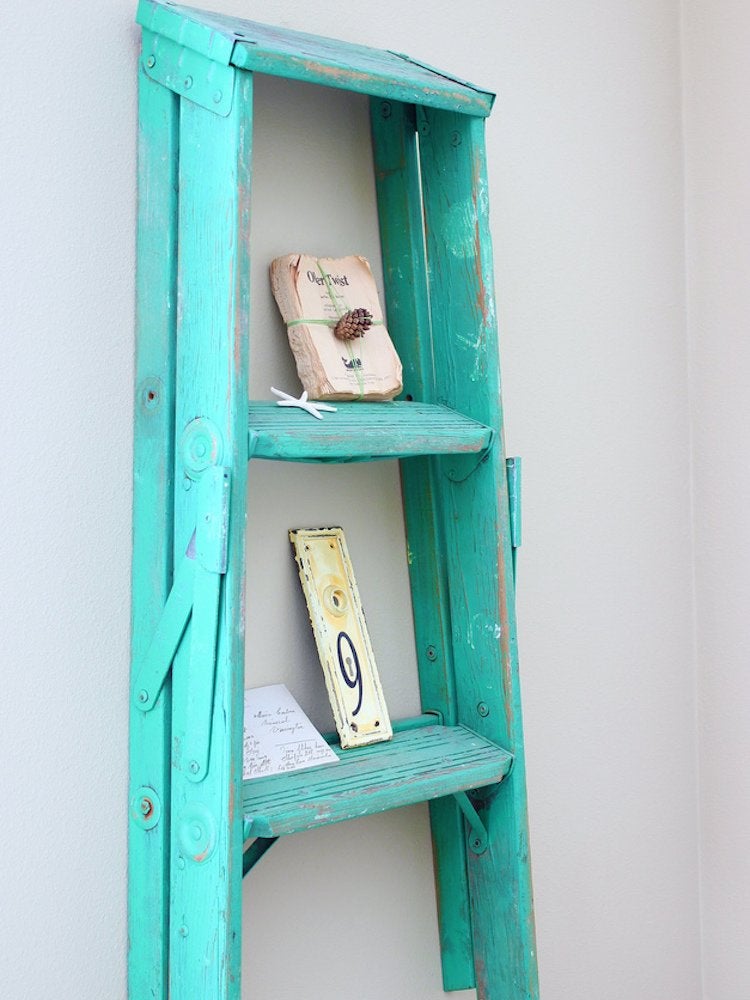
One of the easiest ways to step up the storage in a do-nothing space is to mount an old ladder against an empty expanse of wall. The retro color palette and distressed finish of this antique wooden ladder make it an ideal pick for a cottage-chic home.
Back to the Drawing Board
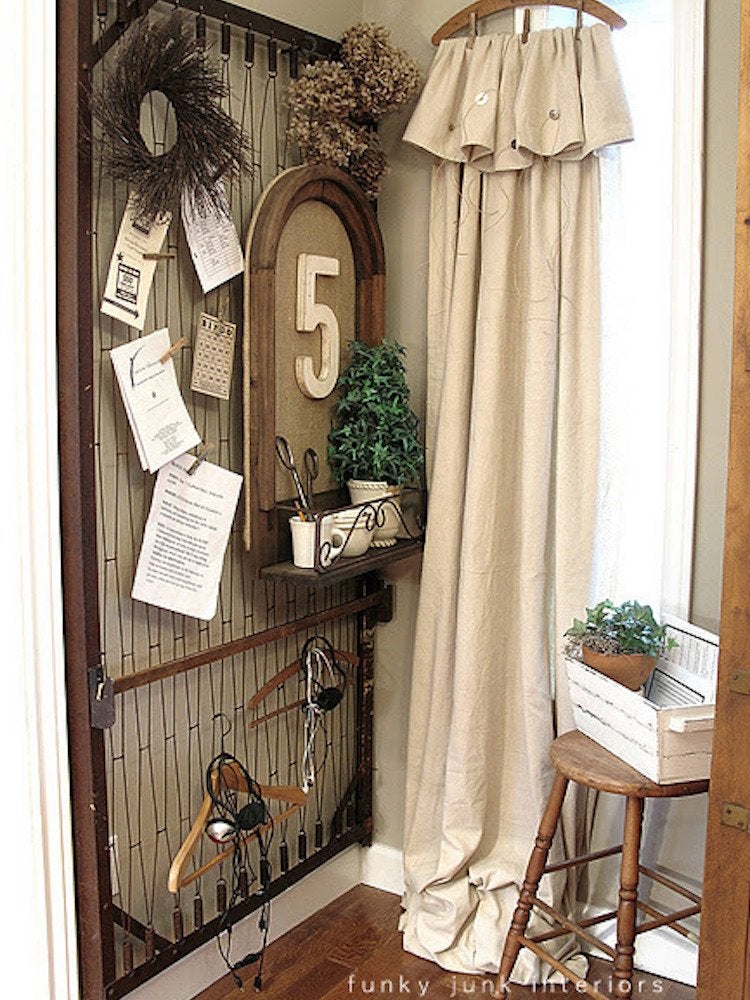
Your old metal bed frame may have lost its bounce, but you won’t have to consign it to the junkyard if you know how to upcycle it. Here, an old spring bed frame that’s been cleaned and topped with a clear satin coat serves as the backdrop for a crafty bulletin board—actually, a plant holder retrofitted with a cork backboard. While the bulletin board offers room for small plant pots and everyday knickknacks, the surrounding bed frame is perfect for keeping track of daily reminders and receipts.
Don't Sweat It
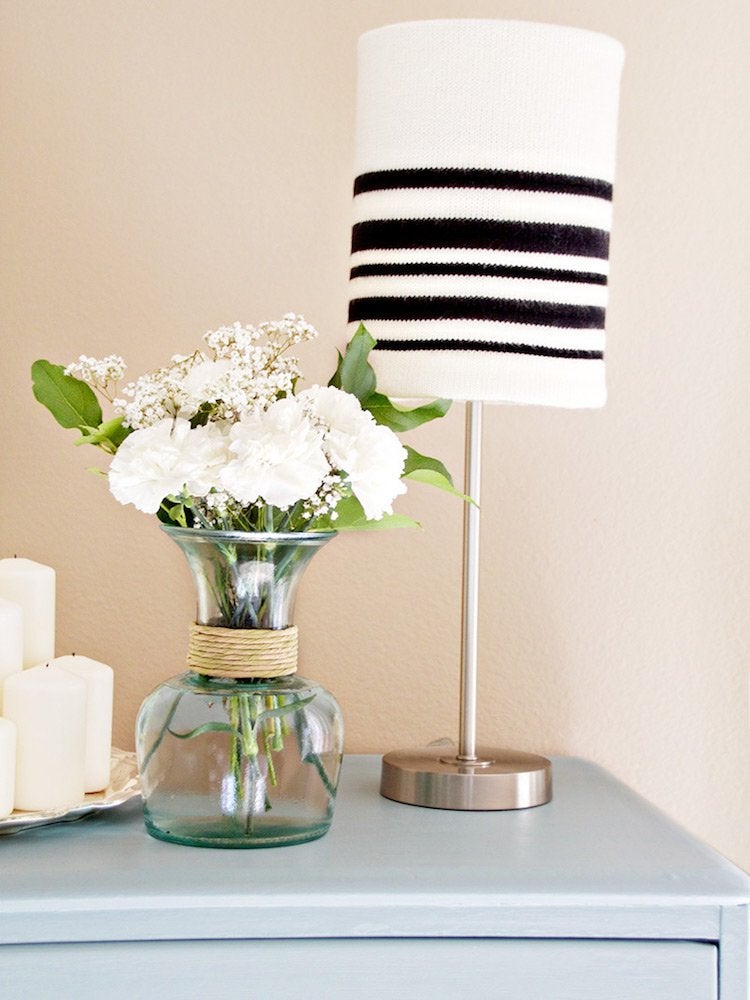
Who knew? An old sweater that was accidentally shrunk in the wash makes the perfect shade for a blindingly bright lamp. Pull the sweater over the lampshade, then cut off the excess fabric above and below, leaving just an inch to secure the sweater to the shade. Fold the extra fabric under the top and bottom edges of the lampshade, and hot-glue it down to achieve an artful lampshade that envelops the room in a soft glow.
Bed and Board
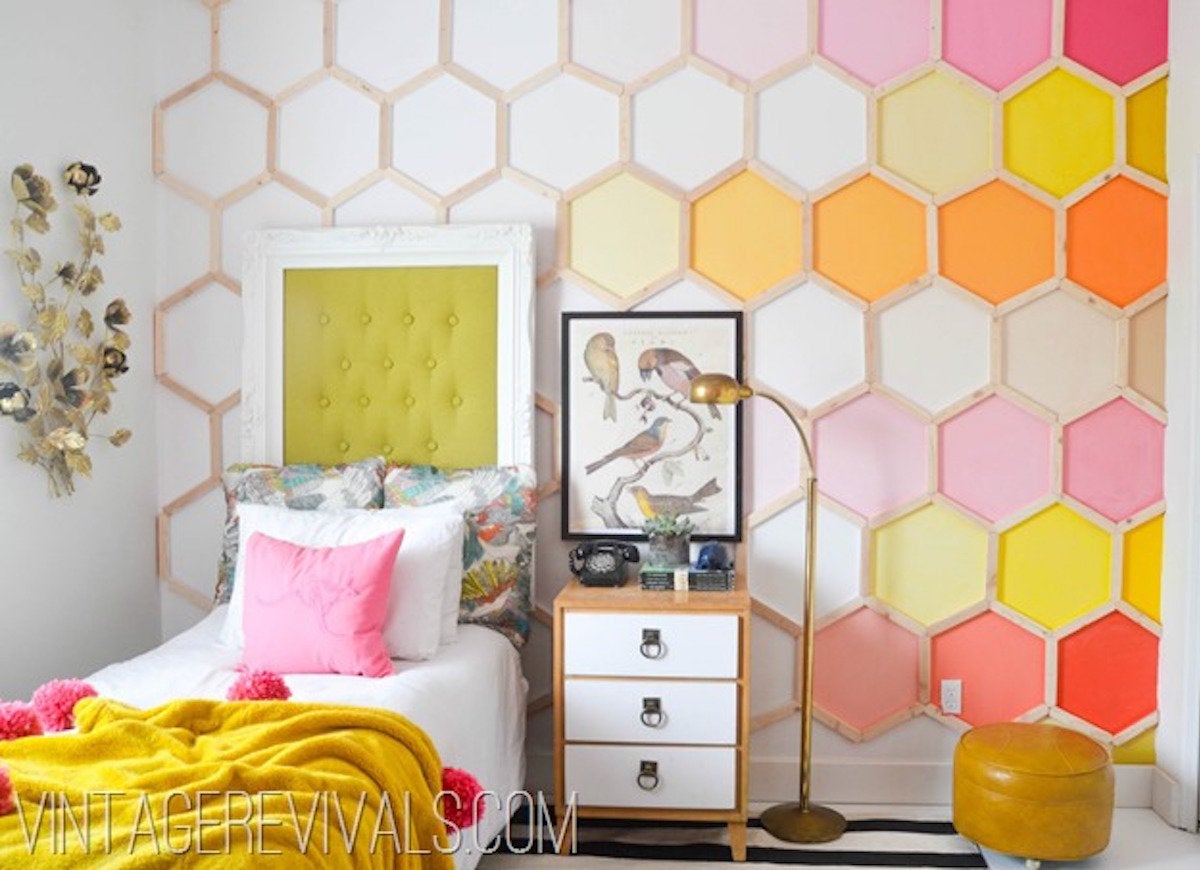
Your guests will never guess that this picture-perfect headboard got its unlikely start as an oversize picture frame. To re-create the look, cut a large sheet of plywood to fit a large wooden frame, upholster the board with thrifted fabric, batting, and egg-carton foam, then complete the assembly by nailing the picture frame to the upholstered board. For an even dreamier finish, use staples to create shallow tufts, then hot-glue decorative buttons on top of each staple.
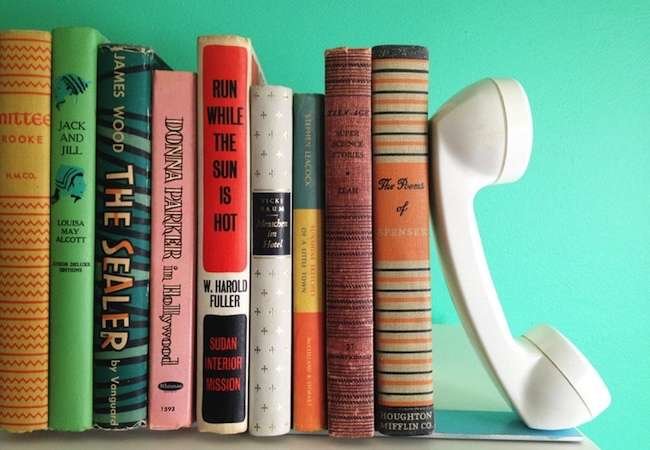
Good Call
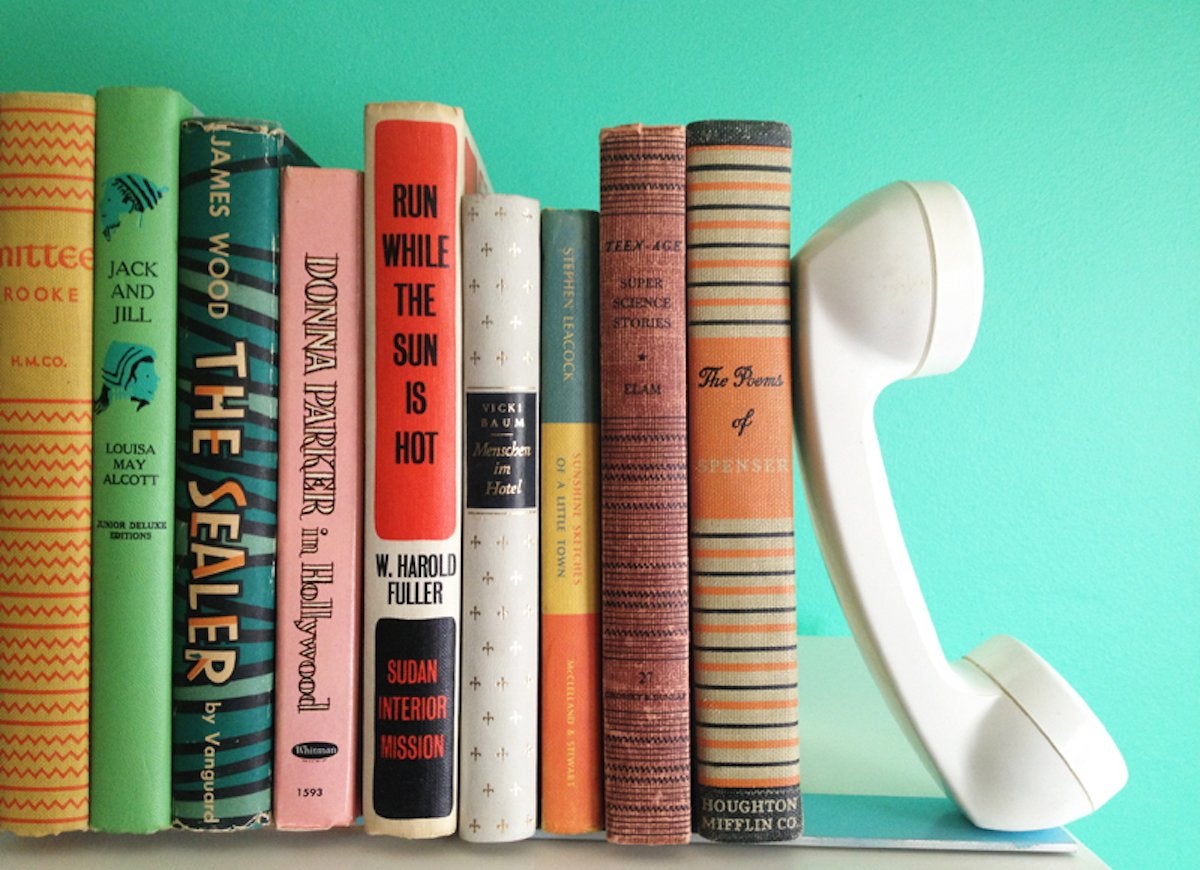
Before calling it quits on a pair of dead corded phones or even retro-era rotary phones, transform them into an unconventional set of bookends. First, remove the cords (or unscrew the microphone covers from the rotary phones), spray-paint two scrap metal bases, then use screws to secure the handsets to the bases in an upright position. With strips of felt affixed to their bases, these eye-popping organizers will keep unruly books in their place without scratching shelves.
A Breath of Fresh Air Plants

If your coffee carafe is no longer keeping up with your coffee habit, why not recycle it into a living work of art? All it takes to re-create this quirky terrarium is an empty coffeepot filled with sand, river rocks or gravel, moss, and a few mini air plants. (Shown here are a green Tillandsia and Tillandsia ionantha ‘Fuego’.) Air plants require no more than moderate sunlight and a light misting of water every day, making this one garden you can keep up with no matter your skill level.
Bowl of Greens
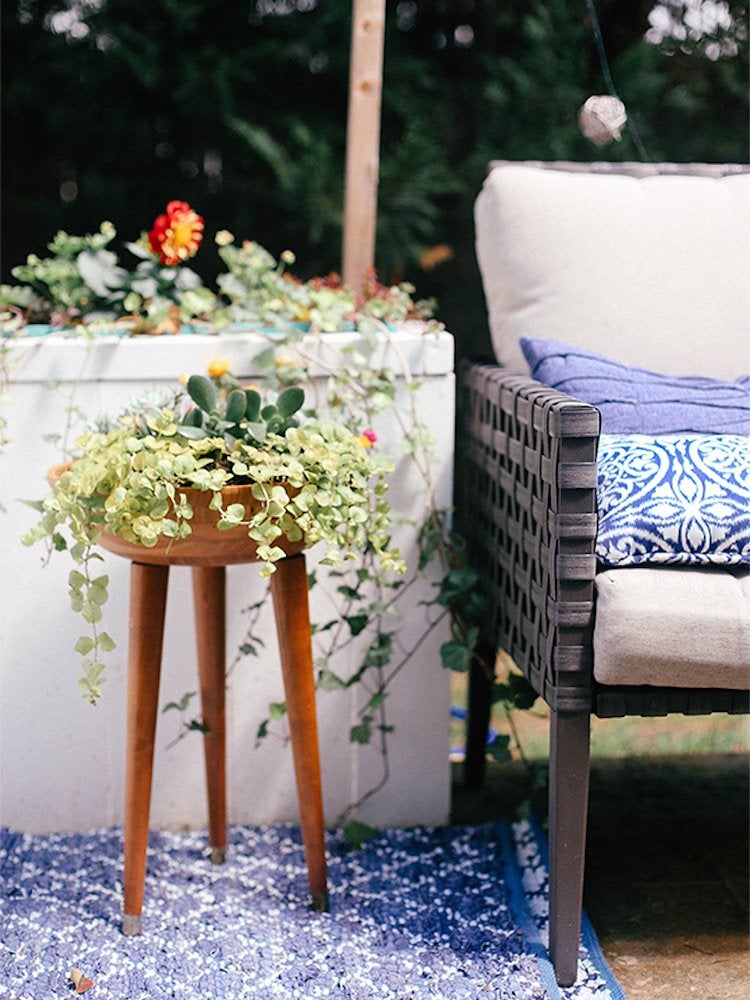
A dried-out or cracked wooden salad bowl might not look great on the family dinner table, but it could make a big statement on the back patio. Screw three tapered table legs to the bottom of a wooden bowl to construct a tripod planter, then fill the bowl with succulents, creeping Jenny, or other greenery to breathe life and color into your yard. And don’t forget this important step: Drill a hole in the center of the base of the bowl to allow the planter to drain, keeping the plants healthy.
It's a Cakewalk
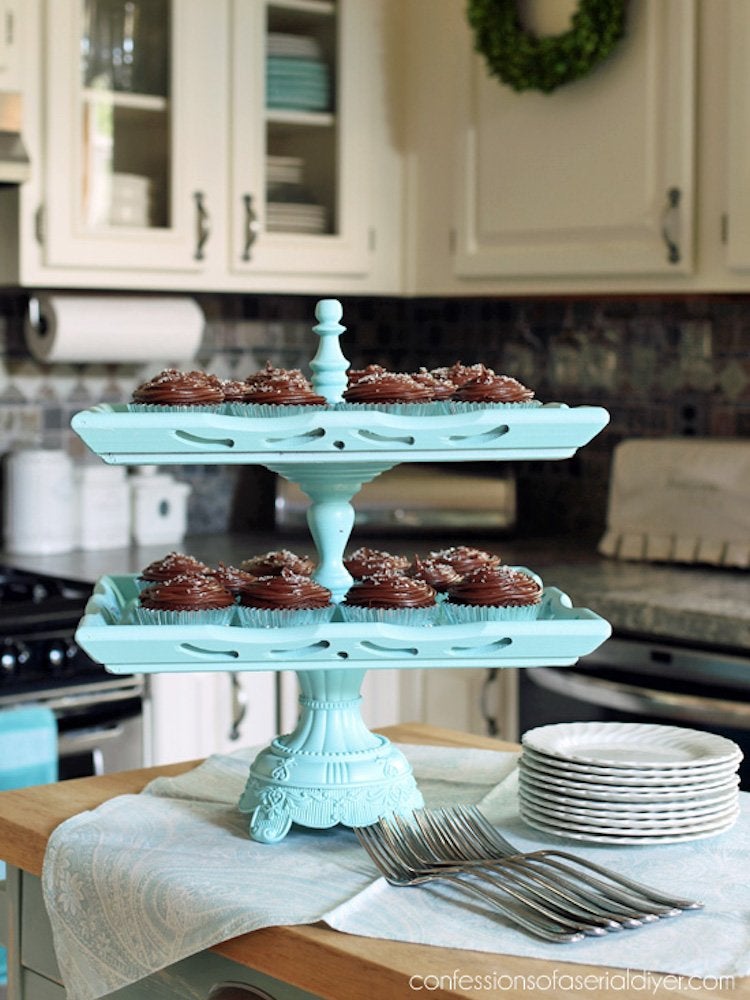
Even more amazing than the treats served up on this cupcake stand are the shockingly simple steps it took to build it. The vertical pieces are two candlesticks and the decorative finial of an old birdhouse, and the two trays are nothing more than empty picture frames lined with beadboard. An eye-catching coat of robin’s-egg blue adds a touch of whimsy to this graceful serving piece—what could be sweeter?
Hang It All!
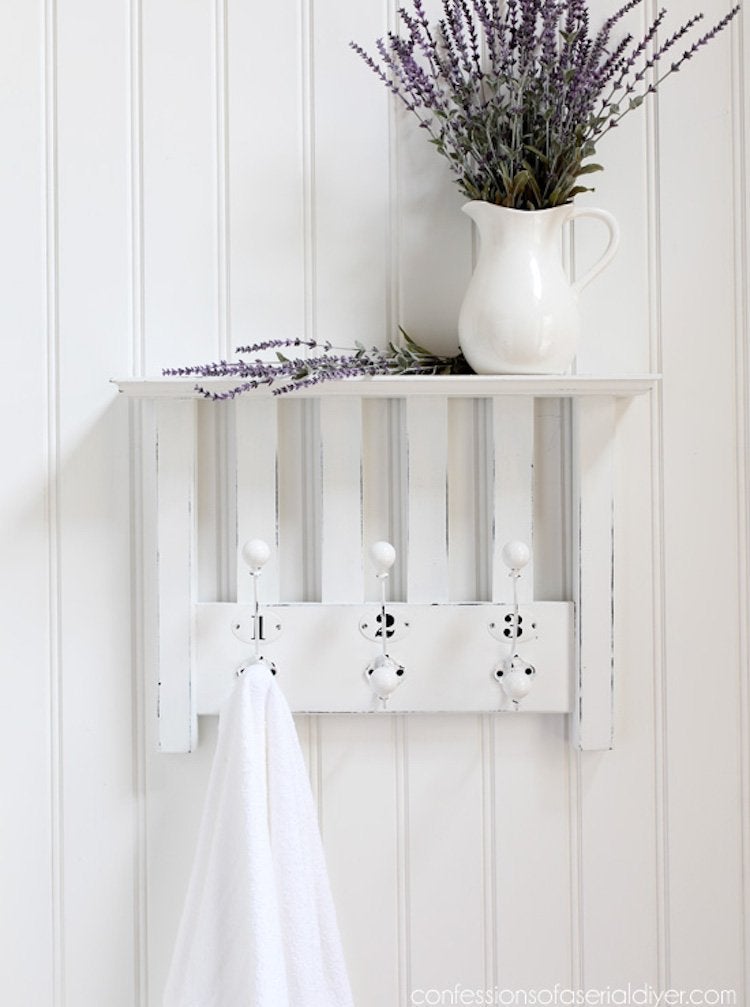
Why scrap a broken rocking chair when you can preserve its vintage glamour—and the fond memories associated with it—by upcycling it into this chic wall-mounted coatrack? Secure a plain wooden shelf to the top of the chair back, mount a hanging shelf to the base, then spray-paint the rack in your favorite shade. Reserve the hooks for coats, scarves, hats, and other fall essentials, but don’t neglect the top of the rack, which offers display space for collections or other decor.
Dish It Out
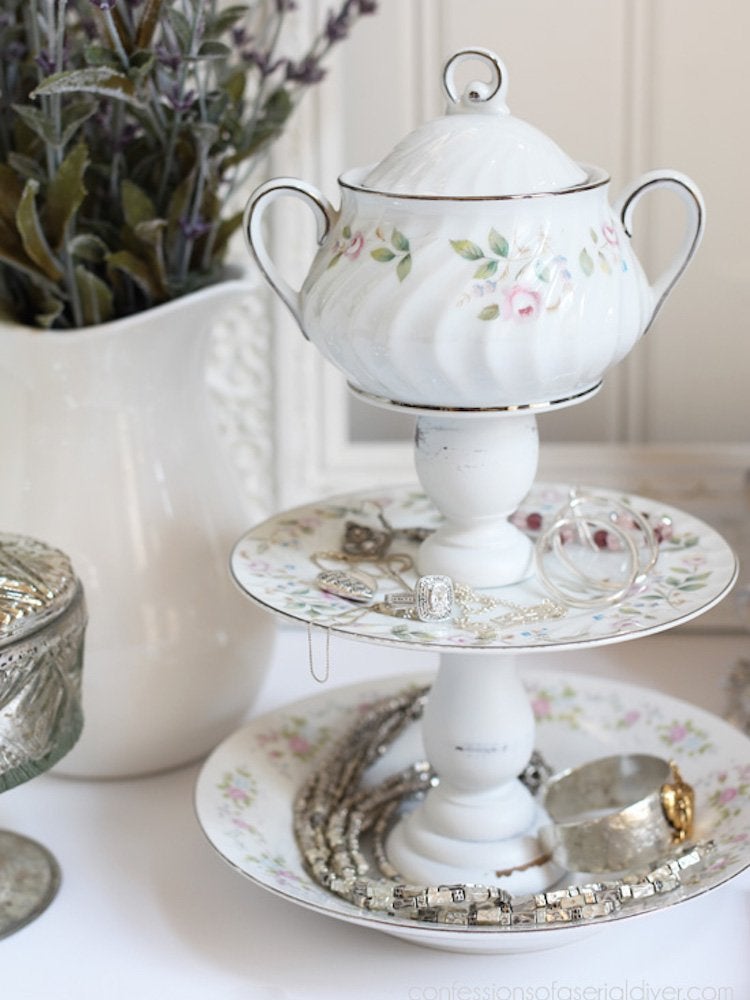
Chips or cracks in fine china are no reason to part with a prized heirloom. While your old china may no longer pass muster in the dining room, it may be just right for this clever jewelry stand that capitalizes on the material’s elegance and storage potential. Make your own by assembling candlesticks and china dishes into a tiered stand using industrial-strength adhesive. The bottom and middle tiers are great for storing rings and bracelets, while the finial piece—a sugar bowl—artfully conceals tiny valuables.
Fractured Fairy Tale
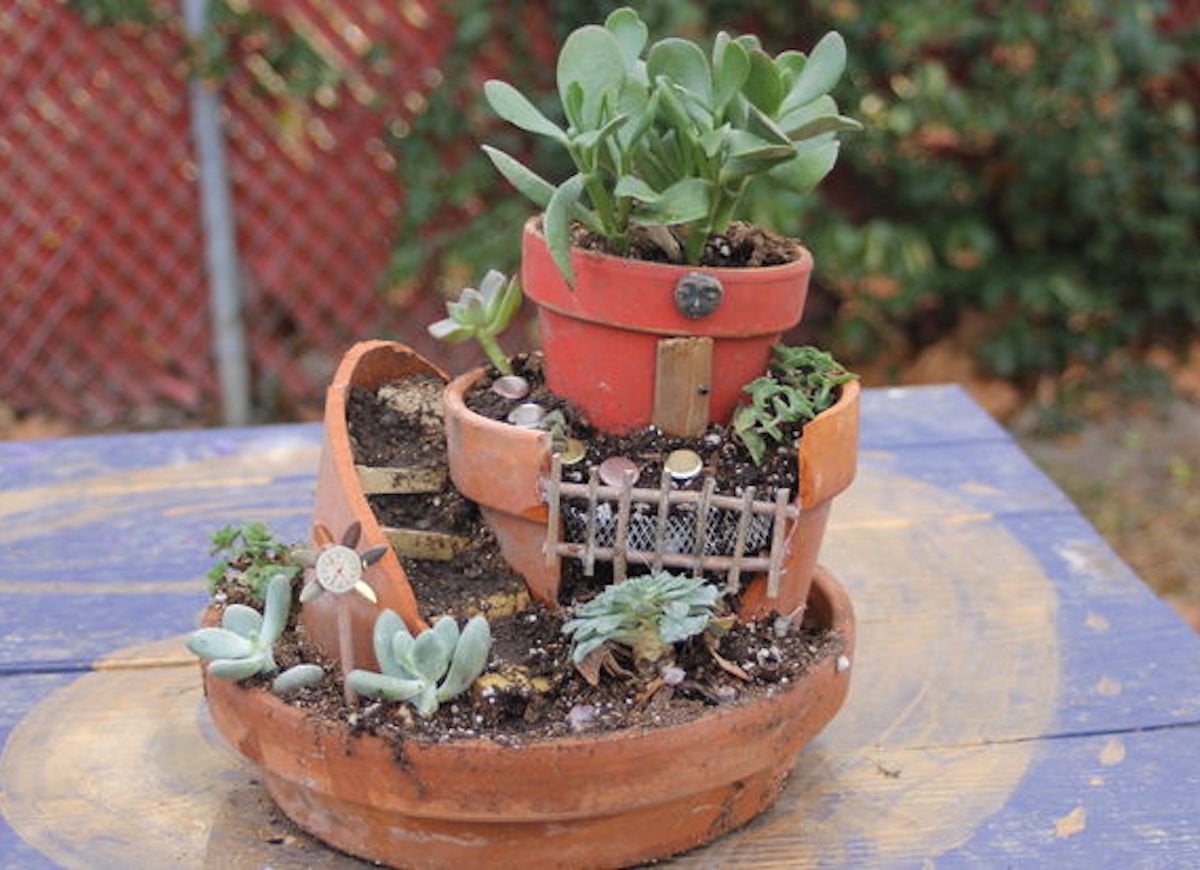
instructables.com via TamarasSoliloquy
Whether your terra-cotta pots were tipped over and broken by kids, pets, or yours truly, you can make good use of the ruddy remnants in this fairy garden. Arrange the broken pots in a tiered design, filling each with soil before stacking the next pot on top. Add large succulents to the topmost pot and smaller succulents at random in and around the lower-lying pots. Place modeling mesh against any broken sides of pots to hold in the soil, then add gold-colored brads to serve as stepping stones and a tiny wooden door at the base of the top pot to evoke the look of a dainty fairy cottage. Little ones will never guess that it’s your DIY magic at work!
Music in the Making
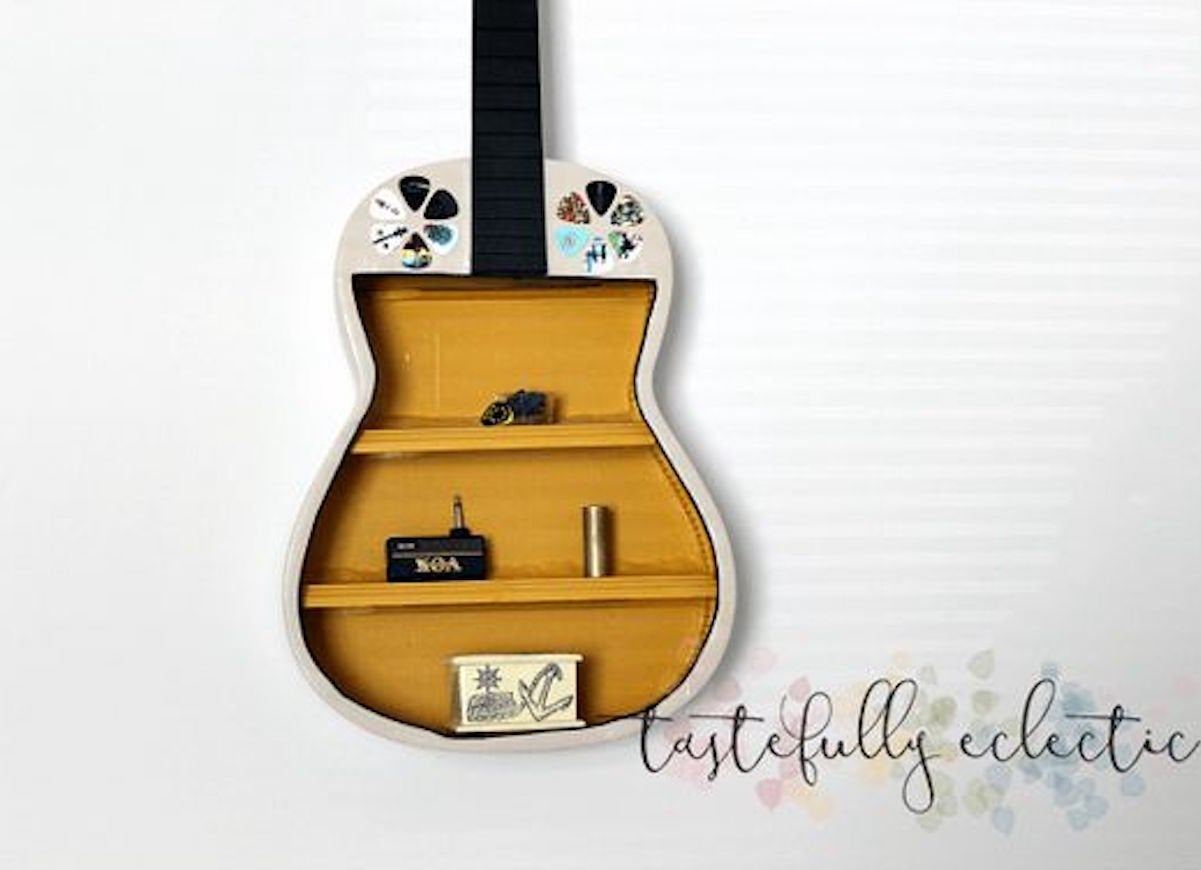
Roomy, retro-chic, and easy to re-create, this guitar shelf strikes all the right chords when mounted on a bedroom or living room wall. Build the shelf by removing the tuning pieces from the headstock, cutting out the center of the guitar, then fitting the hollow body with shelves and replacing the tuning pieces. Three different shades of paint applied to the shelf, body, and neck of the guitar, coupled with colorful guitar picks adhered to the body, add rock-and-roll flair to the space-smart accessory.
Sweet Dreams, Fido
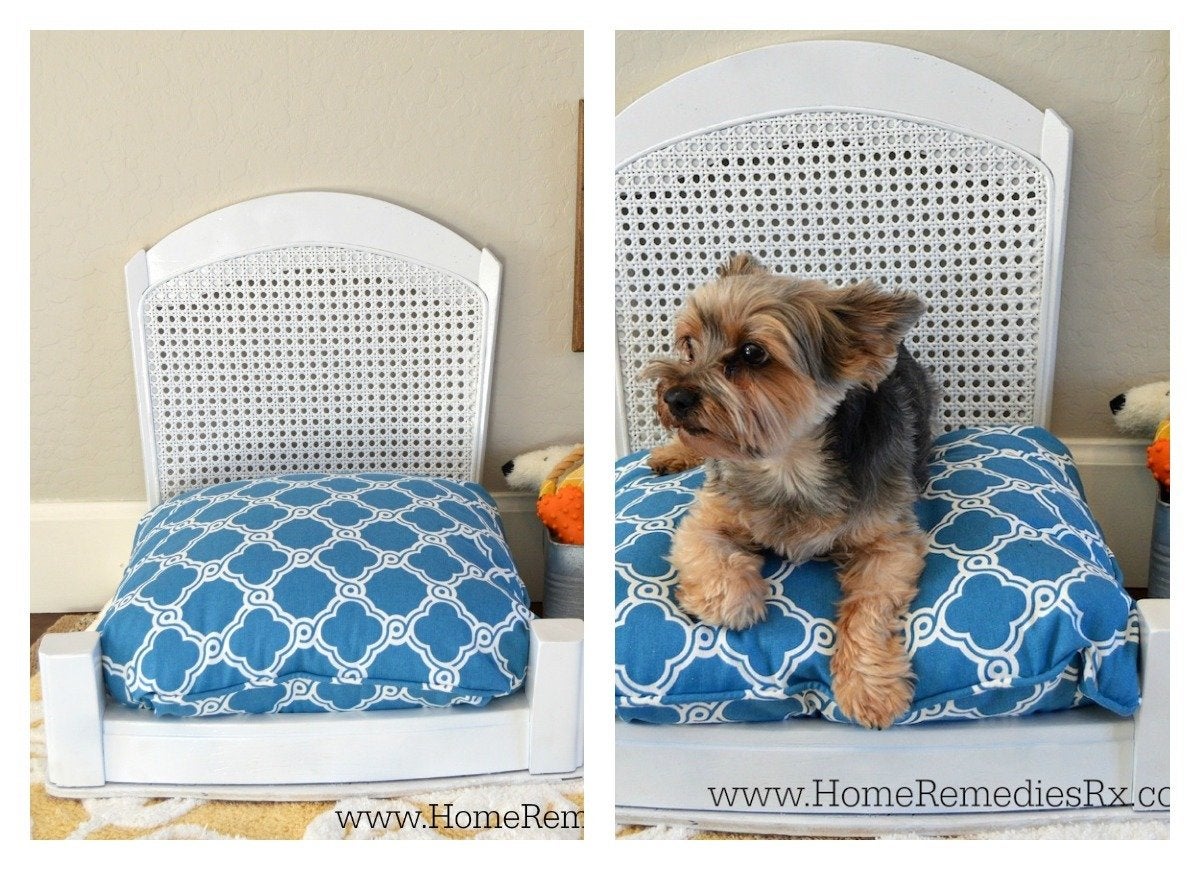
Give an old wooden chair a chance at redemption—and your pooch a comfy place to nap—with this plush DIY pet bed. Detach the chair seat from the chair back and turn it upside down so that the old front legs of the chair become the new bedposts around the seat, then shorten the bedposts with a circular saw. All that’s left to do now is to paint the chair and let it dry, then replace the old chair cushion with a patterned throw pillow to make a cozy spot for your four-legged friend.
Hard at Play
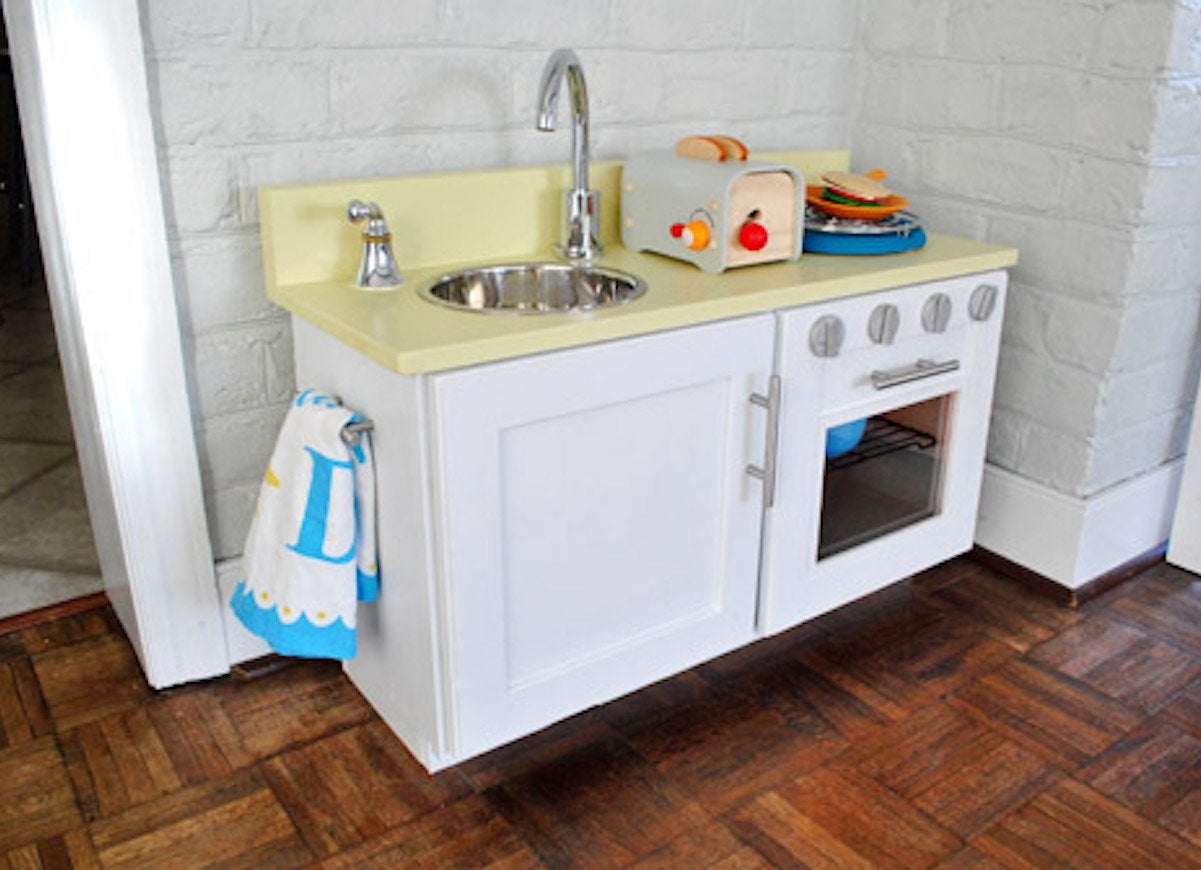
Look around your kitchen and basement for cast-off items—old cabinets gathering dust, faucets that you swapped out for newer models, and kitchen implements that you never use. These discards could be the foundation for a great play kitchen for the kids, a place where they can pretend cook and clean without getting underfoot. Realistic enough to appeal to kids and budget-friendly enough to please grown-ups, this miniature kitchen features a faucet and sink, a trivet as a faux burner, and a converted cabinet door fitted with plexiglass to serve as a play oven. Oven knobs that really spin, a convenient towel bar, and cheerful shades of paint on the cabinet base and counters add a sense of play to the hardworking station.
Reduce, Reuse, Repurpose
Before you put your household junk to the curb ask yourself if it can be repurposed into something brand new.
