
We may earn revenue from the products available on this page and participate in affiliate programs. Learn More ›
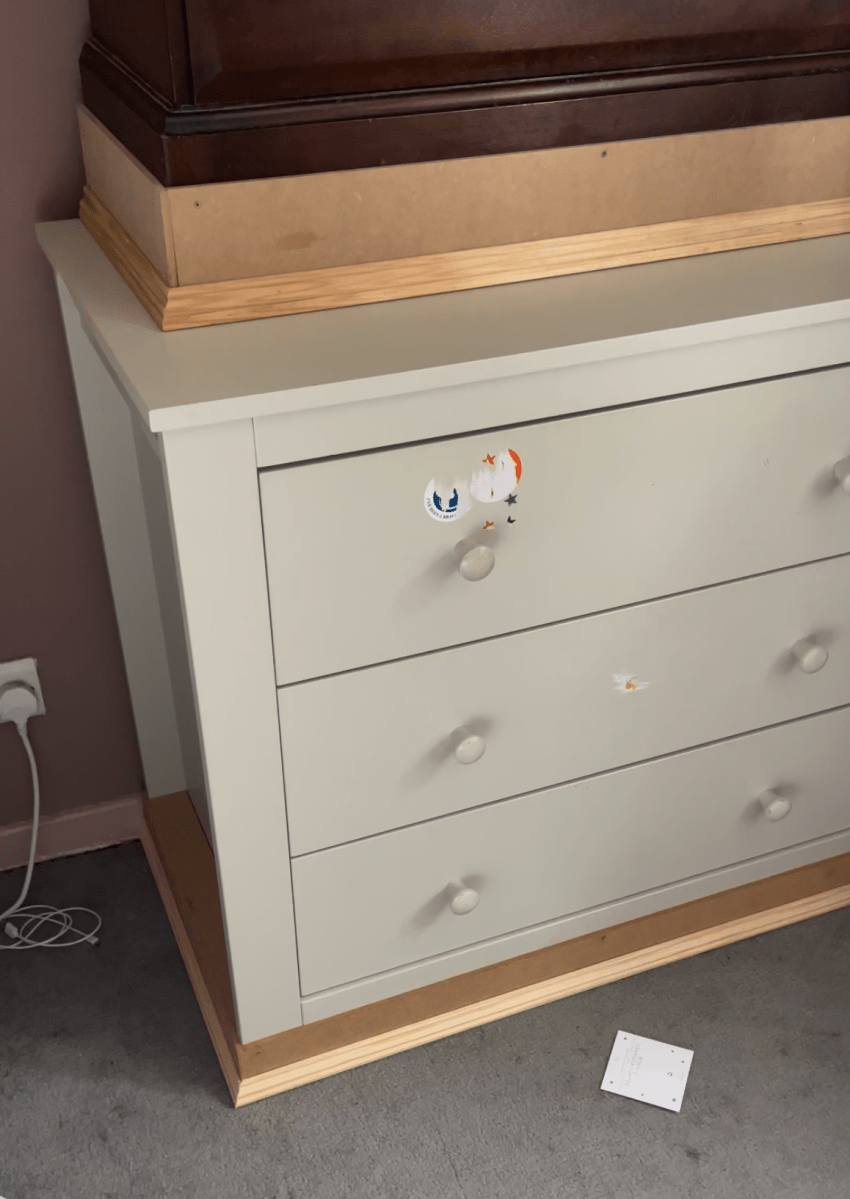
Mind the gaps. It may be a common warning when riding a railway, but it’s also a handy reminder when raising kids. Why? Their seemingly endless collection of tiny toys and ephemera tend to flow and gather inside every crevice in a home. And even though fundamental Feng Shui guides us to embrace raised furniture—in order to allow energy to flow easily throughout a space—the area beneath furniture can become a mini-Narnia with all of the bits and bobs from a household full of busy kids and pets.
“If you have kids I suggest no gaps under furniture,” says Dawn Allen, an interior designer and mom of two who created Design with Dawn to share how she’s transforming her home so it better fits with her family’s lifestyle. “I spent a lot on renovating our house a couple of years ago and I didn’t have enough money to finish everything. I’m now looking at trying to finish certain spaces on a very tight budget.”
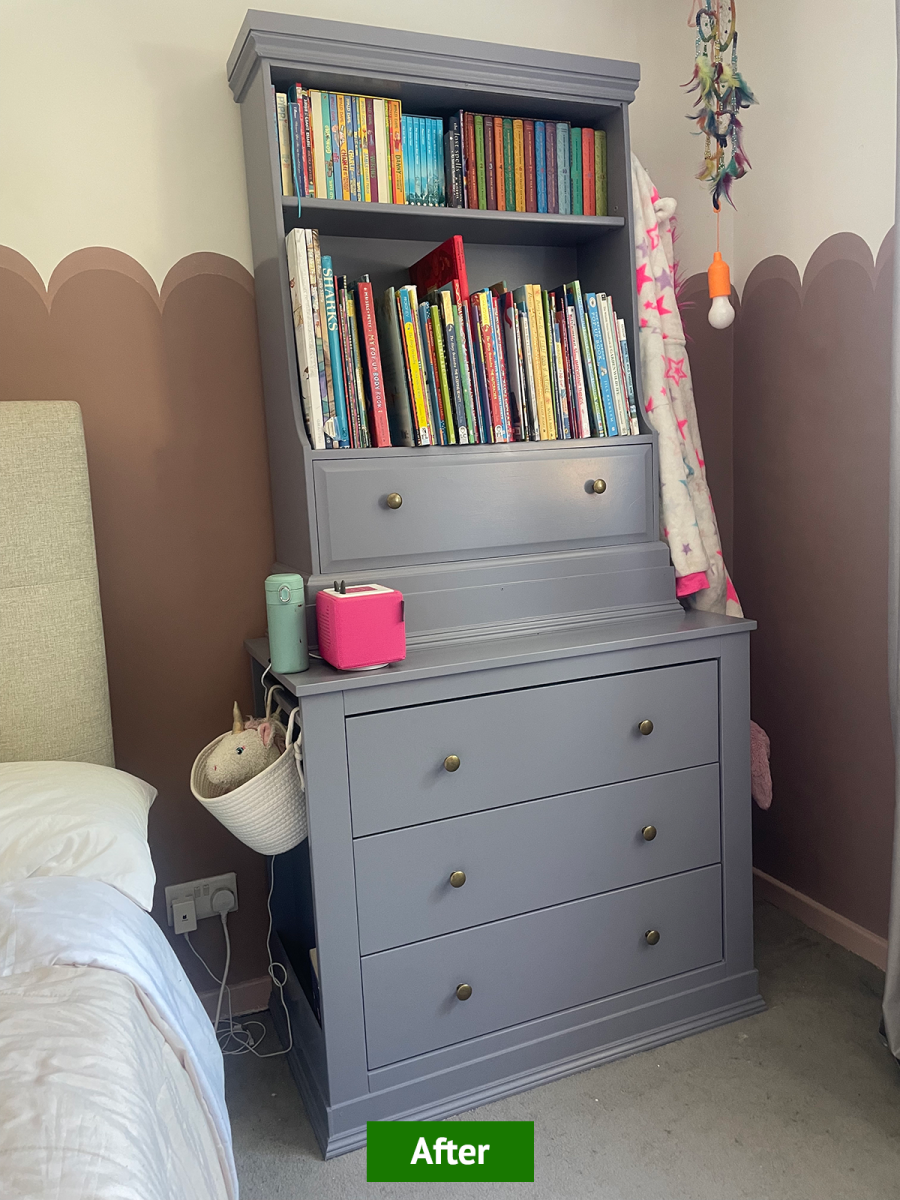
One of her clever recent projects involved combining a changing table dresser and a bookcase—a hefty DIY challenge on its own. But what caught my eye is how she trimmed the new combo storage piece along the bottom to eliminate the gaps because she was “forever pulling out toys and socks from under sofas and units so this seemed like a good idea!”
Before you start eyeing your furniture for floor-gap-ending potential combos, there are a few key DIY and design tips to keep in mind.
Start with sturdy furniture.
If you’ve ever modified furniture, you know about the ‘good bones’ theory. As a general rule, solid wood furniture is much easier to manipulate—sand, paint, stain, and repurpose—than cheap furniture made from particle board and other flimsy materials.
“It’s all good quality furniture,” says Allen. “My daughter had these items in her room anyway. The dresser was a baby changer and the bookcase was from a charity shop.” Secondhand shops are often a frugal source for good quality furniture.
And while you can successfully add trim to the bottom of pretty much any kind of furniture to eliminate the clutter gaps, solid furniture makes combining two pieces into one unit a safer and more manageable project for most DIYers.
Measure the gaps carefully.
After you’ve decided to add trim to the bottom of a dresser, desk, or nightstand, it’s essential to get the measurements spot-on. Depending on the age of your home and the condition of the furniture, the gaps between the floor and the furniture could be inconsistent around the piece. Houses just naturally settle over time, and furniture gets nicked from vacuums, moving days, and rambunctious family members.
While you can choose just one piece of trim, like a flat-stock baseboard, like this option available at The Home Depot, and scribe it along the floor, you can also consider the finish carpenter method of layering trim. Attach baseboard around the bottom of the dresser and then add a cove shoe molding. Since shoe molding is thin and flexible, it can follow any floor level changes.
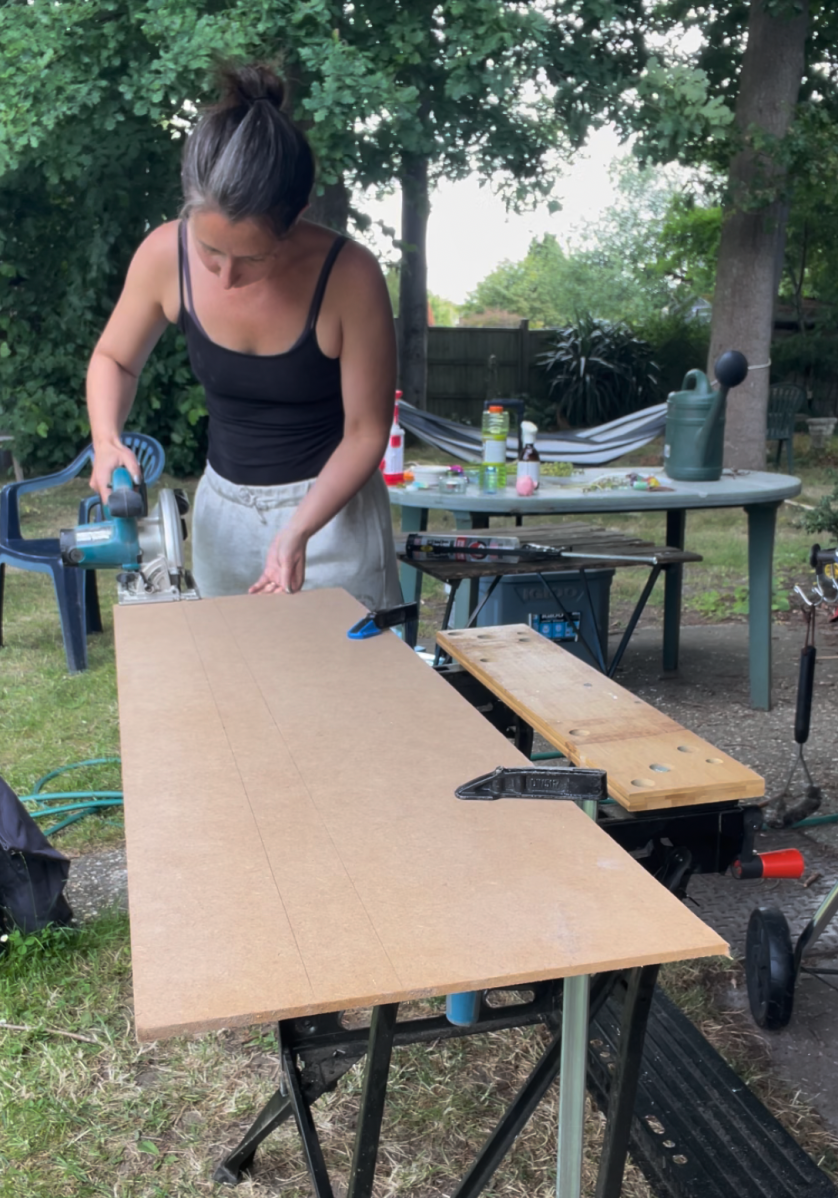
Use what you’ve got.
When updating a home on a budget, it’s important to consider any potential supplies that you already own. Or, if friends just renovated, there may be a few extra supplies or some charming paint they can’t return. Also, don’t overlook an off-cut collection and leftover paint or stain at your local hardware store.
“I do a lot of refurbishment work on properties so I have a lot of wood scraps and tools already,” says Allen. “I only had to buy the purple paint in the end as everything else was in my garage.”
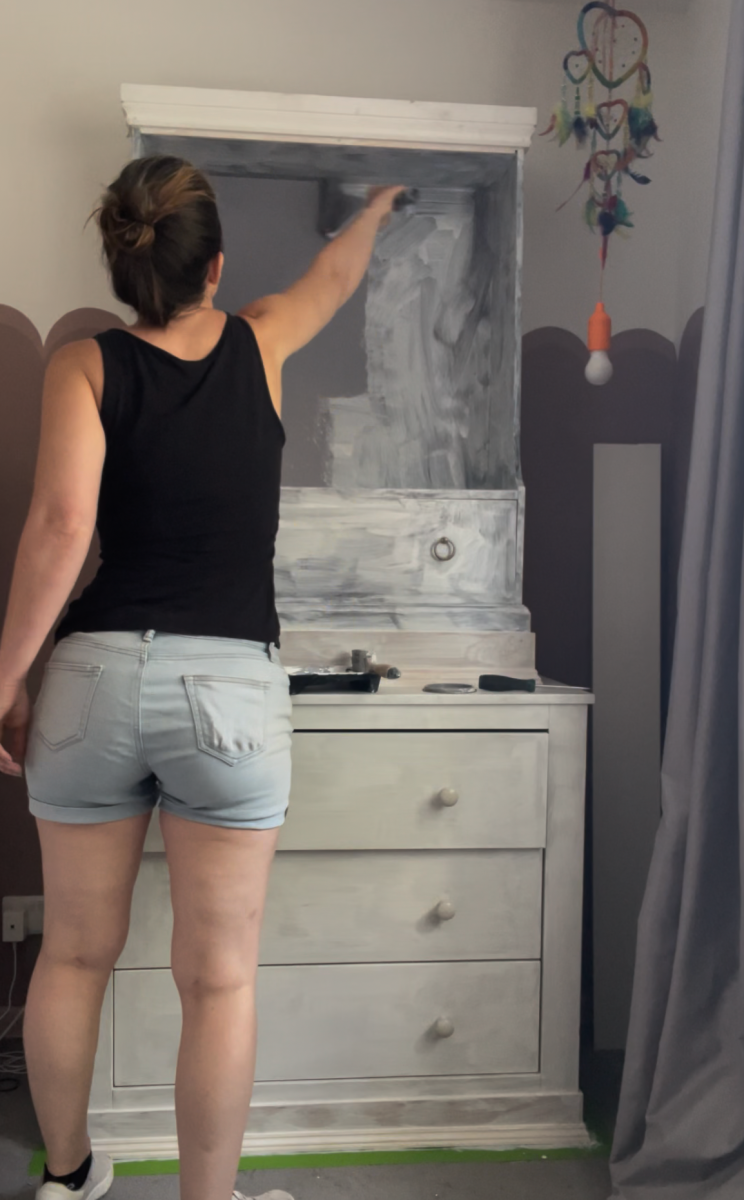
Create a cohesive look.
Even though the point of this project is functional, don’t forget about aesthetics. When Dawn combined a white dresser and a brown bookcase, the after could have looked a little franken. By painstakingly sanding and painting the combo piece in one color, the finished furniture looks cohesive. It would take a careful eye to ever suss out that the new dresser/shelf was ever actually two separate pieces.
Paint or stain in one color is an easy way to distinguish a unit, but you can also choose to highlight the trim or door fronts in a contrasting or complementary color. As long as the choices are consistent throughout the piece, like the same color behind the bookshelves or the frame, the finished furniture will read as a cohesive unit.
Don’t rush the process.
Whenever tackling a new project, make sure to set aside more time than you need. Life happens, and complications often arise. Dawn says that she was able to complete the entire project between school runs during just 3 days. But, she does wish she would have been “a bit more careful with the finishing. I didn’t fill and repair bits as well as I would have liked because I was in a rush.”
Just like with any DIY project you tackle at your home, you will notice the flubs more than anyone else. Most everyone else will see a successful completed project. And Dawn’s daughter is one of those fans: “She’s very happy with it and is asking when I’m going to do her desk!”
