We may earn revenue from the products available on this page and participate in affiliate programs. Learn More ›
I look forward to starting seeds every year because it gives me a chance to play in the garden in the middle of winter and allows me to start unusual varieties not available in nurseries. Although I love the delicate, careful process of germinating and caring for young plants, it can also be a hassle to keep up with seedling mats, seed-starting soil, humidity domes, and lights. As an avid fan of the AeroGarden hydroponic systems, I was thrilled when I was introduced to their seed-starting system years ago. It has made starting seeds simple, mostly clean, and very convenient.
Best Hydroponic Seed Starter
Photo: Debbie Wolfe for Bob Vila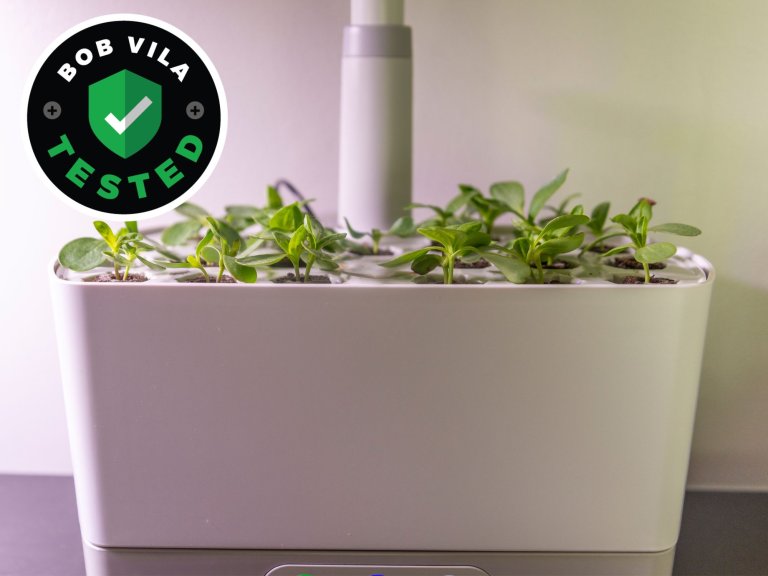
What We Like
- Simple, low-maintenance setup with consistent lighting
- Produces sturdy, non-leggy seedlings
- Reusable for multiple growing seasons
What We Don’t Like
- Not suitable for root vegetables
Specs
- Material: Plastic
- Compatibility: Designed to work with Harvest models
- Capacity: Starts up to 23 seedlings
The Size Works for Most Home Gardens
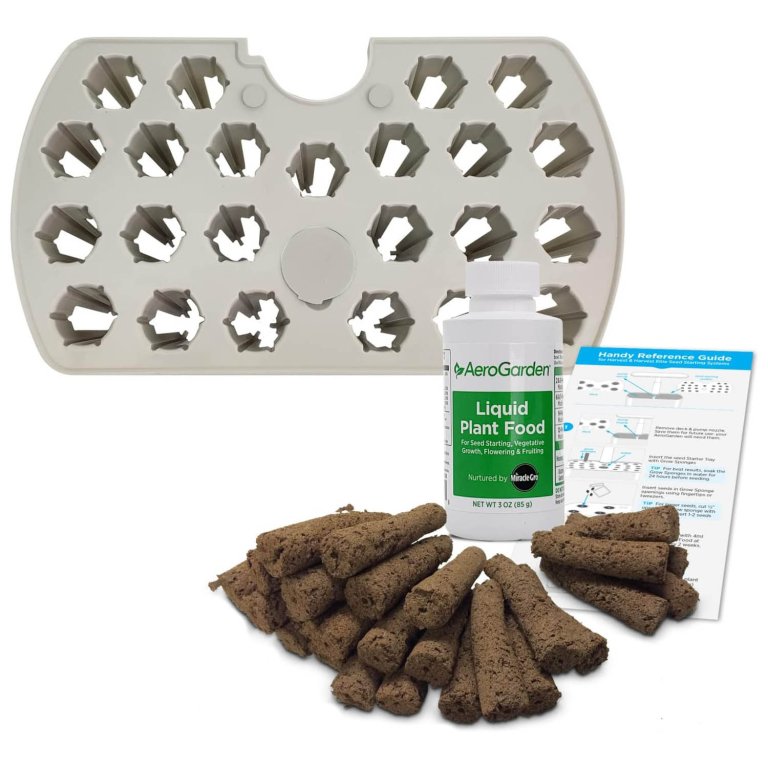
AeroGarden makes seed-starting trays for nearly all its countertop hydroponic models. I’ve used the seed-starting trays for the Bounty and Sprout, but I find the Harvest system the most convenient. Its 23-cell capacity makes it the perfect size for starting everything you need for most home gardens. The kit comes with 23 grow sponges, one 3-fluid-ounce bottle of liquid plant food, and a seed-starting and transplanting guide. What I like most about this system is that you can buy additional sponges and fertilizer (there are plenty of third-party versions that work great, too) to keep using your seed-starting setup for multiple seasons.


Swap-In Tray Requires No Tools
Getting the system prepped for seed starting is quick and straightforward. Start by removing the grow deck and pump nozzle from your Harvest and setting them aside for later use. In their place, insert the seed starter tray. Add a grow sponge to each cell, making sure they’re seated properly. Next, fill the reservoir with water and add plant food. For best results, allow the sponges to soak and fully hydrate before planting—I let mine soak overnight, though AeroGarden recommends up to 24 hours. Once the sponges are saturated, add one or two seeds to each opening using your fingertips or tweezers.
After placing the seeds, plug the garden back in—but don’t turn the lights on just yet. Seeds don’t need light to germinate; in fact, being exposed to bright light too early can even inhibit the germination of some types of seeds. As such, give the seeds a few days to germinate on their own. Once you see sprouts emerging, turn the Harvest on and let the light system do its thing. Keep the lights positioned about 4 to 6 inches above the seedlings and adjust as they grow.
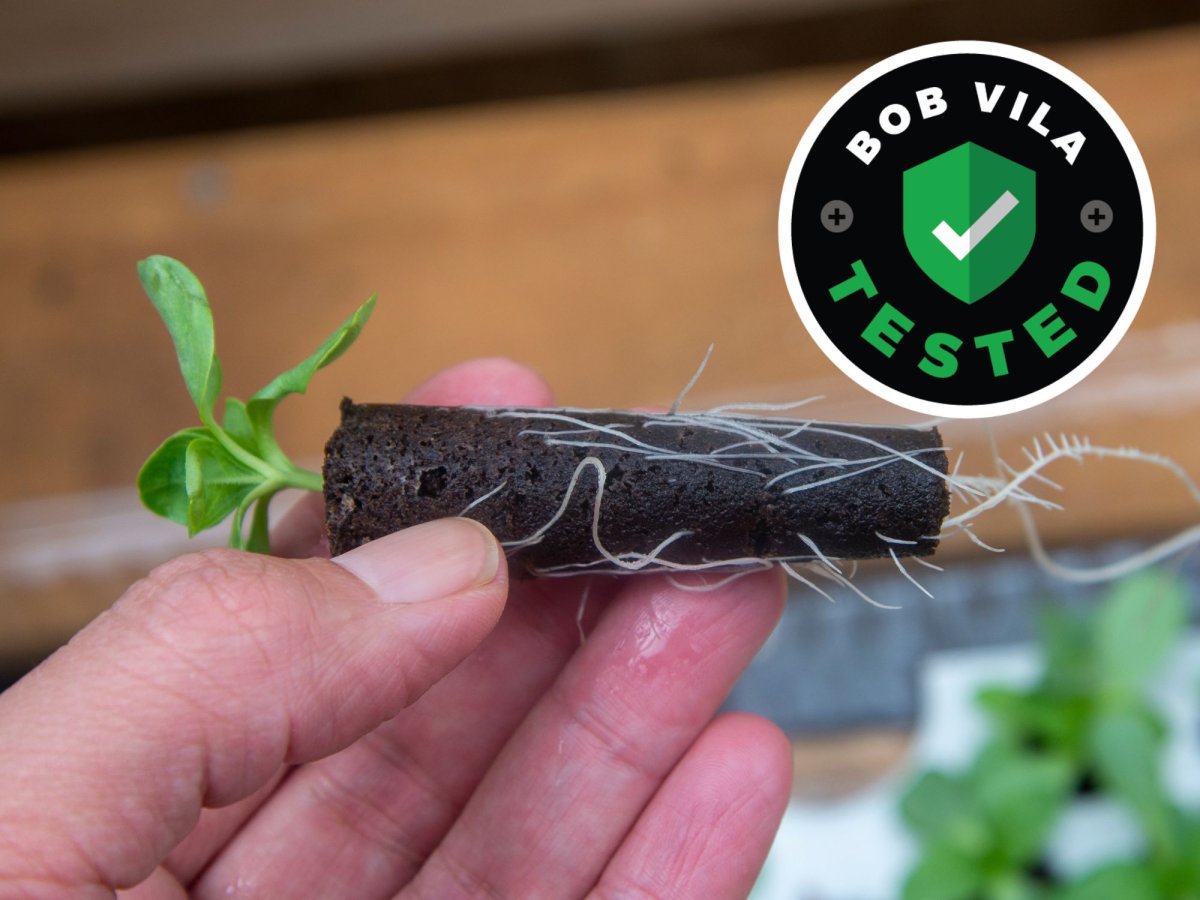
Strong, Even Seedlings Every Time
The total time I spend monitoring my seedlings is significantly less than with a traditional seed-starting system. My seedlings are also less leggy and more robust thanks to the even, overhead lighting. The Harvest alerts me when it’s time to add more water and fertilizer, so there’s no need to set calendar reminders. I’ve successfully started a wide range of plants, including lettuces, leafy greens like kale and collard greens, scallions, tomatoes, peppers, herbs, and a variety of flowers. The only plants not recommended are root vegetables, such as carrots and parsnips, because their taproots can become restricted in the growing sponges.
Reliable Results Season After Season
Overall, the AeroGarden Harvest seed-starting system has streamlined my winter seed-starting routine without sacrificing results. It delivers strong, healthy seedlings with far less effort and clutter than traditional setups, making it easier to focus on what I enjoy most about seed-starting systems: experimenting with new varieties and getting a head start on the growing season. For home gardeners who want a simple, reliable way to start seeds indoors, I stand by this one. It’s a system I reach for year after year.
I look forward to starting seeds every year because it gives me a chance to play in the garden in the middle of winter and allows me to start unusual varieties not available in nurseries. Although I love the delicate, careful process of germinating and caring for young plants, it can also be a hassle to keep up with seedling mats, seed-starting soil, humidity domes, and lights. As an avid fan of the AeroGarden hydroponic systems, I was thrilled when I was introduced to their seed-starting system years ago. It has made starting seeds simple, mostly clean, and very convenient.
AeroGarden makes seed-starting trays for nearly all its countertop hydroponic models. I’ve used the seed-starting trays for the Bounty and Sprout, but I find the Harvest system the most convenient. Its 23-cell capacity makes it the perfect size for starting everything you need for most home gardens. The kit comes with 23 grow sponges, one 3-fluid-ounce bottle of liquid plant food, and a seed-starting and transplanting guide.
Getting the system prepped for seed starting is quick and straightforward. Insert the seed starter tray, add a grow sponge to each cell, fill the reservoir with water, and add plant food. For best results, allow the sponges to soak and fully hydrate before planting. Once you see sprouts emerging, turn the Harvest on and let the light system do its thing. The Harvest will alert you when it’s time to add more water and fertilizer. The total time I spend monitoring my seedlings is significantly less than with a traditional seed-starting system. Best of all, my seedlings are less leggy and more robust, thanks to the even, overhead lighting. I’ve successfully started lettuces, leafy greens, tomatoes, peppers, herbs, and flowers. Overall, the AeroGarden Harvest seed-starting system has streamlined my winter seed-starting routine without sacrificing results.
Where to Buy
Aerogarden Harvest Seed Starting System
Buy at Amazon