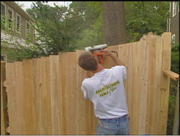
Okay, so now it's starting to all come together.
Let's go inside and get together with Frank Palmeri.
Who comes all the way from Owen's Corning's headquarters in Toledo, Ohio to tell us all about it.
Oh my, what progress indeed!
And Frank is accompanied by Susie Mitchell who's also from OC.
Hi guys.
Hey Bob.
Doesn't this look amazing?
It looks great!
Yeah, good to see you.
Good to see you.
What's the most important element of the whole system?
Well, the unique part of this system really is the structural lineal, and that's where is all starts.
The structural lineal.
And that's this thing here?
That's this thing here.
It's made out of PVC, and the flange that goes up against against the wall has a tongue, the trim snaps in just like that.
It's that simple.
So that's really what makes it possible to kind of create any kind of enclosure or space without having to use fasteners, nails, or screws or anything like that.
Absolutely.
It's because of this system is why we can finish just about any basement out there.
And then the other key component is the fact that we're using fiberglass here, right?
Absolutely.
What are some of the properties of fiberglass that make for a better finish?
Well, Bob, the whole entire system is made of fiberglass and PVC.
There are no organic materials in here, so organic materials is what mold feeds on, so we remove the organic material and the source for mold.
The panel is made out of fiberglass and this is a poly-olefin fabric, basically plastic.
So there's nothing for any kind of growth to...
Absolutely not.
What about if you have to get behind the wall, if you have some sort of damage or something?
Well, the cool thing is that these batten , cold moldings and base moldings basically just pop right out.
Then you can remove the wall panel, access the foundation, and when you're done, snap it right back in.
Now, Suzy, one of the big advantages of fiberglass is that there's energy savings, right?
Yeah, absolutely.
The fiberglass walls offer an R11 insulation, which is a great insulating value.
And that makes a big difference here in a basement.
in an 80 year old house where there wasn't any insulation in the first place.
It makes a huge difference.
In fact we have studies that show, independent studies that show that if you insulate the basement, you can save up to 25% in whole home heating cost.
And in fact , currently our system is the only basement remodeling option that qualifies homeowners for up to $500 energy credit under the energy policy act.
OK, that's great news.
Let's talk a minute about the ceiling because we' ve got lots of different options here, right?
Yeah, the ceiling basically comes in two options, this is a nice reveal ceiling.
You can see there's a reveal edge.
It gives it a really nice homey feeling about that.
It is a suspended ceiling so we can't access anything that's above the ceiling, whether it be utility or...
Right.
Or the wood studs that are up there.
And of course the whole package put together has an ability to kind of muffle sound.
It does, and it absorbs up to 95% of sound.
Yeah , and this is a home where the daddy is a professional musician.
It will come in handy.
Yeah, yeah, so it'll come in very handy.
Now, let's talk a little bit about the trim, because you said there's the batons are the pieces in-between and then I see there's cold corner moldings and there's a nice molding at the top where it meets the ceiling.
What about when you're trimming out an existing window, like behind you right here.
What we have here is a plain birch plywood.
Owens Corning also created a PVC jam extender but this is a nice deep well .
So, we used plain birch plywood.
We cut it to fit.
We match it right up to the window and we marry the trim right to the frame of that.
It really does accentuate the beauty of the window.
And again, you're doing the whole thing by snapping it together.
No need for any tools in this whole assembly, other than a saw.
Other than a saw.
That's cool.
Lets see how it works out around the old staircase.
Great.
Alright, the stairs is one of those funky things in any remodel where this is a 1920 staircase and it caused a lot of trouble and actually, we're in an area here where we can still talk about some of the the stuff that goes on above.
Tell us about the lighting package and the electrical part of this thing.
Well, Bob, the first thing that we do is we hire a licensed electrician to come and install the lighting units to the local building ordinances.
OK.
We first set the grid and you can see we put a small smoke detector and a carbon monoxide detector in there.
Because we are the experts in basements and we realize this is a safe-- we need to make this a safe environment.
OK.
So all of these things essentially vary from locality to locality.
Depending on what the code is like.
Absolutely the locality and actually the scope and size of the job.
Now getting back to the staircase, if I can get by you here, oh the doors are included, too, right?
Yes they are.
Yeah, right.
Getting back to the staircase, what we have here.
A grandfathered situation.
The original staircase doesn't meet contemporary codes in terms of clearance and the size of it.
But in order to keep it we had to a little bit of structural repair and we had carpenter Cyrus Beasley here, who told us what was wrong with it and how to fix it.
We're gonna address the first problem, which is just the basic structure.
As we saw before, this thing is completely unsupported, so I've got a post over here which I'm going to set under this corner.
And I'm leaving enough space next to this stringer so that I can sister on another piece, because this one is missing some pieces at the top.
Construction adhesive...will never move.
And fire.
I'm using decking screws to hold this in place for a little tighter hold on the stairs, especially when things are moving around.
Keep it from squeaking.
And I like the decking screws because they countersink themselves and pre-drill their own holes.
So you don't have to spend all day drilling holes to make it work.
Gluing up this plywood to go up underneath the existing treads was a tongue and groove.
So de-board, and our little Sketchy so we're going to beef them up with another layer.
So the next step is to get a good attachment from tread to riser, so what I'm doing is I've got my decking screws again and I'm going right through the back of the riser and into the tread.
And then I come around to the front and screw the tread back down to the riser below it.
And, it's really that connection between the treads and the risers all the way from the top to the bottom that it's going to add a lot of rigidity to these stairs.
You can see it sucking right down.