
We may earn revenue from the products available on this page and participate in affiliate programs. Learn More ›
Many homeowners strive for the lived-in look—the shabby chic, vintage-eclectic vibe touted by interior designers and home decor publications. But if you’re building your own furniture to keep to a tight budget or purchasing a collection all at once because it’s simply more convenient, how you do make the wood look like it has lived through decades of sunshine, spills, use and abuse, despite being just a week old?
There are actually a number of ways to age your furnishings fast, but bear this in mind before you get started: Different wood gets different results, even when subjected to the same process. And that process, whatever it is, is never an exact science. Use a light hand to see what results you get with your wood, then repeat the process if you want more oomph. Here, we outline a few physical and chemical methods for aging wood, whether a new 2×4 lumber structure or a store-bought piece of furniture, but you’ll still want to improvise a little until your results match your vision.
1. Fake Wear and Tear
MATERIALS AND TOOLS
– Hammer
– Crowbar
– Safety glasses
– Paper bag
– Nails or screws
– Wire brush or steel wool
– Awl or 1/16-inch drill bit
– Sandpaper
Imperfect texture makes wood look authentically old. Fake years of use overnight by trying some of the following methods:
- Bang the wood up with blunt objects like hammers and crowbars, paying particular attention to any perfect edges.
- Strap on safety glasses and sling a bag of nails or screws against the boards to create a random pocking texture.
- Drag a coarse wire brush or some steel wool up and down in the direction of the grain to leave striations.
- Tap an awl or 1/16-inch drill bit with a hammer into the wood to mimic the look of insect damage from worms and termites.
No need to do all of the aforementioned activities, though. Use whatever tools you have on hand to wear down your new wood, and finish by sanding the entire piece to temper the weathered look. After you’ve achieved the desired texture, you can continue with any of the following methods to alter the wood’s color.
2. Go Gray
MATERIALS AND TOOLS
– Fine steel wool
– Distilled white vinegar
– Mason jar
– Paintbrush
Achieving an ashen-gray look (similar to driftwood) is as easy as applying a special DIY wood stain. Tear up one #0000-grade steel wool pad and stick it in a mason jar, along with 1-1/2 cups white vinegar. Screw on the lid. The rusting wool will change the tint of the vinegar, which you’ll then brush onto your wood. The darkness and color of the stain will vary depending on how much steel wool you use (more means more surface reaction) and how long it’s left to sit in the vinegar.
For a weathered gray look, soak the steel wool anywhere from 30 minutes to two days. You’ll get a very subtle gray after 30 minutes to an hour of wait time; for even grayer shades, wait two or three hours. Silvery gray comes after two days of soaking. Consider using the lighter tints on blond woods and going with a darker gray when trying to fade red and brown woods.
When the solution is ready, remove the steel wool and dip a paintbrush into the vinegar. Apply to your wood as you would any store-bought paint or stain. Wet wood always looks very different when dry, so let your treatments dry completely before deciding to add another layer.
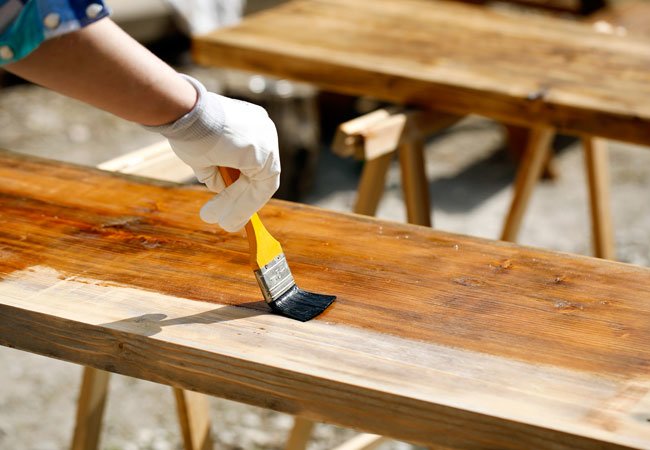
3. Mix Up a Richer Wood Stain
MATERIALS AND TOOLS
– Fine steel wool
– Distilled white vinegar
– Mason jar
– Tongs
– Rubber gloves
– Paintbrush
– Rag
For rich, warm weathered tones, start by using the instructions above to create a gray wood stain (#0000-grade steel wool soaked in a mason jar of white distilled vinegar). Except this time, let your mixture sit for anywhere from two days to a month, or longer, to achieve a deep, rustic brown. The steel wool may even completely dissolve! If it’s still in there, use tongs or rubber gloves to remove it.
- Test out the stain on your wood by painting a small area on the back or underside of your project—or even better, on a scrap piece of the same lumber—to see the resulting color. Let it dry. If it’s too dark, simply dilute the solution with some water.
- When you’re happy with the color, grab your paintbrush and apply the solution following the grain.
- Brush it on lightly and use a dry rag to wipe up excess as you work, just in case it’s still darker than expected.
- Let the wood dry completely before you decide whether or not to add another coat.
4. Weather with Paint
MATERIALS AND TOOLS
– Sandpaper
– Hammer
– Paint (three or four colors)
– Paintbrushes
– Orbital sander
– Wood stain
– Cloth
First, hand-sand and bang down any perfect edges with a hammer to give the piece a rustic vibe. Then, using a mostly dry brush, paint thin, inconsistent coats in three or four colors that suit your color scheme. (We recommend that one of the colors be white for better contrast.) The key here is to apply each color sparingly—one on top of the other—with some of the wood still peeking through. Don’t bother drying between applications; the color-blending will help make the weathered effect appear more authentic. Let your wood dry overnight.
The next day, bust out the orbital sander and work the machine over the wood. Again, inconsistency and imperfection is actually perfect. Rustic is the goal! Wipe off the dust from your sanding, apply a thin coat of the stain of your choice, and let it dry, and you’ll have a piece that will look like it was constructed from wood reclaimed from an old painted barn.
5. Bleach with a Sun Bath
MATERIALS AND TOOLS
– Baking soda
– Water
– Plastic container
– Sawhorse
– Drop cloth
– Paintbrush
– White vinegar (optional)
– Spray bottle (optional)
– Hard-bristle brush
– Rags
Here’s a crazy idea: Use the elements to weather your wood. One sunny afternoon outdoors could add years to your furniture’s appearance. Note that this method works only with tannic woods, such as redwood, cedar, pine, mahogany, and red oak, so check what type of wood your piece is made of before you begin. While you’re at it, make sure the wood is untreated so that the star ingredient—baking soda—can react with the natural agents; if it’s already treated, you’ll need to strip it and sand it down.
- Find a sunny patch of yard. Set up sawhorses if you’re weathering just a board or two of wood; use drop cloths if you’ll be working on a piece of furniture.
- Mix equal parts water and baking soda in any available plastic container, enough to apply it thickly over your wood.
- Cover the wood with thick coats of the baking soda paste using a standard paintbrush, then leave the wood in the sun to dry for at least six hours.
- If you want to either intensify the reaction or speed it up, spray the wood with white vinegar soon after applying the baking soda and water mixture.
- After the wood has spent a day in the sun, brush away the dried baking soda with a hard-bristle brush, following the grain of the wood.
- Rinse with water or a dampened rag, and then dry the wood with a clean cloth.
- You should see a grayish tint in the wood now. Want more impact? Repeat the process.
After you’re done, your piece will be ready for any standard wood stain.
Remember: Nothing is permanent.If you’re not crazy about your end results, rest assured that they’re only surface deep! You can always paint it or strip it and try again, thanks to the forgiving nature of this beloved building material.