
We may earn revenue from the products available on this page and participate in affiliate programs. Learn More ›
Building a homemade birdhouse can be a blast. Unlike real houses that require complex framing, these humble avian abodes can be constructed from one board purchased at a local home center. Learning how to build a birdhouse takes just a few minutes, and the project can be completed in one afternoon. Plus, kids love getting involved!
But it isn’t just the kiddos who benefit from DIY birdhouses. Inviting birds to your yard by providing them with safe homes is like hiring your own pest-control squad. Birdhouses attract martins, wrens, bluebirds, chickadees, tanagers, and other species that eat worms, beetles, grubs, and even wasps. Birds of prey (namely owls and some hawks that make homes in birdhouses) can reduce the number of furry pests as well.
Project Overview
Working Time: 3 hours
Total Time: 5 hours
Skill Level: Beginner
Estimated Cost: Under $50
Tools & Materials
Bobvila.com may earn a commission from purchases made through these links.
- Tape measure
- Combination square
- Miter saw
- Hole saw (size depends on species of bird)
- Finish nailer
- 1 ¼-inch stainless steel screws
- Exterior paint
- Paintbrush
- 1x8x8 cedar board
- ⅜-inch dowel
- Wood glue
- 1 ¼-inch stainless steel finish nails
Before You Begin
This project is workshop-friendly, but some folks may experience a reaction to cedar sawdust. For that reason, it’s best to work outside and wear a dust mask, gloves, and safety glasses when cutting. Also, if you have little ones working with you, make sure to keep them away from power tools and other dangerous items until you’re able to supervise them. It takes a split second for a child (or adult!) to get hurt around tools.
Also, different birdhouse plans apply to different birds. Larger birds need wider entry holes and deeper birdhouses, while smaller birds prefer small holes that allow them in but keep predators out. This guide will explain how to build a general birdhouse for smaller birds, but you can scale up once you know how to make a birdhouse.
Tool Tip
Supported by Craftsman
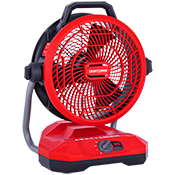
Speed up drying times and stay cool while you work with the Craftsman 20V AC/DC fan. It features three different air speeds and a 130-degree tilting head, so you can direct the right amount of breeze where you need it. In addition, the 12-inch fan operates at 55 decibels, which is about the sound level of a normal conversation, making it a handy helper for any interior DIY project.
Step 1: Choose your wood.
There are quite a few tree species that yield great birdhouse wood, but cedar may be the best: It’s weather- and rot-resistant, and it doesn’t contain potentially harmful chemicals like pressure-treated wood does. However, you can build a birdhouse out of almost any wood, as long as you paint or stain it to preserve it.
Our recommendation? One 1×8 cedar board from your local home improvement store.
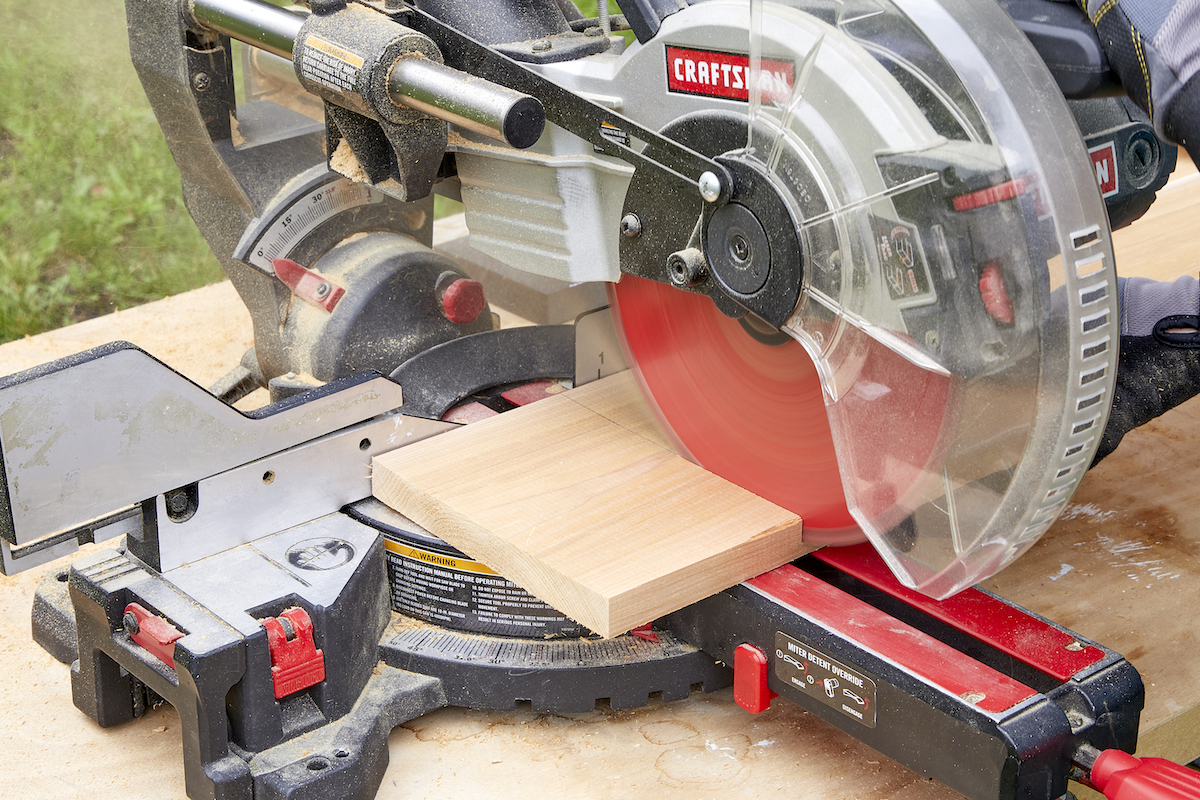
Step 2: Square the board.

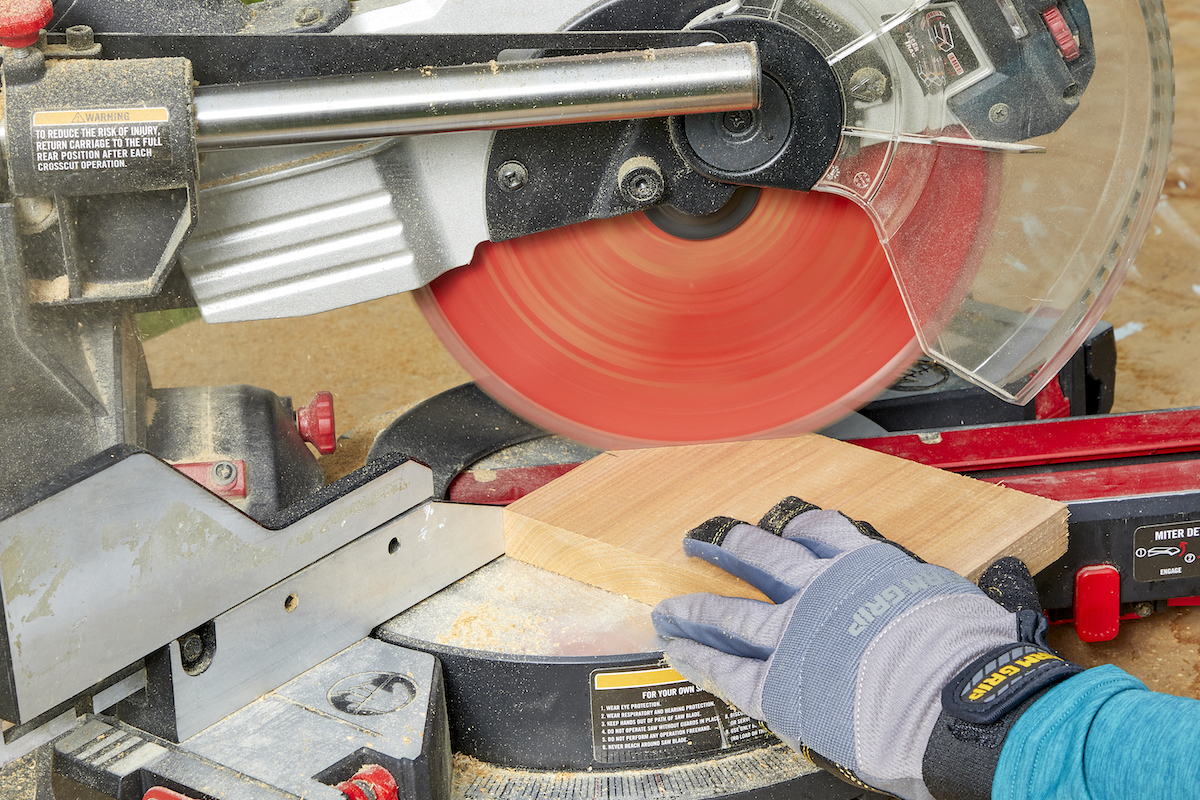
Exterior-grade wood is almost never square straight from the home improvement store. Place it on a miter saw with the blade set at 90 degrees. Cut approximately 1 inch off the board to square its end. Use this cut edge as the starting point for your cuts to ensure nice, square joints.
Step 3: Cut the floor.
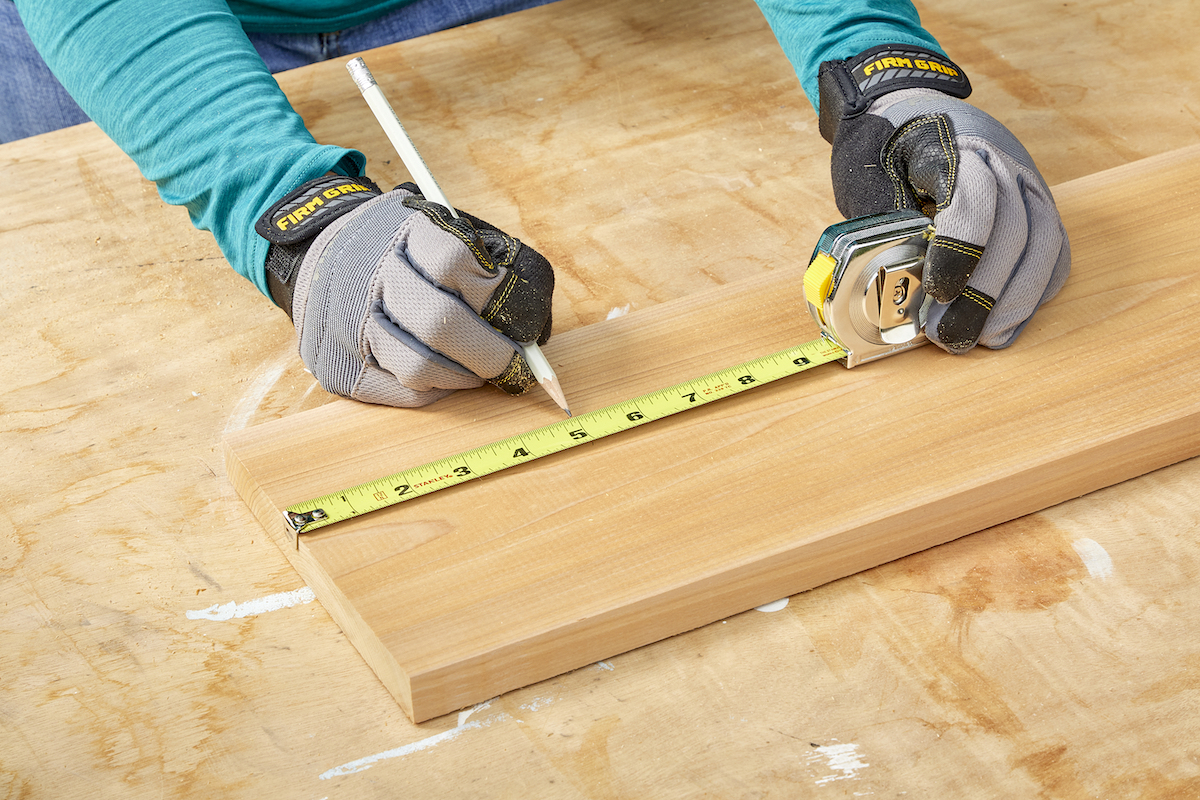
For our design, the floor of the birdhouse measures 6 ½ inches by 5 inches. Use the measuring tape and combination square to mark the board at 5 inches and cut it on the miter saw. The board will then measure 5 inches by roughly 7 ¼ inches. Use the tape measure and combination square to mark the wider length at 6 ½ inches and carefully cut the board on the miter saw. (This may require flipping the board over, depending on the miter saw.) You should now have a 5-inch by 6 ½-inch piece.
Step 4: Cut the sides.

Use the measuring tape and combination square to mark the board at 4 ¾ inches and cut it on the miter saw. This will create a 4 ¾-inch by roughly 7 ¼-inch board. Mark this board at 5 inches and carefully cut it on the miter saw.
Repeat this process to create two 5-inch by 4 ¾-inch boards.
Step 5: Cut the front and back.
Use the measuring tape and combination square to mark the board at 5 inches. Cut the board at the mark and repeat. This should yield two pieces that measure 5 inches by roughly 7 ¼ inches.
Designate one of the 5-inch-wide ends as the top on each board. Find the middle of the top edge (2 ½ inches), and mark the board at this point. Use the 45-degree angle on the combination square to draw a line from this center point to each side. This will create the traditional five-sided house shape, with a peak in the middle. Cut the board along those diagonal lines, and then repeat on the other board.
Step 6: Drill the entry hole and install the perch.
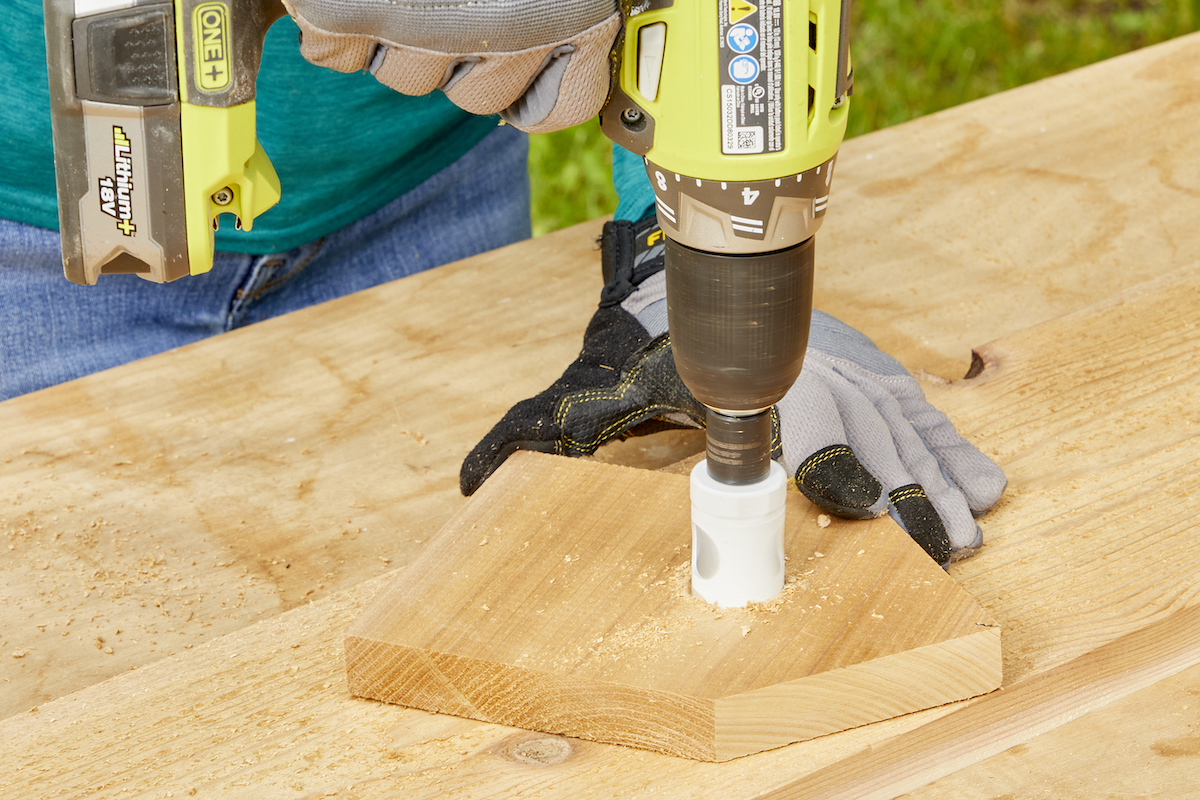
Select the house-shaped board you’d like to use for the front of the birdhouse. Install a hole saw in your drill/driver (1 to 1 ½ inches for smaller birds). Measure about 3 inches down from the peak. Place the board on top of a piece of scrap wood and drill through the front of the board at this mark.
Use a screwdriver or the claws of a hammer to roughen the inside of the board (the side of the panel that will face into the birdhouse). This will provide footholds for baby birds to climb out. You can also add wire mesh inside.
If you’d like to add a perch, measure down roughly 1 inch from the bottom of the hole and drill a ⅜-inch hole. Cut a piece of dowel about 3 inches long, apply a bit of glue on its end, and insert it into the hole. This will be the perch.
Note: Traditional design calls for a perch. However, many experts suggest not installing a perch, as this allows predatory birds a spot to land and access eggs and young. Folks who are concerned about predatory birds should skip the perch.
Step 7: Cut the roof pieces.
Again, using the tape measure and the combination square, mark the board at 4 ¾ inches and cut it at the mark. Then, measure and mark the board again, but this time at 5 ½ inches. This should yield one piece measuring 4 ¾ inches by 7 ¼ inches and one piece measuring 5 ½ inches by 7 ¼ inches.
Step 8: Assemble the front, back, and sides.
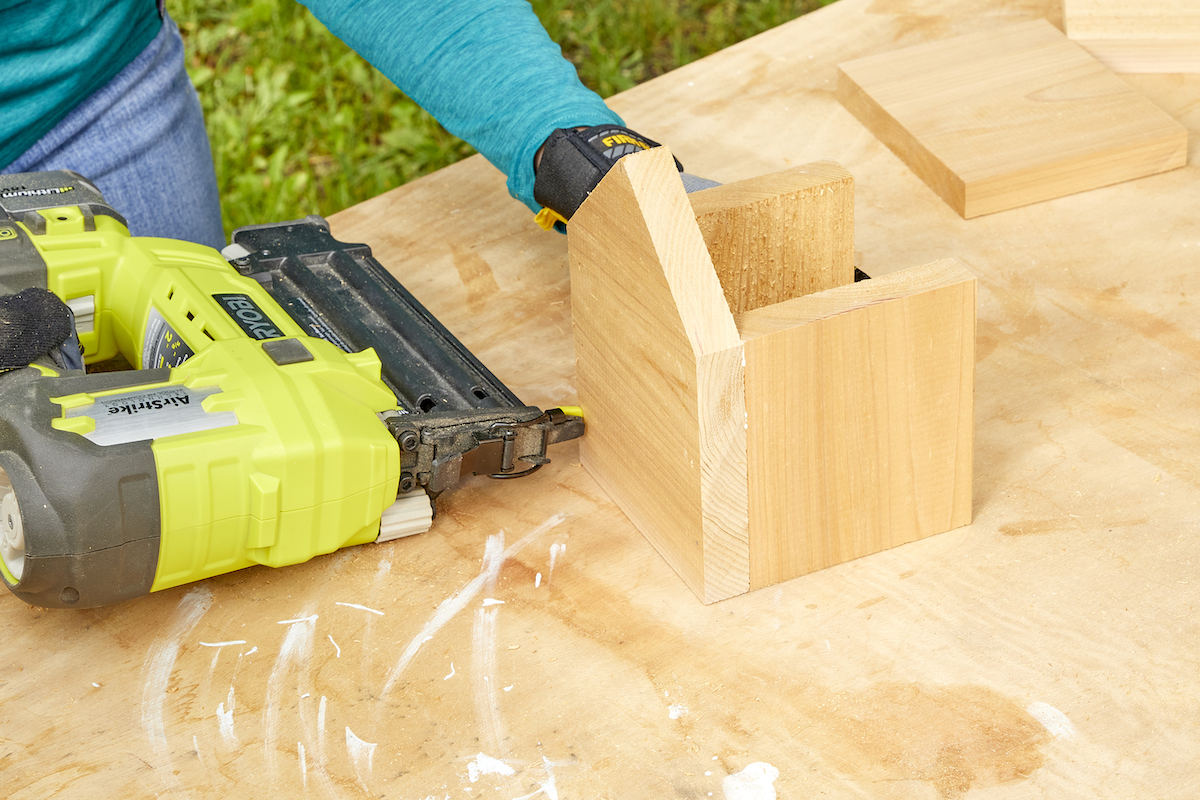
Test fit the fronts and sides to ensure they fit. Apply glue to the edges of the side panels and place them between the front and back boards. Nail through the faces of the front and back boards to attach the front, back, and sides.
Step 9: Attach the floor.
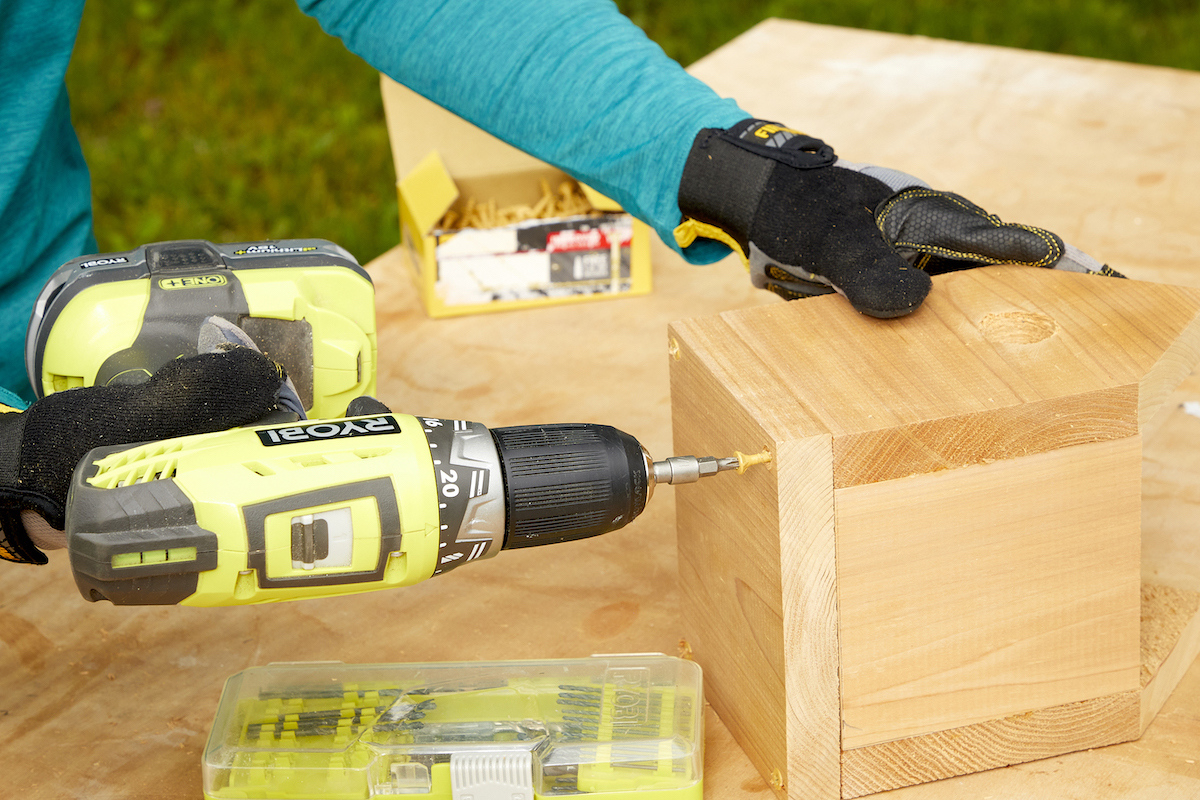
Center the floor on the bottom of the birdhouse. Drill pilot holes underneath and attach the floor with 1 ¼-inch stainless steel screws. Do not glue the floor in place, as it needs to be removable for cleaning.
Step 10: Attach the roof panel.

Take the shorter roof panel and fit it on the birdhouse so that it’s flush with the back of the birdhouse and its peak (front and back). Attach with glue and nails. Next, align the longer roofing panel so it’s flush with the back of the birdhouse and aligned with the top edge of the other roof panel (they’ll overlap), and attach it with glue and nails.
Step 11: Sand the birdhouse.
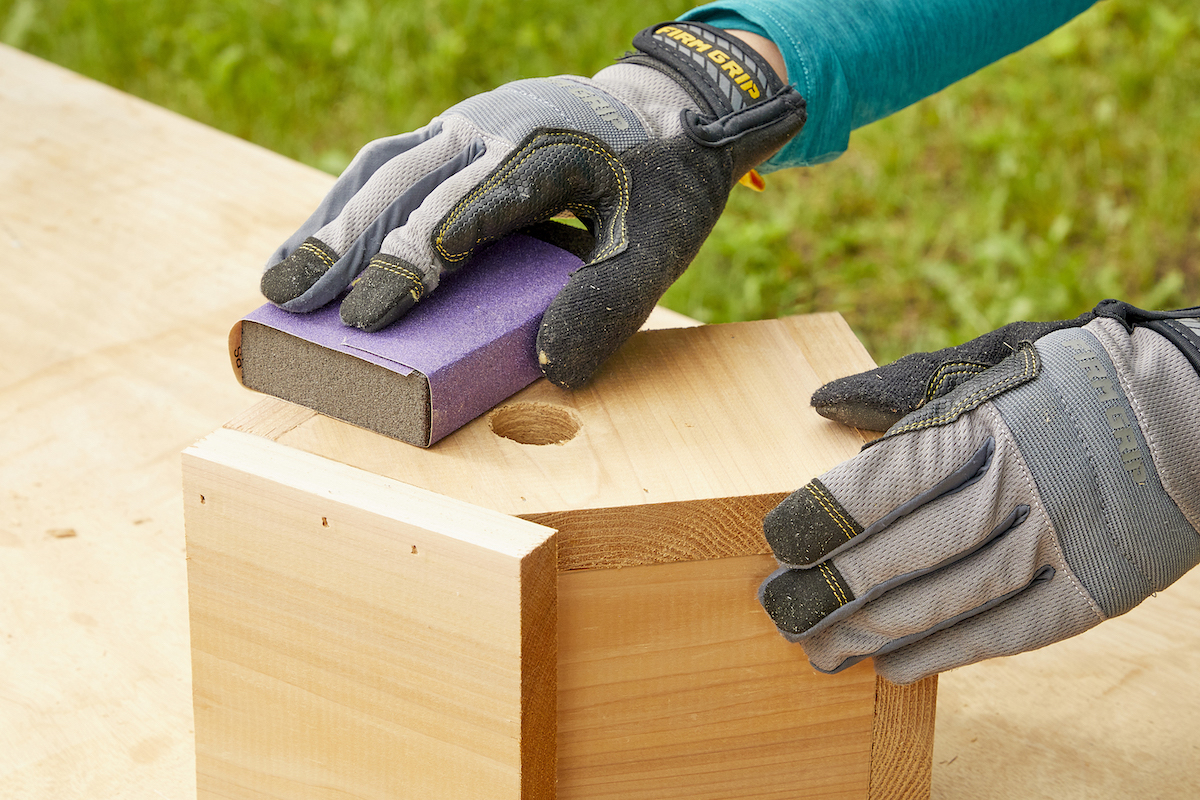
Chances are there will be some rough edges or splinters to remove before hanging up the birdhouse. Use 120-grit sandpaper and a sanding block to remove rough spots and ease any sharp edges.
Step 12: Paint or stain the birdhouse and add a hanger or strap.
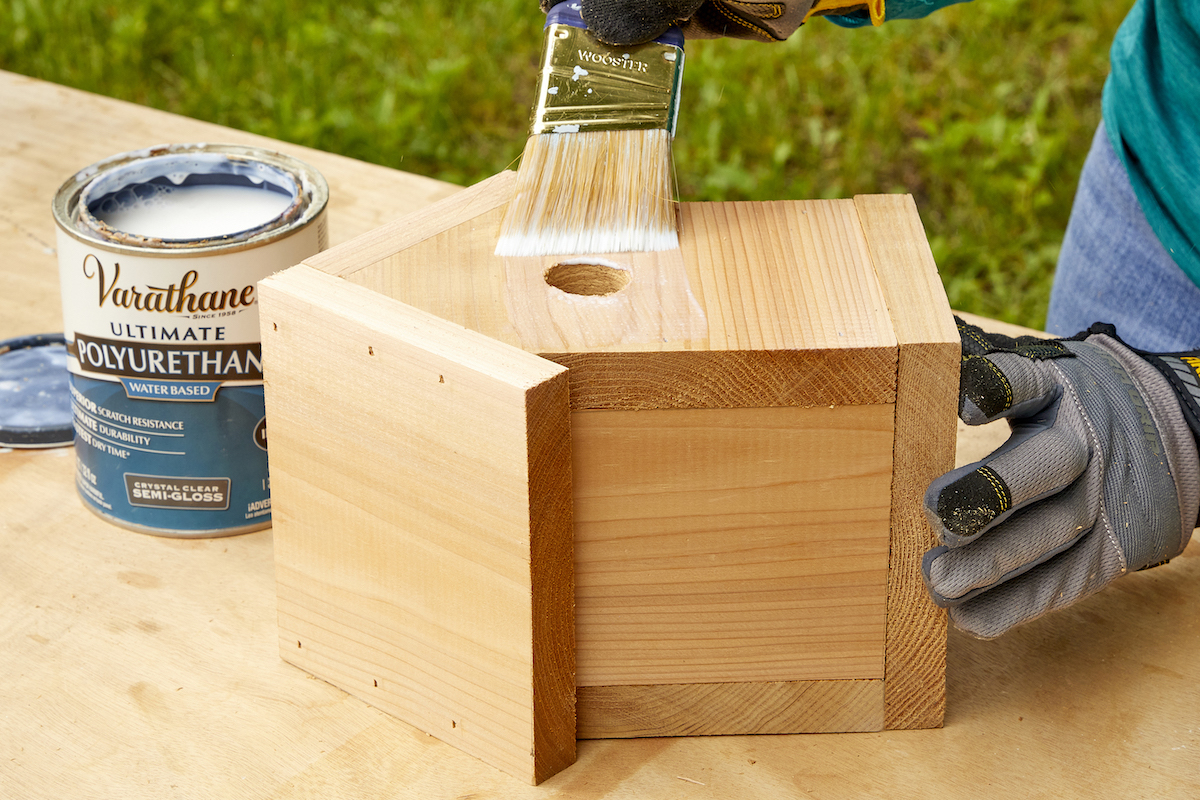
Although it’s not a necessary step, painting the birdhouse is half the fun. Use exterior-grade paint for the best results, and be sure to paint any exposed edges. Stain is also an option, but again, look for an exterior-grade stain for best results.
If you’d like, you can add a hanger to the top of the birdhouse, or a strap that can be tied or snapped around a tree trunk. Otherwise, use stainless steel screws to attach it to a sturdy surface, or to a fence post or tree. There are a lot of styles of birdhouses, and they can be installed in many different ways.
Step 13: Enjoy your new neighbors!

Now it’s time to welcome those high-flying neighbors to your yard. You can encourage certain species to call the new birdhouse their home by:
- Staying away from the birdhouse
- Keeping water nearby
- Providing food sources
Experts suggest cleaning birdhouses out at least once a year. Most do-it-yourself birdhouses have removable panels (ours has a removable floor). To clean, open the birdhouse, remove the nesting material, and clean the interior of the birdhouse with a solution of mild dish soap and water. Rinse well and allow it to dry before reinstalling.
Final Thoughts
Learning how to build birdhouses can be a fun hobby. Plus, there’s the satisfaction of providing a safe place for our winged friends to rest and raise their young. The process is easy and doesn’t require many tools, so with this step-by-step guide, you’ll be able to build as many birdhouses as you’d like. You can vary the size of the birdhouse itself as well as the entry holes to attract a greater variety of bird species to your backyard.
