We may earn revenue from the products available on this page and participate in affiliate programs. Learn More ›
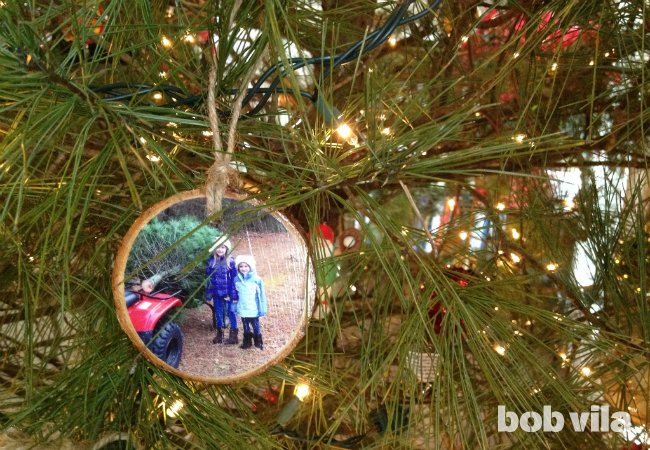
The holidays are all about making and enjoying memories. Almost every ornament on our Christmas tree holds a personal meaning, which we revisit as we hang it on the limbs of our carefully selected evergreen. This year, we started a new tradition: When we went to the Christmas tree farm to pick out our specimen, we asked them to cut a few extra slices off the bottom of the trunk. That strategic slicing provided us with rounds of wood that we could craft into new keepsakes. I made one for our family tree, and each of our daughters made one that will hang on our tree for now, and then travel with them when they leave home.
SKILL LEVEL: EASY
This project can be as involved or as inexpensive as you want it to be. You can use a drill to make a hole to string ribbon or twine through the ornament for hanging, but if you’d rather not handle power tools, you can put a small screw eye into the top.
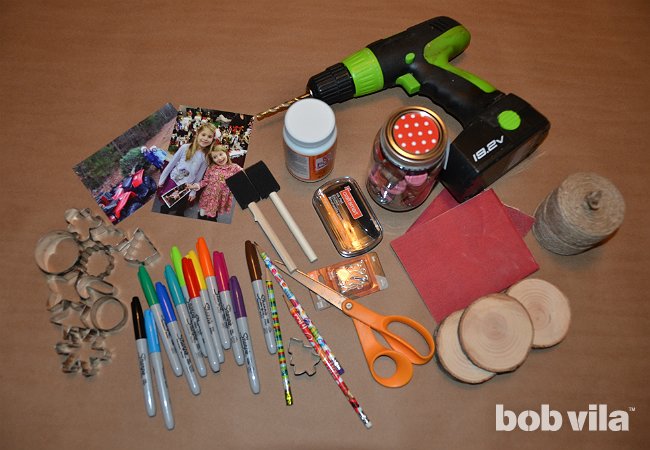
TOOLS AND MATERIALS
– Wood slices
– Sandpaper or palm sander
– Pencil
– Sharpie markers
– Small cookie cutters
– Stamps and ink
– Photos
– Scissors
– Hole punch
– Mod Podge
– Small foam brush
– Drill with wood bit
– Screw eyes
– Twine
STEP 1
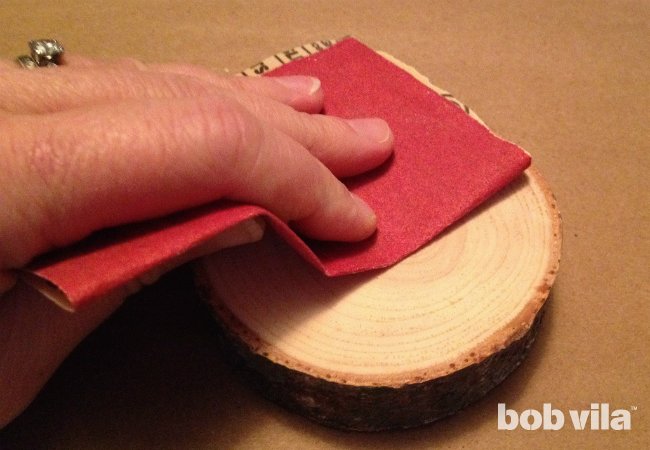
No matter how careful you are when you cut, your wood slices will probably still be a little rough. Use some sandpaper to clean them up and smooth them out. If you have a palm sander, the job will go even more quickly.
STEP 2
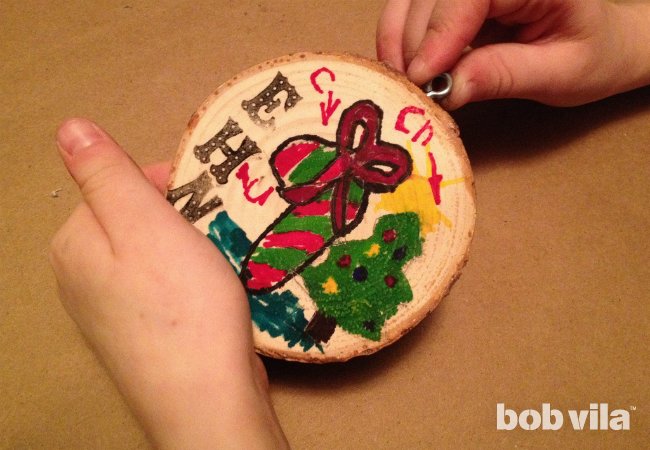
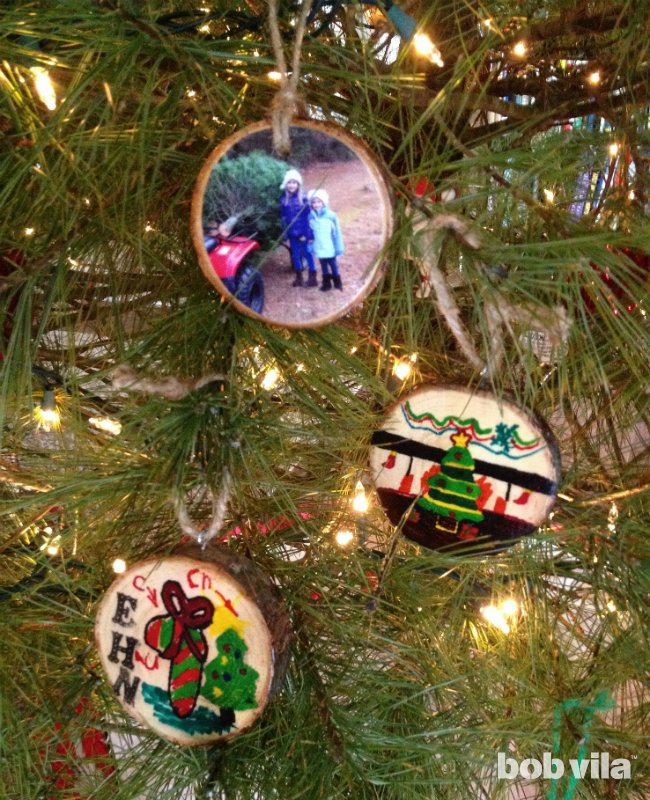
Now, it’s time to decide how you want to decorate your ornament. You’ll see that we used three different approaches: Hand-drawn, stamped, and decoupaged.

• If you’re drawing on your ornament, first lightly sketch out your design in pencil. A helpful trick for young artists: Small cookie cutters make great guides for shapes like trees, candy canes, and gingerbread men. Once you’ve mapped out your design, color it in with markers. Remind your kids (and maybe yourself) that it doesn’t need to be perfect. Its homemade quality will make it even more meaningful to you 20 years from now.
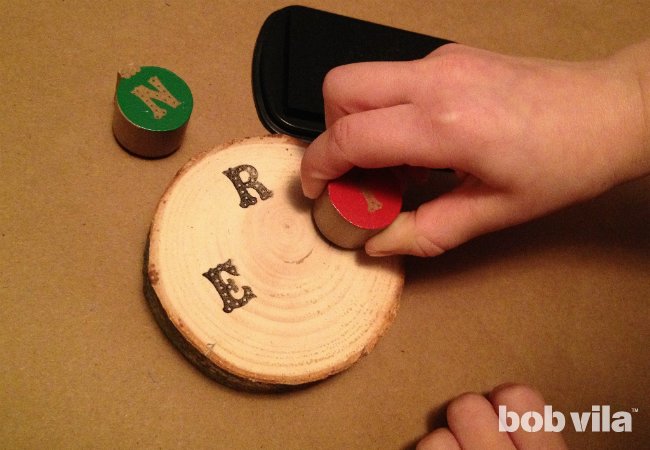
• If you’re stamping, the process is pretty self-explanatory: Load up your stamp with ink, and press firmly onto your wood round. Ta-da! Continue until your design is complete. You can go back over with marker to fill in whatever colors are missing.
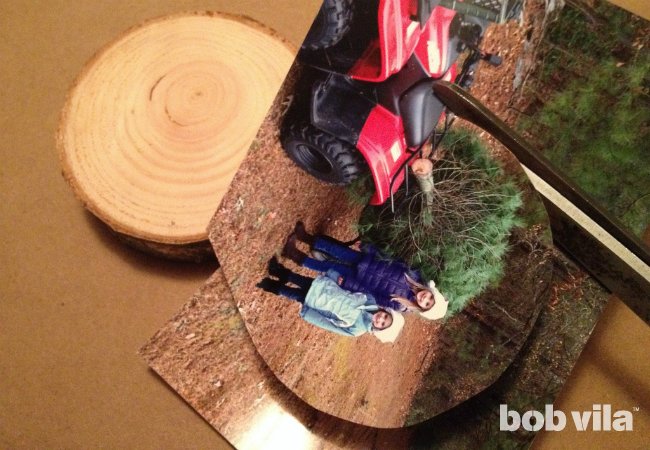
• If you’re attaching a photograph, place your wood slice over your 4″ x 6″ photo so that it covers the portion of the image you want to appear on your ornament. Trace the outline with a pencil, and cut out the photo with your scissors.
STEP 3
Prep the ornament for hanging by either drilling a hole through the top of the round or attaching a screw eye to the top (see below for more information). For photo ornaments, if you’re planning on drilling a hole, first hole-punch the very top of your picture and use this cutout as a guide. Simply line the photo up with the wood round and mark the hole using a pencil. Then drill the hole in the wood slice before you adhere the photo with Mod Podge in the next step.
If you choose to go the screw eye route, you may have trouble getting the screw started. If so, first make a guide hole by lightly tapping in a small nail at the top of the round where you want to affix the screw eye. Remove the nail to reveal the guide hole.
STEP 4
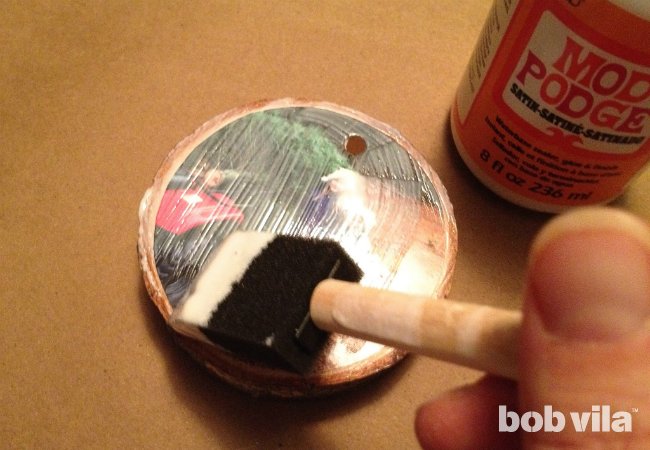
Mod Podge works wonders in preserving these ornaments and preventing the design from fading or getting dirty, which is important as you’ll want to hang them season after season.
For a photo-covered ornament, apply a layer of Mod Podge to the wood slice and lay your photo on top of it. Then, apply another two to three coats of Mod Podge on top of the photo, allowing the glue to dry between applications. Two to three coats of Mod Podge should offer sufficient protection for marker- and ink-decorated wood slices.
STEP 5
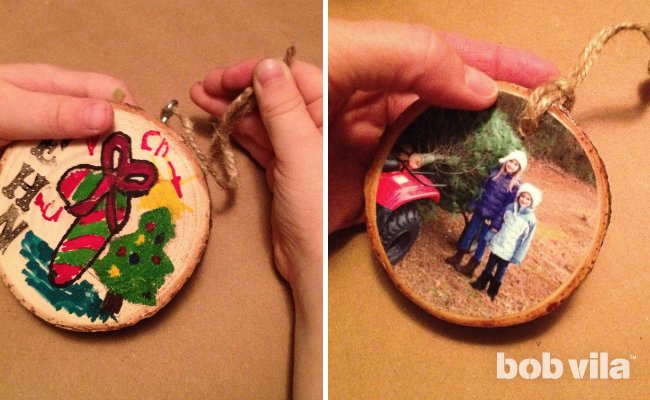
You’re almost ready to hang! Whether your ornament has a drilled hole or screw eye, thread a piece of twine (roughly six to nine inches in length) through it and tie the ends together in a knot. Use this loop to hang your creation wherever you please.
Now that we’ve finished our first batch, I can’t wait make a set of these ornaments every year—one for me to keep for the family collection, and one for each of my daughters to take with them when they set up their own Christmas trees. By the time the girls leave home, we should have quite a collection—both of ornaments and of the memories they represent!