We may earn revenue from the products available on this page and participate in affiliate programs. Learn More ›
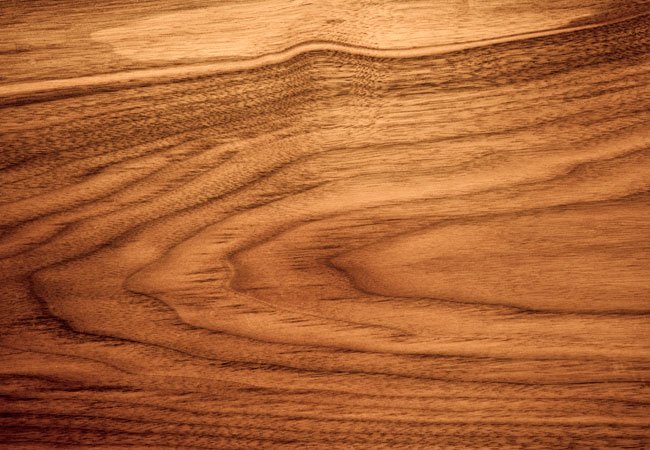
The ageless patina of wood grain makes it a popular material for home furnishings. Unfortunately, solid wood pieces—side tables, bedroom dressers, and chair—cost a pretty penny.
Thankfully, an innovative painting technique called “faux bois” (French for “false wood”) can offer the perfect compromise for do-it-yourselfers who budget for laminate furniture but dream of wood grain look. Using this technique, homeowners can mimic a natural-looking wood grain on non-wood surfaces, ranging from medium-density fiberboard to drywall. What’s more, the painter has full control over the color and variation of the faux wood grain, so they can dictate how to add texture to otherwise flat surfaces.
With two shades of latex paint and a simple acrylic glaze, you can apply paint that looks like wood to all of your favorite home accents.
Tools & Materials
Bobvila.com may earn a commission from purchases made through these links.
- Sanding block
- Microfiber cloth
- Natural-bristle paint brush
- Paint roller
- Paint roller covers
- Synthetic-bristle paint brush
- Paint mixing jar
- Paint pans
- Wood grain rocker
- Painter's tape
- Fine-grit sandpaper
- Oil-based primer
- Latex paint (2 shades)
- Clear acrylic glaze
- Paper Towels
STEP 1
To prepare the workspace for painting, cover all surrounding areas with painter’s tape. You’ll also want to remove hinges, knobs, and other hardware or décor, in order to protect them from stray splatters. Lay down old newspaper beneath the workspace to keep sanding debris and paint drops off of floors and furnishings.
STEP 2
If painting engineered wood such as MDF, particle board, or plywood, use a sanding block to lightly sand the project surface. Sanding will slough off any upright fibers in the board and level out any bumps. Choose sandpaper in the grit range of 120 to 220 for already smooth surfaces like MDF, and start with a medium-grit sandpaper in the grit range of 60 to 100 for coarser engineered woods. Use a dry cloth to wipe away the sanding dust when finished.
STEP 3
If working with engineered wood, apply white primer to the entire project surface with a natural bristle brush or a paint roller. Some wood products like MDF tend to absorb water and swell, and they’re also prone to expanding or contracting with changes in temperature. For these types of wood, opt for an oil-based primer and coat both the top and underside of the project surface to help minimize warping. Dry the primer completely per the manufacturer’s instructions.
If you’re starting with bare or painted drywall, use a paint roller to apply a latex primer to the wall. Dry the primer completely per the manufacturer’s instructions.
STEP 4
With the project surface primed, you’re ready to apply a base coat of paint that looks like wood. Choose a low-luster latex paint that matches the undertones of the type of wood you want your project to mimic. For example, if you want the surface to bear resemblance to mahogany, opt for coral or dark red. For lighter woods like walnut or maple, select a shade of gold or orange.
Use a synthetic bristle brush or paint roller to cover the entire project surface in paint. When the paint dries, apply a second coat and then allow the coat to dry completely.
STEP 5
Now you’ll want to mix the glaze for your faux bois painting technique. In a paint mixing jar (view example on Amazon), combine equal parts clear acrylic glaze and a second latex paint pick. Opt for latex paint that is a similar to, but a few shades darker than, the base coat. Replace the cap on the jar and shake the contents to create a translucent tinted glaze. Later on, when you apply the glaze, you’ll want the base coat to still be visible through it.
STEP 6
Pour the glaze into a paint pan, and load a synthetic bristle brush (or a roller with a quarter-inch nap roller cover) with the glaze. Working in sections 6 inches in width at a time, apply a thin layer of the glaze that extends the entire height of the project surface.
STEP 7
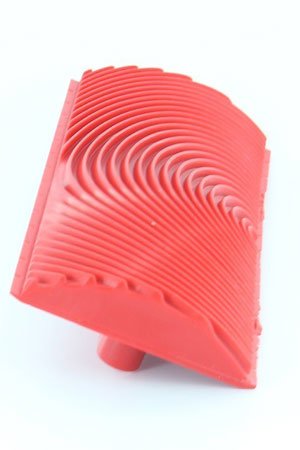
Create the faux wood grain in the fresh glaze. Position a wood grain rocker—a hand tool that creates a wood grain texture on painted surfaces (view example on Amazon)—at a top edge of the project’s surface. Then slowly drag the rocker down vertically, rocking the curved head of the tool from the top to bottom through the wet glaze until you reach the opposite end of the project surface.
To change the direction of the faux wood grain, simply flip the rocker and drag it in the opposite direction. To create variety with larger arches and a fine straight grain, position a graining comb—a triangular tool with teeth that mimics a grain texture—along the edge of the section you completed and pull the comb either straight down through the glaze or at a slight angle. This technique should create a more random (and therefore more natural) appearance.
Tip: Practice your wood grain rocker technique in advance by applying a thin layer of glaze to scrap cardboard or drywall board and pulling the hand tool through it. When you’re satisfied with your faux wood grain, move on to the main project surface.
STEP 8
Use a paper towel to wipe the glaze from the rocker and comb. Then move to the next 6-inch swath of the project surface, and repeat Steps 6 and 7. If you make a mistake, simply re-glaze the offending area and re-apply the faux wood grain.
Continue this process until the faux wood grain covers the entire project surface.
STEP 9
Allow the glaze to dry completely. Lastly, replace any hardware on the project surface, and step back to admire your faux bois finish!