We may earn revenue from the products available on this page and participate in affiliate programs. Learn More ›
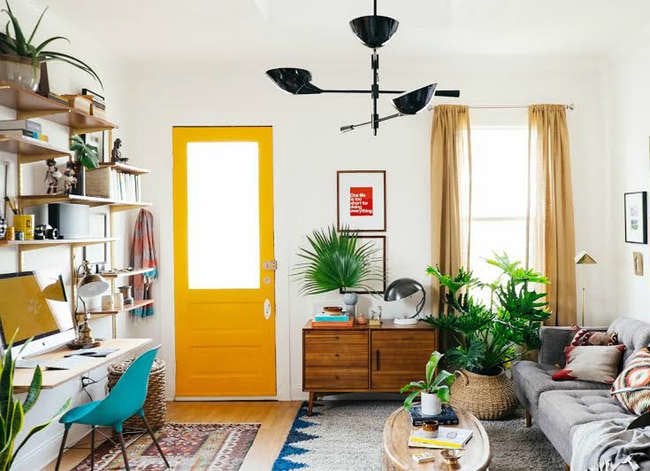
Long gone are the days when desks were reserved for the classroom or the office. Even if you don’t work from home, chances are you have a computer there. So as we welcome desks into our homes, why not make them an extension of our personal styles?
There’s no better way to meet your personal home office requirements than to build your own desk. DIY desk plans are abundant, and there’s surely one that suits your style.

You don’t need to start from scratch, if you don’t want to. Use elements that you already have, like file cabinets and cubbie systems. Reuse, recycle, or upcycle nearly anything from a pallet to plywood. Even a couple stools and a simple plank can come together for a DIY desk that’s easy on the eyes.
In general, a 28- or 30-inch high work surface is most comfortable for writing, with a somewhat lower height (24 or 28 inches) being best for typing. And you should allow about a two-foot width to accommodate knees. A conventional office desk is about 30 inches deep.
In the end, you can build your own desk however you want—whatever would work best to the suit your individual space and needs.
From free and easy to time-intensive labors of love, here are 15 DIY desk projects that will get you excited to get to work.
Go Old School
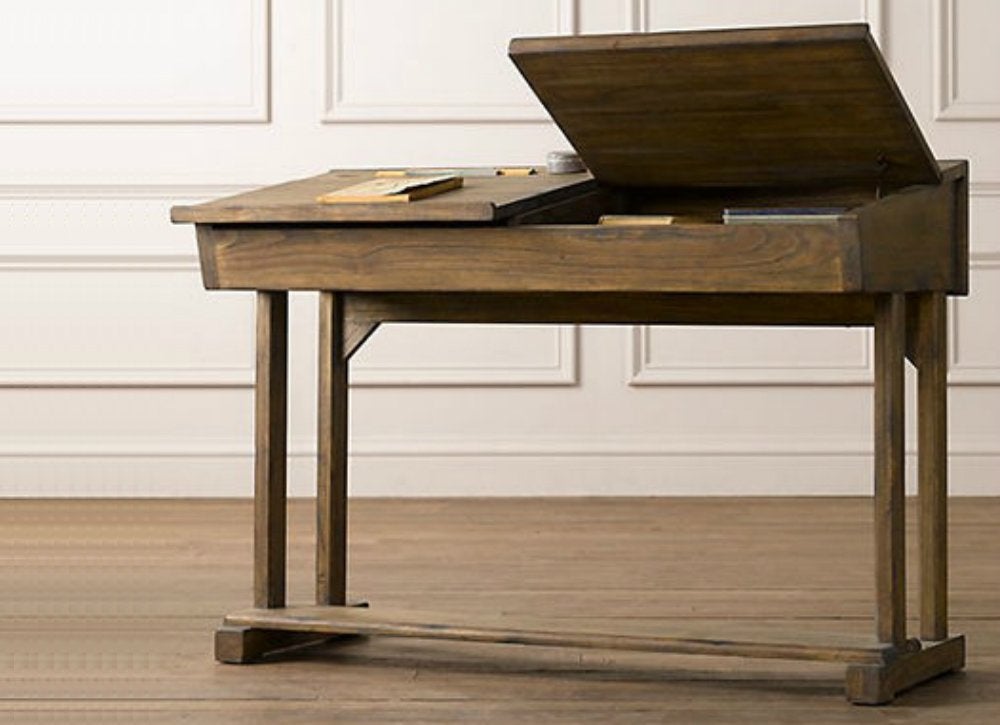
Here’s another classic DIY desk design from Instructables that can be scaled up or down, depending on the size of your student. Once you’ve put it together, you may decide to keep it natural with a couple of coats of clear acrylic, or give it more character with an antique wax finish.
Taking a Stand
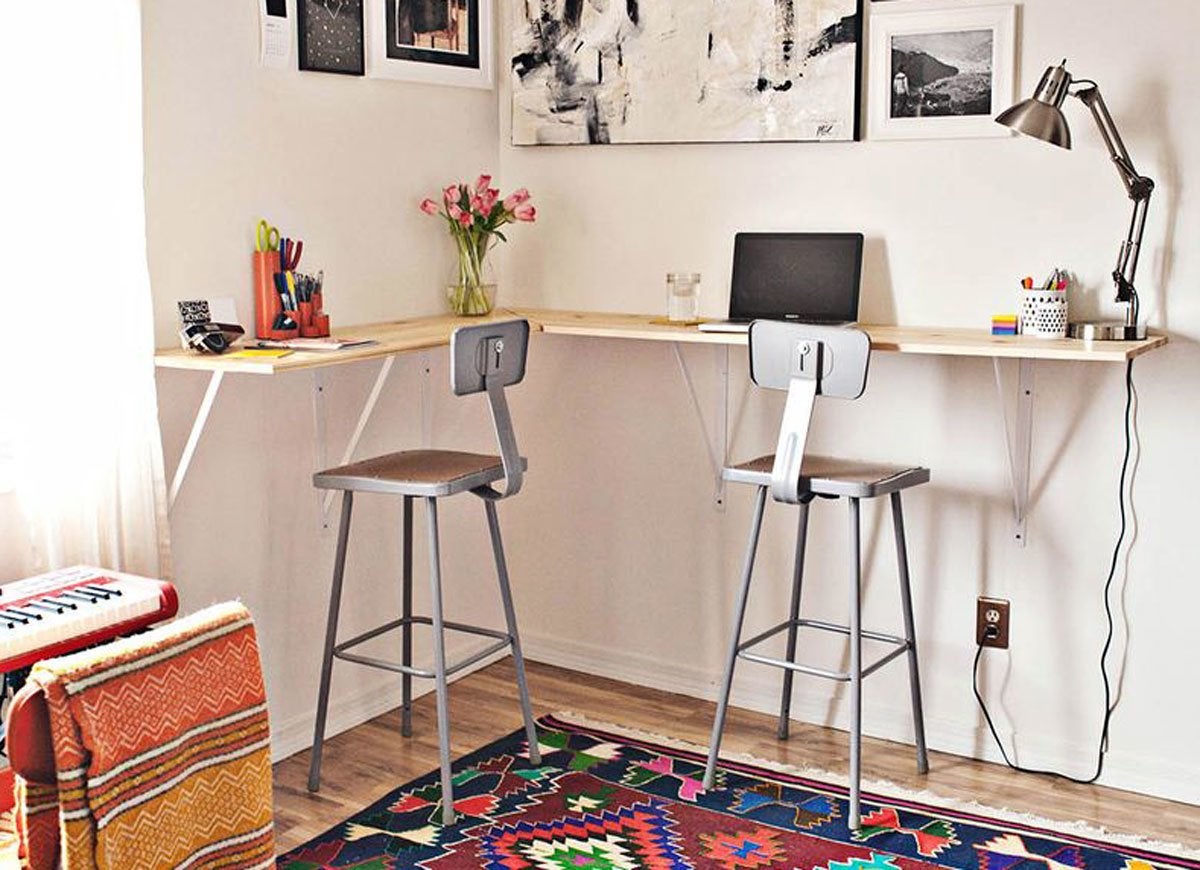
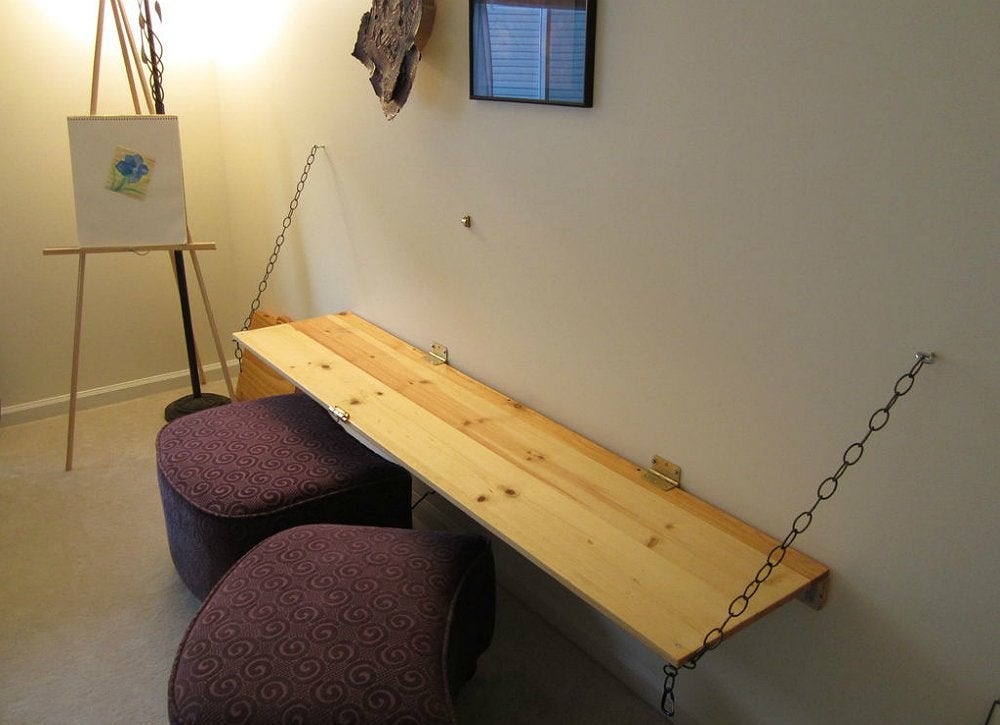
Want to build your own standing desk? Check out this wrap-around version from A Beautiful Mess. The design gives you plenty of workspace without taking up floor space or projecting too far into the room. Materials needed? Pine boards and shelf brackets.
Crafty Counter
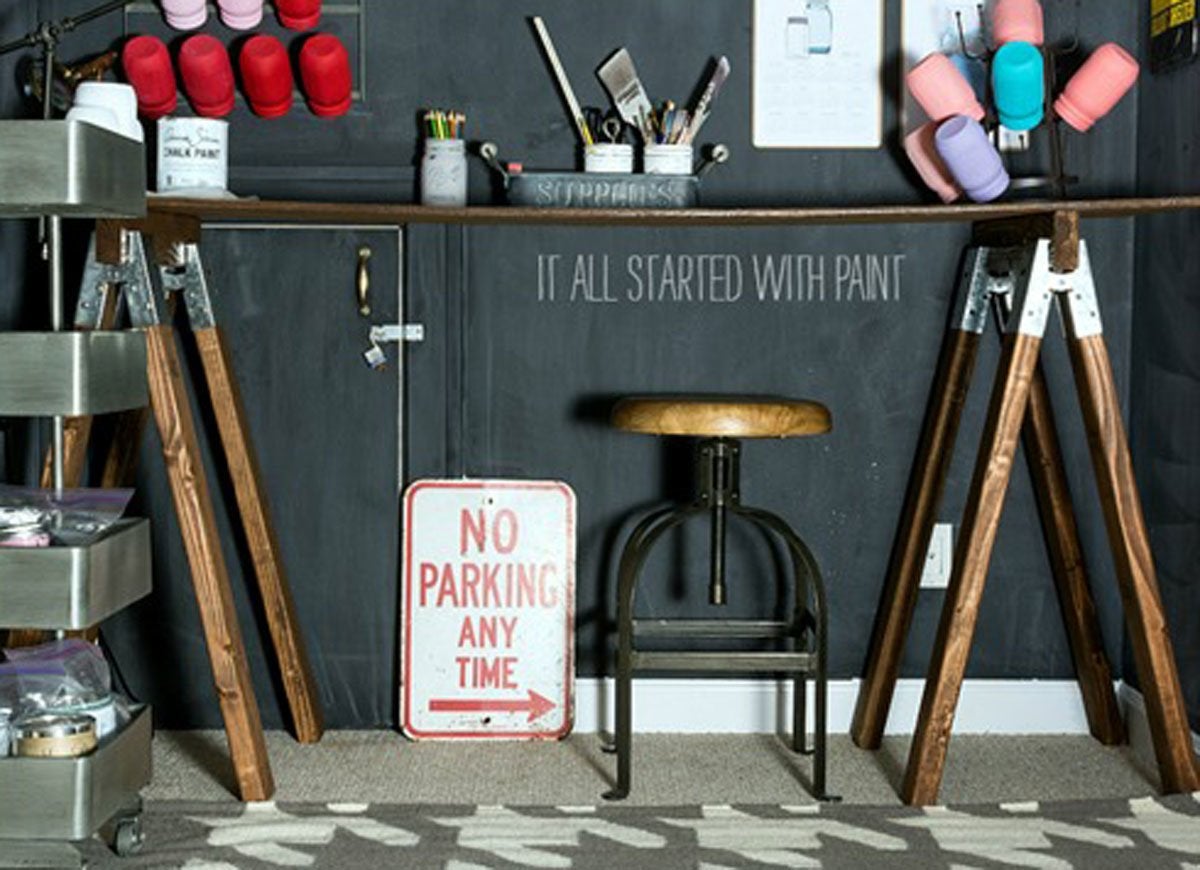
It’s no sweat to build your own desk out of sawhorses—especially if you already have a couple of sawhorses laying around in the garage or workshop. But even if you don’t, no problem. Just the hinges at your local hardware store and attach 2×4 lumber to them. Then last but not least, top the DIY desk with a regular sheet of plywood, cut to size. Get the tutorial from It All Started with Paint.
Modern Double Duty
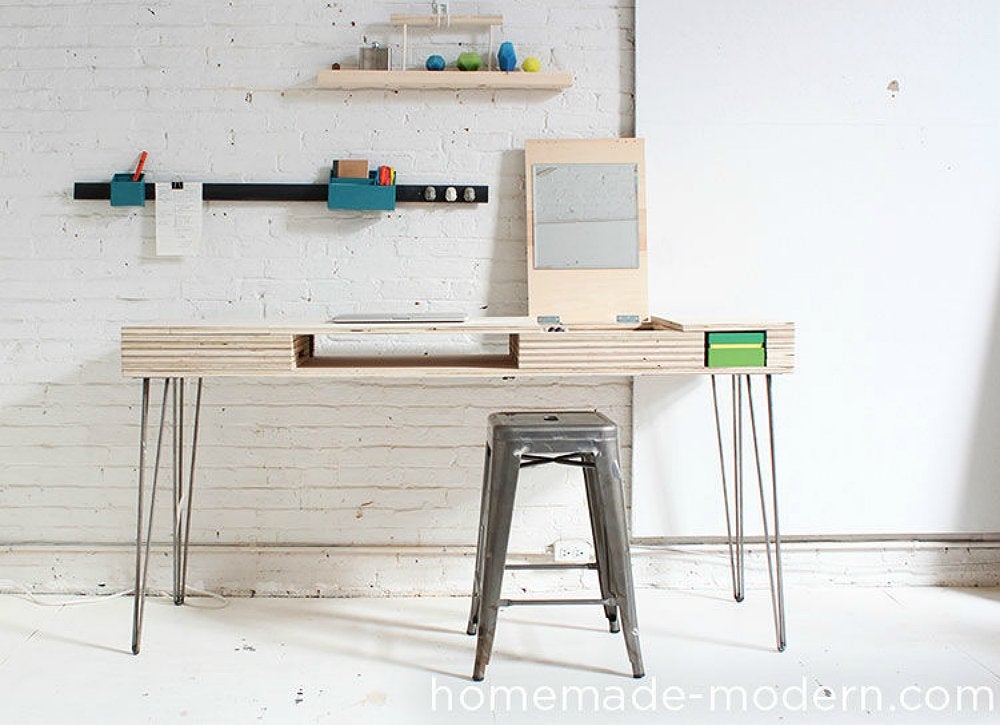
This modern DIY desk will be your new all-purpose piece, able to function as a work surface as easily as serving platform. Watch the video tutorial for details on how to build your own desk just like it. Besides some basic tools, you only need plywood and a quartet of hairpin legs to pull it off. Total project time? A few hours.
Sneaky Storage
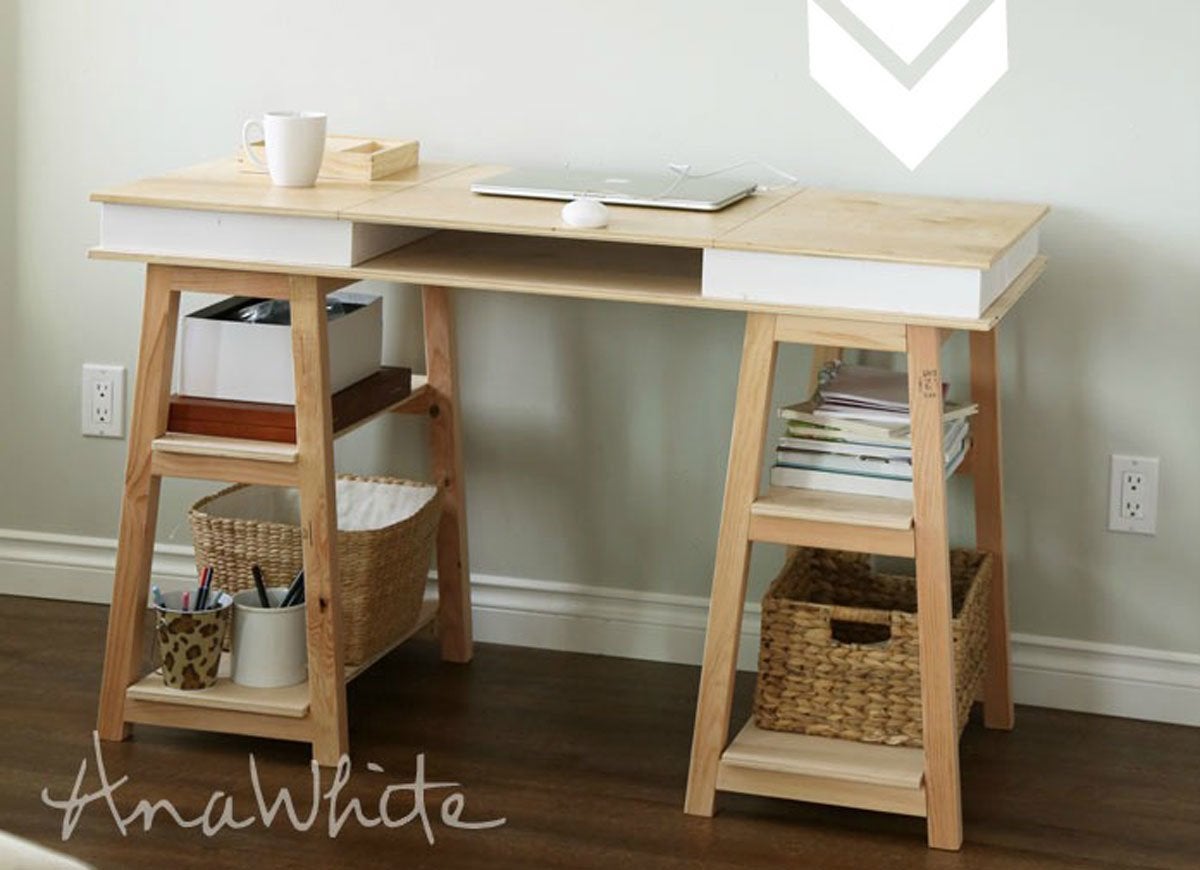
The design of this DIY desk allows for a great deal of customization. Once you have picked a base design, move on to tailoring the top with an arrangement of storage cubbies for the items you need day to day. Even better: Since the top uses off-the-shelf pre-cut plywood panels, the desk comes together more quickly than you might expect. Plans available from Ana White.
A Tiny Table

Copper pipe and stock lumber are the two main materials in this chic yet functional DIY desk for kids, featured on A Beautiful Mess. Once the pipes are cut to length, it’s just a matter of gluing them together, mounting the seat, and setting the desk top in place. The desk is so adorable, it may earn a permanent spot in your living room instead of the playroom!
Pull Up A Stool
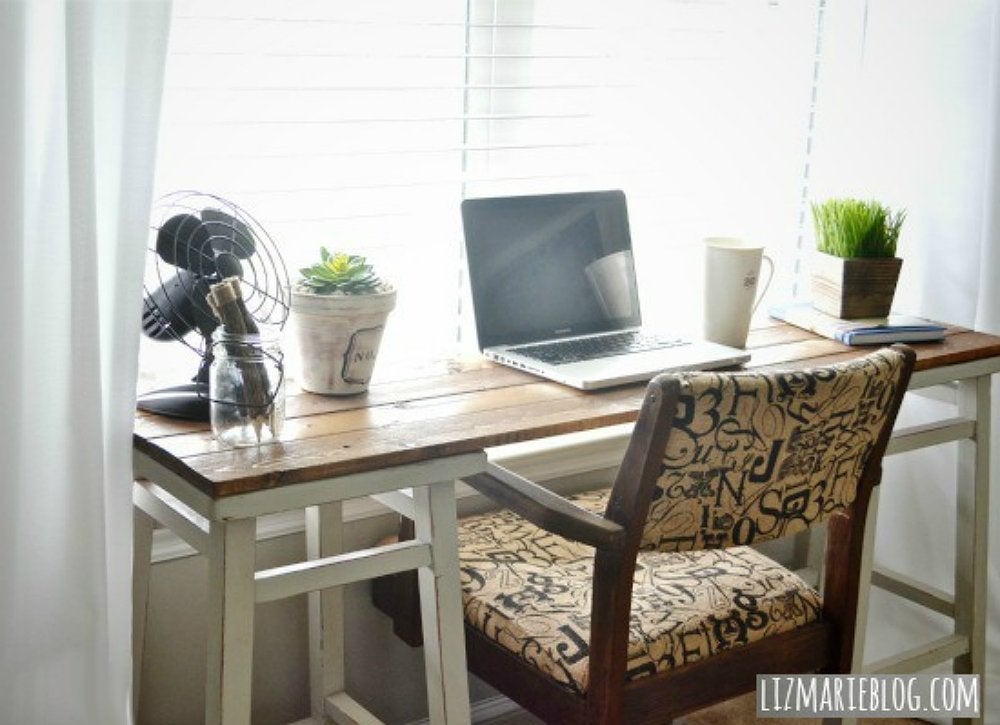
In a small space, opt for a desk with a narrow profile. This clever idea from Liz Marie Blog fits the bill. Repurpose unused bar stools for the support legs, cut a wooden board to size, and use screws to affix each end into the top of a stool. Finish off with a couple of coats of paint or stain, and you’re done.
Keep it On File
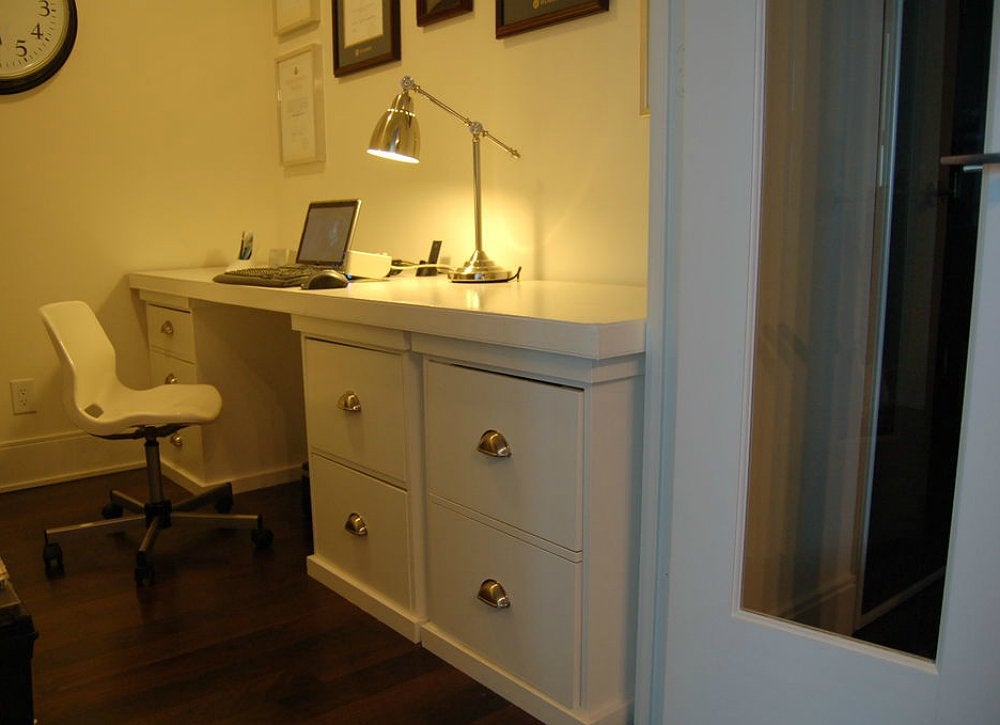
This workspace-meets-storage solution is easy to customize according to how much filing space you need, and it’s equally easy to break down into parts for relocation. If you’re feeling ambitious, you can build your own desk storage with cabinetry made from scratch, but prefab cabinets work just fine. Visit Instructables for the step-by-step.
Put It on a Pedestal
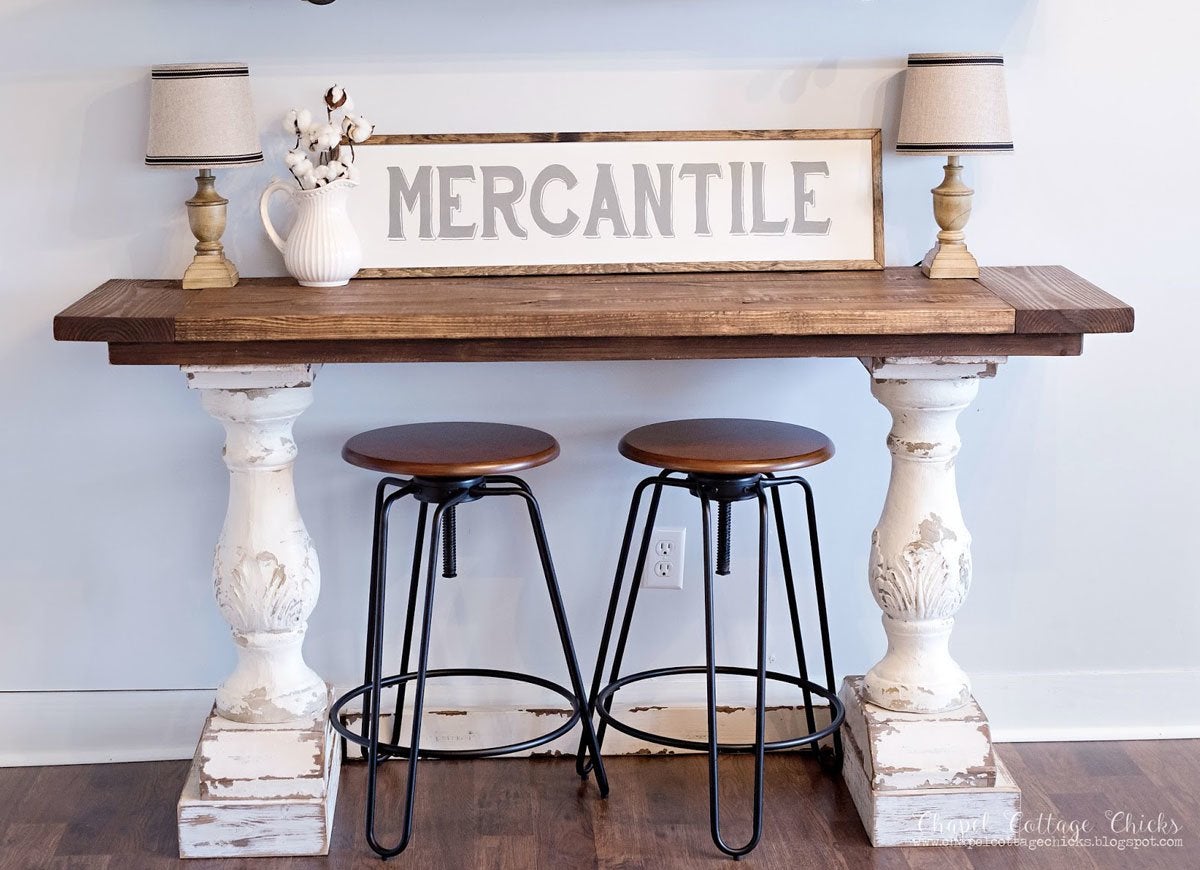
A couple of reclaimed pedestal legs finished with a board top makes an excellent multi-purpose piece. It’s a desk, it’s a buffet, it’s a snack bar, and more! Chapel Cottage Chicks has the full how-to guide.
At Long Last

At 12′ long and 3′ deep, this farm table-style desk has plenty of room on top and down below. But the fact that it’s big in size doesn’t mean that it’s expensive. In fact, the entire table was built from found materials—cedar planks, pallet posts, and thick chunks of reclaimed wood. The total cost to Funky Junk Interiors? $3.00 for new screws.
Upcycled Charm
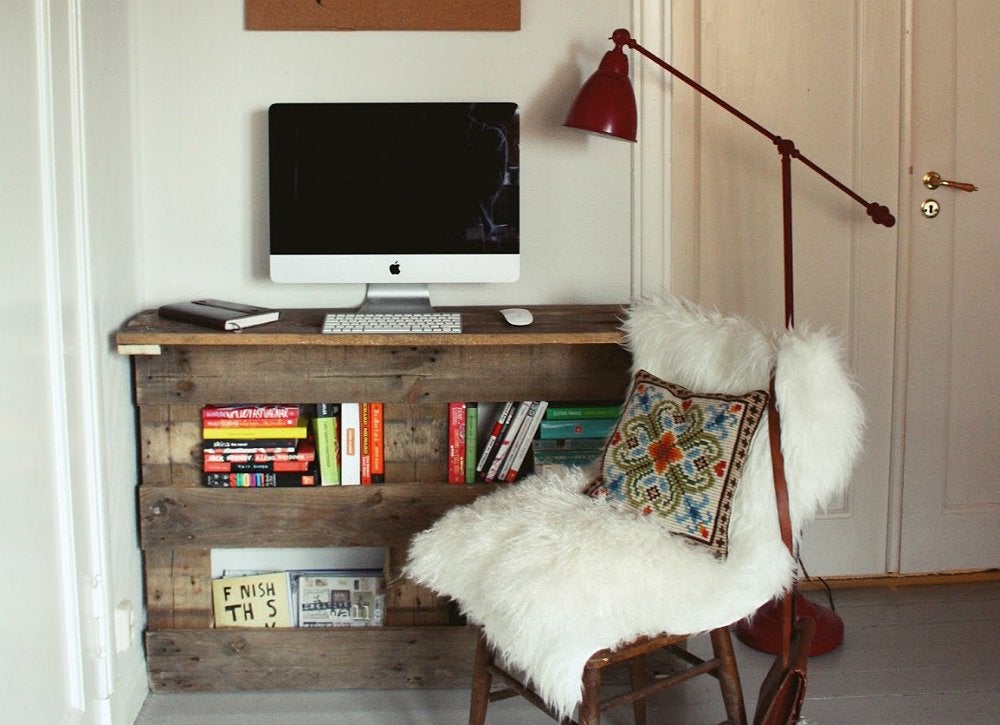
Built from nothing more than an old wooden pallet and a few extra planks, this rustic DIY desk from Peculiarmee is as charming as it is creative. In addition to being a quick and low-cost (if not free) project, the end result gives you four bonus nooks for stray books.
In the Home Stretch
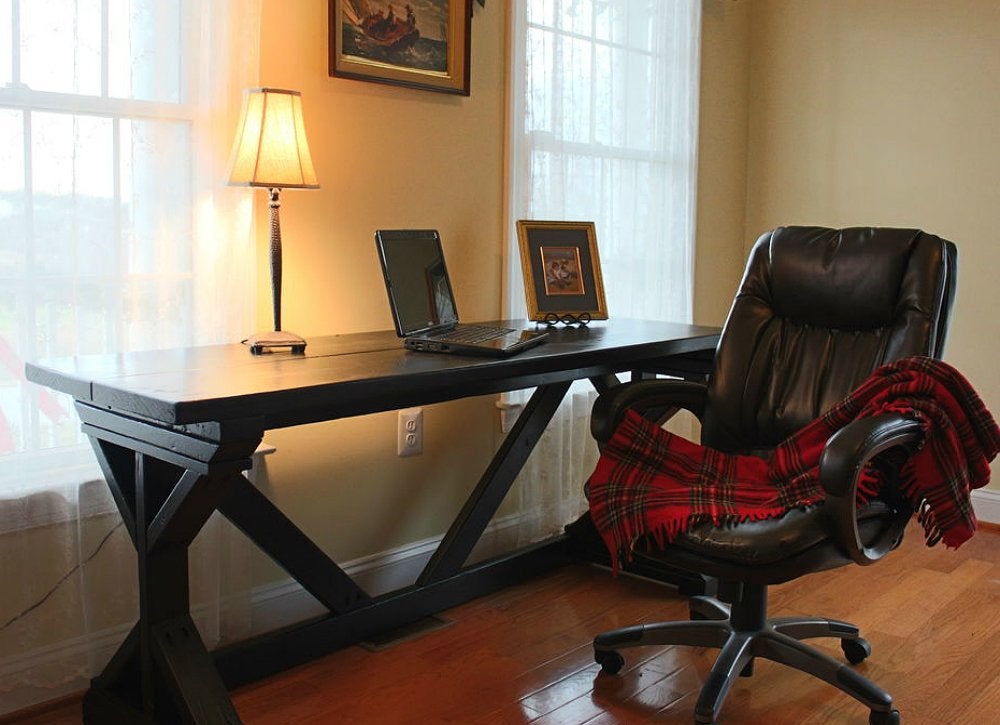
Spread out a little with a DIY desk whose generously proportioned top joins with sturdy legs that boast architectural interest and farmhouse charm. Instructables has a quick how-to video, plus a handy PDF version of the plans.
Right on Track
Maximize a basic track shelving system by adding an especially deep shelf to function as a makeshift, informal desk. One of the best features of this design is its versatility—you can adjust the height of the shelf up or down on a whim. Check out Old Brand New for more details.
Flip the Table
At first glance, this looks like a basic drop-down desk—but there’s a surprise underneath. When you’re not using the top as a space-efficient work surface, flip it up to reveal a chalkboard. Learn how to build your desk for dual purposes right here.
Convenient Cubbies
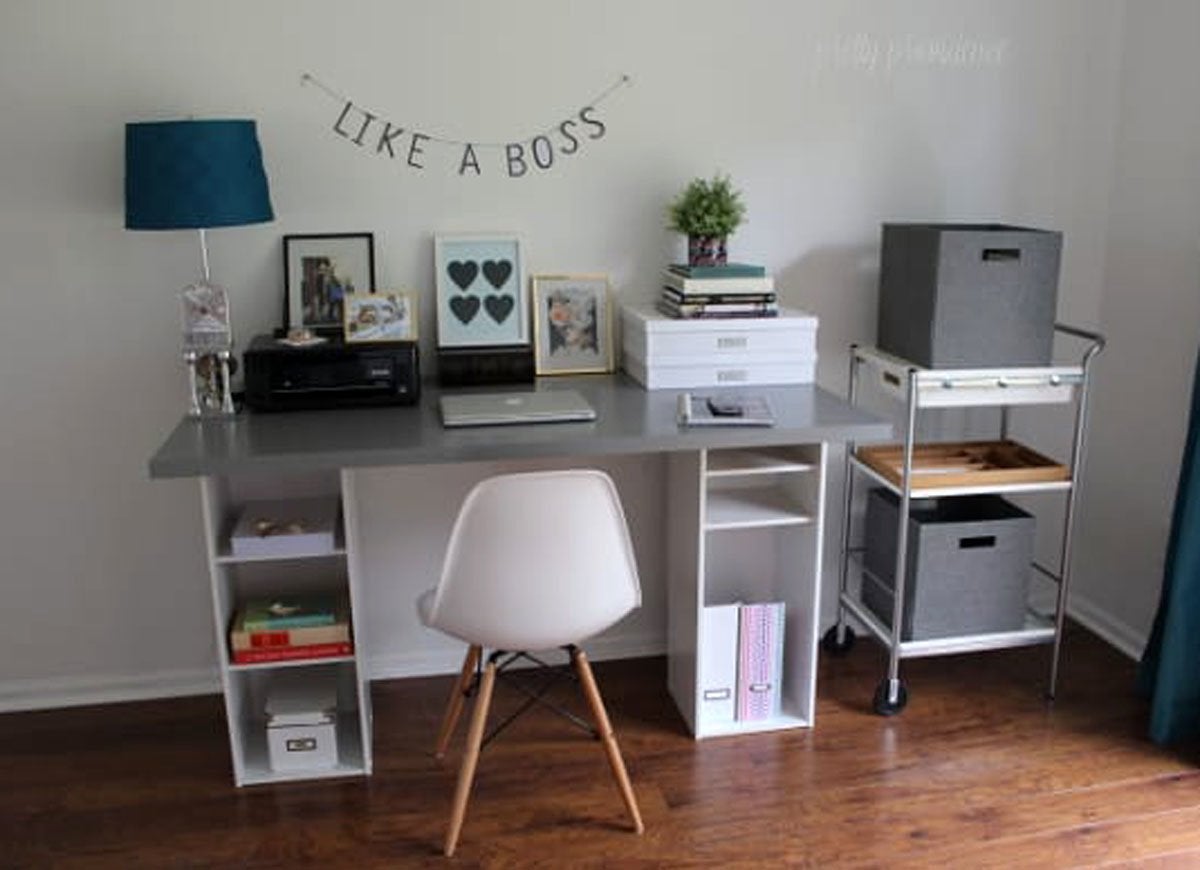
The epitome of budget friendly (and easy to build), this DIY desk depends on shelving units from Target and a desk top surface from IKEA. With a price tag around $60—and an assembly process that doesn’t demand any special skills—even a budget-conscious beginner can handle it. Check out Pretty Providence for full the tutorial.
