We may earn revenue from the products available on this page and participate in affiliate programs. Learn More ›
Whether you’re cooling off, rinsing off, or actually bathing, an outdoor shower is a fun and relatively easy summer DIY project that you’ll find yourself using even more than you imagined.
Of course, the easiest installation is one involving a garden hose, shower head, and tree branch, but you can DIY your own free-standing outdoor shower just as easily by following the steps below:
Tools & Materials
Bobvila.com may earn a commission from purchases made through these links.
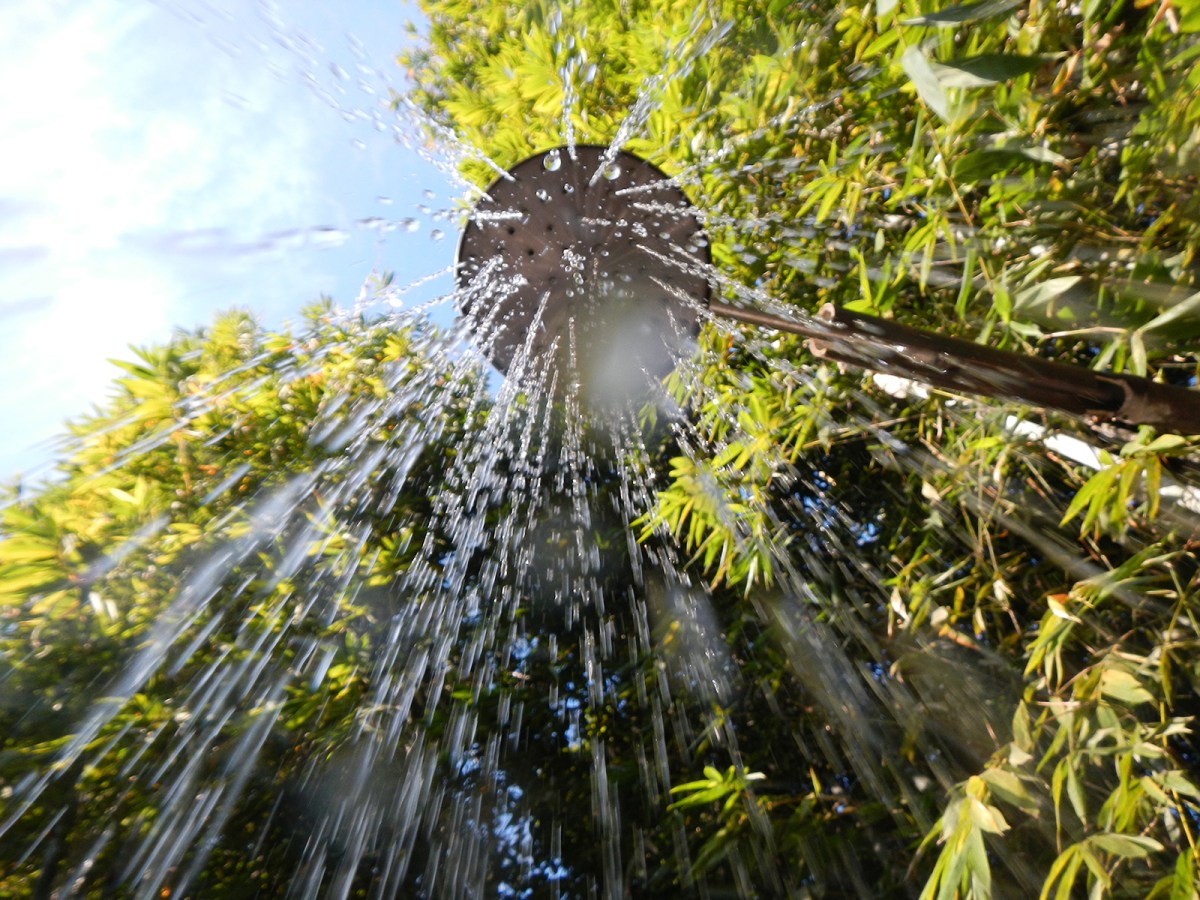
- Shower head
- 1/2″ threaded shower arm
- 4-1/2" decking screws
- 3-1/2" decking screws
- 2-1/2" decking screws
- Outdoor wood sealer
- Quick-drying concrete
- 1/2" threaded faucet
- 1/2" pipe straps
- Nylon plumbing tape
YOU’LL ALSO NEED
– Two 8-foot lengths of 4″ x 4″ lumber (cedar, redwood or pressure-treated are best)
– Two 8-foot lengths of 1″ x 4″ lumber
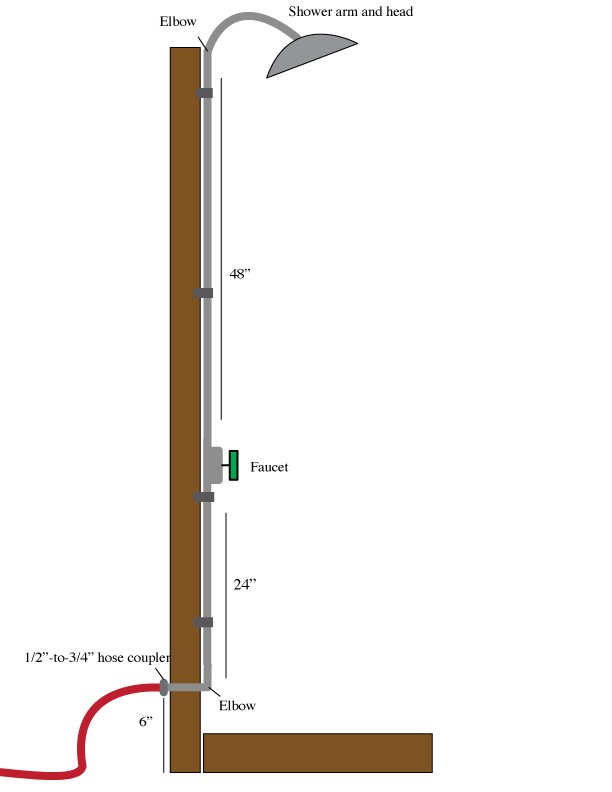
– 1/2″ galvanized pipe in threaded lengths of 48″, 24″, and 6″
– Two 90° galvanized pipe elbows
– Pea gravel or small stones
Note: This tutorial is designed for those with an outdoor water spigot. If you desire hot water for your outdoor shower, hire a plumber to run hot and cold water to your site.
Step 1
Choose the location of your outdoor shower. Select an area that’s relatively level; a slight grade will promote runoff. Consider it’s proximity to your outdoor spigot and the relative privacy it affords.
Step 2
Build the base. Cut one 4″ × 4″ into four equal 23″ lengths. Build a basic square by staggering the ends and securing with 4-1/2″ screws. Then, cut the 1″ × 4″s into seven 26-1/2″ lengths and space them evenly on top of the base, leaving about a 1/4″ between boards for drainage. Secure the slats to the frame with 3-1/3″ screws. Finish the entire base and the uncut 8′ length of 4″× 4″ with wood sealer and allow to dry.
Step 3
Install the shower. Dig a 12″ deep hole with a post hole digger, and insert the 8′ 4″ × 4″. You can use concrete to secure it, or just fill the hole with dirt. Place the shower base next to the upright 4″× 4″, mark its location, then remove the base and cover the ground with pea gravel or small stones to help with drainage. Place the base on top of the gravel.
Step 4
Install the plumbing. Use a 5/8″ spade bit to drill a hole all the way through the 4″ × 4″ about 6″ above the ground and 2-1/2″ above the base. Connect the plumbing in the following order: Shower head – shower arm – 90° elbow – 48″ length – faucet – 24″ length – 90° elbow – 6″ length. Use nylon plumbing tape at each joint. Then, stick the 6″ horizontal pipe length through the hole in the base of the 4″× 4″upright, and set the plumbing flush to the face. Use 2-1/2″ screws to secure the plumbing to the 4″ × 4″ with the pipe straps.
Step 5
Add the water. Attach the hose to the coupler in the back of the shower. You may want to purchase a Y-splitter for your outdoor spigot so that you can run an additional hose for lawn and gardening tasks. Test the water, and enjoy!