We may earn revenue from the products available on this page and participate in affiliate programs. Learn More ›
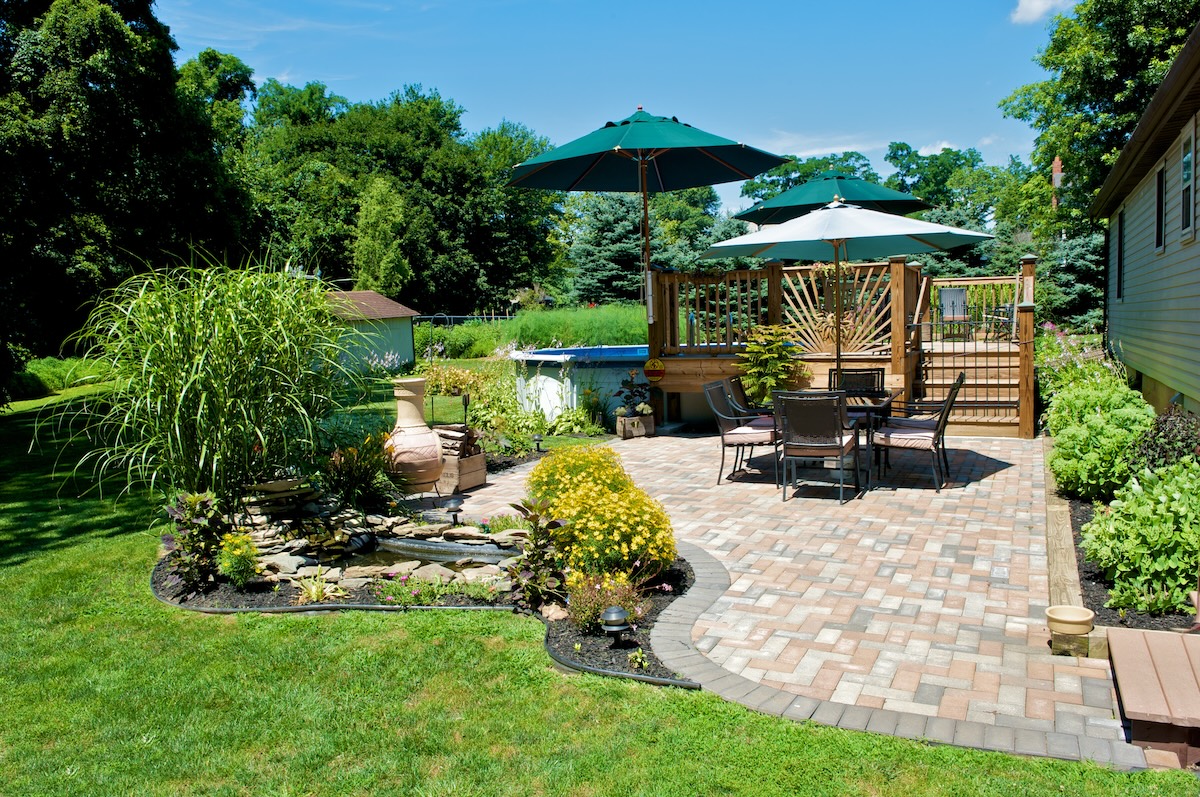
Of all the materials suitable for use in patio construction, brick stands out for its beauty and ease of installation. Depending on the sophistication of your design, it may be possible to build a brick patio within the space of a single weekend. Here’s how:
Tools & Materials
Bobvila.com may earn a commission from purchases made through these links.
Step 1: Pick the right location.
Choose an area of your property that is easily accessible from the house. Make sure the chosen area is relatively flat, with a moderate slope away from the house for the purpose of drainage. Plan around the position of mature trees, whose roots may complicate the process of leveling a yard. (Also, plan around young trees that are nearby, as their growth over time may eventually shift patio bricks.) While you can level the yard to a degree, a deck may be more appropriate for a landscape with a dramatically steep gradient.
Step 2: Decide on the size and shape of the patio.
Having identified a location for the patio, you must next decide on its size and shape. Remember that bricks come in different sizes. Choosing a mix of bricks with different dimensions may facilitate the installation job by minimizing the need for cutting. A rectangular or square design will be easier to accomplish than one that is round or curved.
Step 3: Prepare the site.
Excavate the site to a depth that will accommodate the bricks’ thickness as well as a two- or three-inch sand base. For example, if you’re using reclaimed brickk that measure 4 inches x 4 inches x 8 inches, you should excavate to a depth of 6 or 7 inches. Dig a deeper trench around the perimeter that will allow you to stand bricks on end, side by side, to create a border.
Lay landscape fabric on top of the soil (for weed prevention) and cover the cloth with an even layer of sand. Mark the area, row by row, with stakes and strings to keep perimeters square. Doing so also serves as a guide to help you get the right drainage slope.
Note: Double-check with your building materials supplier, but usually a ton of sand covers about 200 square feet to a depth of approximately 2 inches.
Step 4: Buy the bricks.
To calculate the number of bricks required, first determine the number of bricks per square foot. A brick measuring 4 inches x 4 inches x 8 inches is equivalent to 32 square inches, so each square foot in the patio would need four and a half bricks. Multiply that number by the overall dimensions planned for you patio; the sum is your total brick count.
Don’t forget to factor in those bricks to be used in the border, not to mention the 1/4-inch space between bricks. If it’s easier, use graph paper to draw your patio to scale. Consider ordering 10 percent more materials than is strictly necessary. You can always return the unused bricks or save them for a future project.
Step 5: Set the border.
Begin by setting the border. Insert bricks end first, shoulder to shoulder, so they sit flush with the patio surface. These border bricks will hold the patio installation in place, keeping its constituent bricks from spreading apart. The border will also provide a professional finish to your project. Alternatively, steel or wood beams may be used to frame the patio.
Step 6: Lay the brick.
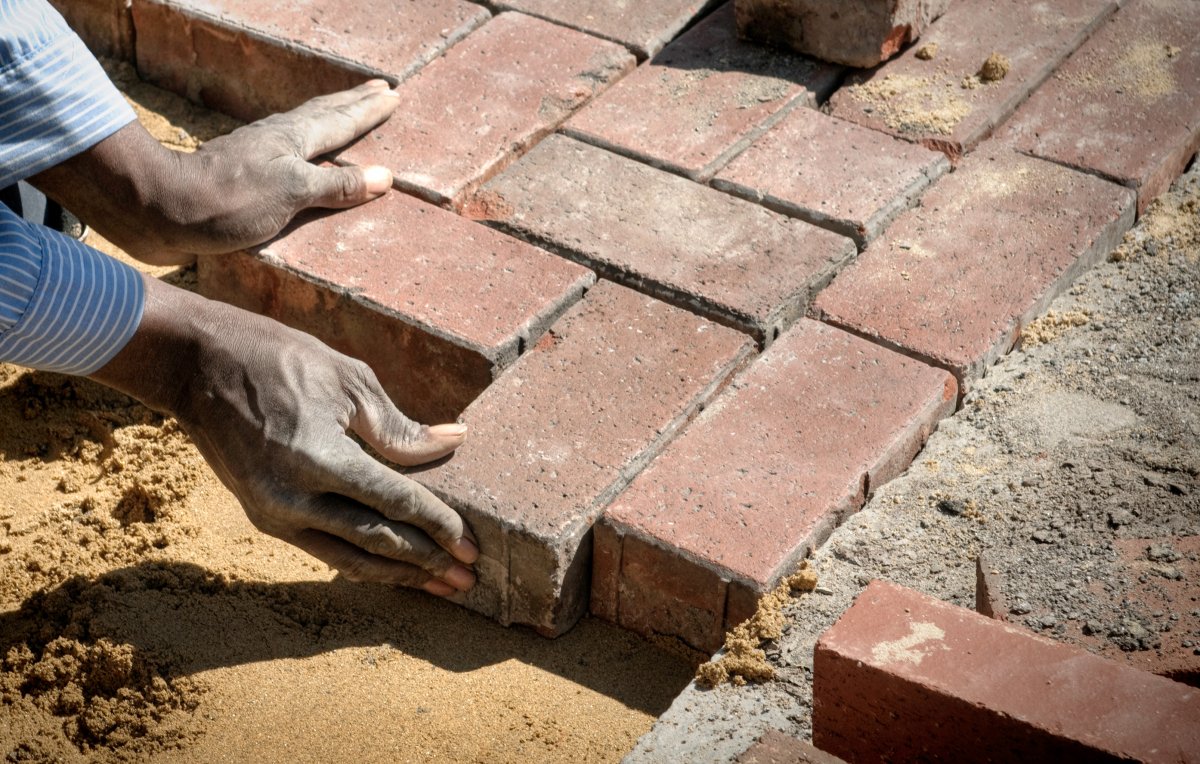
Once the border is in place, lay the bricks flat on the sand, using the strings as a height guide. Remember to leave a 1/4″ gap between bricks. After positioning all of the bricks, apply additional sand in the spaces between them.
I have found it easiest to pour sand in a small area before using a push broom to move the sand over all the openings. Repeat the process until the gaps between the bricks and borders are evenly filled and level.
Sweep off the extra sand and fire up the grill!
