We may earn revenue from the products available on this page and participate in affiliate programs. Learn More ›
Q: I am renovating most of my bathroom, but I’m not changing the shower tiles or bathtub. However, the caulk lines between the tiles and the tub are looking old and I’m not sure if they properly seal out water anymore. Do I need to remove the old caulk, or can you caulk over caulk?
A: Partial renovations are common, whether it’s for time or budget reasons. However, it’s important to do each job, like caulking, right or possibly face spending more money and time fixing costly water damage, rot, and mold.
People often ask, “Can you caulk over old caulk?” but it may be more important to ask, “Can you caulk over cracked caulk?” Generally, caulking over old caulk isn’t recommended. Removing the old caulk and replacing it with a new bead of caulk instead usually creates a better seal.
However, you can effectively caulk over caulk as long as the bottom layer of caulk isn’t damaged or moldy. The old caulk should also be clean, dry, and free of oil for the best adhesion.
Related: This Was the Only Caulking Gun I Could Use One-Handed Comfortably
Types of Caulk
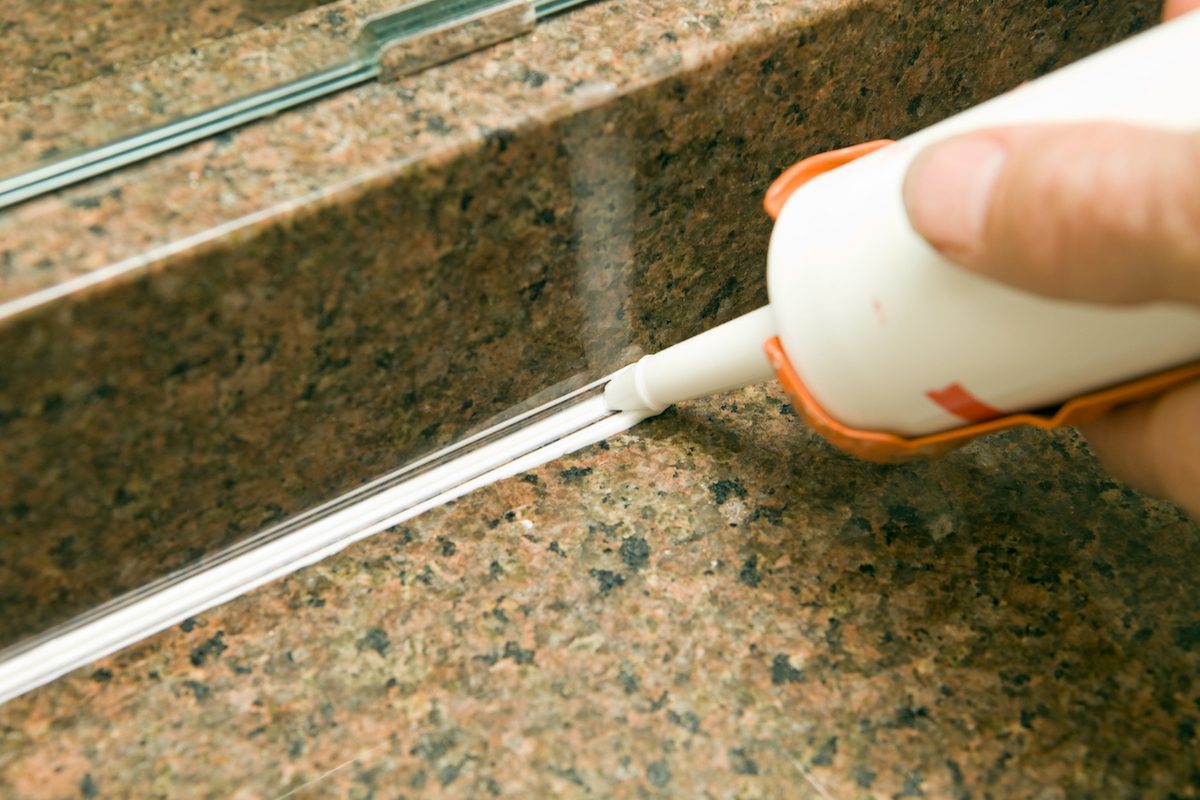
Since there are various types of caulk available, DIYers sometimes wonder, can you put a second layer of caulk over acrylic latex, and can you caulk over silicone caulk? Though you can caulk over both acrylic latex and silicone, there are differences between these two main types.
- Acrylic latex: Typically used for filling the gaps around window frames, doorframes, and baseboards, acrylic latex caulk is flexible and paintable. If you are applying a second layer of caulk over an old layer of caulk, acrylic latex is more likely to form a strong bond than silicone.
- Silicone: You can caulk over silicone caulk, but it may not work because it doesn’t have the same flexibility and adhesion as acrylic latex. Silicone caulk is often used in the bathroom or kitchen, where it forms a watertight seal to help prevent water damage, rot, and mold.
Related: The Dos and Don’ts of Caulking the Bathroom
Old caulk should be removed before applying new caulk for the best results.
Even experienced DIYers who know the benefits of replacing old caulk will sometimes look at the scope of the job in front of them and consider caulking over old exterior caulk, as well as the prospect of caulking over new caulk when faced with removing long beads of caulk. Despite the extra effort involved, it’s always better to remove old caulk, regardless of whether it’s exterior caulk, acrylic latex caulk, silicone caulk, or even a new bead of caulk that wasn’t allowed to fully cure and form a proper seal.
To remove caulk, apply a caulk remover to soften it before using a utility knife to cut along the top and bottom of the bead, which should help free the caulk. In some cases, it’s possible to pull a large strip of caulk out in one pull, but this isn’t always the case. Be prepared to spend some time cutting, peeling, and scraping to remove old caulk. This process will also help prepare these gaps for the new caulk.
It’s possible to apply new caulk over existing caulk with a few key preparations.
If you don’t have the time or simply don’t want to remove the old caulk, then it is possible to successfully apply new caulk over the existing caulk by following these steps.
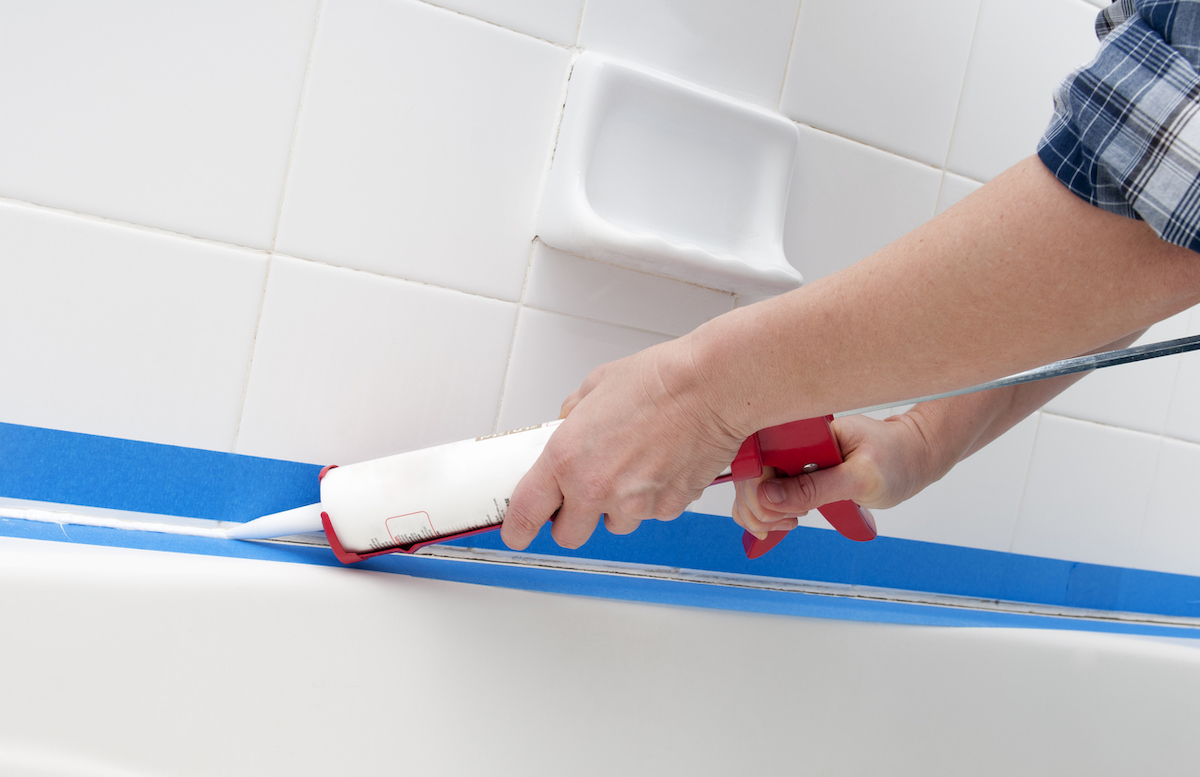
- Use soap and water to thoroughly clean old acrylic latex caulk and the surfaces on either side of it. Denatured alcohol can also be used on the surrounding surfaces, but do not apply it to the caulk. For silicone caulk, do not use soap and water because the soapy residue will prevent the new silicone from bonding. Instead, use a mixture of bleach and warm water in a 1:10 ratio in order to create a cleaning solution for silicone.
- Allow the caulk to dry for about 24 hours, then double check the caulk to make sure that all surfaces are dry. Do not proceed if any of the caulk lines are still wet.
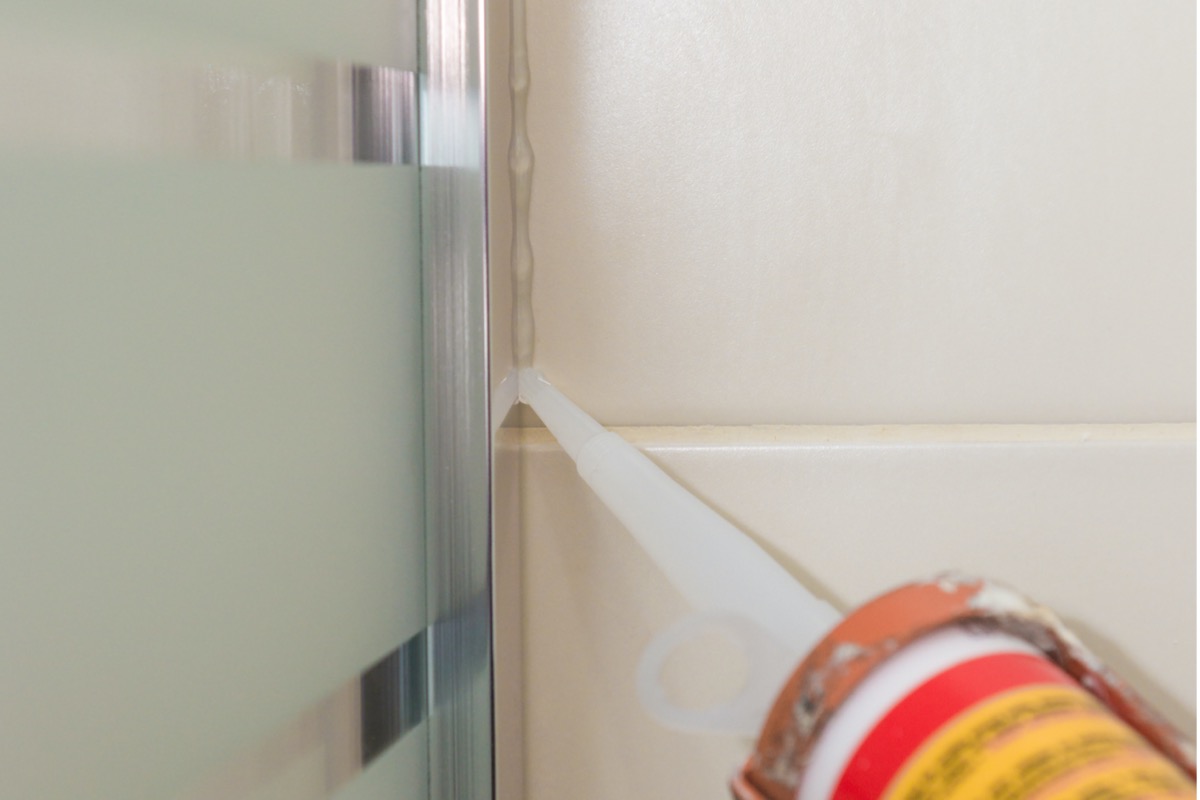
- Apply the new bead of caulk over the old bead, ensuring that the new layer of caulk extends beyond the old layer. This allows the new layer of caulk to bond with the surrounding surfaces on either side of the old caulk, improving adhesion. This step is integral for bathrooms and kitchens, where a small leak in the seal could lead to serious water damage.
- Allow the caulk to dry and fully cure for 24 to 48 hours.
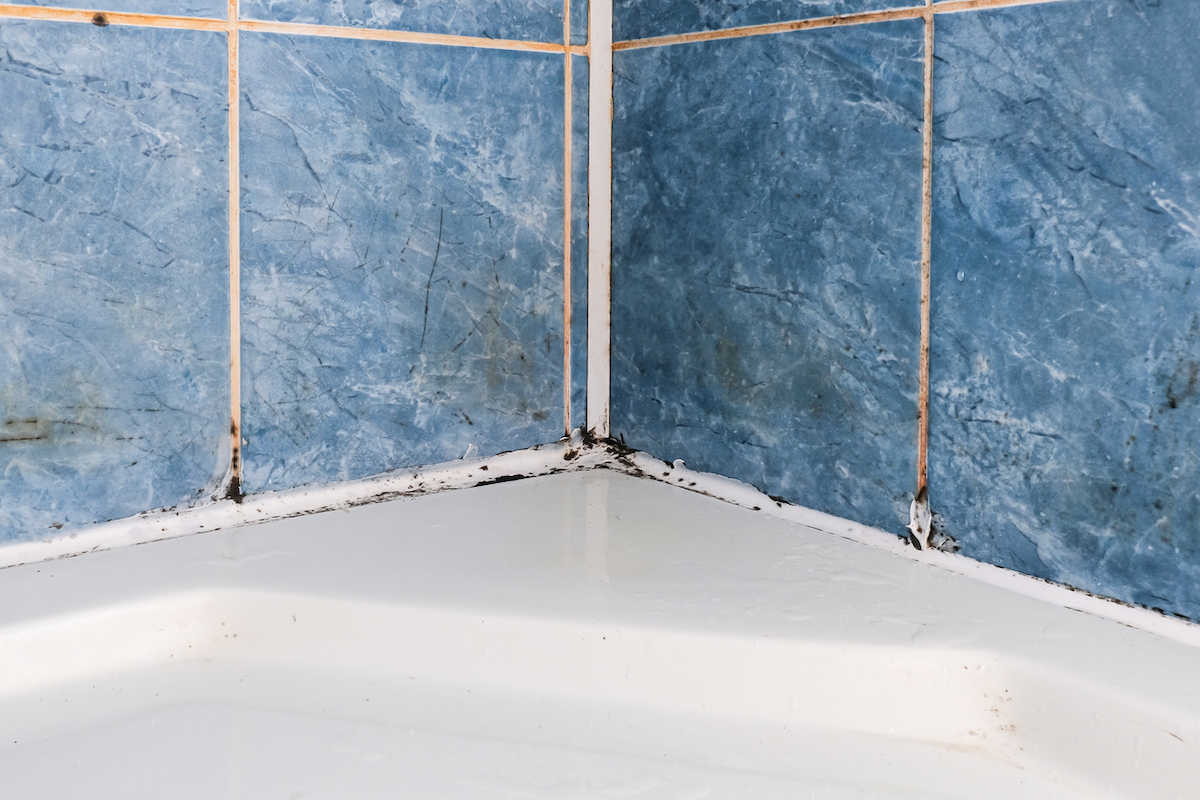
Never caulk over damaged or moldy caulk.
Applying a new layer of caulk to an old layer of caulk isn’t recommended, but it is doable if the old caulk is still in relatively good condition. Damaged, cracked, and worn caulk won’t provide a firm surface for the top layer of caulk, often leading to cracks and damage in new caulk. Remove the old layer before properly sealing the gap.
Similarly, moldy caulk doesn’t just go away because you cover the mold with new caulk. The mold continues to grow and spread inside the walls, as it thrives in dark, moist locations. If the mold isn’t cleaned or otherwise treated, then it can contribute to reduced air quality and may increase the degradation of the home. Avoid this problem by removing moldy caulk and treating the affected area to remove any residual mold before applying new caulk.
Related: How to Use a Caulk Gun
