We may earn revenue from the products available on this page and participate in affiliate programs. Learn More ›
Q: My childhood dresser is beautiful but the wood stain looks faded. I’d love to update it with fresh paint and new hardware, but I’ve heard that you can’t get good results painting over stain. Is that true—and if not, what’s the best way to paint over wood stain?
A: Kudos to you for doing right by a family heirloom! And you certainly can paint over stain, choosing the method that best suits the type of stain on the surface and the kind of paint you wish to use. Keep in mind, however, that proper prep is essential; skimp on these steps and tannins from the stain would likely bleed unattractively onto the fresh paint. Read on to learn how to get great results when painting over wood stain.
Always prepare the wood before you paint over stain.
Before you prep, determine the type of wood stain (oil- or water-based) that you’re dealing with by lightly sprinkling water on a small patch of the wood surface. If the water beads up after about a minute, the stain is oil-based (oil repels water). Then, follow these general preparatory steps for painting over stain:
- First, clean the stained surface with soapy water to remove any dust, dirt, and cobwebs.
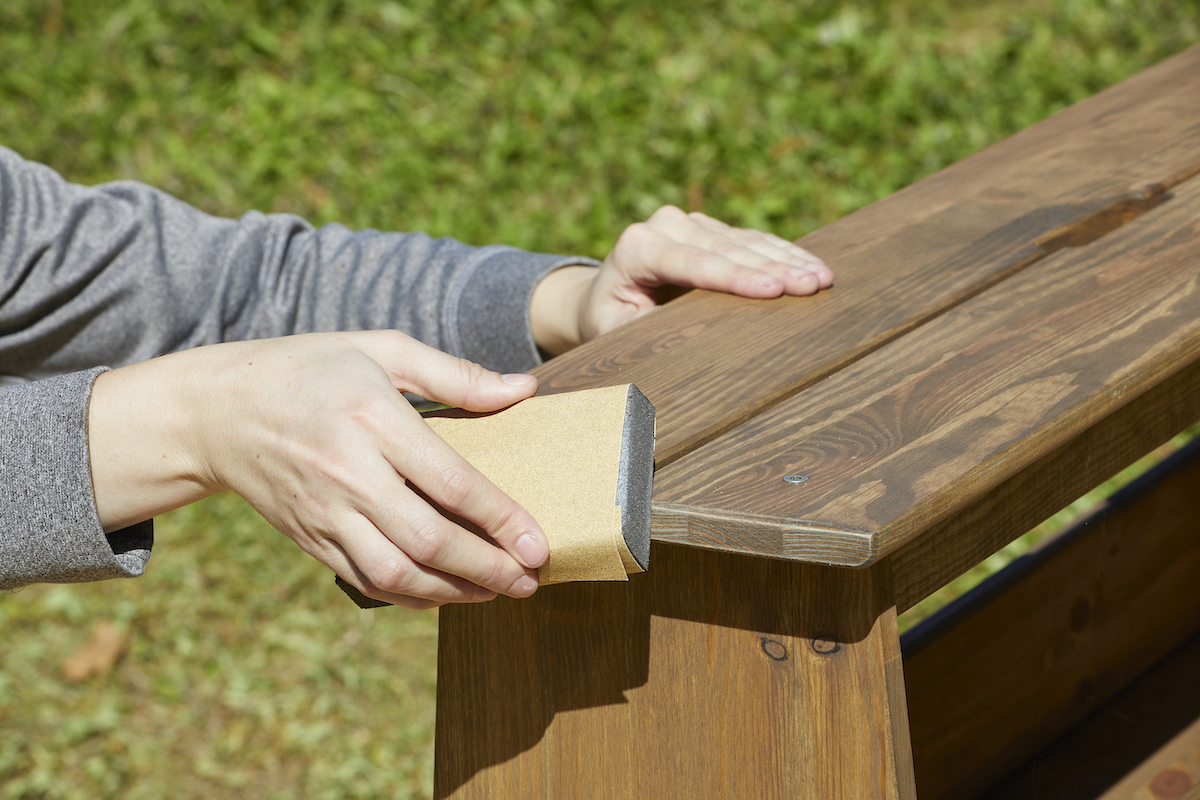
- Next, to dull the stain, lightly sand the surface with 150-grit or finer sandpaper, moving in the direction of the grain to avoid crosshatching in the final result. Sponge away any dust from your sanding process.
- Then dip a rang into deglosser and wipe down the surface. Deglosser, also known as “liquid sandpaper,” contains heavy solvents that strip the finish off wood surfaces faster than manual sanding. Because chemical deglossers contain volatile compounds harmful to lungs and skin, always wear a safety mask and gloves and work in a well-ventilated space. Allow the surface to dry for at least 10 minutes.
- Repair any holes, scratches, or other damage with wood filler. Sand again to smooth the surface and clean with a damp rag.
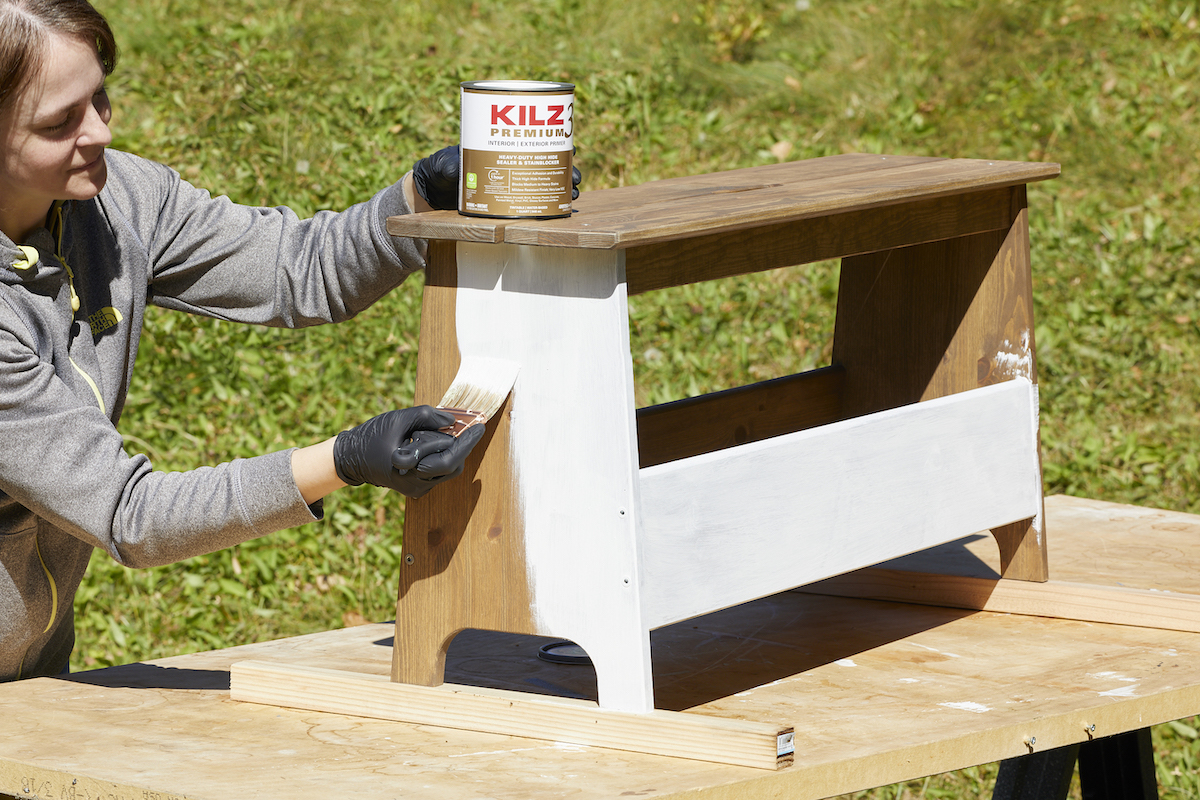
- Brush on a quick-dry primer to ensure that paint adheres fully to the prepared surface—and save you lots of drying time. Wait an hour, and you’re ready to paint.
Use latex primer and paint when painting over a water-based wood stain.
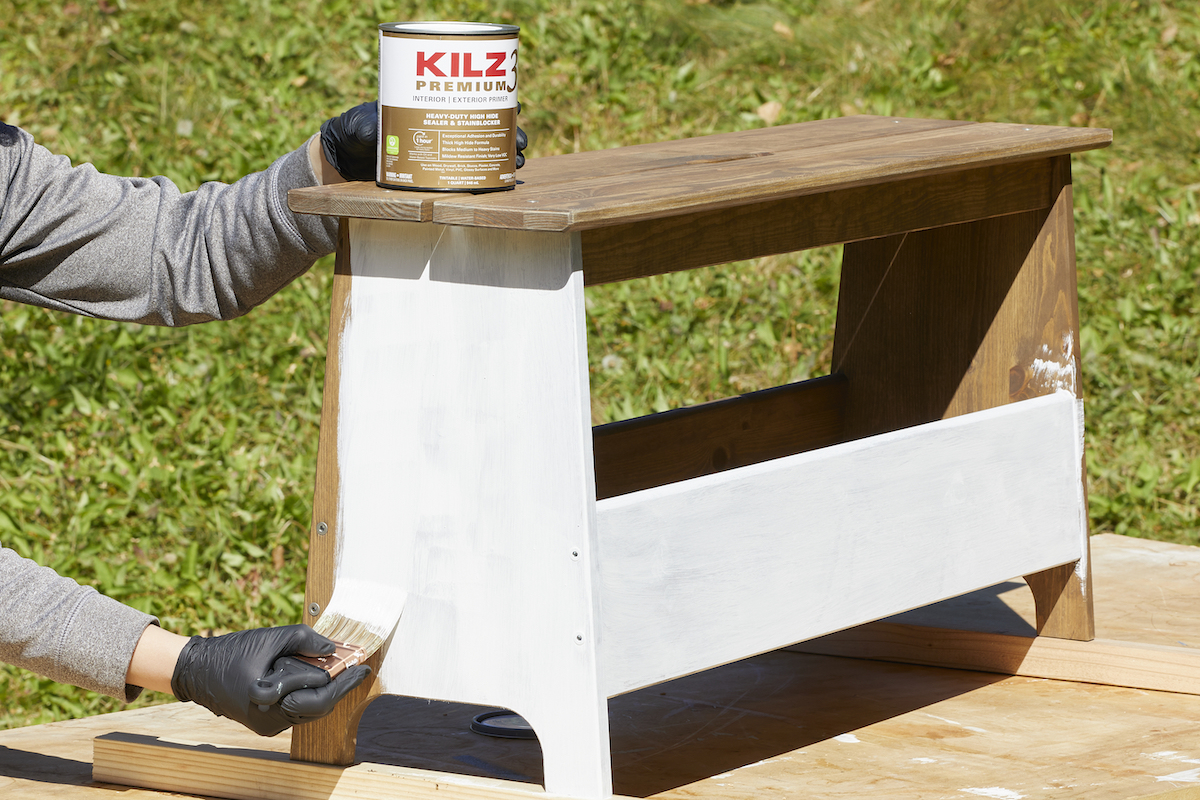
Paint adheres well over water-based stain, so after completing the prep steps outlined above, apply a water-based latex primer with a brush or a roller. To ensure the best results, ask your paint store to tint the primer a similar color to your top coat. Apply two coats of latex paint over the primer for complete coverage. Always wait before the first coat is completely dry—typically overnight—before applying a second coat.
Special prep is required when painting over oil-based wood stains.
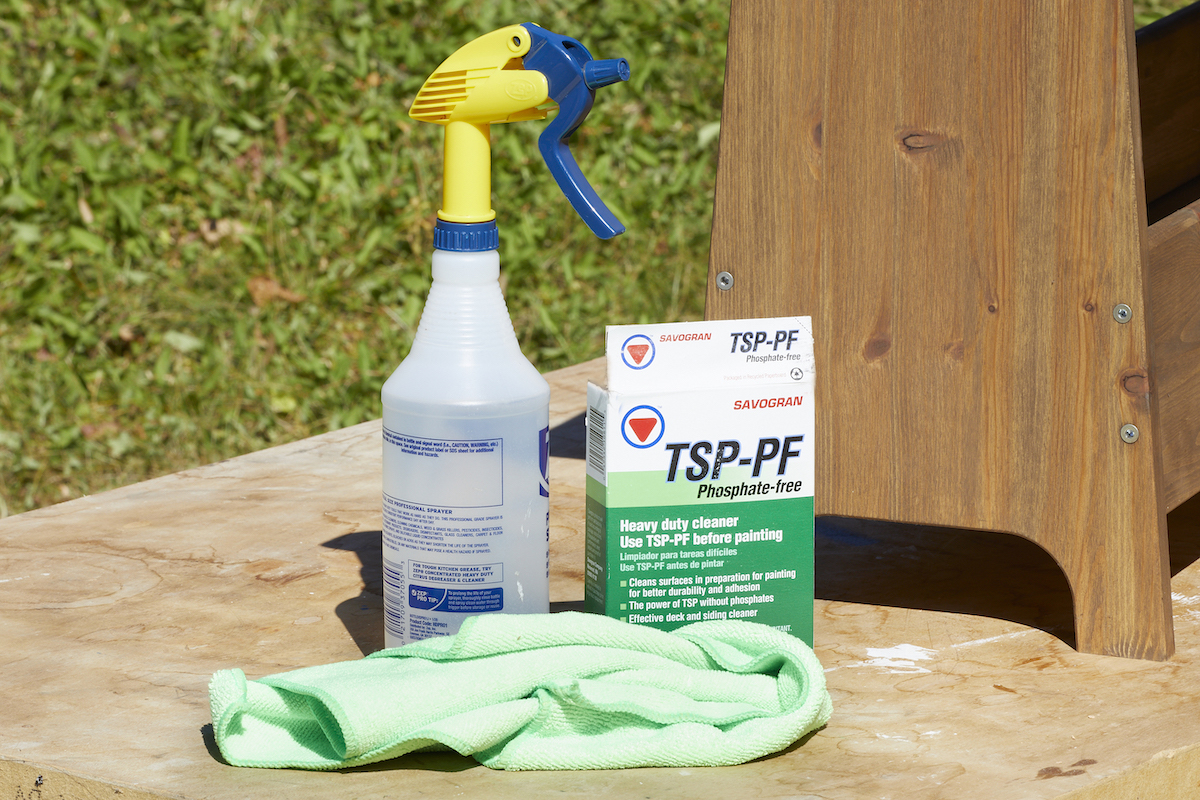
It’s possible to cover oil-based finish with either latex paint or oil-based paint, but additional surface prep is needed. First, don safety goggles and gloves, and turn on a fan to circulate the air in your work area. Next, dissolve 1/4 cup of trisodium phosphate (TSP) in one gallon of warm water. Dip a soft sponge into the mixture, wring out, and wipe down the surface, soaking up all dirt and grime. Repeat and let the surface air dry. Sand all rough areas and wipe clean with a damp rag. Now apply a bonding primer—a water-based formula designed to adhere to glossy and other hard-to-paint surfaces (such as varnish and polyurethane)—following product directions carefully. Finally, apply two coats of paint. For indoor projects, use interior paint. For outdoor projects, choose an “interior/exterior” formula, which will resist rot and extreme weather.
For a matte finish, use chalk paint and a polyurethane top coat.
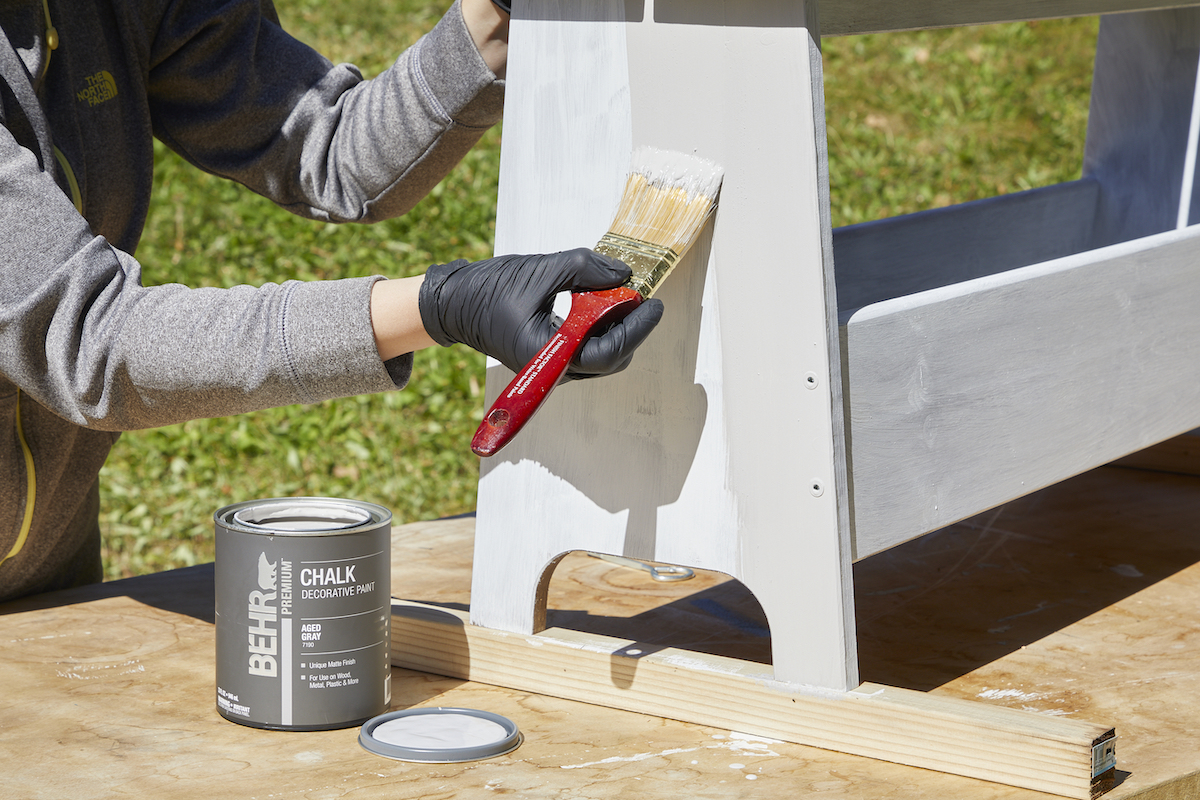
Chalk paint is a water-based formula that will stick to almost anything. It is perfect for updating antiques, creating a matte finish that can easily be distressed for a “shabby chic” feel. First, patch-test the chalk paint on an inconspicuous spot and let dry eight hours. If the paint adheres without bleed-through, you can paint without priming. If, however, you notice streaks, prime with a bonding, stain-blocking primer such as Valspar’s primer/sealer.
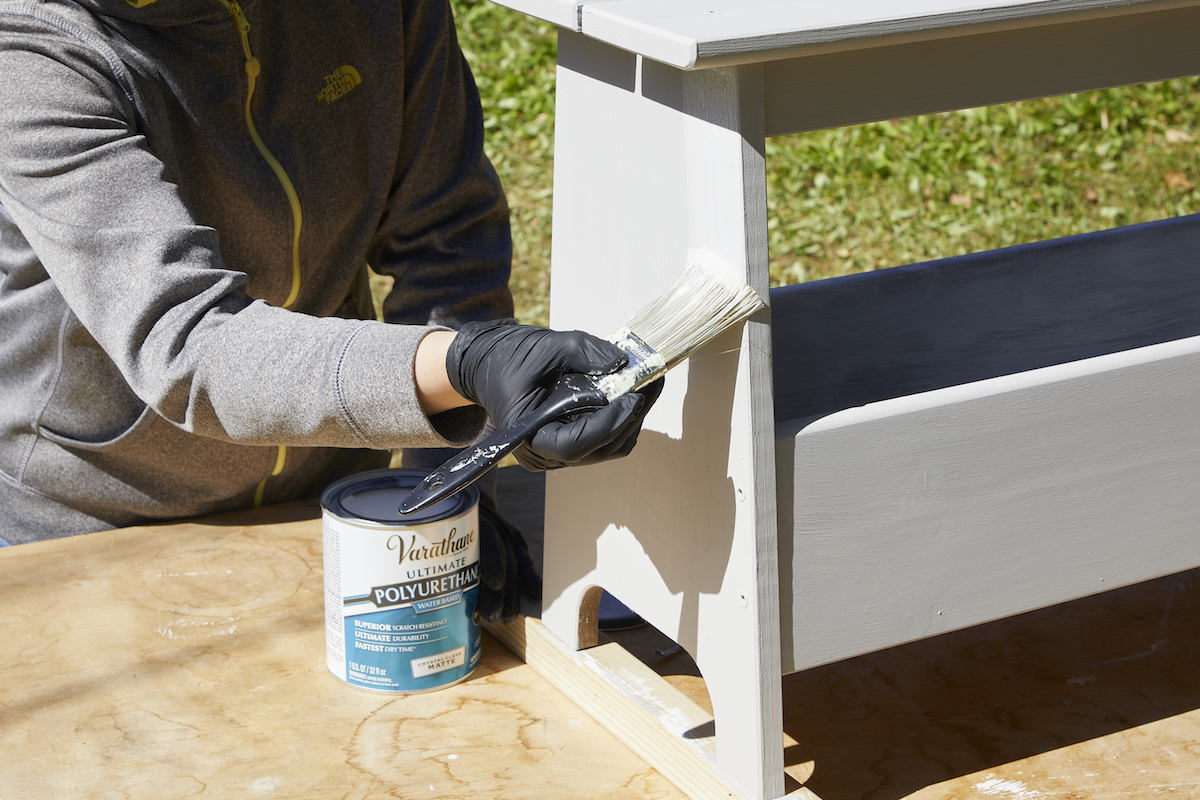
Follow the basic steps of clean, sand, prime, paint. Wait overnight for the first coat of chalk paint to dry, then apply a second coat. Because chalky surface can scratch more easily, protect your paint job with a polyurethane top coat. Wait seven days for the painted surface to fully cure, then apply a thin coat of matte polyurethane such as Varathane Ultimate Polyurethane to the surface. Allow it to dry overnight, then lightly sand any rough areas with a 220-grit sandpaper. Repeat this step if necessary, applying a second thin polyurethane top coat and sanding any rough areas the next day.
