
We may earn revenue from the products available on this page and participate in affiliate programs. Learn More ›
Q: I want to re-tile my floor, but I’d rather not go through the hassle of ripping up the existing flooring first. Can you tile over tile in order to save time?
A: The short answer is, most likely, yes. If your tiles are in relatively good condition—evenly placed, without cracks, and not appearing to retain any moisture—then you can probably leave them underneath your new layer of tile when going about installing a new floor or even a backsplash.
Assess the existing tile.
Before you begin tiling over tile, conduct a thorough assessment of the base layer to pinpoint any surface irregularities, which can cause foundational problems down the road. Mildew and deep discoloration in the grout often signal an absorption issue–meaning that trapped water has damaged the grout and could thus rot the new tile from below. An absorption issue will fester and worsen when the tiles are covered up. Likewise, if the original tiles were not properly installed, the new overlaying tiles won’t lie flat or line up. If you do discover either of these issues, it’s better to start from scratch than to tile over the existing floor.
Prepare the surface for installation.
Tiling over an uneven surface will give you less-than-stellar results, so level out any globs of dried grout with a sander and secure loose tiles with fresh tile adhesive before beginning the project. Then, lay out your new tiles and cut them to fit around the walls and fixtures, as necessary. Once all pieces of tile are cut to size, move them out of the way so that you can scrub down your base layer with a degreasing soap. Let the surface dry completely before you start taping off the edges of the project area with painter’s tape and laying out plastic sheets to protect surrounding surfaces.
Lay the groundwork for the new tile in stages.
Generally speaking, thin-set adhesive (also known as thin-set mortar) is great for setting tiles in areas subject to moisture, like bathrooms, while mastic adhesive is best for drier spaces, like kitchens. Scoop the adhesive of choice from its bucket with a trowel and apply a thin layer to a section of tiles only a few feet wide, for starters. Don’t attempt to cover a full floor or backsplash at once; since curing times may vary, you’ll want to set each tile before the bonding agent is too dry to do its job. Score the surface adhesive with the toothed edge of your trowel by drawing straight lines along the wet surface, as these grooves aid in the drying and adhesion process.
Position the tile as you go.
Set each tile atop the adhesive you’ve scored and firmly press it into place. Once these are in place, you can rotate through spreading adhesive, scoring, and laying tile until you’ve completely covered the space.
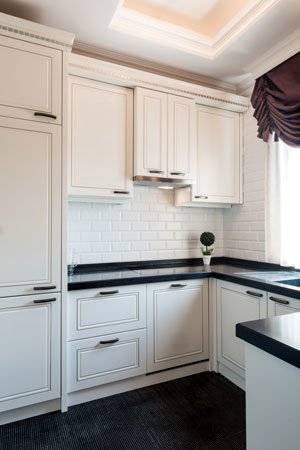
Tip: To save even more time, apply your adhesive directly to the back of your new tiles rather than prepping the area with thin-set adhesive. This method, though, should be saved for situations where the original tile is in perfect condition and you’re really only looking for a temporary fix until you can attempt a more in-depth renovation project—placement this way won’t set the tiles so securely that they last for generations without needing repair. Take a cue from the blogger at Renov8or, who chose to lay crisp white subway tile over an old layer of beige squares in the kitchen simply by applying silicone adhesive to the back of each individual tile, and placing them over the old tile with spacers in between to save space for even grout lines. While silicone isn’t a recommended adhesive for tiles that will encounter lots of water (a shower wall, for example), this simple fix could cut your project time in half on areas where heavy splashing won’t be a concern in the long run.
Finally, seal off your work.
No matter what kind of adhesive you’ve used beneath the new layer of tiles, you’ll need to apply grout in the grooves between them. This step protects the entire surface from moisture creeping into the seams between each tile and leading to water damage or out-of-sight mildew growth. For the sake of speed, use premixed grout from the hardware store, and apply it quickly in a single round. Or you can choose to mix the grout yourself; just be sure to use an application tube with an opening small enough to fit the troughs you’re filling.
So, in short, you can tile over tile as long as you’re working on a fairly sound surface. The surface of the existing tile should be free of mold and mildew, completely level (including grout), and without any warping or strangely-placed tiles that might otherwise interfere with a smooth new layer. Also, keep in mind that it’s best not to lay heavy new tile over existing tile floors unless the foundation beneath both is concrete. Otherwise, the excess weight can cause structural issues. Now go forth and enjoy your new, easy-to-install tile surface!
