We may earn revenue from the products available on this page and participate in affiliate programs. Learn More ›
Over time, tile grout stains, cracks, and becomes loose. If you’re noticing that your tile grout has seen better days, it’s probably time to repair or replace it. The good news is that grout repair is an easy and budget-friendly fix to quickly update the look of kitchen or bathroom tile. Damaged grout can not only make your tile look old and worn, but it can also be a breeding ground for bacteria and mold growth. Grout repair requires a few specialty tools, such as a grout saw and a grout float, but it also necessitates some commonly owned ones, such as eye protection, a shop vacuum, gloves, towels, and a scrub pad.
Dealing with damaged grout?
Maybe it's time to call in a pro. Get free, no-commitment estimates from experts near you.
Time required: 1 to 3 days, including drying time
Difficulty: Beginner
Estimated cost: $180 to $420, depending on size of the area
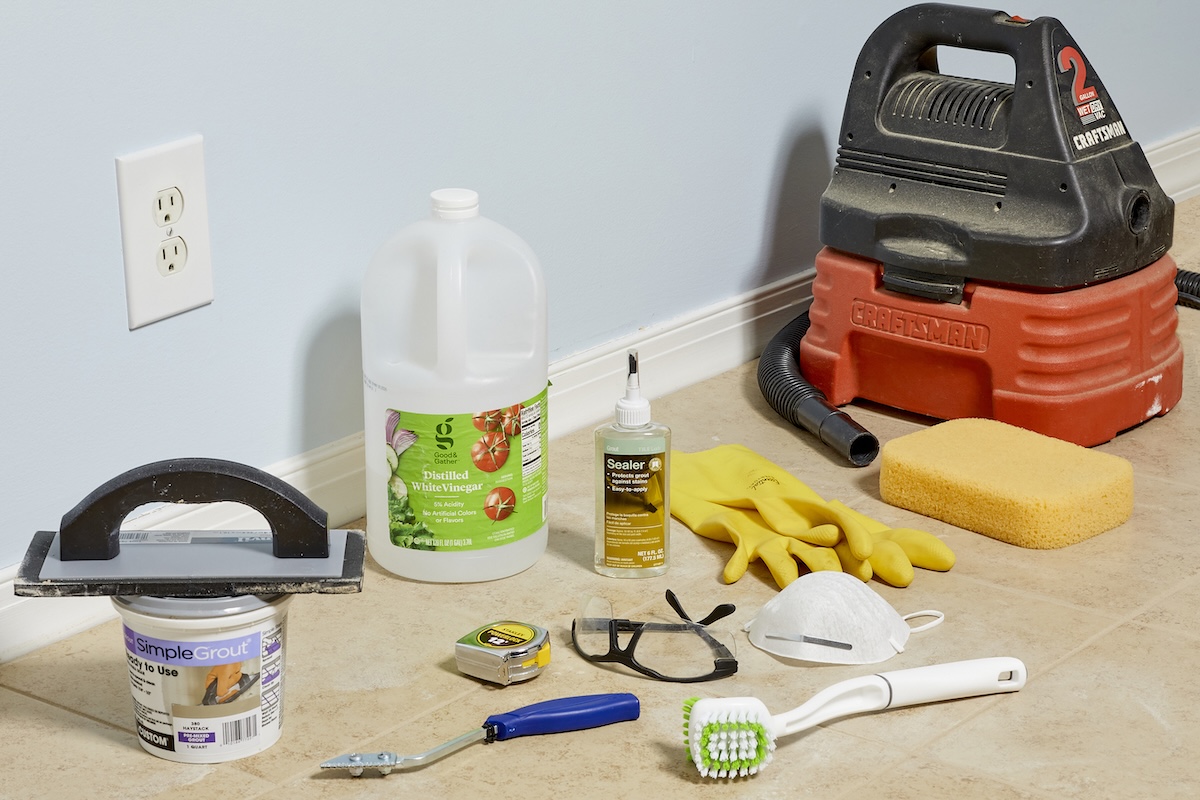
Tools & Materials
Bobvila.com may earn a commission from purchases made through these links.
- Scrub brush
- Rubber gloves
- Eye protection
- Dust mask
- Grout saw
- Shop vacuum
- Bucket for mixing grout powder
- Grout float
- Grout sponge
Before You Begin
A very important first step is cleaning the grout before removing the cracked or loose pieces. This way, you can match the color of the existing grout with the replacement grout.
Tip for Grout Repair
- Buy grout that matches the existing grout color for consistency.
Safety Considerations
- It’s crucial to wear eye protection during grout repair since the grout breaks up into small pieces during removal.
- Wearing a dust mask is highly advised; this way, you don’t breathe in grout dust and possibly even mold.
Other Considerations
- You’ll need to dampen the tile when replacing grout. However, if you’re using epoxy grout, the surface area needs to be completely dry before application.
- If using epoxy grout, opt for a nonstick gum-rubber float to apply the grout.
Grout Repair Instructions
Step 1: Clean the broken grout with a white vinegar and water solution.
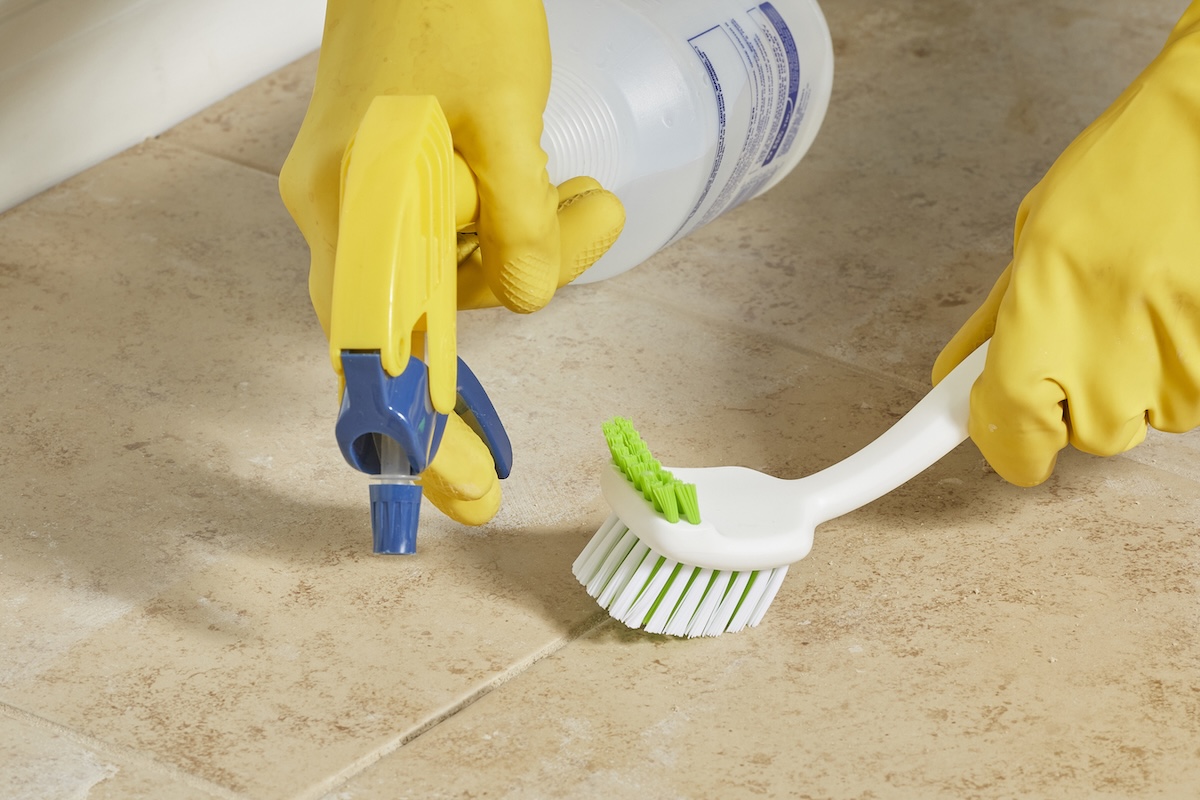
Mix one part white vinegar and one part water in a bowl or bucket. Then, dip a clean toothbrush or scrub brush in the mixture and scrub the damaged grout until all the dirt and grime comes off. Wipe away the excess mixture with a cloth.
Step 2: Buy new grout that matches your existing grout color.
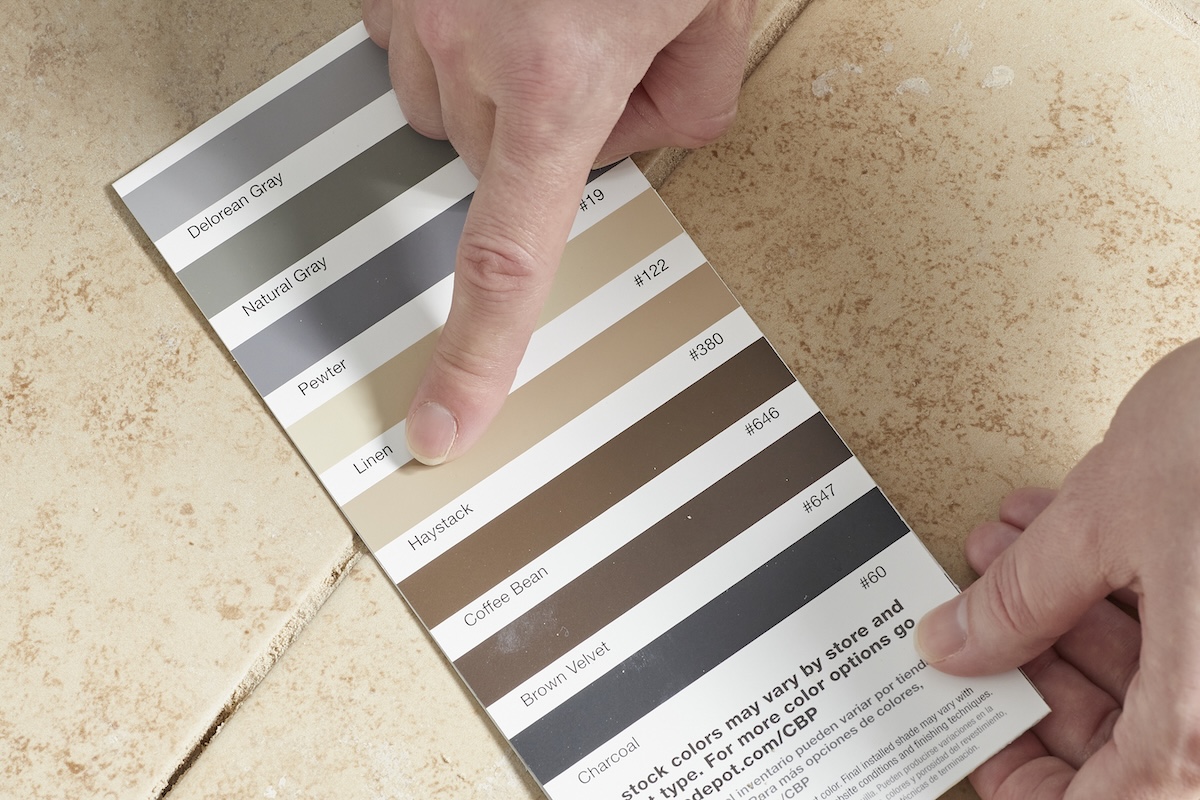
To find the closest color match, use sample grout chips, which are available from most home improvement stores. If the original grout color is lighter than the color you chose from the chips, lighten the new grout by adding more water when you mix it. If the original grout color is darker, use less water. Grout is available as sanded or unsanded. Choose the correct type of grout (detailed below) based on the width of the tile joints, the location of the repair, and the type of tile.
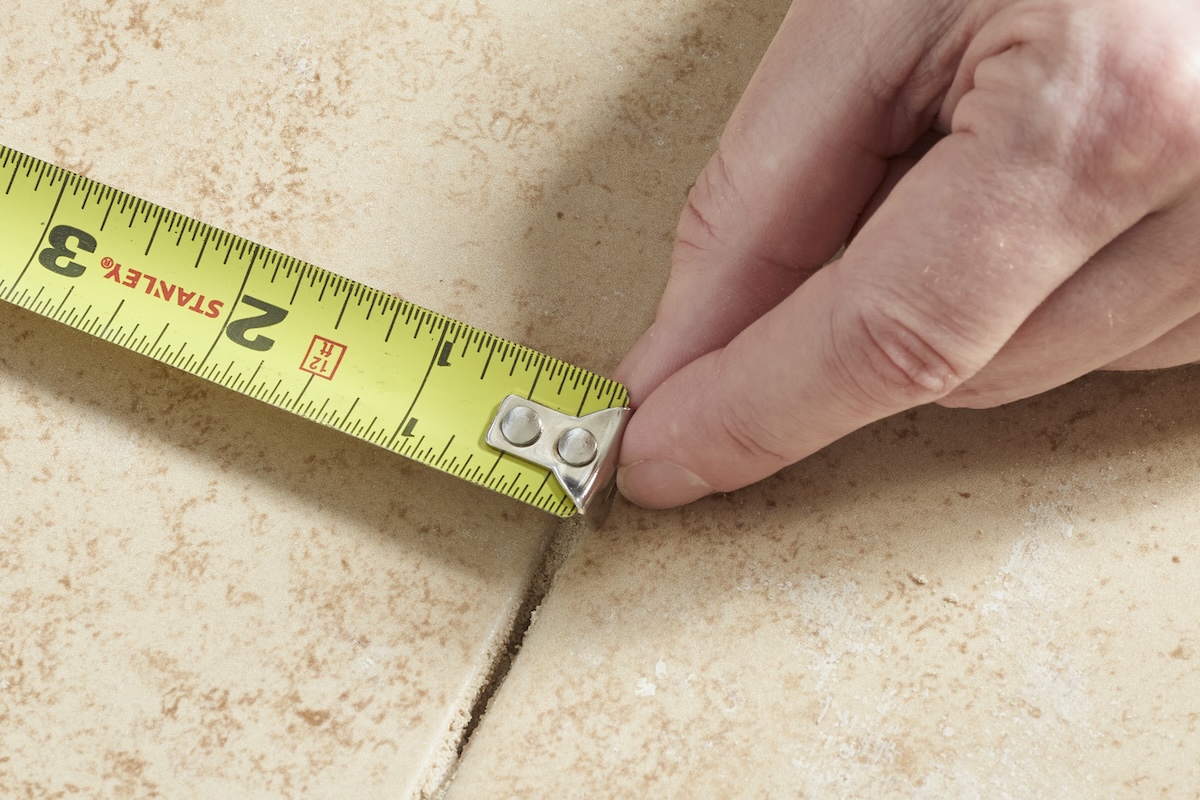
- Measure the space between the tile. If the space is wider than ⅛ inch, use sanded grout. If the width is ⅛ inch or narrower, use unsanded grout.
- Regardless of the size of space between the tile, never use sanded grout with metal, glass, or marble tile. The sand will scratch the surface. Instead, use unsanded grout.
Acrylic latex grout is comparatively easy to work with, but it requires sealing. Epoxy grout is highly resistant to stains and doesn’t require sealing, but it’s more difficult to apply. You can buy grout powder and mix it yourself, or you can buy premixed grout.
Step 3: With a grout saw, remove the top ⅛ inch of the damaged grout.
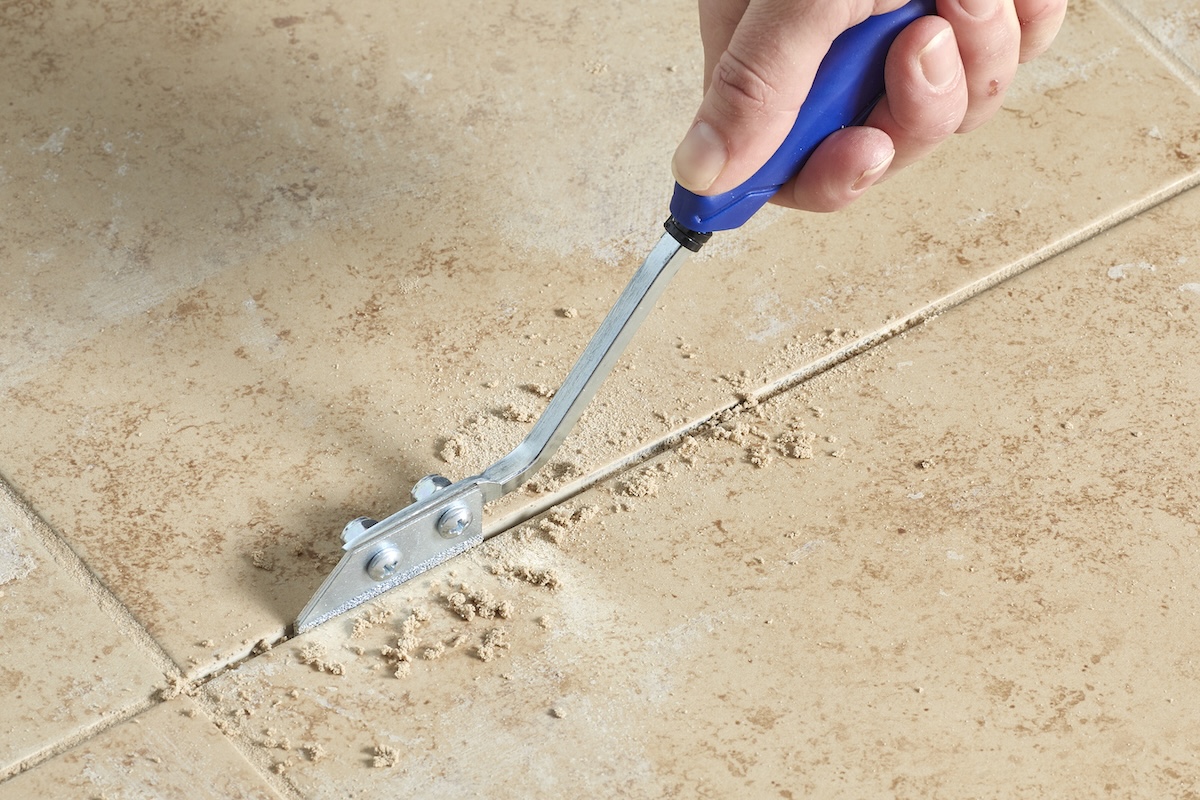
A grout saw is a small, handheld blade that fits between the tile. Use a grout saw that has a blade with a width that will fit between the tiles you’re working on. Place the grout saw over the damaged grout and move it back and forth, like you’re scrubbing away the old grout (but be careful not to chip the tile). Continue until the top layer (about ⅛ inch) of the damaged grout has been broken up into pieces. Another option is to use a reciprocating saw with a grout remover accessory for quick and easy removal. To prevent any discomfort or avoid health issues related to grout particles, you’ll want to wear a dust mask and eye protection while you’re removing the old grout.
Leave the work to the pros
Not everyone is cut out for grout repair. Get free, no-commitment estimates from experts near you.
Step 4: Vacuum the remaining grout particles.
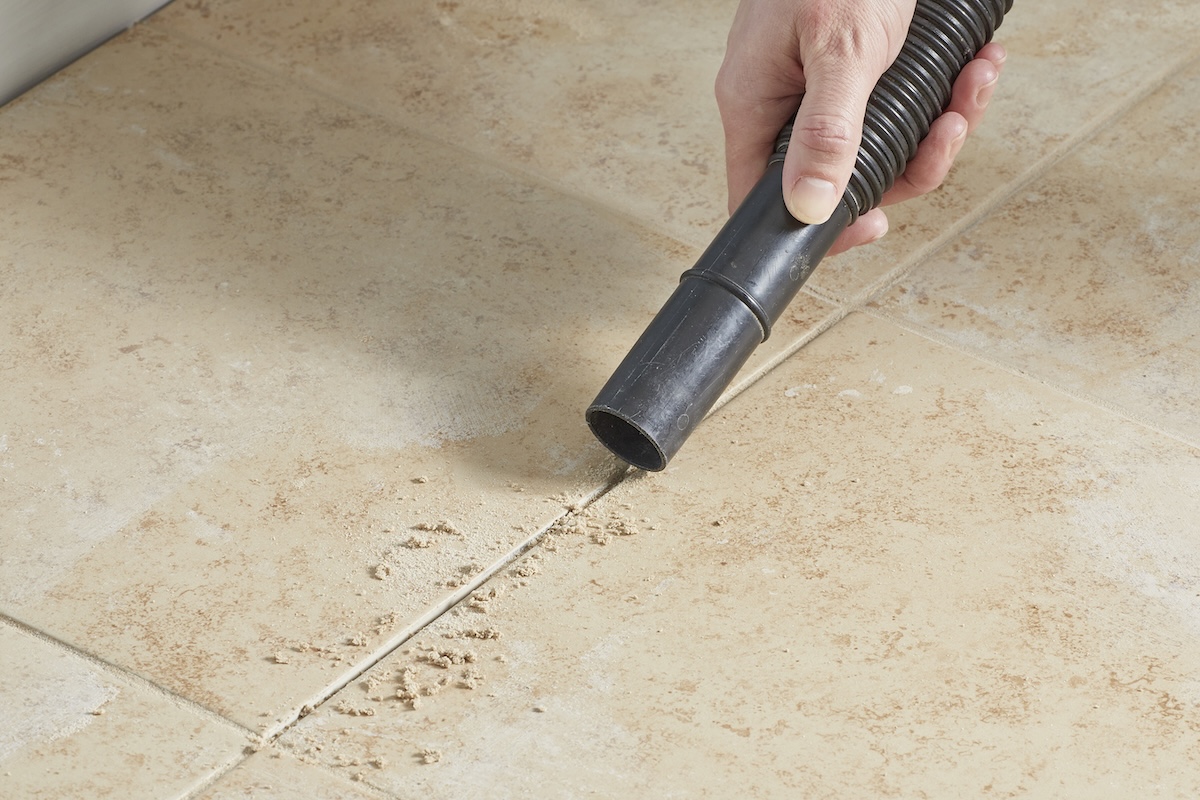
Use the hose attachment on your shop vacuum to make sure all the pieces of the old grout are cleared out of the gap between the tiles. This helps to see how deep you’ve gone and assess how much farther you need to continue removing the old grout.
Don't want to do it yourself?
Maybe it's time to call in a pro. Get free, no-commitment estimates from experts near you.
Step 5: Wet the tile.
Before you can move along in the grout repair process and apply any new grout, you need to give your surface a thorough cleaning. Going over the grout lines again with a vacuum and wiping down the tiles with a soft wet grout sponge should be all that you really need to do to prep for the new grout. Use a paper towel to absorb any water that puddles in the joints. For epoxy grout, make sure the tile is completely dry before application.
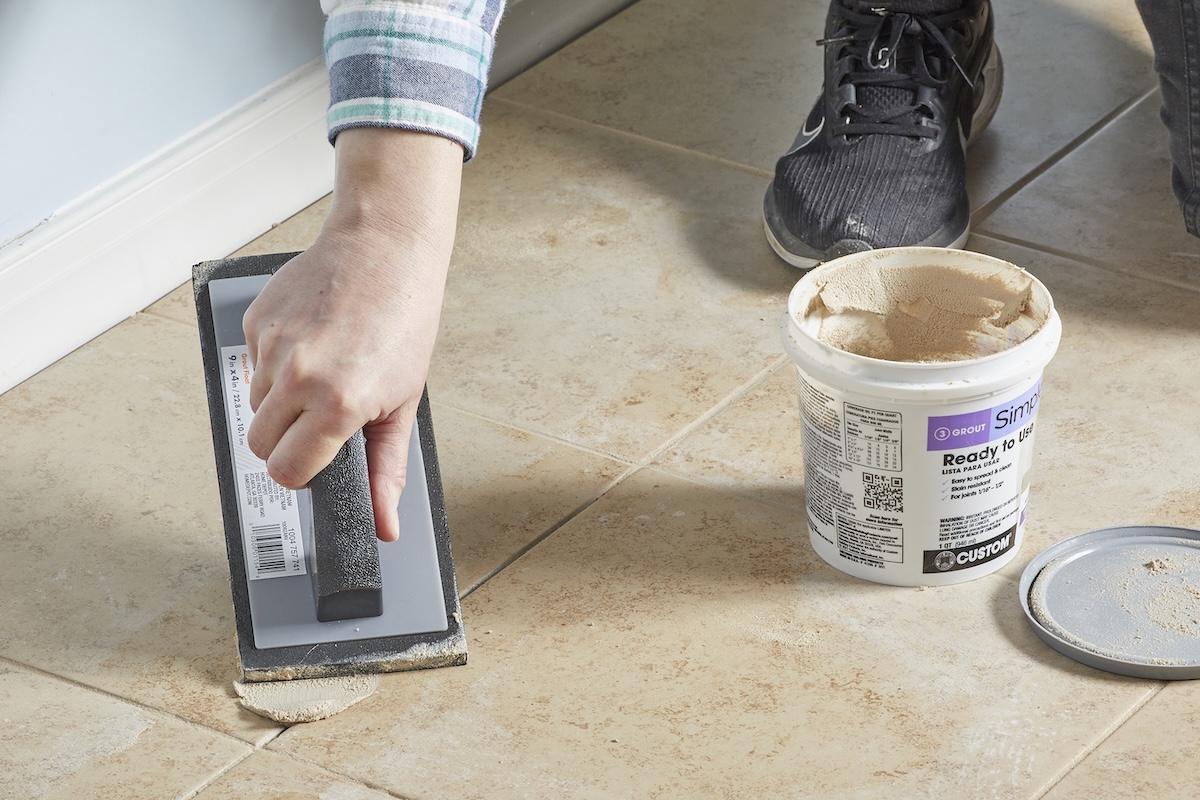
Step 6: Apply the grout. Use the grout float to fill the gaps with the mixture.
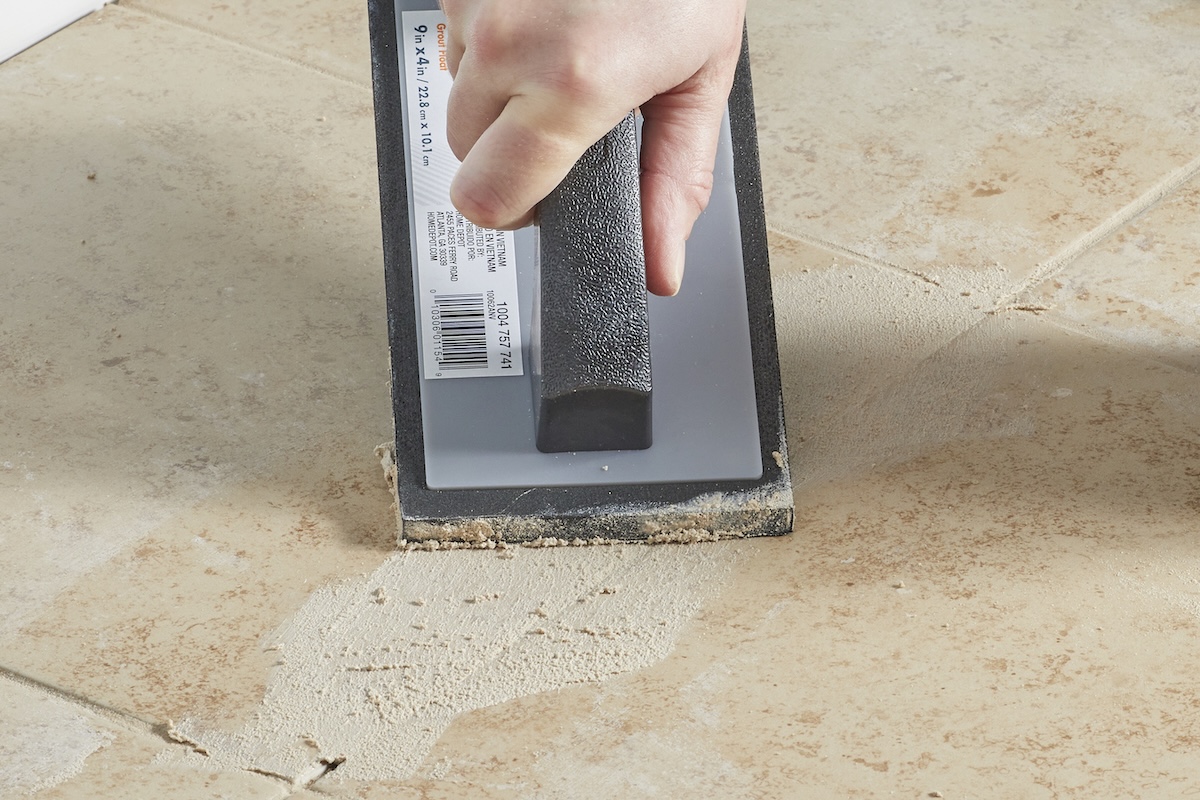
A grout float is a thick rubber pad with a handle that you can find at most home improvement stores. Scoop some of the grout mixture out of the bucket using the padded part of the grout float. Be generous, and press the mixture down into the gap you’re repairing until it’s completely filled. Don’t worry if grout gets on the surrounding tiles—you’ll be able to clean it off later. If you’re using epoxy grout, a nonstick gum-rubber float works the best.
Step 7: Remove the excess grout.
Hold the float so it’s at a 45-degree angle with the floor. Slowly drag the edge of the float over the gap you filled to scrape up the excess grout and make the grout flush with the rest of the floor. Make sure the joints are completely filled.
Step 8: Let the grout set. Let it dry for 30 minutes and use a damp sponge to remove the residue.

After 15 to 30 minutes, clear away any excess grout with a damp grout sponge. Wet the sponge and squeeze out all the excess water before you use it. Don’t use a soaking wet sponge or you could damage the new grout. Press down lightly as you wipe the sponge over the new grout and any nearby tiles that got grout on them. Rinse the sponge periodically and moisten it with clean water until the tiles are clean. With epoxy grout, you may need to use a scrub pad. Drip or mist some water onto the joints, and lightly scrub the tile. Wipe the haze away with a single pass of a clean, damp sponge. Follow the manufacturer’s instructions to set the grout firmly and let it dry between 24 and 48 hours. Allow it to dry until a haze appears on the tile. Polish the tile with a dry towel. If necessary, use a haze remover to get rid of any remaining residue.
Step 9: Apply a sealant.
If using acrylic latex grout, apply a sealant after the grout dries completely.
Grout repair is an efficient and cost-effective way to refresh old, worn, and damaged tile grout. Remember to wear safety glasses and a dust mask to protect yourself from getting grout chips in your eyes and to prevent breathing in grout dust. To keep the grout repair project looking like new, use a tile grout cleaner to care for your new grout. If the grout continues to chip or crack after you repair it, the tile underlayment may be uneven or exposed to moisture. In this case, you may want to have a professional check the underlayment and repair it if necessary. If grout repair seems too time- and effort-intensive, or if you are truly a novice, you may also want to hire a professional to do the work for you.
