We may earn revenue from the products available on this page and participate in affiliate programs. Learn More ›
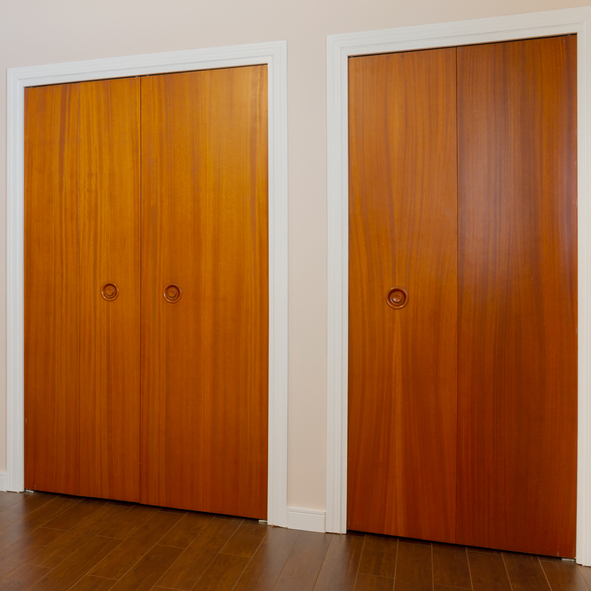
Many older homes were built with far less storage than modern living demands. For homeowners struggling with the amount of closet storage space in their home, there is hope. If there are two small closets situated side-by-side in one room or back-to-back in adjacent rooms, they can easily be combined into one dream closet. Depending on the space and layout, the two smaller closets can even be transformed into a spacious walk-in closet.
This construction can certainly be done as a DIY project if a homeowner has electrical, measuring, basic carpentry, and painting skills. However, some parts of the project may require calling in the professionals for help. Keep reading to learn the best steps for turning two closets into one to increase storage space, including when to DIY and when to hire a professional.
1. Assess the space.

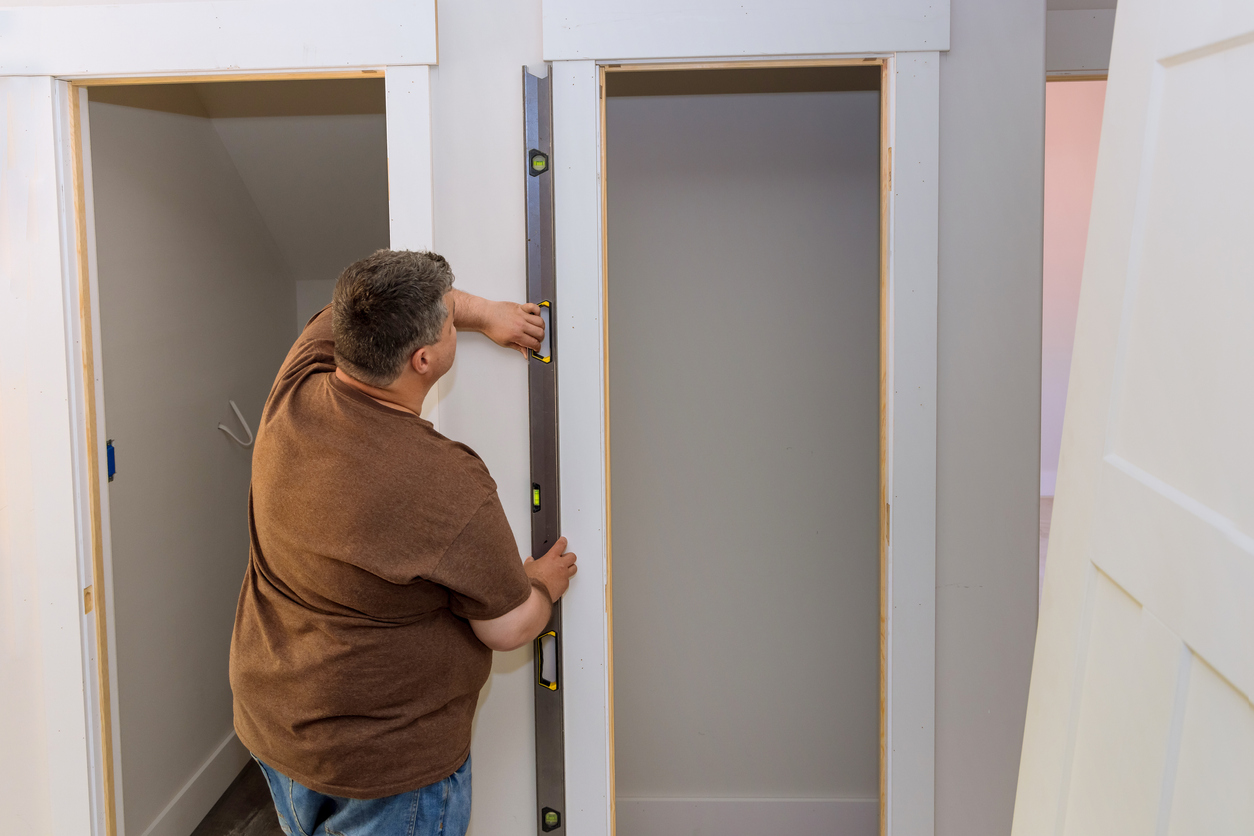
The first step is to carefully analyze the current and potential space. Determine the storage and functionality goals and then figure out the best design to maximize space and usability of the area. While a larger closet provides more space, it can sometimes get cluttered if not designed with well-organized, aesthetically pleasing storage elements. It is critical to take measurements at this stage to ensure the correct materials are purchased to fit the final closet.
Oren Farkash, CEO and Owner of South Land Remodeling, explains that if the two smaller closets are not right next to each other, the project may become more complex. For example, an adjoining wall may need to be reconfigured to become part of the new closet. In that case, the new area should be converted with the same materials as the room in which it is located to get a cohesive look. This often involves framing work, new flooring, and a fresh coat of paint.
RELATED: The 6 Best Closet Design Companies
2. Determine if the wall is load bearing.
Check to see if the wall between the two closets is load bearing, which means it was designed to support the weight of the floor or roof structure above it. This step is critical, as it could take a project in a whole new direction depending on the answer. It is recommended that homeowners hire a professional to verify that the walls to be removed or modified are not load bearing before moving forward with the project.
If the wall is load bearing, it might make sense to create a wardrobe wall as opposed to one large, walk-in closet. Removing a load-bearing wall can be tricky, and may require hiring a reliable contractor, structural engineer, or both. More experienced DIYers can take on this challenge themselves. Learn more about how to remove a load bearing wall.
3. Remove existing shelves.
Start clearing the space by removing the existing shelves in the separate closets, so you can change their location and free up the wall you intend on taking down. This is also a good time to check the walls and paint for lead. If lead is detected, consult a pro for removal.
4. Demo the wall and header.
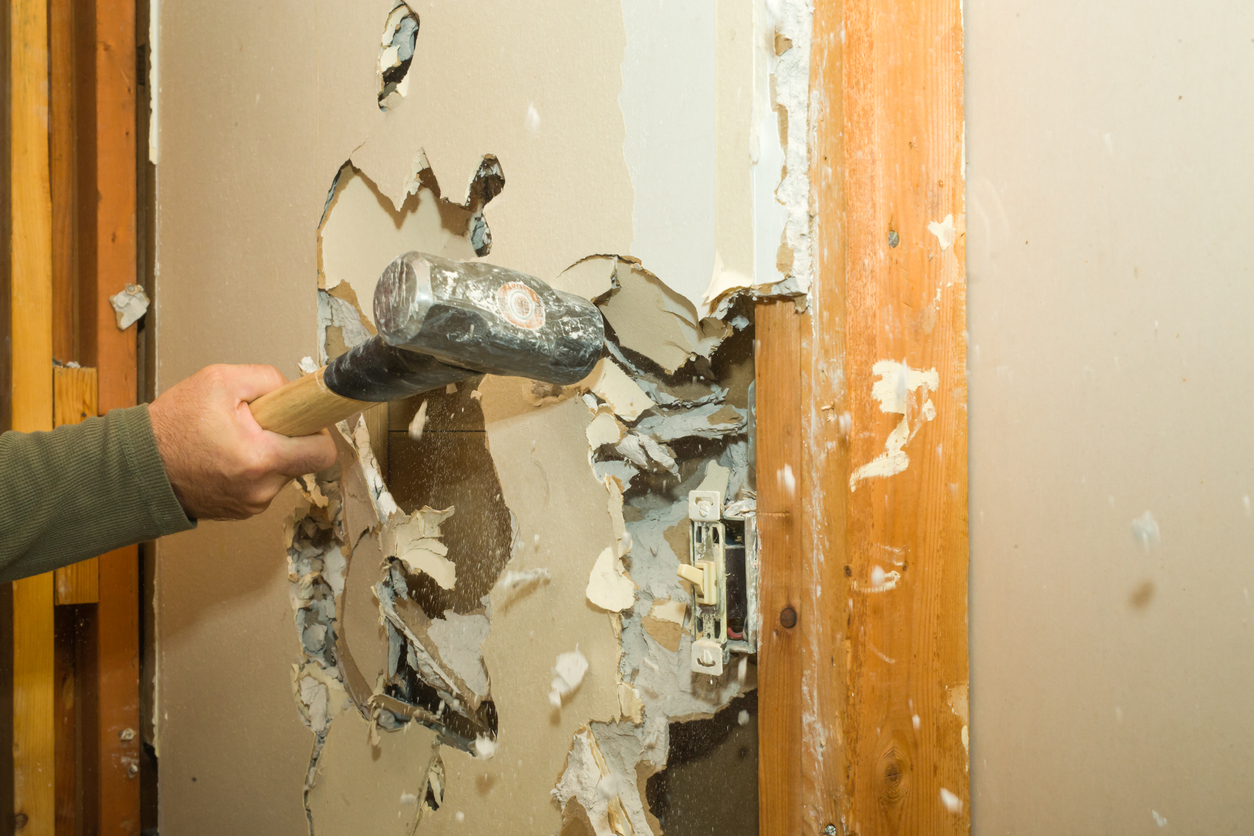
Now the real fun begins. It is time to demo the wall and headers where the existing closet was or the wall separating the two closets. By knocking down the wall between the closets, the homeowner will gain more space and be able to maximize storage possibilities using shelves, drawers, hanging rods, and other updated storage options.
While tearing down a wall can be done by an experienced homeowner, it is one of the top ten DIY tactics that might end up costing more in the end. If wiring, gas lines, or pipes exist behind the drywall, one misstep could result in the project taking longer and costing more than anticipated. This might be a good time to hire a contractor.
RELATED: 12 Ways You May Be Wasting Closet Space
5. Add electrical.
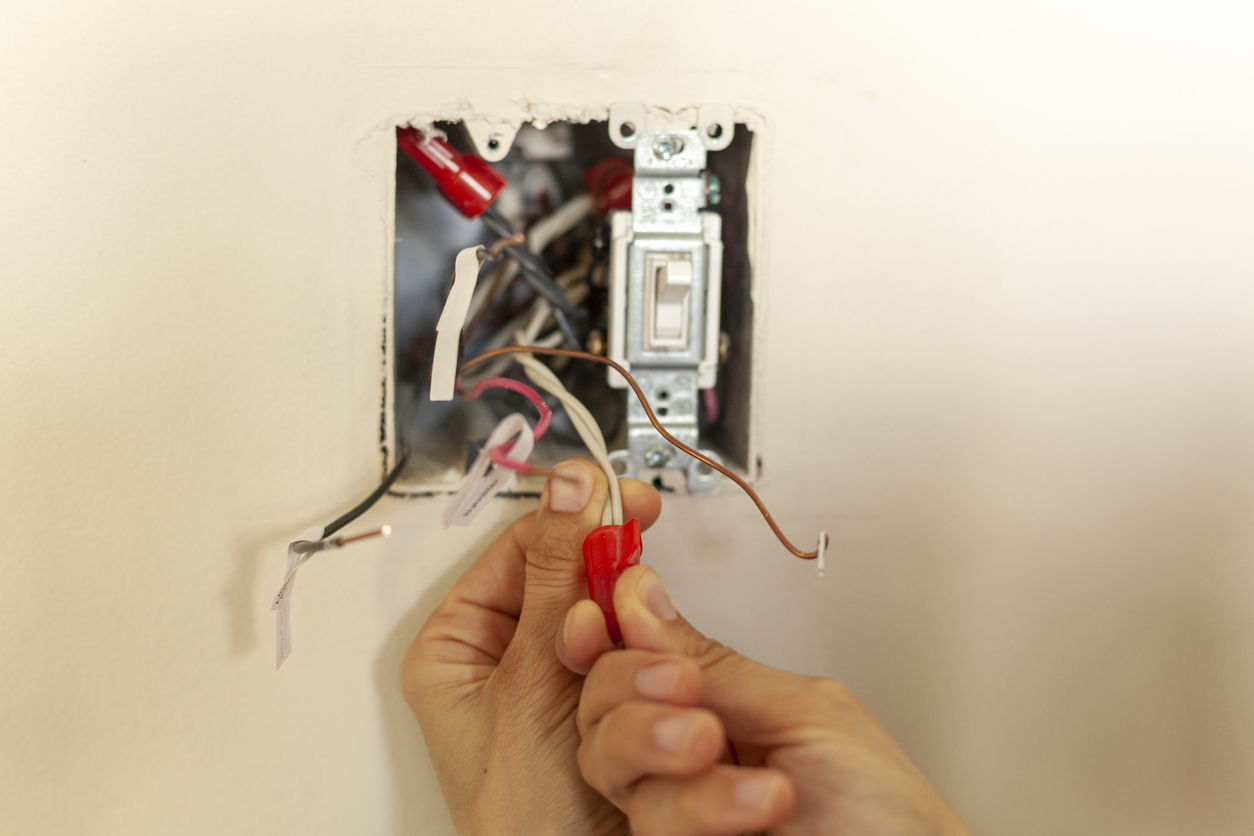
Since two closets are being combined, some electrical work is necessary. It is likely that the current lighting will have to be relocated or the fixtures replaced. In addition, a new electrical switch will need to be installed. These changes require minor electrical work that can be a DIY project. If the homeowner is not experienced with electrical work, then calling an electrician is the best plan.
6. Patch drywall.
Patch up the drywall to match the old plaster and cover the areas where the wall was damaged during the demolition process. While hanging drywall can be done by the homeowner, it is best to have someone experienced to complete this important step if you’re unsure of your ability to get this done correctly. If done incorrectly, there can be visible bumps, cracks, and tape lines on the wall. If this happens, it might mean going back a step and starting over, which will cost extra time and money.
RELATED: Dos and Don’ts of Repairing Drywall
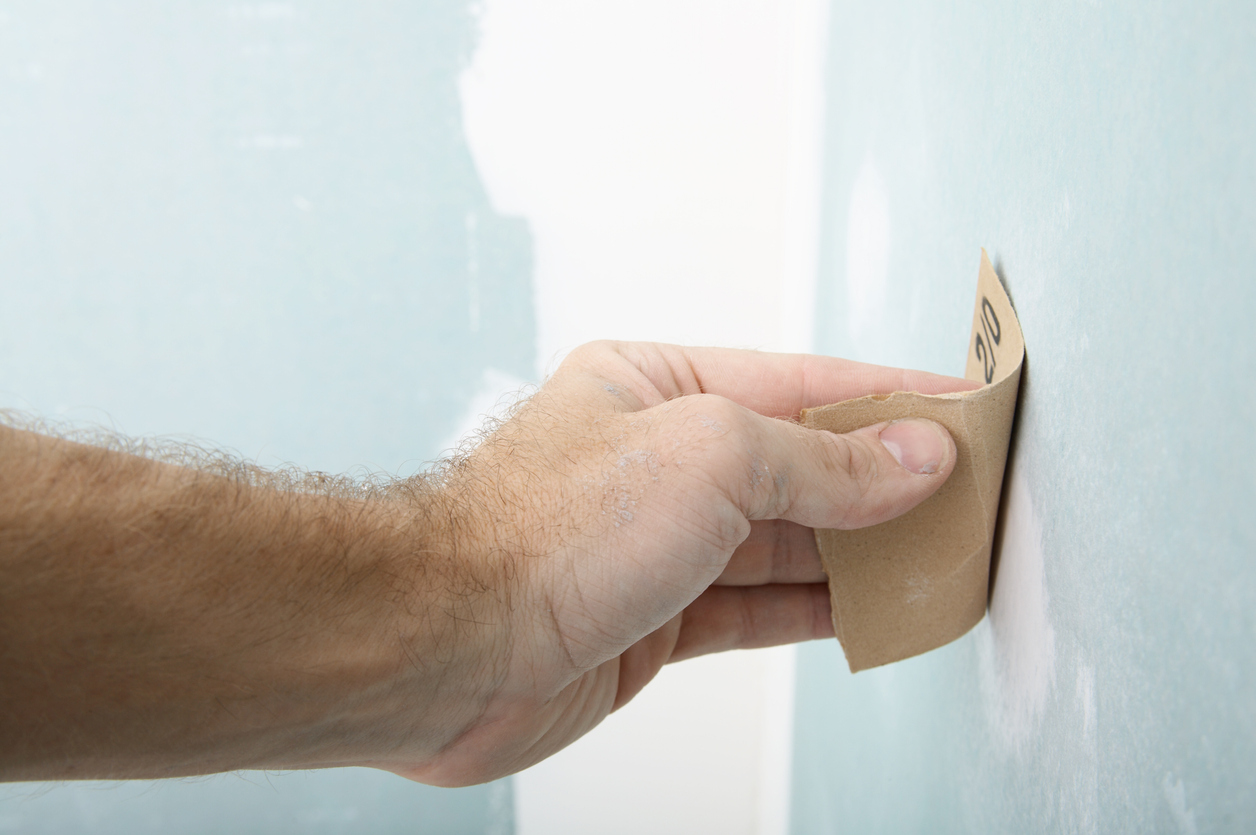
7. Fix flooring.

Another area that can get messed up during construction is flooring. Home improvement expert Oren Farkash explains that when a wall is removed, the floor is often damaged or bare where the wall was located. Therefore, the floor will need to be redone inside the closet. This might involve sanding the floor or installing new material altogether. He recommends using the same material in the rest of the room, if available, to create a cohesive design. If unavailable, a transition piece can be placed right under the closet door and a different floor can be installed inside the closet.
8. Apply paint.
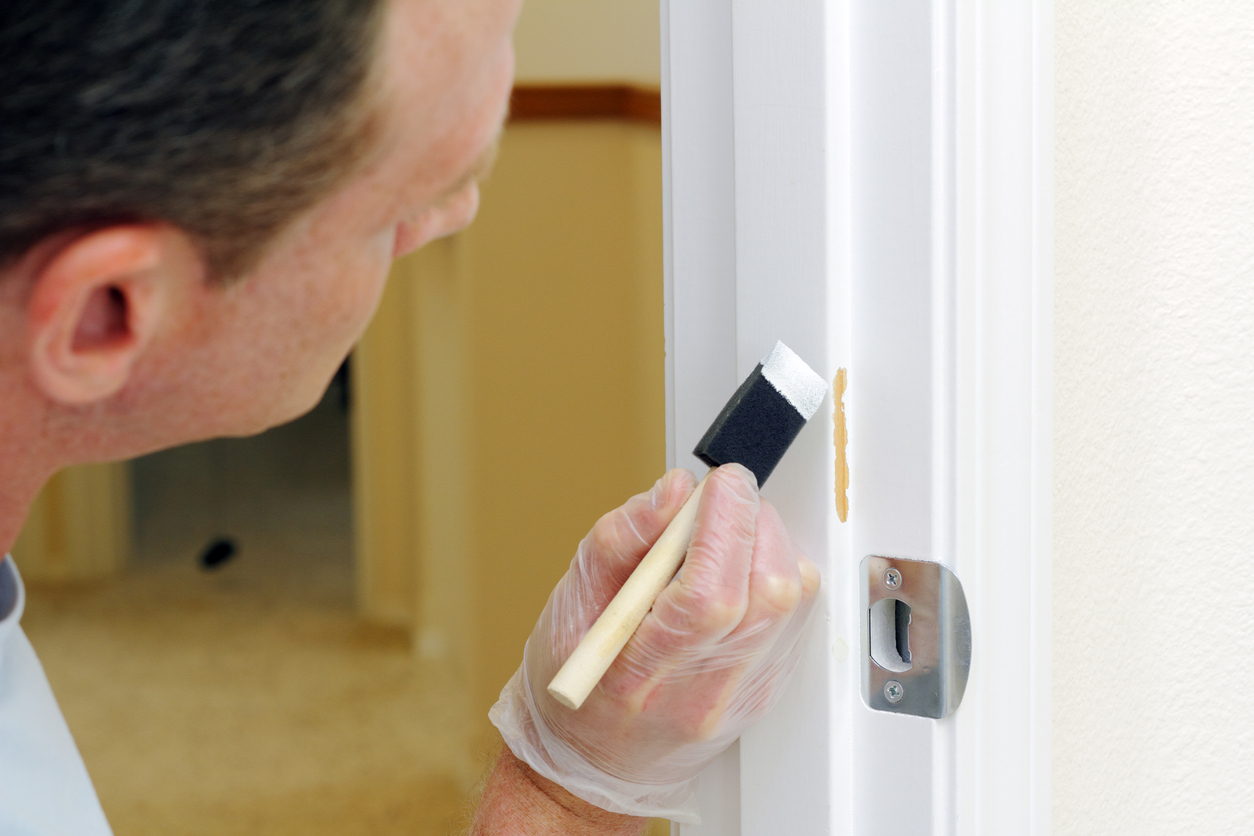
This stage involves painting the walls and trim, and touching up any paint that came off of the ceiling during demolition. This is also a good time to add any flooring stain or paint. It is recommended that the new closet space be painted before installing any of the shelving or other storage features. Ventilating the small space might be challenging, so be sure to have a fan on hand.
RELATED: How to Install Bifold Doors
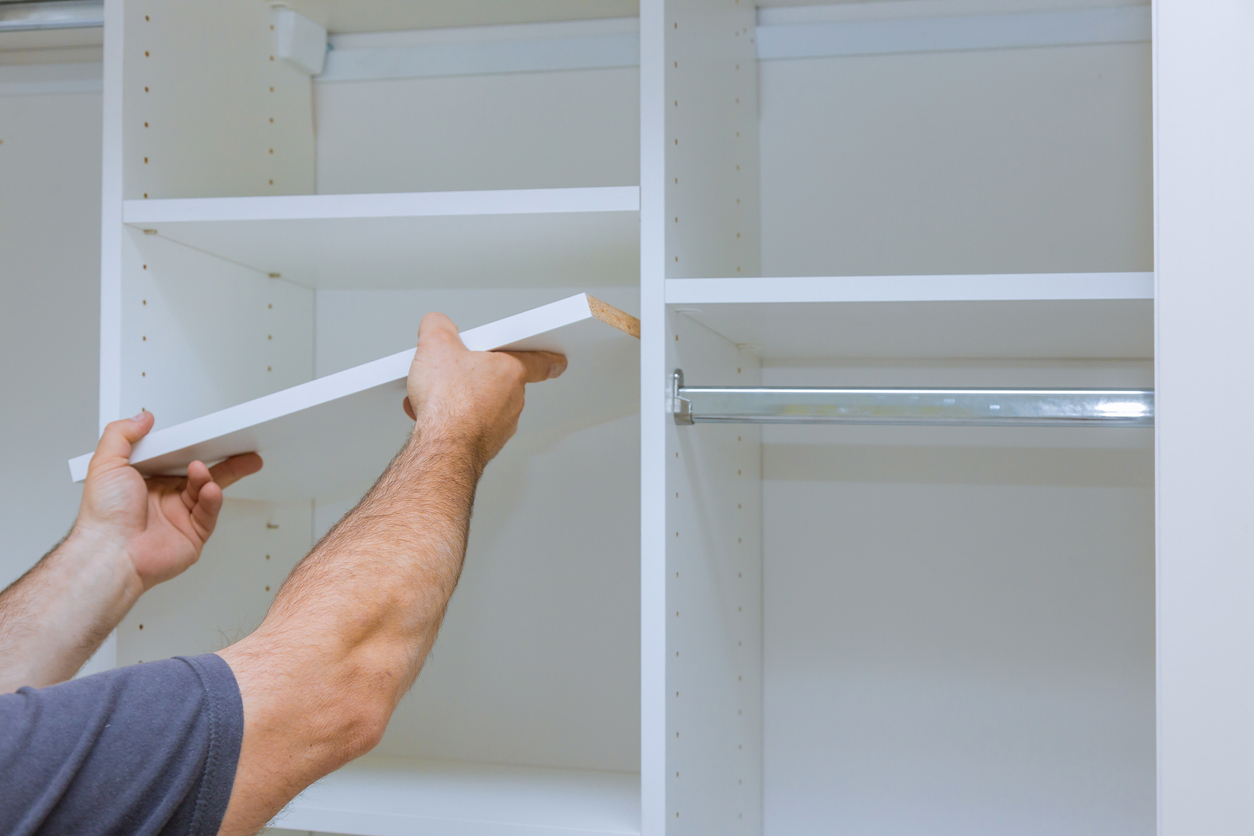
9. Install storage components.

Install shelves, drawers, pull-outs, rods, and other storage elements of the new closet. The most important tip is to choose an adjustable system to maintain flexibility. These systems typically have holes on the side of the vertical supports to easily add shelves and move hanging sections higher or lower as needed.
Choose more shelves and less hanging space to store more neatly folded clothing. Home improvement expert Marty Ford suggests using double-hang rods to maximize space and to be able to hang twice as many items. Storage bins are another great choice to help organize the larger closet. Finally, try using each wall for a separate function. For example, clothing can be organized on one wall, shoes can be displayed on another wall, and another section of wall space can contain pegs for hanging items like hats, belts, or ties.
RELATED: 25 Closet Organization Ideas for Saving Space and Sanity
10. Add personal touches.
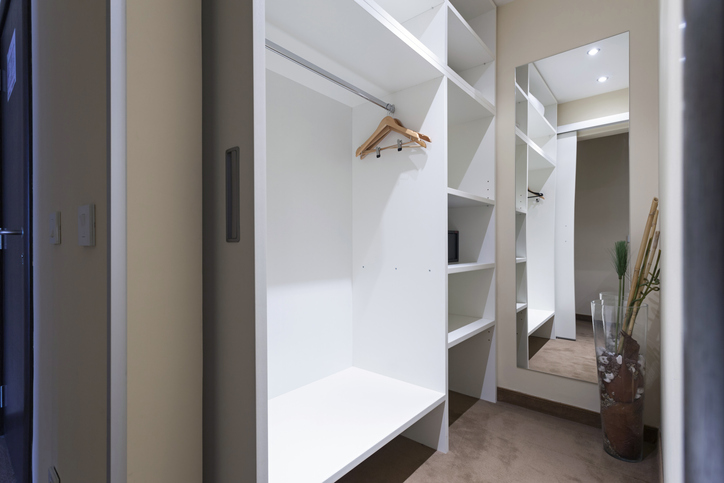
By adding a few personal touches, the dream closet will be complete. Add a mirror (full length if possible) to make the closet feel even larger and to allow for a dressing room element. It can even be attached to the back of the door. Add decorative hooks to hang items like a robe, coat, scarves, or bags. One of the best ways to upgrade a closet is to add a built-in hamper. It can be attached to the closet cabinetry and tucked away so it does not even look like it holds laundry. Finally, consider adding decorative curtains and pictures to really make the space special.
Now that the hard work is done, it is time to step back and enjoy the benefits of transforming two tiny, overcrowded closets into one dream closet to keep everything neat and organized.
